
Related Manuals for Monacor DVT-440SET


Summary of Contents for Monacor DVT-440SET
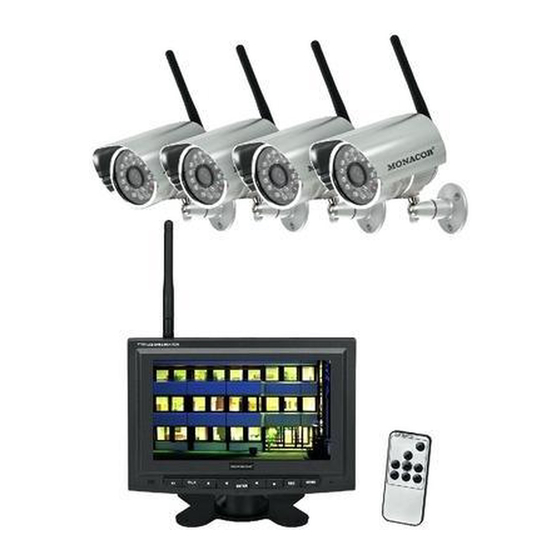
- Page 1 FUNK-ÜBERWACHUNGSSET WIRELESS SURVEILLANCE SET DVT-440SET Bestellnummer 18.8720 BEDIENUNGSANLEITUNG INSTRUCTION MANUAL MODE D’EMPLOI ISTRUZIONI PER L’USO...
- Page 2 Before switching on … Wir wünschen Ihnen viel Spaß mit Ihrem neuen We wish you much pleasure with your new Gerät von MONACOR. Bitte lesen Sie diese MONACOR unit. Please read these operating Bedienungsanleitung vor dem Betrieb gründlich instructions carefully prior to operating the unit.
- Page 3 a b c 7"TFT LCD DVR & MONITOR AV OUT ON/OFF 12V¿ TALK MENU ENTER Œ 13 14 LCD REMOTE Pairing MENU Ž 21 22 23 ...
-
Page 4: Table Of Contents
Auf der ausklappbaren Seite 3 finden Sie 1 Übersicht der Bedienelemente alle be schriebenen Bedienelemente und An - und Anschlüsse schlüsse. 1.1 Monitor 1 Antenne Inhalt 2 SMA-Buchse für die Antenne Übersicht der Bedienelemente 3 Signalausgang A / V OUT zum Anschluss eines und Anschlüsse . -
Page 5: Fernbedienung
8 Taste AV zum Umschalten zwischen der Bild- 1.2 Fernbedienung wiedergabe über den Bildschirm (4) oder über Die Tasten der Fernbedienung (8, 10 – 14) haben einen an der Buchse AV OUT (3) angeschlos- dieselben Funktionen wie die Tasten am Monitor senen Monitor –... -
Page 6: Hinweise Für Den Sicheren Gebrauch
Schützen Sie die Geräte vor niedrigen und Hiermit erklärt MONACOR INTERNATIONAL, dass hohen Temperaturen (zulässiger Einsatztempe- sich das Geräteset DVT-440SET in Übereinstim- raturbereich 0 – 40 °C). mung mit den grundlegenden Anforderungen und Ziehen Sie sofort das zugehörige Netzgerät aus den übrigen einschlägigen Bestimmungen der... -
Page 7: Kameras Zuweisen
Please Press cker des Kabels in die Buchse AV OUT (3) ste- Pair Key cken. Den gelben Cinch-Stecker mit dem Video- on Camera side Eingang des Monitors verbinden und den wei- ßen Cinch-Stecker mit dem Audio-Eingang. 8) Die Taste „Pairing“ (23) an der Kamera innerhalb 5) Den Monitor mit der Taste ON / OFF (6) einschal- von 30 Sek. -
Page 8: Grundeinstellungen
Single = Einzelbilddarstellung manueller 6 Grundeinstellungen Kameraanwahl Alle Einstellungen erfolgen über ein Menü. Scan = Einzelbilddarstellung mit automatischem 1) Zum Aufrufen die Taste MENU (14) drücken. Es Umschalten auf die nächste Kamera erscheint das Hauptmenü, über das die vier nach jeweils 5 Sekunden Untermenüs mit den Tasten (12) ange- Quad = viergeteiltes Bild mit allen Kameras... -
Page 9: Live-Überwachung Gegensprechfunktion
7 Live-Überwachung Gegensprechfunktion 1) Solange kein Menü aufgerufen ist und keine c) Die obere Skala für die Helligkeit ist ange- Aufzeichnung betrachtet wird, zeigt der Bild- wählt (erscheint grün). Die Helligkeit mit den schirm entsprechend der Einstellung im Menü- Tasten einstellen. -
Page 10: Foto- Und Videoaufnahmen
3) Für eine Durchsage über das Monitormikrofon 8.1 Einstellungen für die Aufnahmen (15) zum Lautsprecher (20) der gewählten 1) Das Hauptmenü mit der Taste MENU (14) aufru- Kamera die Taste TALK (9) gedrückt halten. Das fen. Das Untermenü „Camera Setup“ ist ange- Lautsprechersymbol (h) wechselt dabei die wählt. -
Page 11: Aufnahme Starten
i) Zum Speichern und Verlassen der Maske die 7) Um das Menü zu verlassen, die Taste MENU Taste REC drücken. Zur Bestätigung wird drücken. blinkend die Meldung „Updating motion Zeigt der Bildschirm das Live-Bild einer Kamera, detect mask area“ angezeigt. Dann erscheint können entsprechend der Einstellungen folgende wieder der Menüpunkt „Motion detect“... -
Page 12: Fotos Und Videoaufzeichnungen
6) Während des Ansehens eines Fotos lassen sich 9 Fotos und Videoaufzeichnungen die Fotos im Ordner mit den Tasten ansehen durchblättern. Wichtig! Während des Ansehens von Fotos oder Beim Abspielen einer Videoaufzeichnung wird Videoaufzeichnungen kann keine Aufnahme erfol- oben im Bild die bereits gespielte Zeit und die gen. -
Page 13: Aufnahmen Löschen
Sonstiges: ..Mikrofon und Lautspre- cher eingebaut Änderungen vorbehalten. Diese Bedienungsanleitung ist urheberrechtlich für MONACOR INTERNATIONAL GmbH & Co. KG ® geschützt. Eine Reproduktion für eigene kommerzielle Zwecke – auch auszugsweise – ist untersagt. -
Page 14: Operating Elements And Connections
All operating elements and connections de - 1 Operating Elements scribed can be found on the fold-out page 3. and Connections 1.1 Monitor Contents 1 Antenna Operating Elements and Connections . 14 2 SMA jack for the antenna 1.1 Monitor ......14 3 Signal output A / V OUT for connection of a (larger) monitor 1.2 Remote controller . -
Page 15: Monitor
8 Button AV to switch over between the picture 1.2 Remote controller reproduction via the screen (4) or via a monitor The buttons of the remote controller (8, 10 – 14) connected to the jack AV OUT (3) – also see have the same functions as the buttons on the item 3 monitor and are described in chapter 1.1. -
Page 16: Safety Notes
Protect the units against low and high tempera- Herewith, MONACOR INTERNATIONAL declare tures (admissible ambient temperature range that the set DVT-440SET is in accordance with the 0 – 40 °C). basic requirements and the other relevant regula- Immediately disconnect the corresponding power tions of the directive 1999 / 5 / EC. -
Page 17: Assigning Cameras
5) Switch on the monitor with the button ON/OFF Thus, the camera is assigned to the selected (6). As long as no camera picture is received, the channel and the camera picture appears on the message “Out of Range” appears on the screen. screen. -
Page 18: Basic Settings
Single = single picture display with manual cam- 6 Basic Settings era selection All settings are made via a menu. Scan = single picture display with automatic 1) To activate it, press the button MENU (14). The switching over to the next camera after main menu appears which allows to select the 5 seconds respectively four submenus with the buttons... -
Page 19: Live Surveillance Intercom Function
7 Live Surveillance Intercom Function 1) As long as no menu is activated and no record- c) The upper scale for the brightness is selected ing is viewed, the screen shows a live picture (displayed in green). Adjust the brightness according to the adjustment in the menu item with the button “Preview mode”... -
Page 20: Photo And Video Recordings
3) For an announcement via the monitor micro- ment is detected, a video recording starts for phone (15) to the speaker (20) of the selected 3 minutes or a photo is taken. camera keep the button TALK (9) pressed. Then a) The first camera is selected. -
Page 21: Starting The Recording
4) Go to the next menu item “Overwrite record” with 8.2 Starting the recording the button and switch on or off the overwrite 1) Use the button (10) to select the picture mode with the button . With the overwrite of the camera to be recorded or the quad picture mode activated, the oldest recordings are over- with all cameras. -
Page 22: Viewing Photos And Video Recordings
6) While viewing a photo, it is possible to browse the 9 Viewing Photos and photos in the folder with the buttons Video Recordings While replaying a video recording, the time Important! While viewing photos or video record- already played and the total time of the record- ings, no recording can be made. -
Page 23: Deleting Recordings
Other features: ..microphone and speaker integrated Subject to technical modification. All rights reserved by MONACOR INTERNATIONAL GmbH & Co. KG. No part of this instruction manual ® may be reproduced in any form or by any means for any commercial use. -
Page 24: Eléments Et Branchements
Vous trouverez sur la page 3, dépliable, les élé- 1 Eléments et branchements ments et branchements décrits. 1.1 Moniteur 1 Antenne Table des matières 2 Prise SMA pour lʼantenne 3 Sortie signal A / V OUT pour brancher un moni- Eléments et branchements . -
Page 25: Moniteur
8 Touche AV pour commuter entre lecture des 1.2 Télécommande images via lʼécran (4) ou via un moniteur relié à Les touches de la télécommande (8, 10 – 14) ont la prise AV OUT (3) – voir position 3 les mêmes fonctions que les touches sur le moni- teur et sont décrites dans le chapitre 1.1. -
Page 26: Conseils Dʼutilisation Et De Sécurité
3 Possibilités dʼutilisation secteur les plus petits (25) au moniteur, il serait en surcharge. Le set DVT-440SET permet de constituer une ins- tallation de surveillance vidéo sans fil. Il se com- 4) Pour la surveillance vidéo via un autre moniteur pose de quatre caméras sans fil, dʼun moniteur... -
Page 27: Attribution Des Caméras
Please Press Branchez la fiche jack du cordon à la prise AV Pair Key OUT (3) ; reliez la fiche RCA mâle jaune à lʼen- on Camera side trée vidéo du moniteur et la fiche RCA blanche à lʼentrée audio. 8) Appuyez sur la touche “Pairing”... -
Page 28: Réglages De Base
nez la visualisation live : 6 Réglages de base Single = visualisation image unique avec sélec- Tous les réglages sʼeffectuent via un menu. tion manuelle de caméra 1) Pour appeler, appuyez sur la touche MENU (14). Scan = visualisation image unique avec com- Le menu principal sʼaffiche, on peut choisir entre mutation automatique sur la caméra quatre sous-menus avec les touches... -
Page 29: Surveillance Live, Fonction Interphone
7 Surveillance Live, fonction interphone 1) Tant quʼaucun menu nʼest appelé et quʼun enre- c) Lʼéchelle supérieure pour la luminosité est gistrement nʼest visualisé, lʼécran affiche une sélectionnée (visible en vert). Réglez la lumi- image Live en fonction du réglage dans le point nosité... -
Page 30: Enregistrements Photo Et Vidéo
symbole haut-parleur (h) passe du rouge au b) Avec la touche ENTER, on peut allumer et vert. éteindre le capteur pour la caméra sélection- née. Le symbole correspondant de caméra 4) On peut zoomer les images de caméra pour que indique le réglage : sur le moniteur, un segment plus grand soit affi- ché. -
Page 31: Démarrer Un Enregistrement
4) Allez au point suivant “Overwrite record” avec la 8.2 Démarrer un enregistrement touche et activez (On) ou désactivez (Off) le 1) Avec la touche (10), commutez sur mode dʼécrasement avec la touche lʼimage de la caméra qui doit être enregistrée ou Lorsque le mode dʼécrasement est activé, les sur lʼimage divisée en quatre avec toutes les enregistrements les plus anciens sont écrasés... -
Page 32: Visualisation De Photos Et Enregistrements Vidéo
nouveau à la page précédente. Pour voir, ap - 9 Visualisation de photos puyez sur la touche ENTER. et enregistrements vidéo 6) Lorsque vous regardez une photo, on peut les Important ! Pendant que vous regarder des photos feuilleter dans le dossier avec les touches ou enregistrements vidéo, aucun enregistrement ne peut être effectué. -
Page 33: Effacer Des Enregistrements
Particularités : ..Microphone et haut-par- leur intégrés Tout droit de modification réservé. Notice dʼutilisation protégée par le copyright de MONACOR ® INTERNATIONAL GmbH & Co. KG. Toute reproduction même partielle à des fins commerciales est interdite. -
Page 34: Elementi Di Comando E Collegamenti
A pagina 3, se aperta completamente, vedrete 1 Elementi di comando tutti gli elementi di comando e i collegamenti e collegamenti descritti. 1.1 Monitor 1 Antenna Indice 2 Presa SMA per lʼantenna Elementi di comando e collegamenti . . 34 3 Uscita segnali A / V OUT per il collegamento di un monitor (più... -
Page 35: Telecomando
8 Tasto AV per cambiare fra rappresentazione 1.2 Telecomando dellʼimmagine tramite lo schermo (4) oppure tra- I tasti del telecomando (8, 10 – 14) hanno le stesse mite un monitor collegato alla presa AV OUT (3) funzioni come i tasti sul monitor e sono descritti nel –... -
Page 36: Avvertenze Di Sicurezza
0 e 40 °C). La MONACOR INTERNATIONAL dichiara che il Staccare subito il relativo alimentatore dalla set di apparecchi DVT-440SET è conforme a tutti i presa di rete se: requisiti di base e alle rimanenti disposizioni in 1. uno degli apparecchi presenta dei danni visi- materia della direttiva 1999/ 5 / CE. -
Page 37: Assegnare Le Telecamere
Please Press cavo AV in dotazione. Inserire il jack del cavo Pair Key nella presa AV OUT (3). Collegare il connettore on Camera side RCA giallo con lʼingresso video del monitor e il connettore RCA bianco con lʼingresso audio. 8) Entro 30 secondi, premere il tasto “Pairing” (23) 5) Accendere il monitor con il tasto ON / OFF (6). -
Page 38: Impostazioni Base
6.1 Impostazioni del sistema 6 Impostazioni base 1) Chiamare il sottomenù “System Setup” (MENU, Tutte le impostazioni si fanno tramite un menù. , ENTER). 1) Per chiamare il menù premere il tasto MENU (14). Appare il menù principale, dal quale, con i 2) È... -
Page 39: Sorveglianza Dal Vivo Funzione Interfono
a) È scelta al prima telecamera. Per sceglierne 7 Sorveglianza dal vivo unʼaltra, premere il tasto Funzione interfono b) Con il tasto ENTER chiamare il menù delle 1) Finché non è chiamato nessun menù e non si impostazioni: guarda nessuna registrazione, lo schermo fa vedere unʼimmagine dal vivo secondo le impo- stazioni nella voce del menù... -
Page 40: Riprese Foto E Video
4) Le immagini delle telecamere possono anche b) Con il tasto ENTER si può attivare e disatti- vare il sensore per la telecamera selezionata. essere zoomate cosicché sul monitor si vede ll relativo simbolo della telecamera visualizza una sezione ingrandita. lʼimpostazione: a) Per prima cosa, con il tasto decidere... -
Page 41: Avviare La Registrazione
4) Con il tasto saltare alla voce successiva 8.2 Avviare la registrazione “Overwrite record” e attivare (on) o disattivare 1) Con il tasto odoer (10) portarsi sullʼimma- (off) il modo di sovrascrittura con il tasto gine della telecamera che deve essere regi- . -
Page 42: Guardare Foto E Registrazioni Video
6) Mentre si guarda una foto, con i tasti è 9 Guardare foto e registrazioni video possibile sfogliare le foto nella cartella. Importante! Mentre si guardano foto e registra- Riproducendo una registrazione video, in alto zioni video non è possibile fare delle riprese. nellʼimmagine è... -
Page 43: Cancellare Le Riprese
Altro: ....microfono e altoparlante integrati Con riserva di modifiche tecniche. La MONACOR INTERNATIONAL GmbH & Co. KG si riserva ogni diritto di elaborazione in qualsiasi forma ®... - Page 44 ® MONACOR INTERNATIONAL GmbH & Co. KG • Zum Falsch 36 • 28307 Bremen • Germany Copyright © by MONACOR INTERNATIONAL. All rights reserved. A-1310.99.01.03.2012...
Need help?
Do you have a question about the DVT-440SET and is the answer not in the manual?
Questions and answers