Table of Contents
Advertisement
Quick Links
Advertisement
Table of Contents
Troubleshooting

Related Manuals for Tally Dascom DP-581H


Summary of Contents for Tally Dascom DP-581H
- Page 1 DASCOM DP-581H DASCOM DP-581H Operator's Manual Operator's Manual Rev1_01...
- Page 2 Read this manual carefully before use and keep it at your side for reference. The contents of this manual are subject to change without notice. The manufacturer will not be responsible for the result of operation using this manual regardless of errors or misprint. The manufacturer will not be responsible for troubles resulting from use of accessories and consumables other than specified in this manual.
- Page 3 Safety Guide Safety Guide Warning Indications Warning Warning Indications which, if not properly followed, may have high risk of serious injury or death. Caution Caution Indications which, if not properly followed, may lead to serious injury or death. Alert Alert Indications which, if not properly followed, may result in injury or property damage.
- Page 4 Caution Caution In case of heating, smoke, abnormal sound or smell, turn the power off and contact your dealer or customer service. Continued usage may become a fire hazard. When any foreign objects (metal fragments, water or other liquid, etc.) entered in the printer, turn the power off...
- Page 5 Caution Caution Do not touch the printhead or paper cutter when opening the paper cover. The printhead may be very hot and the cutter may injure your hand. Be careful not to have your hand caught in the paper cover. Alert Alert Use only specified thermal paper.
- Page 6 Battery Danger Danger If any electrolyte come into contact with your eyes, immediately wash your eyes with fresh running water and consult your doctor. Failure to follow the instructions below may result in leakage, heating, or explosion of the battery: Do not heat the battery or throw in fire.
- Page 7 AC Power Adapter Alert Alert Do not disassemble or alter the AC Power Adapter or it may lead to electric shock or fire. Thermalpaper Alert Alert Print density can be affected by temperature and media types. To avoid discoloration and deterioration of thermal paper, pay attention to the following: Store in a dark, cool place.
-
Page 8: Table Of Contents
Chapter 1 Introduction Printer Features What's included Quick Start Chapter 2 Main unit Names Operation panel Chapter 3 Rolled Paper Installing (8 inch rolled paper) Cutting Removing Chapter 4 Power and Battery Battery installation Battery charge level Connecting the AC Power Adapter Charging the battery Power ON Power OFF... -
Page 9: Chapter 1 Introduction
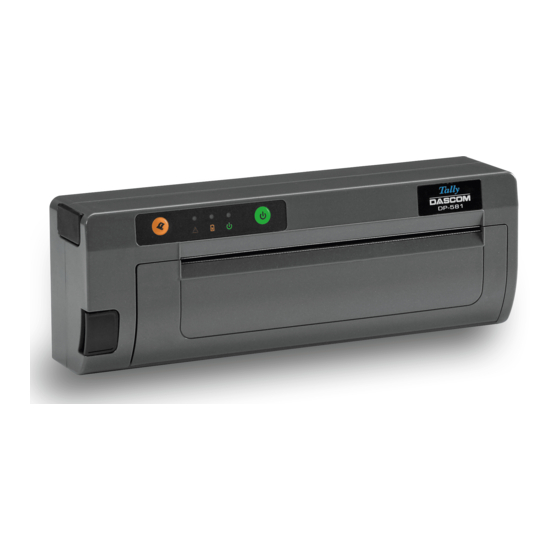
Introduction Introduction Thank you for purchasing the DP-581H mobile thermal printer. This is an easy-to operate thermal printer that prints on rolled paper up to 8.5 inches wide. This document describes basic operation and information that you need before first use. -
Page 10: What's Included
What's included Quick Start 1. Install battery(P7) 2. Install rolled paper(P5) 3. Charge the battery(P8) 4. Turn on power(P9) 5. Self-test(P10)... -
Page 11: Main Unit
Chapter 2 Main unit Main unit Names Operation panel 2.2.1 Buttons Button Function Operation Press & release when the Power on power is off. Press & hold 3 seconds when Power off the power is on. Power Press twice when the printer Web Configuration mode is ready. - Page 12 2.2.2 Lamps Lamp Status Power/Status Battery Error (Green) (Yellow) (Red) Booting up ● On 〇 Off ● On Ready ● On 〇 Off 〇 Off Paper end / Lid open ◉ Flashing 〇 Off 〇 Off Printing Web Configuration ◉ Flashing 〇...
-
Page 13: Chapter 3 Rolled Paper
Chapter 3 Rolled Paper Rolled Paper Installing (8 inch rolled paper) Press button (1) and open paper lid (2). Install rolled paper. Pull out paper end about 5cm and close paper lid until you hear "click". -
Page 14: Cutting
Cutting The paper is cut by the cutter attached on the printer lid. Hold and pull the end of the paper so that the paper is cut from one end of the cutter to the other end continuously. The Cutter is very sharp. Please do not touch the cutter in order to avoid injury. Removing Press button (1) and open paper lid (2). -
Page 15: Chapter 4 Power And Battery
Chapter 4 Power and Battery Power and Battery Battery installation Place Main Unit bottom side up and insert battery as shown. Turn screws clockwise to fix clockwise to fix battery firmly. Turn screws counter-clockwise to remove counter-clockwise to remove battery. Please see "Battery Care"... -
Page 16: Connecting The Ac Power Adapter
Connecting the AC Power Adapter 1. Connect the power cord to the AC Power Adapter. 2. Connect the DC connector of the AC Power Adapter to the printer. 3. Insert the plug at the end of the power cord into the power outlet. Be sure to follow this procedure. -
Page 17: Power On
Power ON 1. Press the Power button on the operation panel. 2. The Power lamp and the Error lamp will show ON during the start up sequence. 3. The Error lamp will be turned OFF when the printer is ready to print. Power OFF 1. -
Page 18: Chapter 5 Self-Test
Chapter 5 Self-Test Self-Test Performing Self-Test 1. Install the rolled paper and close paper lid. 2. Turn the power ON. 3. When the printer becomes ready, press the Feed button twice continuously. The printer will start printing the test page. -
Page 19: Chapter 6 Windows Pc Software
Windows PC software Web Configuration Driver 6.1.1 Installing Configuration of the DP-581H printer is done through a built-in web page. To use it, Web Configuration Driver must be installed in your PC. 1. Open \Driver_Software\RNDIS_Driver\Install.exe in the CD. 2. Click the Next button. - Page 20 6.1.2 Uninstalling 1. Open Device Manager in your PC. 2. Choose "Show hidden devices" in the View menu to make it checked. 3. Right-click Network adapters > USB Ethernet/RNDIS Gadget and choose "Uninstall device" from the contextual menu. 4. Select "Delete the driver software for this device." and click the Uninstall button. 5.
-
Page 21: Chapter 7 Configuration
Chapter 7 Configuration Configuration Configuration of the DP-581H printer is done through a built-in web page. Web Configuration Driver is required, which is described above. Accessing Web Configuration 1. Turn on the printer. 2. Connect a USB cable between the printer and a PC. -
Page 22: Wi-Fi Configuration
When configuration is finished, press and hold the Power button to turn the printer off. Then turn it on again. Wi-Fi configuration 1. Click "WIFI Config" placed on the top menu to open Wi-Fi configuration. - Page 23 2. Select suitable address method. DHCP: Printer will acquire an IP address from your network DHCP server. Static: Printer will always connect to the network using the IP address defined. Click the Submit Changes button to save the settings. 3. The Available Networks list shows access points discovered by the printer. Click the Add/Connect button to use one of these access points.
-
Page 24: Printer Configuration Reset
6. Click "Main" to back to the main page. 7. In the main page, the WIFI Config field shows the current Wi-Fi settings. 8. Close the web browser. 9. Press and hold the Power button of the printer to turn off the power and push the Power button to turn on the power again. -
Page 25: Updating The Firmware
Updating the firmware 1. Make sure that the printer is connected to a power source through the AC Power Adapter. 2. Click "Updates". 3. Click the "Browse..." button and choose the firmware file saved in your PC. 4. Click the "Upload" button and it starts processing. 5. - Page 26 6. Don't turn off the printer while updating. 7. When updating is finished, the 3 lamps will flash together. 8. Turn off the printer and close the Web browser on the PC. 9. Turn on the printer and then it will run with the firmware that you uploaded. It may take longer time when rebooting after updating the firmware.
-
Page 27: Chapter 8 Maintenance And Troubleshooting
Chapter 8 Maintenance and troubleshooting Maintenance and troubleshooting Cleaning In normal environments, the printer should be cleaned after printing a few rolls of paper or if there are voids in the printout. For optimum performance and life, you should clean the Print Head and Platen Roller whenever you load new paper. - Page 28 8.1.2 Platen Rollers Turn the platen roller gently with your hand and wipe the surface with a soft cloth moistened with alcohol. 8.1.3 Inside You may also experience a buildup of paper dust in the printer. This may be removed using a compressed air spray or by vacuuming.
-
Page 29: Battery Care
Battery Care 8.2.1 Usage New batteries are shipped in an “uncharged” state and must be charged for at least 4 hours prior to the first use. Maximum battery capacity is not reached until after completing a minimum of three complete charge and discharge cycles. When the battery is charging and not fully charged, the Battery lamp on the Control Panel will illuminate. -
Page 30: Troubleshooting
Troubleshooting 8.3.1 General Error Conditions Whenever the printer detects an error condition the Error lamp will either flash or stay on. Error lamp (Red) Possible Cause Solution Make sure the door is fully closed by Paper Out or Paper Door opening the door and closing it Flashes not fully closed. - Page 31 Problem Possible Cause Solution Not suitable paper Verify paper from approved source. Verify paper from approved source. Not suitable or “old” paper Try new roll of paper. Poor print quality Clean print head. Refer to Print head dirty “Maintenance” section of this document.
-
Page 32: Chapter 9 Specifications (Printer)
Chapter 9 Specifications (Printer) Specifications (Printer) ▼ ▼ Environmental Environmental ▼ ▼ Printing Printing Operating Temp Operating Temp Printing Method Printing Method -10℃ to 45℃ (using battery) Direct thermal Storage Temp Storage Temp Printing Resolution Printing Resolution -20℃ to 60℃ 203 dpi (8 dots per mm) Humidity Humidity...
Need help?
Do you have a question about the DP-581H and is the answer not in the manual?
Questions and answers