Table of Contents
Advertisement
Advertisement
Table of Contents

Related Manuals for Nidek Medical LM-1800P


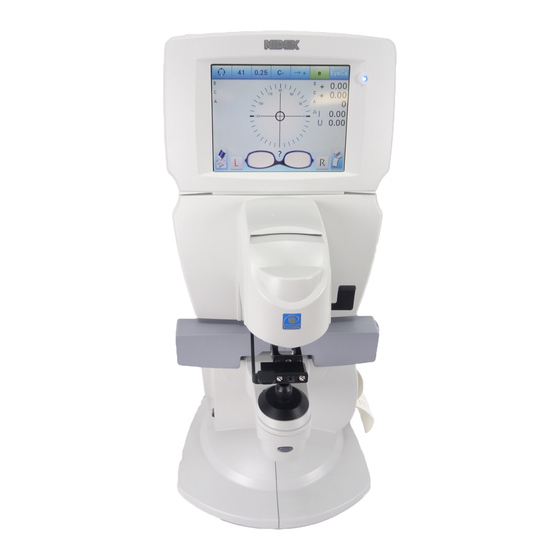
Summary of Contents for Nidek Medical LM-1800P
- Page 1 AUTO LENSMETER LM-1800P/LM-1800PD INTERFACE MANUAL MLM26*RTZ002F...
- Page 2 NIDEK CO., LTD. : 34-14, Maehama, Hiroishi-cho, Gamagori, Aichi 443-0038, Japan (Manufacturer) Telephone: +81-533-67-6611 Facsimile: +81-533-67-6610 NIDEK CO., LTD. : 3F Sumitomo Fudosan Hongo Bldg., 3-22-5, Hongo, (Tokyo Office) Bunkyo-Ku, Tokyo 113-0033, Japan Telephone: +81-3-5844-2641 Facsimile: +81-3-5844-2642 NIDEK INCORPORATED : 47651 Westinghouse Drive, Fremont, California 94539, U. S. A. (United States Agent) Telephone: +1-510-226-5700 Facsimile: +1-510-226-5750...
-
Page 3: Table Of Contents
Table of Contents 1. OUTLINE OF COMMUNICATION....1 1.1 Outline of Communication Function ........1 2. - Page 4 5.2 Installation Procedure (Windows 8) ........76 5.3 Installation Procedure (Windows Vista) .
-
Page 5: Outline Of Communication
OUTLINE OF COMMUNICATION Outline of Communication Function The LM-1800P/LM-1800PD comes standard with interfaces shown in the table below that enables transmission of the measurement data to an external computer. RS-232C interface RS-232C compliance USB interface USB 2.0 HOST/FUNC compliance LAN interface... - Page 6 OUTLINE OF COMMUNICATION: Outline of Communication Function MLM26*RTZ002F...
-
Page 7: Rs-232C Communication And Usb Communication
RS-232C Communication and USB Communication Basic Interface Specifications • Be sure to set the Auto print S and Auto print R/L parameters to Off before communication. Failure to do so could cause a printer error. • Priority of interface (RS-232C/USB) The communication is established with the port received data first. - Page 8 PC, NCP10, NCP20 Com mode The NIDEK option is unavailable in USB communication. CR code Off, On * The underlined option shows the factory setting. For the method of setting parameters, see “Setting Parameters” of the LM-1800P/LM-1800PD opera- tor’s manual. MLM26*RTZ002F...
-
Page 9: Installation Of The Usb Driver
• Set the representation form of prism data by setting the Prism parameter. 2.1.1 Installation of the USB driver The USB driver must be installed in the computer to receive the data measured by the LM-1800P/LM- 1800PD. Install the USB driver provided with the USB cable (option) to the computer. -
Page 10: Cable Connection
RS-232C Communication and USB Communication: Basic Interface Specifications 2.1.2 Cable connection <LM-1800P/1800PD> <Computer (external device)> Connector Connector Signal Connection Signal Signal name Signal name Pin No. Pin No. Transmit exchange Data Received exchange Data Received exchange Data Transmit exchange Data (Ready To Send) -
Page 11: Communication Format
RS-232C Communication and USB Communication: Communication Format Communication Format Among transmitted data are commands such as “Request to Send” other than measurement data. In a sequence of transmission of measurement data from the LM to the computer, the computer transmits “Send Data command” to the LM, and the LM receives the command and sends “measurement data”. The software on the computer reads the received data strings according to the format information and then performs necessary processing (for example, display of data on the screen or storage of data on disks). -
Page 12: Command Format
RS-232C Communication and USB Communication: Communication Format 2.2.1 Command Format The commands (control character string) that are transmittable from and receivable by the LM are described below. These commands reciprocally control the LM and computer to make them transmit and receive data. The format of a basic command is described below: : Character string (10 characters in this case) 0DH : Character code (H = Hexadecimal) - Page 13 RS-232C Communication and USB Communication: Communication Format (4)CL command (Computer → LM) Command for the computer to request the LM to clear the data in it. The command corresponds to the actuation of the clear button of the LM. This com- mand also releases the fixed data indication.
- Page 14 RS-232C Communication and USB Communication: Communication Format (8) UV Read command (Computer → LM) Command for the computer to request the UV measurement for the LM. The command corresponds to the actuation of the UV measurement of the LM. However, the mode is fixed to the Simple mode. n = 0, 1, 2 0: Request the UV 100% measurement (Performs the auto correct of the menu regardless of time.)
-
Page 15: Data Format
RS-232C Communication and USB Communication: Data Format Data Format 2.3.1 Basic format The measurement data transmitted from the LM is provided below: The basic data format is described in details. When the LM receives “SD command”, it sends data out in the following format. Data character string Separated by the data type. - Page 16 RS-232C Communication and USB Communication: Data Format The LM transmits the following types of data. These types of data are output according to the lens measurement mode, whether the data has been measured or not, and the condition for the lenses (single, left or right).
-
Page 17: Format Of Each Data
The number inside the parentheses indicates the number of characters transmitted. (1) Company name / Model name The name of the manufacturer (NIDEK) and the name of model (LM-1800P/LM-1800PD) are output. * In the lower line, the ASCII codes are represented by hexadecimals. - Page 18 RS-232C Communication and USB Communication: Data Format (5)SPH, CYL and AXIS data Measurement data of SPH, CYL, and AXIS are output. Single “ ” (Space, space) Identification Right “ R” (Space, R) code Left “ L” (Space, L) The ETB and CR codes are added to the end (when the CR code parameter is set to On). (The codes are added to the end of all the following types of data.) Each measurement data is output as fixed digits with the leading digit 0 remaining.
- Page 19 RS-232C Communication and USB Communication: Data Format (6) SE data (Spherical Equivalent value, only in the contact lens measuring mode) Measured of the SE value is output. Single “S ” (S, Space) Identification Right “SR” code Left “SL” The measurement data is output as fixed four digits including a decimal point with a polarity sign and the leading digit 0 remaining.
- Page 20 RS-232C Communication and USB Communication: Data Format 2) Example of the primary and secondary addition powers in the right data (ADD = +2.00 D, ADD2 = +2.50 D ETB CR ETB CR 41H 52H 30H 32H 2EH 30H 30H 17H 0DH 30H 32H 2EH 35H 30H 17H 0DH ADD (5 characters) ADD2 (5 characters) 3) Example of the primary and secondary addition powers represented by spherical powers in the...
- Page 21 RS-232C Communication and USB Communication: Data Format When the Prism parameter is set to P-B: Single “P ” “B ” (P, Space) (B, Space) Identification Right “PR” “BR” code Left “PL” “BL” The measurement data is output as fixed digits with the leading digit 0 remaining. Four digits with a fixed decimal point PRISM with no polarity sign...
- Page 22 RS-232C Communication and USB Communication: Data Format ETB CR 44H 20H 17H 0DH V. Length (2 characters) 2) Example of the right data (V. Length = 8 mm) ETB CR 44H 52H 17H 0DH V. Length (2 characters) (10)Channel width data (LM-1800 PD only) The measurement data of channel width (Wid) and progressive lenght (Len) are output.
- Page 23 RS-232C Communication and USB Communication: Data Format ETB CR 47H 20H 30H 38H 30H 17H 0DH Green (3 characters) 2) Example of the right data (Green = 75%) ETB CR 47H 52H 30H 37H 35H 17H 0DH Green (3 characters) (12)UV transmittance data The measurement data of UV transmittance is output.
- Page 24 RS-232C Communication and USB Communication: Data Format (13)PD data (LM-1800PD only) The measurement data of PD is output. * This data will not be included in the output unless PD has been measured for both sides. Identification “PD” code The data is sent in the order of Total PD (T.PD), Right PD (R. PD), and Left PD (L. PD). The measurement data of PD is output as fixed three-digits including a decimal point.
- Page 25 RS-232C Communication and USB Communication: Data Format (15)Net prism data (LM-1800 PD only, Normal measurement mode) The measurement data of net prism (Net Prism) is output. * This data will not be included in the output unless net prism has been measured for both sides.
-
Page 26: Success Format
RS-232C Communication and USB Communication: Success Format Success Format IS command (LM → Computer) The LM will respond to “IZ command” by sending “success” when the initialization is successful. Since this format is the same as that of data, the success can be processed with normal interface soft- ware. -
Page 27: Error Format
RS-232C Communication and USB Communication: Error Format Error Format When the LM becomes unable to perform measurements or to perform measurements properly, the LM will respond to “SD command” by transmitting an error message instead of sending measurement data. Basic error formats are as follows. Since this format is the same as that of data, the error can be processed with normal interface soft- ware. -
Page 28: Example Of Data Output
RS-232C Communication and USB Communication: Example of Data Output Example of Data Output The formats of various types of measurement data are explained in "2.3.2. Format of each data (Page 13)"; the entire format of the data to be transmitted varies with the existence or absence of various types of measurement data and the designation of lenses (Left/Right). - Page 29 RS-232C Communication and USB Communication: Example of Data Output (2) In the case of signal data in progressive power lens measurement mode: Measurement conditions: Progressive power lens measurement with the single state designated SPH = +1.00D, CYL = 0.00D, AXIS = 0° PRISM = IN 3.00Δ.
- Page 30 RS-232C Communication and USB Communication: Example of Data Output (3) In the case of single data in contact lens measurement mode: Measurement conditions: Contact lens measurement with the single state designated SPH = +2.00 D, CYL = +0.50 D, AXIS = 60°, SE = +2.25 D PRISM = 1.25Δ, BASE = 70°...
- Page 31 RS-232C Communication and USB Communication: Example of Data Output (4) In the case of right data only in normal measurement mode Measurement conditions: Single vision lens measurement with the right-eye lens designated Right: SPH = -11.25 D, CYL = -9.75 D, AXIS = 90° Right: PRISM = OUT 1.25Δ, DOWN 2.00Δ...
- Page 32 RS-232C Communication and USB Communication: Example of Data Output (5) In the case of the left and right data in normal measurement mode Measurement conditions: Trifocal lens measurement with the left- and right-eye lenses designated Right: SPH = -1.25 D, CYL = -0.75 D, AXIS = 120° ADD = +2.00 D, ADD2 = +3.00 D No prism measurement performed No transmittance measurement performed...
- Page 33 RS-232C Communication and USB Communication: Example of Data Output (6) In the case of the left and right data in progressive power lens measurement mode Measurement conditions: Progressive power lens measurement with the left- and right-eye lenses desig- nated Right: SPH = -1.25 D, CYL = -0.75 D, AXIS = 120° ADD = +2.00D PRISM = IN 2.50Δ, DOWN 2.00Δ...
- Page 34 RS-232C Communication and USB Communication: Example of Data Output → To be ETB CR continued 20H 4CH 2DH 30H 32H 2EH 30H 30H 2DH 30H 30H 2EH 35H 30H 31H 38H 30H 17H 0DH Left SPH Left CYL Left AXIS → To be ETB CR O ETB CR continued...
- Page 35 Transmittance measurement Green = 80%, UV = 20% CR code = Added • This is an example of the LM-1800P of the maximum data size (233 characters) in normal lens measurement mode. • When the Near parameter is set to “Near Sph”, both the addition powers (ADD) and near spherical data (NSPH) are output.
- Page 36 RS-232C Communication and USB Communication: Example of Data Output → To be ETB CR continued 44H 41H 32H 30H 31H 30H 2EH 31H 31H 2EH 32H 33H 2EH 31H 35H 3AH 33H 30H 17H 0DH ”N Month Hour Minute →To be ETB CR continued 20H 52H 2DH 30H 31H 2EH 32H 35H 2DH 30H 30H 2EH 37H 35H 31H 32H 30H 17H 0DH...
- Page 37 RS-232C Communication and USB Communication: Example of Data Output → To be ETB CR ETB CR continued 4EH 4CH 2BH 30H 30H 2EH 32H 35H 17H 0DH 2BH 30H 31H 2EH 35H 30H 17H 0DH Left NSPH Left NSPH2 → To be O ETB CR U ETB CR continued...
- Page 38 Transmittance measurement Green = 80%, UV = 20% CR code = Added • This is an example of the LM-1800P of the maximum data size (233 characters) in progressive power lens measurement mode. The checksum is added according to the setting of the Com mode parameter “NCP10”.
- Page 39 RS-232C Communication and USB Communication: Example of Data Output → To be ETB CR continued 44H 41H 32H 30H 31H 30H 2EH 31H 31H 2EH 32H 33H 2EH 31H 35H 3AH 33H 30H 17H 0DH Year Month Hour Minute → To be ETB CR continued 20H 52H 2DH 30H 31H 2EH 32H 35H 2DH 30H 30H 2EH 37H 35H 31H 32H 30H 17H 0DH...
- Page 40 RS-232C Communication and USB Communication: Example of Data Output (9) In the case of the maximum data size in contact lens measurement mode (LM-1800P) Measurement conditions: Contact lens measurement with the left- and right- eye lenses des- ignated Right: SPH = -1.25 D, CYL = -0.75 D, AXIS = 120º, SE= -1.50 D PRISM = IN 2.50Δ, DOWN 2.00Δ...
- Page 41 RS-232C Communication and USB Communication: Example of Data Output → To be ETB CR continued 20H 52H 2DH 30H 31H 2EH 32H 35H 2DH 30H 30H 2EH 37H 35H 31H 32H 30H 17H 0DH Right SPH Right CYL Right AXIS → To be ETB CR ETB CR continued...
- Page 42 RS-232C Communication and USB Communication: Example of Data Output (10)In the case of the maximum data size in prism layout measurement mode (LM-1800P) Measurement conditions: Single vision lens measurement with the left- and right- eye lenses designated Right: SPH = -1.25 D, CYL = -0.75 D, AXIS = 120º...
- Page 43 RS-232C Communication and USB Communication: Example of Data Output → To be ETB CR continued 20H 52H 2DH 30H 31H 2EH 32H 35H 2DH 30H 30H 2EH 37H 35H 31H 32H 30H 17H 0DH Right SPH Right CYL Right AXIS → To be ETB CR ETB CR continued...
- Page 44 RS-232C Communication and USB Communication: Example of Data Output (11)In the case of the maximum data size in normal measurement mode (LM-1800PD) Measurement conditions: Trifocal lens measurement with the left- and right- eye lenses designated Right: SPH = -1.25 D, CYL = -0.75 D, AXIS = 120º ADD = +2.00 D, ADD2 = +3.00 D Representation form of near portion power = NEAR SPH NSPH = +0.75 D, NSPH2 = +1.75 D...
- Page 45 RS-232C Communication and USB Communication: Example of Data Output → To be 1 ETB CR continued 49H 50H 31H 32H 33H 34H 35H 36H 37H 38H 39H 30H 31H 30H 30H 30H 30H 31H 17H 0DH Barcode data 2 (Up to 16 characters) →...
- Page 46 RS-232C Communication and USB Communication: Example of Data Output → To be ETB CR ETB CR continued 41H 4CH 30H 32H 2EH 32H 35H 17H 0DH 30H 33H 2EH 35H 30H 17H 0DH Left ADD Left ADD2 → To be ETB CR ETB CR continued 4EH 4CH 2BH 30H 30H 2EH 32H 35H 17H 0DH 2BH 30H 31H 2EH 35H 30H 17H 0DH...
- Page 47 RS-232C Communication and USB Communication: Example of Data Output (12)In the case of the maximum data size in progressive power lens measurement mode (LM- 1800PD) Measurement conditions: Progressive power lens measurement with the left- and right- eye lenses des- ignated Right: SPH = -1.25 D, CYL = -0.75 D, AXIS = 120º ADD = +2.00 D Representation form of near portion power = NEAR SPH NSPH = +0.75 PRISM = IN 2.25Δ, DOWN 2.00Δ...
- Page 48 RS-232C Communication and USB Communication: Example of Data Output → To be 6 ETB CR continued 49H 50H 31H 32H 33H 34H 35H 36H 37H 38H 39H 30H 31H 32H 33H 34H 35H 36H 17H 0DH Barcode data1(Up to 16 characters) →...
- Page 49 RS-232C Communication and USB Communication: Example of Data Output → To be ETB CR continued 20H 4CH 2DH 30H 32H 2EH 30H 30H 2DH 30H 30H 2EH 35H 30H 31H 38H 30H 17H 0DH Left SPH Left CYL Left AXIS → To be ETB CR ETB CR continued...
- Page 50 RS-232C Communication and USB Communication: Example of Data Output (13)In the case of the maximum data size in contact lens measurement mode (LM-1800PD) Measurement conditions: Contact lens measurement with the left- and right- eye lenses designated Right: SPH = -1.25 D, CYL = -0.75 D, AXIS = 120º, SE= -1.50 D PRISM = IN 2.50Δ, DOWN 2.00Δ...
- Page 51 RS-232C Communication and USB Communication: Example of Data Output → To be ETB CR continued 20H 52H 2DH 30H 31H 2EH 32H 35H 2DH 30H 30H 2EH 37H 35H 31H 32H 30H 17H 0DH Right SPH Right CYL Right AXIS ETB CR → To be ETB CR continued 53H 52H 2DH 30H 31H 2EH 35H 30H 17H 0DH 50H 52H 30H 32H 2EH 35H 30H 49H 17H 0DH...
- Page 52 RS-232C Communication and USB Communication: Example of Data Output (14)In the case of the maximum data size in prism layout measurement mode (LM-1800PD) Measurement conditions: Single vision lens measurement with the left- and right- eye lenses designated Right: SPH = -1.25 D, CYL = -0.75 D, AXIS = 120º PRISM = IN 2.50Δ, DOWN 2.00Δ...
- Page 53 RS-232C Communication and USB Communication: Example of Data Output → To be ETB CR continued 20H 52H 2DH 30H 31H 2EH 32H 35H 2DH 30H 30H 2EH 37H 35H 31H 32H 30H 17H 0DH Right SPH Right CYL Right AXIS → To be ETB CR ETB CR continued...
- Page 54 RS-232C Communication and USB Communication: Example of Data Output MLM26*RTZ002F...
-
Page 55: Communication Procedure (Other Than Ncp20)
COMMUNICATION PROCEDURE (other than NCP20) Outline The procedure for transmitting data measured by the LM to the computer is explained. Save the measurement data on the LM. Press the read key of the LM or send “RD command” from the computer. Transmit the saved data to the computer. -
Page 56: Communication Control Signals (Dtr Output To Dsr Input)
COMMUNICATION PROCEDURE (other than NCP20): Communication Control Signals (DTR Output to DSR Input) Communication Control Signals (DTR Output to DSR Input) The communication control method when the Com mode parameter is set to “NIDEK” or “NIDEK2” is described. To transmit and received “Command” and/or “Data”, it is necessary to connect the DSR (Data Set Ready) and DTR (Data Terminal Ready) wires as well as the TXD (Transmit eXchange Data) and RXD (Received eXchange Data) wires. - Page 57 COMMUNICATION PROCEDURE (other than NCP20): Communication Control Signals (DTR Output to DSR 3) Because DTR is not enabled (ON) on the LM even after 0.1 second or more (when Com mode is set to “NIDEK”) or 4 seconds or more (when Com mode is set to “NIDEK2”), the computer ter- minates communication by disabling DTR (OFF).
- Page 58 COMMUNICATION PROCEDURE (other than NCP20): Communication Control Signals (DTR Output to DSR Input) Note 2)If the Com mode parameter is set to “NIDEK” or “NIDEK2” be sure not to leave the DTR signal enabled (ON). In 10) of the above example, unless the computer disables DTR (OFF), the LM misjudges that the computer will send the next “Command”...
-
Page 59: Actual Communications
Set the parameters related to an RS-232C interface on the computer in accordance with the descriptions in "2.1. Basic Interface Specifications (Page 3)". For the procedure for setting parameters, refer to the LM-1800P/LM-1800PD operator’s manual. It is allowed that the parame- ters are set by the communication program. -
Page 60: The Lm Requests The Computer To Receive Measurement Data
COMMUNICATION PROCEDURE (other than NCP20): Actual Communications 3.3.1 The LM requests the computer to receive measurement data Procedure for transmitting the measurement data to the computer by pressing the print button export button After saving the measurement data by pressing the read key of the LM, press the print LM→... -
Page 61: The Computer Requests The Lm To Send Measurement Data
COMMUNICATION PROCEDURE (other than NCP20): Actual Communications 3.3.2 The computer requests the LM to send measurement data Procedure for transmitting the measurement data saved by the actuation of the read key of the LM by controlling the measurement data from the computer: LM→... -
Page 62: The Computer Controls All The Operations Of The Lm
COMMUNICATION PROCEDURE (other than NCP20): Actual Communications 3.3.3 The computer controls all the operations of the LM Procedure for the computer to control the entire process: Measurement → Storage of measurement data → Transmission of measurement data: Place a lens on the nosepiece of the LM to put the LM into the measuring state. ←COM The computer enables DTR (ON) to let the LM know that it is starting communication. -
Page 63: Example Of Communication Program
COMMUNICATION PROCEDURE (other than NCP20): Example of Communication Program Example of Communication Program The communication program on the computer should be written to handle such processes as described in "3.3. Actual Communications (Page 55)". In this section, an example of communica- tion program is provided for reference. - Page 64 COMMUNICATION PROCEDURE (other than NCP20): Example of Communication Program < Procedure > 1) Enter the sample program. Connect the computer to the LM with the communication cable in advance. 2) Type “RUN 2000” and press the Enter key to execute the program. 3) As the “Let’s Measure !!”...
- Page 65 COMMUNICATION PROCEDURE (other than NCP20): Example of Communication Program Reference) If the Com mode parameter is set to “PC” on the LM, the control/check process of DTR becomes unnecessary. Therefore, delete lines 1110, 1130, 1140, 2120, and 3140 in the sample program. 10 '************************************************************************* 20 '* * 30 '* Input Data from LM‑1800P/1800PD V1.00 ...
- Page 66 COMMUNICATION PROCEDURE (other than NCP20): Example of Communication Program 2090 PRINT: PRINT " ** Let's Measure !! ( and PC's any key on ! ) **" 2100 K$=INKEY$: IF K$="" THEN 2100 2110 OPEN "COM:O81NN" AS #1 ' RS‑232C & DTR on 2120 IF (INP(&H32) AND &H80)=&H0 THEN 2120 ' check DSR on 2130 PRINT #1,SD$ ' output SD command 2140 FOR I=1 TO 210 2150 INPUT #1,LM$(I) ' input DATA 2160 IF LM$(I)=CHR$(4) THEN 2180 ' check 'EOT(04H)' 2170 NEXT I 2180 CLOSE #1 ' RS‑232C & DTR off 2190 ' 2200 BEEP 2210 FOR I=1 TO 210 2220 IF LM$(I)=CHR$(4) THEN 2250 2230 PRINT LM$(I) ' disp DATA 2240 NEXT I 2250 FOR I=1 TO 10000: NEXT I ' wait 2260 GOTO 2090 2270 ' 2280 ' 3000 '‑‑‑‑‑‑‑‑‑‑‑‑‑‑‑‑‑‑‑‑‑‑‑‑‑‑‑‑‑‑‑‑‑‑‑‑‑‑‑‑‑‑‑‑‑‑‑‑‑‑‑‑‑‑‑‑‑‑‑‑‑‑‑‑‑‑‑‑‑‑‑‑‑ 3010 ' RD(COMP) ‑‑> SD(COMP) ‑‑> DATA(LM) ‑‑> CL(COMP) 3020 '‑‑‑‑‑‑‑‑‑‑‑‑‑‑‑‑‑‑‑‑‑‑‑‑‑‑‑‑‑‑‑‑‑‑‑‑‑‑‑‑‑‑‑‑‑‑‑‑‑‑‑‑‑‑‑‑‑‑‑‑‑‑‑‑‑‑‑‑‑‑‑‑‑ 3030 CLEAR ,,,3000 3040 CHILD ("SWITCH RS232C‑0 [9600]") ' set 9600 bit/sec 3050 DIM LM$(210) 3060 RD$=CHR$(1)+"CLM"+CHR$(2)+"RD"+CHR$(23)+CHR$(4) ' RD command 3070 SD$=CHR$(1)+"CLM"+CHR$(2)+"SD"+CHR$(23)+CHR$(4) ' SD command 3080 CL$=CHR$(1)+"CLM"+CHR$(2)+"CL"+CHR$(23)+CHR$(4) ' CL command 3090 FOR I=1 TO 210: LM$(I)="": NEXT I ' buffer clear 3100 ' 3110 PRINT: PRINT " ** Let's Measure !! ( and PC's any key on ! ) **" 3120 K$=INKEY$: IF K$="" THEN 3120 3130 OPEN "COM:O81NN" AS #1 ' RS‑232C & DTR on 3140 IF (INP(&H32) AND &H80)=&H0 THEN 3140 ' check DSR on...
-
Page 67: Flowchart
COMMUNICATION PROCEDURE (other than NCP20): Flowchart Flowchart < Computer > < LM-1800P/1800PD > Explanation Numbers indicated in the parentheses are the line No. in the sample program. START Initialization (1000) INITIALIZE Opening the RS-232C port (1100) OPEN Disabling DTR that was enabled by 'OPEN'... - Page 68 COMMUNICATION PROCEDURE (other than NCP20): Flowchart < LM-1800P/1800PD > < Computer > Explanation Numbers indicated in the parentheses are the line No. in the sample program. START Initialization (2000) INITIALIZE Opening the RS-232C port. DTR is left en- CHECK DSR (2110)
- Page 69 COMMUNICATION PROCEDURE (other than NCP20): Flowchart < Computer > < LM-1800P/1800PD > Explanation Numbers indicated in the parentheses are the line No. in the sample program. START Initialization (3000) INITIALIZE Opening the RS-232C port. DTR is left en- (3130) OPEN CHECK DSR abled (ON) because communication is started immediately.
- Page 70 COMMUNICATION PROCEDURE (other than NCP20): Flowchart MLM26*RTZ002F...
-
Page 71: Method Of Rs-232C Communication (Ncp20)
METHOD OF RS-232C COMMUNICATION (NCP20) NIDEK communication protocol “NCP20” performs establishment of the communication and multi block data communication by command handshake without control line (DTR/DSR). Block Format Basic format Number Source Destination Message Checks Command of unsent Message (0X01) port No. - Page 72 METHOD OF RS-232C COMMUNICATION (NCP20): Block Format [Number of unsent blocks] To send data as multi block, blocks (2 bytes) other than the present data are sent. When single data is sent, the command cord is 0x0000. Only single data is used for the lens meter.
-
Page 73: Normal Sequence
METHOD OF RS-232C COMMUNICATION (NCP20): Normal Sequence Normal Sequence When equipment A sends data to B by request from equipment A 1) Equipment A requests B to accept data sending (Request to Send). 2) Equipment B sends “Accept to Send” to A to accept data sending. -
Page 74: Error Sequence
METHOD OF RS-232C COMMUNICATION (NCP20): Error Sequence Error Sequence Error or Abort can be sent instead of Accept in response to Request or Data. Error is sent to request data resending when the contents of Request or Data are not correct or check- sum error occurs. - Page 75 METHOD OF RS-232C COMMUNICATION (NCP20): Error Sequence When equipment A sends data to B by request from equipment A Equipment A Equipment B T.O. Error T.O. T.O. Error T.O. T.O. Abort Error Aborts the communication at all times. MLM26*RTZ002F...
- Page 76 METHOD OF RS-232C COMMUNICATION (NCP20): Error Sequence When equipment A sends data to B by request from equipment B Equipment A Equipment B T.O. Error T.O. T.O. Error T.O. T.O. Error T.O. T.O. Abort Error Aborts the communication at all times. MLM26*RTZ002F...
-
Page 77: Installation Of Usb Driver
Follow the procedure below for computer running Windows 7. * Log in as an administrator. Some procedures might not be displayed due to security setting. Connect the LM-1800P/LM-1800PD and computer with the USB cable. Turn on power to the LM-1800P/LM-1800PD. The operating system recognizes unknown devices. - Page 78 INSTALLATION OF USB DRIVER: Installation Procedure (Windows 7) Double click “Unknown device”. The new dialog box is displayed. Click the Update Driver button. The new dialog box is displayed. Click “Browse my computer for driver software”. The new dialog box is displayed. MLM26*RTZ002F...
- Page 79 Click the Next button. The Windows Security dialog box is displayed. Click the Install button. The Update Driver Software dialog box is displayed. Click the Close button. Turn off power to the LM-1800P/LM-1800PD. The installation of the USB driver is complete. MLM26*RTZ002F...
-
Page 80: Installation Procedure (Windows 8)
Follow the procedure below for computer running Windows 8. * Log in as an administrator. Some procedures might not be displayed due to security setting. Connect the LM-1800P/1800PD and computer with the USB cable. Turn on power to the LM-1800P/1800PD. Point the upper right corner or lower right corner of the screen and click the Settings. - Page 81 INSTALLATION OF USB DRIVER: Installation Procedure (Windows 8) Click “Device Manager”. The new dialog box is displayed. Double click “Unknown device”. The new dialog box is displayed. Click the Update Driver button. The new dialog box is displayed. MLM26*RTZ002F...
- Page 82 INSTALLATION OF USB DRIVER: Installation Procedure (Windows 8) Click “Browse my computer for driver soft- ware”. The new dialog box is displayed. Click the Browse button. The Browse For Folder dialog box is displayed. Specify the location of the comclass.inf file and click the OK button. Normally, specify the E002 folder on the distribution media.
- Page 83 INSTALLATION OF USB DRIVER: Installation Procedure (Windows 8) Click the Close button. Turn off power to the LM-1800P/1800PD. The installation of the USB driver is complete. MLM26*RTZ002F...
-
Page 84: Installation Procedure (Windows Vista)
* Log in as an administrator. Some procedures might not be displayed due to security setting. Connect the LM-1800P/LM-1800PD and computer with the USB cable. Turn on power to the LM-1800P/LM-1800PD. The operating system recognizes unknown devices. The Found New Hardware dialog box is displayed. - Page 85 INSTALLATION OF USB DRIVER: Installation Procedure (Windows Vista) Click “Don't search online”. The new dialog box is displayed. Click “Browse my computer for driver software (advanced)”. The new dialog box is displayed. Click the Browse button. The Browse for the Folder dialog box is displayed.
- Page 86 INSTALLATION OF USB DRIVER: Installation Procedure (Windows Vista) Click the Install button. The Update Driver Software dialog box is displayed. Click the Close button. Turn off power to the LM-1800P/LM-1800PD. The installation of the USB driver is complete. MLM26*RTZ002F...
-
Page 87: Installation Procedure (Windows Xp)
Follow the procedure below for computer running Windows XP. * Use SP2 or later. * Log in as an administrator. Connect the LM-1800P/LM-1800PD and computer with the USB cable. Turn on power to the LM-1800P/LM-1800PD. The plug & play operating system recognizes the USB device. - Page 88 The Completing the Found New Hard- ware Wizard dialog box is displayed. Click the Finish button. After performing “Safely Remove Hardware”, disconnect the USB cable. Turn off power to the LM-1800P/LM-1800PD. The installation of the USB driver is complete. MLM26*RTZ002F...
-
Page 89: Lan Communication
6.1.1 Outline of communication function The LM-1800P/LM-1800PD creates XML (measurement results and information) files of the measure- ment data to be used in electronic filing systems for ophthalmology, and it comes equipped with the LAN interface that outputs those created files to shared folders in external computers using CIFS (Common Internet File System). -
Page 90: Connecting Barcode Scanner/ Magnetic Card Reader
LAN COMMUNICATION: Outline of LAN Communication 6.1.3 Connecting barcode scanner/ magnetic card reader Turn off power to the main body and connect the barcode scanner or magnetic card reader to the USB port A on the bottom of the device. • Do not connect or disconnect the barcode scanner or magnetic card reader while the CAUTION main body power is on. -
Page 91: System Diagram Example
LAN COMMUNICATION: System Diagram Example System Diagram Example The diagram below illustrates the connection of an actual system. The system diagram below is only an example. It may be changed significantly depending on the con- nection network scale. To confirm the system diagram, contact the network administrator of the facility. Server IP ADDRESS: 10.50.XXX.YYY SUBNET MASK: 255.255.255.0... -
Page 92: Confirmation And Setting Of Receiver Computer
6.3.2 Setting up the shared folder Set up a shared folder to save the measurement data transmitted from the LM-1800P/LM-1800PD. • Do not set up a shared folder on an external storage such as an external hard disk. • Be sure that a folder with the same name does not exist. - Page 93 LAN COMMUNICATION: Confirmation and Setting of Receiver Computer ex.) Setting up a shared folder (folder name: LM) to the desktop of the receiver computer 1) Newly create a folder on the desktop and name the folder as “LM”. 2) Open the LM Properties dialog box of the LM folder and select “Share this folder”...
-
Page 94: Confirming Items Necessary For Other Settings
LAN COMMUNICATION: Confirmation and Setting of Receiver Computer 6.3.3 Confirming items necessary for other settings Confirm the following settings necessary for device connection. (If necessary, consult the network administrator.) • File format • Login user name of the receiver computer • Login password of the receiver computer •... -
Page 95: Setting The Device Transmission
LAN COMMUNICATION: Confirmation and Setting of Receiver Computer 6.3.4 Setting the device transmission Set the network parameters of the device based on the information of "6.3.3. Confirming items neces- sary for other settings (Page 90)". Turn on the device and enter the parameter screen. - Page 96 LAN COMMUNICATION: Confirmation and Setting of Receiver Computer 1) When the User name parameter is selected, the Full view field character input screen is displayed. 2) Press the alphanumeric character selection button (“ABC” for upper case letters, “abc” for lower case letters, or for numbers) to change or add the “12_”...
- Page 97 LAN COMMUNICATION: Confirmation and Setting of Receiver Computer Select the Folder parameter and set the shared folder of the computer to which measurement data is transmitted in the same manner as step 7 based on the infor- mation of "6.3.3. Confirming items necessary for other settings (Page 90)". When transmitting the data to the subfolder of the shared folder, input a slash (/) between the share folder name and subfolder name as in “shared folder name”...
-
Page 98: Testing The Device Network Setting
LAN COMMUNICATION: Confirmation and Setting of Receiver Computer 6.3.5 Testing the device network setting After completing up to step 13 of "6.3.4. Setting the device transmission (Page 91)" in the previous section and rebooting, enter the parameter screen. Press the network test button for one second or more. - Page 99 LAN COMMUNICATION: Confirmation and Setting of Receiver Computer Message Description Disk full No free drive space. Network test completed successfully The LAN communication is confirmed being performed correctly. When the LAN connection test is complete successfully, the device network setting is complete. See the following table for the error messages regarding network communication that is displayed while the device is in use.
-
Page 100: Data Format
LAN COMMUNICATION: Data Format Data Format The data format varies depending on the setting (NIDEK_V1.00 or NIDEK_V1.01) of the File format parameter. The network communication is performed according to the NIDEK V1.00 NIDEK_V1.00 specifications. The network communication is performed according to the NIDEK V1.01 NIDEK_V1.01 specifications. -
Page 101: Response To Data Acquisition
LAN COMMUNICATION: Data Format Measurement data XML file When the File format parameter is set to “NIDEK_V*.**” Delimiter (underscore) ABCDEFGHIJKLMNOP 20110309103057 012345 . xml ID: A maximum of 16 characters XML extension: Date and time: 14 characters MAC address 3 Header: Two characters fixed Three characters fixed (YYYYMMDDHHMMSS) lower-order bytes:... -
Page 102: Xml File Configuration
LAN COMMUNICATION: Data Format 6.4.4 XML file configuration Tags for data which have not been measured are not output. For example, when only the right- eye lens is measured, there are no tags for left-eye lens measurement. Regardless of the print format and communication format of the parameter, all output-enabled data are output. -
Page 103: Tag Definition Of Xml Output Data
LAN COMMUNICATION: Data Format 6.4.5 Tag definition of XML output data Sign in Meaning “Necessity” field Tags and values are necessary. ○ Tags are necessary. △ No tags or values are necessary. * Indicates that lower tags are necessary when an upper tag exists. * Does not depend on the print format or communication format. - Page 104 LAN COMMUNICATION: Data Format ● LM data Tag name Description Data type Necessity Example <Measure Type="LM"> Measurement type tag - ○ String (64 characters) (AutoNormal, Normal, AutoProgressive, <MeasureMode> Measurement mode AutoNormal △ Progressive, Contact, Layout, Convex, Index, and Other only) <DiopterStep unit="D"> Diopter unit increment Double 0.25...
- Page 105 LAN COMMUNICATION: Data Format Tag name Description Data type Necessity Example Horizontal prism power △ ) <PrismX unit="pri" base="out"> Double 0.50 △ (base in and base out only) Vertical prism power ( △ ) <PrismY unit="pri" base="up"> Double 0.00 △ (base up and base down only) <UVTransmittance unit="%">...
- Page 106 LAN COMMUNICATION: Data Format Tag name Description Data type Necessity Example <L> Left-eye lens measurement value - <Length unit="mm"> Progressive length (mm) ○ <ChannelWidth unit="mm"> Channel width (mm) ○ <ChannelLength unit="mm"> Channel width position (mm) ○ <Index> Refractive index Double 1.60 △...
- Page 107 LAN COMMUNICATION: Data Format Tag name Description Data type Necessity Example <NameJ1> Multilingual patient name String (64 characters) △ <NameJ2> Multilingual patient name String (64 characters) △ <Operator> Operator name - <No.> Operator number String (64 characters) △ <ID> Operator ID String (64 characters) △...
- Page 108 LAN COMMUNICATION: Data Format Tag name Description Data type Necessity Example Single state measurement value (when <S> - an error occurs) <Error> Error information String (64 characters) △ <R> Right-eye lens measurement value - <Sphere unit="D"> Spherical power (D) Double -3.00 ○...
- Page 109 LAN COMMUNICATION: Data Format Tag name Description Data type Necessity Example <PD> Pupillary distance - <Distance unit="mm"> Far pupillary distance Double 64.0 △ <DistanceR unit="mm"> Right-eye lens far pupillary distance Double 31.5 △ <DistanceL unit="mm"> Left-eye lens far pupillary distance Double 32.5 △...
-
Page 110: Style Sheet
LAN COMMUNICATION: Data Format 6.4.6 Style sheet The XML files are supported by a style sheet. They cannot be displayed in Internet Explorer without the style sheet files in the LM folder. (Use a text editor to check the contents.) When there is no style sheet file in the LM folder, it is automatically produced when measurement data is received. - Page 111 LAN COMMUNICATION: Data Format LM data --- Stylesheet sample Measurement conditions Measure mode Progressive Diopter step 0.25D Axis step 1° Cylinder mode Prism diopter step 0.25 Prism base step 1° Prism mode Add mode Right side Prism Horizontal Vertical Sphere Cylinder Axis SE ADD ADD2 NearSphere NearSphere2 Prism ConfidenceIndex base prism...
-
Page 112: Xml File Sample
LAN COMMUNICATION: Data Format 6.4.7 XML file sample This is not a collection of actual measurement data rather it is simply a sample for explanation. NIDEK_V1.00 <?xml version="1.0" encoding="UTF-8"?> XML header <?xml-stylesheet type="text/xsl" href="NIDEK_LM_Stylesheet.xsl" ?> Style sheet Ophthalmology data <Ophthalmology> <Common> Common tag Company name <Company>NIDEK</Company>... - Page 113 LAN COMMUNICATION: Data Format <LM> LM measurement data <S> Single state measurement value <Sphere unit="D">-2.00</Sphere> Spherical power (D) <Cylinder unit="D">-1.50</Cylinder> Cylindrical power (D) <Axis unit="deg">143</Axis> Cylinder axis (°) <SE unit="D"></SE> Spherical equivalent value (D) <ADD unit="D">1.75</ADD> 1st add power (D) <ADD2 unit="D"></ADD2> 2nd add power (D) <NearSphere unit="D">0.00</NearSphere>...
- Page 114 LAN COMMUNICATION: Data Format <PD> Pupillary distance <Distance unit="mm">70.5</Distance> Far pupillary distance <DistanceR unit="mm">35.5</DistanceR> Right-eye far pupillary distance <DistanceL unit="mm">35.0</DistanceL> Left-eye far pupillary distance </PD> LM measurement data (NIDEK inherent <NIDEK> optical tag) <S> Single state measurement value <Length unit="mm">23</Length> Progressive length (mm) <ChannelWidth unit="mm">18</ChannelWidth>...
- Page 115 LAN COMMUNICATION: Data Format NIDEK_V1.01 <?xml version="1.0" encoding="UTF-8"?> XML header <?xml-stylesheet type="text/xsl" href="NIDEK_LM_Stylesheet.xsl" ?> Style sheet Ophthalmology data <Ophthalmology> <Common> Common tag Company name <Company>NIDEK</Company> Model name <ModelName>LM-1800PD</ModelName> <MachineNo></MachineNo> Model distinction number ROM version (Software/FPGA) <ROMVersion>1.10</ROMVersion> Format version (not software version) <Version>NIDEK_V1.01</Version>...
- Page 116 LAN COMMUNICATION: Data Format <LM> LM measurement data <S> Single state measurement value (when no error occurs) <Sphere unit="D">-2.00</Sphere> Spherical power (D) <Cylinder unit="D">-1.50</Cylinder> Cylindrical power (D) <Axis unit="deg">143</Axis> Cylinder axis (°) <SE unit="D"></SE> Spherical equivalent value (D) <ADD unit="D">1.75</ADD> 1st add power (D) <ADD2 unit="D"></ADD2>...
- Page 117 LAN COMMUNICATION: Data Format <L> Left-eye lens measurement value <Sphere unit="D">-2.00</Sphere> Spherical power (D) <Cylinder unit="D">-1.50</Cylinder> Cylindrical power (D) <Axis unit="deg">148</Axis> Cylinder axis (°) <SE unit="D"></SE> Spherical equivalent value (D) <ADD unit="D">1.75</ADD> 1st add power (D) <ADD2 unit="D"></ADD2> 2nd add power (D) <NearSphere unit="D">-0.25</NearSphere>...
- Page 118 LAN COMMUNICATION: Data Format <Inside> Inside amount <InsideR unit="mm">2.0</InsideR> Right-eye lens near portion inside amount <InsideL unit="mm">1.0</InsideL> Left-eye lens near portion inside amount </Inside> </NIDEK> </Measure> </Ophthalmology> MLM26*RTZ002F...
Need help?
Do you have a question about the LM-1800P and is the answer not in the manual?
Questions and answers