
Related Manuals for HP Velotechnik Gekko 26


Summary of Contents for HP Velotechnik Gekko 26
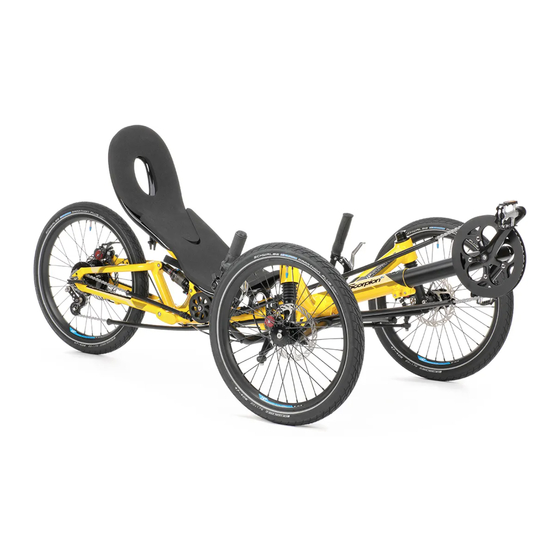
- Page 1 ...
- Page 2 The upper picture shows the Scorpion fs 26 S-Pedelec, the lower picture shows the Scorpion fs 26. Relevant components are alike on all tricycles depending on the model and individual configuration. Parts marked with "*" are options or required for S-Pedelec when using on public roads in the scope of German StVZO (German traffic regulations) Parts marked with "...
- Page 3 Introduction Dear customer, thank you for buying a recumbent tricycle designed by HP V ELOTECHNIK and congratulations on the purchase of your new recumbent tricycle! With this high-quality touring tricycle, you will enjoy many years of ex- hilarating riding pleasure. Your safety and your satisfaction are our main concern.
-
Page 4: Table Of Contents
The ErgoMesh-seat for Scorpion /fx /fs 20 Carrying luggage /fs 26 /fs 26 Enduro /fs 26 S-Pedelec Final assembly /plus 20 /plus 26 Bolts and nuts The Gekko fx 20, Gekko fx 26, and Gekko 26 Quick release levers meshseat The first miles The headrest Raincover... - Page 5 Spokes Headset Maintenance routine Adjusting the headset on Scorpion, Scorpion fx, Wear and tear Gekko fx 20, Gekko fx 26, and Gekko 26 59 Cleaning and conservation Storing the bicycle Wheel alignment Transport in the car Measuring toe-setting on Scorpion,...
-
Page 6: Safety Instructions
Safety instructions General safety instructions The manuals of component manufacturers The specialist dealer is responsible for the ex- such as the brake manufacturer, the gear sys- pert assembly, please contact him for detailed tem manufacturer, and the pedal manufactur- information! A tricycle that has been assem- er also belong to this manual. - Page 7 General safety instructions Gekko fx 20 Scorpion Gekko fx 26 Scorpion fx Gekko 26 Scorpion fs 20...
- Page 8 General safety instructions Scorpion fs 26 Scorpion plus 20 Scorpion plus 26 Scorpion fs 26 Enduro Scorpion fs 26 S-Pedelec...
-
Page 9: Load Capacity
Never drive without holding on! Before your Scorpion, Scorpion plus 20 /plus 26, Gekko 26 first ride, read the chapter “Riding a recum- bent tricycle” on page 16 and get carefully The maximum load (rider + luggage) is 150 kg used to the different vehicle performance. -
Page 10: Carrying Luggage
General safety instructions Carrying luggage The load should be placed as close to the body of the rider as possible, since this results Carrying luggage is only allowed on the special in better riding performance. You can also racks designed by HP V ELOTECHNIK improve the handling of the tricycle by posi- tioning the centre of gravity of the luggage as... -
Page 11: Final Assembly
General safety instructions Attention! Screws must be tightened with prescribed tightening torque. In this manual tightening torques are given in “Nm“ (Newton meter). Al- ways use a torque wrench wherever a torque setting is given in this manual. Nev- er rely on "feeling". Screws tightened too Carrier and lowrider on Scorpion fx much or not enough can break, which can lead to dangerous accidents. -
Page 12: Quick Release Levers
General safety instructions when not given any other recommendation. If Finally, check that the part being secured is you are in doubt, please ask your specialist firmly fixed: Lift each wheel several inches off dealer. the ground and give it a slap onto the tire from above. -
Page 13: Safety Instructions (Bicycle)
Safety instructions (bicycle) Legal requirements other chemical treatment. If any of these works is done improperly it may result in a When you ride your tricycle on public roads loss of strength by direct damage or increased it must comply with national legislation and susceptibility to corrosion. -
Page 14: Added Parts And Accessories
Gekko 26 As a front fairing for recumbent tricycle, you may use the Streamer fairing offered by HP On Gekko 26 frames, the identification num- . Please take care to assure a ELOTECHNIK ber is engraved on the right headtube. -
Page 15: Replacement Of Parts
Safety instructions (bicycle) ences. In strong wind or gusts of wind unsafe Do not take kids with you situations may occur. Please remove the fair- HP V tricycles are not designed ELOTECHNIK ing before riding in such weather conditions. for the transport of children. You are not al- lowed to mount a child's seat. -
Page 16: Trailer On Gekko Fx 20, Gekko Fx 26, And Gekko
ELOTECHNIK mount the trailer coupling. Trailer on Gekko fx 20, Gekko fx 26, and Gekko 26 You are allowed to use trailers (double trail only) up to 40 kg (88 lbs). When using a rear hub motor, you will need our special HP V coupling. -
Page 17: Safety Instructions (S-Pedelec)
Safety instructions (S-Pedelec) Please catch up on present regulations in your country regarding driving licences, the use of bicycle lanes, riding on paths away from the Attention! The situation de- road, wearing helmets etc. frequently. scribed below is valid for Germany only. For legal requirements in your country, please contact the authorities. -
Page 18: Added Parts And Accessories
Safety instructions (S-Pedelec) Parts with no exchange restrictions are the HP V . Please take care to assure a ELOTECHNIK following: good vision over the fairing and sufficient freedom of movement below. • gearing system, chain rings, sprockets Please take into account that any fairing makes •... -
Page 19: No Alteration Of Parts
Safety instructions (S-Pedelec) No alteration of parts Do not take kids with you The transport of children with the Scorpi- on fs 26 S-Pedelec is not allowed. You are not allowed to mount a child's seat. Attention! You are not allowed to perform any work on the parts of the tricycle, especially frame, fork, handlebar Trailers... -
Page 20: Riding A Recumbent Tricycle
Riding a recumbent tricycle Learning the new riding technique Your new tricycle has been assembled by Danger! Never touch the your dealer and adjusted together with you as ground with your feet while the tricycle is described on the pages 19 and following in the still moving. -
Page 21: How To Ride Correctly And Safely
Riding a recumbent tricycle How to ride correctly and safely defensively. Only ride at higher speeds where and when this is safe! Wear protective clothing Attention! Always carry your Riding a tricycle is a potentially dangerous tricycle over stairs and curb stones. Do sport where accidents can happen even when not ride through big road holes. -
Page 22: Slowly Increase The Strain
Riding a recumbent tricycle to a low value to make sure you can get off safely. Please use exclusively the original shoe plates / cleats from the manufacturer of the pedals, do not use any other brand. If you're using shoe plates that are not authorised the bind- ing system won't work properly. -
Page 23: Handling Instructions
Handling instructions Adjusting your new tricycle Your position on the recumbent bicycle is es- The upper curve of the seat back in the area sential for your riding comfort, well-being and of the shoulder blades determines the correct efficient cycling. Therefore, you should adjust seat length: Through this shape the shoulder the frame, seat, handlebar and suspension to and neck area is lifted from the recumbent... - Page 24 Adjusting your new tricycle To achieve the smallest possible seat length, grees by simply opening the quick release lev- move the 2 upper screws from the top to the er. In the medium seat position, the angle is middle holes. about 35°...
- Page 25 Adjusting your new tricycle bar support) is adjustable by moving the seat back and lower seat against each other. Attention! The seat cushion is To get more lumbar support, lower the seat fastened with Velcro and you can take it front edge and put the seat back in a more off.
-
Page 26: The Ergomesh-Seat For Scorpion /Fx /Fs
The Gekko fx 20, Gekko fx 26, and regarding the sheets are completely covered Gekko 26 meshseat by the hole diameter of the clamping surface. The Gekko models are equipped with a mesh... -
Page 27: The Headrest
Adjusting your new tricycle your spine. Forces from pedalling are sup- Adjusting the seat back angle ported in the area of your lower back just A great advantage of the mesh seat on your above your hips. The seat is bowed up in this Gekko is the possibility to adjust the seat back area (lumbar support). -
Page 28: Raincover
Adjusting your new tricycle Raincover To keep the seat dry when your tricycle is parked you can additionally purchase a rain- cover. It can be carried in the optional Micro- bag or in the bag the ErgoMesh seat is equipped standard with. In order to firmly secure the raincover to the Gekko mesh-seats, there are two plastic clamps on the underside of the most forward... -
Page 29: Adjusting To Your Size
Adjusting to your size Adjusting the front boom distance on a recumbent can be slightly longer than on a conventional bicycle. In order to adjust the leg length, you have to move the front boom (the front part of the While you are pedalling, the ball of your foot frame where the cranks are mounted) in the should be positioned above the centre of the... -
Page 30: 56 /Fs 26 /Fs 26 S-Pedelec /Plus 20 /Plus
Adjusting to your size Attention! When you move the front boom take care that its end does not damage any cables or wires that possibly come out of the main frame (e.g. light ca- bles or wires from the drive train). Please inform yourself about the length of the front boom on your tricycle before you do any work. - Page 31 Adjusting to your size After moving the bottom bracket tube your dealer has to adjust the chain length. By de- fault, your recumbent tricycle comes with a very long chain so the adjustment range of the tricycle can be fully used without the need to lengthen the chain.
-
Page 32: Adjusting The Length With Front Boom
Adjusting to your size Adjusting the length with front boom quick adjust The front boom quick adjust is additional equipment for HP V recumbents ELOTECHNIK that feature a telescopic front boom for leg length adjustment. It replaces the standard bolts of the front boom clamping by quick re- lease levers. - Page 33 Adjusting to your size Moving the front boom is easier when turning it a little bit from side to side. When doing this, make sure the pulley bracket doesn’t scratch the frame and its lug won’t be bent. That’s why we recommend to only turn the front boom clockwise (and back afterwards) when looking from the front.
-
Page 34: Adjusting The Handlebars
Adjusting the handlebars A good setting for the handlebars Setting the handlebar width and angle on Scorpion /fx /fs 20 /fs 26 /fs 26 Enduro While riding you should allow your arms to /fs 26 S-Pedelec /plus 20 /plus 26 rest in a relaxed position on the handlebars. -
Page 35: Setting The Angle Of The Handlebar On
Adjusting the handlebars Setting the angle of the handlebar on Gekko fx 20, Gekko fx 26, and Gekko 26 The handlebar position on Gekko tricycles will be set with the stem clamping. Most riders are comfortable with an 85° angle so that the bent grips point upwards and slightly forward. -
Page 36: Adjusting The Cable Length
Adjusting the handlebars Danger! If the handlebar grips Attention! After having adjusted are adjusted pointing too far forward or the handlebar position you have to read- too wide, your hands or the brake levers just the length of the brake cables and can touch the front wheels or mudguards shifter cables. -
Page 37: Folding
Folding Taking off the seat Use your right hand to pull the whole hinge upwards a little bit. At the same time press First step when folding a tricycle out of the the securing tab (2) downwards with your Scorpion family, the seat needs to be re- thumb. -
Page 38: Folding The Scorpion Fs 26 /Fs 26 Enduro
Folding lease lever rests on the front frame part. Else the snap-in mechanism will not work proper- Attention! If the gear system is not in smallest sprocket and smallest Lift the folding hinge until the securing tab chainring the chain may be tightened so far snaps in. - Page 39 Folding and the quick release lever is closed com- pletely. Securing tap on a Scorpion plus 26 Move the chaintubes besides the folding hinge Attention! Make sure all cables and electric wires are long enough to allow proper folding. The chaintubes are con- nected by a flexible rubber joint positioned in the area of the folding hinge.
- Page 40 Folding tioned. Always apply the Velcro so that the seat with your hand to properly fit the seat to buffer is pulled to the centre of the tube. the tricycle. Close the quick releases. Please refer to the hints given on page 8. Danger! Before riding your tri- cycle, make sure the quick release is se- curely closed.
-
Page 41: Folding The Gekko Fx 20 And Gekko
Folding Folding the Gekko fx 20 and Gekko fx 26 3. Open the quick release at the folding hinge. Folding with D.F.F.-move Release the safety bolt against spring pressure. Slightly open the folding hinge. Swivel the Thanks to the Dual-Flat-Fold (D.F.F.) technol- quick release lever to the upside so that it is ogy, your Gekko fx 20 or Gekko fx 26 folds held in an upright position by the sheet metal. - Page 42 Folding 5. Now do the D.F.F.-move: Lift the frame, 7. Place the folded tricycle upright on the in- turn it sideways and fold the rear wheel tegrated rollers and the buffer inside the fold- transversely below the frame in a smooth mo- ing hinge.
- Page 43 Folding Unfolding with D.F.F.-move 4. Close the folding hinge quick release. To unfold the Gekko fx 20 or Gekko fx 26 stand next to the left front wheel. 1. Grab the left seat stay with your left hand (knuckles facing to the rear wheel). Slide your right hand between main tube and seatback and push the locking sheet metal's tongue away from the seatback.
- Page 44 Folding Folding on the floor 7. Tilt the folded tricycle sideways to make it stand upright on the integrated rollers and the Alternatively, the Gekko fx 20 or Gekko fx 26 buffer inside the folding hinge. can be folded on the floor: 1.
- Page 45 Folding Danger! Make sure the folding hinge is properly closed. The safety bolt must be snapped in correctly and the quick release fastened tightly. Danger! Always tightly close the quick release at the seat back. The seat is a structural part of the tricycle frame. An opened quick release may lead to frame damage.
-
Page 46: Lighting System
Lighting system Lighting systems for bicycles Tire dynamo If you want to ride your tricycle on public You turn on the lighting system with the tire streets, it must be equipped with a legal light- dynamo at the rear wheel by unlocking the ing system. - Page 47 Lighting system Button on headlight B&M IQ-X For the hub generator lighting system and battery pow- ered lighting systems on pedelecs there is an integrated switch at the front light to turn the lights on and off. The SON hub dynamo is highly efficient and works silently.
-
Page 48: Lighting System Of Scorpion Fs 26 S-Pedelec
Lighting system Lighting system of Scorpion fs 26 S-Pedelec The lighting system of the S-Pedelec gets turned on and off with the S-Pedelec system. Under the headlight is a legally required posi- tion light mounted. In the rear light is a legally required braking light integrated. -
Page 49: Brakes
Brakes Handling of the brakes Try to avoid braking in bends, though if nec- essary, touch the brakes carefully! Braking in- Your tricycle is equipped with a powerful creases the risk of slipping. Especially when it high-quality braking system. Please read the is wet the rear wheel immediately slides out separate manual of the brake manufacturer of the bend while braking and this can result... -
Page 50: Maintenance Of The Brakes
Brakes the brake levers are equipped with a parking brake-button that locks the pulled lever. To release the parking brake, pull the brake lever. Danger! Always make sure that the disc or rims and brake pads are free of As an option the tricycle can be equipped oil and grease. -
Page 51: Cable Operated (Mechanical) Brakes
Brakes Cable operated (mechanical) brakes Check your brake pads frequently as ex- plained in the manual supplied by the brake The brake pads of your brakes are worn manufacturer. Worn brake pads, oily or dam- when you can pull the lever further and fur- aged pads must be replaced immediately by a ther to the handlebar before the pads touch qualified bicycle mechanic. - Page 52 Brakes Danger! The hose at the left Danger! If the brake pads or the knuckle must not be routed under the brake disc are worn out (pads: thickness track rod. This may lead to snapping off less than 2,5 mm including metal back, disc: the hose.
-
Page 53: Gear System And Chain
Gear system and chain Handling of the gear system great force, all the time that the chain is mov- ing between the sprockets. Due to the long With the gear system you can adjust the ped- cables that expand under pressure and the alling frequency, i.e. -
Page 54: Adjusting The Gear System
Gear system and chain Adjusting the gear system Your dealer will adjust your derailleur gearing Danger! If the chain shifts over system carefully before handing over the tri- the smallest or the biggest sprocket you cycle. But during the first 300 kilometres (186 have to readjust the end-limit adjusters of miles) of riding the cables can stretch, making the rear or the front derailleur. -
Page 55: Chain
Gear system and chain Chain The chain is a wearing part that has to be lu- Danger! Take care not to pour bricated regularly and to be changed at signs any oil on the rims, brake discs or the of excessive wear and tear. The amount of tires. -
Page 56: Chain Protection Tubes
Gear system and chain worn sprocket or chain ring. We recommend There are different types of joining links avail- rust resistant Rustbuster chains from KMC able fitting different types of chains. with smoothly rounded edges. They also pro- Make sure that any chain links in the chain are vide a good gear changing performance. -
Page 57: Replacing The Tubes
Gear system and chain If the tube is too short after you have cut it so that there is not enough protection anymore it has to be replaced. You can buy spare tubes Danger! The rear ends of the either as uncut tubes or already cut into the upper chaintube have to be secured against correct length, complete with retention spring moving with a tight rubber tube over the... -
Page 58: Chain Roller
Gear system and chain Changing the lower chaintube The chain roller wears slowly and gradually shows a sprocket shape in the higher area in The chaintube is connected to the mounting the middle. When this middle area is worn plate by a rubber sleeve. For dismounting the completely the links of the chain will run on chaintube, grab the sleeve on its rear end and the roller. - Page 59 Gear system and chain Dismounting and mounting of the chain roller To dismount the chain roller, the chaintubes need to be removed. See also hints on replac- ing the chaintubes (page 53) The chain roller is not symmetrically shaped; the recessed side of the chain roller has to face to the frame, the flat (logo) side out- wards.
-
Page 60: Wheels
Take care the spacer bush- ings in the knuckle won't be lost. Loosen the screw in the locking part Front wheel mounting parts of Gekko 26 Taking out the front wheel out of the knuckle To reassemble the wheel slide the disc care-... -
Page 61: Tires
Wheels Rear wheel and then retract it a little bit. Now you can pump up your tire easily. According to the configuration the rear wheel After you have pumped up the tire to the de- is mounted with a quick release or with nuts. sired pressure pull off the pump knob. -
Page 62: Rear Wheel Of Scorpion Fx /Fs 20 /Plus 20
Any damaged spokes must be re- Rear wheel of Scorpion /fs 26 /plus 26, placed immediately. Gekko fx 26, Gekko 26 On the rear wheel you have to use a tire of ETRTO size 559 (26"). The tire width possible... -
Page 63: Headset
Fasten the clamp Scorpion fx, Gekko fx 20, Gekko fx 26, again afterwards. and Gekko 26 On tricycles the headset is tightened a little The knuckles that connect the front wheels to bit more than on bicycles. A headset that is... -
Page 64: Wheel Alignment
It is important to measure the distances at the Scorpion, Scorpion fx, Gekko fx 20, same height of 25 cm (10") above the ground, Gekko fx 26, and Gekko 26 as the front wheel are not exactly perpendicu- lar to the ground, viewed from the front of Both front wheels should be parallel to each the tricycle. - Page 65 Wheel alignment end, at the connection to the handlebar stem. The outer rod end is screwed completely into the rod and secured with thread locker. Do Attention! Do not move the not try to turn this side of the rod end. rod-end beyond its limits, or it will be de- stroyed or get excessive play.
- Page 66 Wheel alignment Danger! The locknut must be screwed tight to the tie-rod, otherwise the rod-end could loosen up or play could de- velop. Please pay attention to the table of fastening torques on page 87. On the other side of the track rod the rod end is mounted on the underside of the sus- pension strut’s steering lever.
-
Page 67: Setting Of Camber Angle On Scorpion Fs
Wheel alignment Setting of camber- and caster angle on full suspension tricycles Setting of camber angle on rim wall and square should be 36 mm Scorpion fs 20 /fs 26 /fs 26 Enduro (+0,5°positive camber) now and must be in a /fs 26 S-Pedelec /plus 20 /plus 26 range of 32 mm (+1°... - Page 68 Wheel alignment countersunk bolt M6x25 rotations rotations of rotation screw out: + tricycle frame of forward backward of tie screw in: - washer for M6 bolts rod end rod end rod end rod end caster angle self locking nut for M6 bolts lower by 1°...
-
Page 69: Adjusting The Suspension
Adjusting the suspension Suspension and damping of tional rear shock R Monarch uses air Scorpion /fx /fs 20 /fs 26 /fs 26 Enduro as spring medium. /fs 26 S-Pedelec /plus 20 /plus 26 The damper slows down the process of com- Rear suspension and full suspension tricycles pression and expansion. - Page 70 Adjusting the suspension system. The spring stiffness is a measure for and there is less suspension travel for bumps the compression of a spring at a certain load. while riding. Your suspension will bottom out It is either given in "N/mm" (Newton per Mil- more often.
-
Page 71: Rear Suspension Element
Rear suspension element Adjusting the rear suspension element Steel spring rear shock DV-22 of all Scorpion models Adjustment The preload determines how far the suspen- sion compresses when you are sitting on the Danger! While adjusting the rear tricycle while standing still. Therefore, it is suspension element never load the tricycle necessary that you have the correct spring e.g. - Page 72 Rear suspension element Danger! Take care that the rear wheel or mudguard or suspension element never hit the frame, seat, rear rack or lug- gage box while the suspension is fully com- pressed. Therefore, relax the spring completely by turning the spring retention disc on the thread of the spring element as far as pos- sible (before this, push the possibly existing safety spring ring from its slot in the...
- Page 73 Rear suspension element We recommend the following spring rates, depending on the overall weight: Danger! If the bicycle does not Load Spring stiffness stand on the ground while undoing the 450 lbs/inch • up to 80 kg: screws of the suspension element, the rear •...
-
Page 74: Air Shock Rock Shox Monarch
Rear suspension element play. If there is a safety spring ring, push it damper. The internal oil can become foamy. back into the slot on the thread. This may lead to some noise when the damp- er is working. This noise does not affect the Move the rear swingarm back up and connect function of the damper. - Page 75 Rear suspension element when fully compressed than when only slightly compressed. Danger! Take care that the rear The advantage of this progressive spring be- wheel or mudguard or suspension element haviour is the good bottom-out protection never hit the frame, seat or rear rack box when heavily loaded.
- Page 76 Rear suspension element press. If you are in doubt, please consult your If you turn the knob in direction of the „-“, local dealer. you will get less damping and thus faster de- compression. Turning the knob in direction of The rebound damping prevents an eventual the „+“...
-
Page 77: Front Suspension Elements
Front suspension elements Adjusting and maintenance on the front Your tricycle has reached a sag of 20 mm suspension of Scorpion fs 20 /fs 26 when the upper edge of the knuckle which /fs 26 Enduro /fs 26 S-Pedelec you can feel underneath the shock boot coin- /plus 20 /plus 26 cides with the lower edge of the head tubes of the main frame. - Page 78 Front suspension elements Standard suspension setup above 90 kg (curve 1): • - steel spring hard (yellow) Danger! The mounted spring is • - 4 MCU elastomers 30 mm under tension. Do not remove the preload • - 1 spacer 30 mm adjuster when adjusting the spring preload.
- Page 79 Front suspension elements Attention! Do not install more than two spacers in one strut, otherwise the full suspension travel can not be reached. Spacers should always be installed at the top of the stack inside the spring to give room for the screw in the top cap. The setup must be similar in both suspen- sion struts of your tricycle.
- Page 80 Front suspension elements the strut from frequently bottoming out due to unusual high loads. A characteristic like this (3) can be achieved by a steel spring which is responsible for tak- ing all the load at first and will be supported by only a few elastomers towards the end of travel.
- Page 81 Front suspension elements be removed afterwards. Assembly is done in reversed order. Attention! Use aging-resistant, lithium soap based grease to lubricate. Never use grease containing solid lubri- cants such as zinc sulphide or molybdenum Attention! Before inserting the disulphide. countersunk bolts, make sure the brackets are fitted planar to the frame plates and the hole centres are aligned to each other.
- Page 82 Front suspension elements Unscrew the outer rod end of the track rod black part) and beat the screw head with a from the suspension strut. The lower collar of rubber hammer to release the piston 6 inside. the rubber cap must be slid upwards to access the self-locking M6 nut.
- Page 83 Front suspension elements Applying grease to the bushings. Insert the elastomer band without wrinkles in the knuckle between the two bushings. Slide the stanchion tube back into the knuckle. Slide on the shock boot and insert its upper end in- Exploded view of the suspension strut interior to the stanchion tube's groove.
-
Page 84: Swingarm Pivot
Swingarm pivot Swingarm pivot on Scorpion models The rear swingarm pivot comes with mainte- Attention! There has to be a big nance free bushings. They feature a self- washer between the main frame and the lubricating system with Teflon particles. The end of the bushing else the bushing is not bushings sustain a very high load and they able to function without play and the frame... -
Page 85: Mudguards
Mudguards Mudguards are exposed to very strong vibra- tions, especially at suspended wheels, which may cause them to break. Please check the Attention! You must not mount stays and mountings of the mudguards regu- additional parts like rear lights or reflec- larly for their position and check the mud- tors to the mudguards since those may guards themselves for cracks or deformations. -
Page 86: Front Mudguard Mounting On Scorpion, Scorpion Fx, Gekko Fx 20, Gekko Fx 26, And Gekko
If you decide to uninstall the mudguards, re- place the mudguard mounting with a 5 mm spacer. Mounting of front mudguards on Scorpion, Scorpion fx, Gekko fx 20, Gekko fx 26, and Gekko 26... -
Page 87: Water Bottle Cages
Water bottle cages The derailleur tube at the front of the frame Water bottle cages for Gekko seat comes with threaded inserts M5 for a water bottle cage. Additional water bottle cages can be mounted using a special bracket behind the seat availa- ble from HP V ELOTECHNIK A useful alternative to water bottles are sys-... -
Page 88: Maintenance And Care
Maintenance and care Maintenance routine Your tricycle is equipped with the latest bicy- Cleaning and conservation cle technology that does not require much The frame of your recumbent tricycle has a maintenance. high quality and environmentally friendly pow- However, you will have to maintain your bicy- der coating. - Page 89 Maintenance routine your bicycle with a soft cloth to make it real shiny. Attention! Do not use any Do not only wax the frame but also the cleansing agents that scrub or are chemi- spokes, hubs, screws and nuts etc. You can al- cally aggressive since they affect the paint- so conserve the chain with wax spray after lu- work.
-
Page 90: Storing The Bicycle
Maintenance routine Storing the bicycle Transport in the car Before storing your bicycle over a longer pe- The best way to transport your tricycle is in- riod of time, e.g. during winter, please take side the car. Take care that it does not lie on care of the following steps: the derailleur. -
Page 91: Tightening Torques
Tightening torques Table of tightening torques for all Scorpion models The values indicated are meant for a friction value µ=0,125 (greased threads and screw heads). They only refer to the indicated parts. Please do always follow the values given in the manuals of the parts manufacturers since the following values may not be up to date due to changes in the product line! part connection... -
Page 92: Tightening Torques For Gekko Fx 20, 60 Gekko Fx 26, And Gekko
Tightening torques Tightening torques for Gekko fx 20, Gekko fx 26, and Gekko 26 The values indicated are meant for a friction value µ=0,125 (greased threads and screw heads). They only refer to the indicated parts. Please do always follow the values given in the manuals of the parts manufacturers since... -
Page 93: Warranty
Warranty Warranty policy In case of warranty we will replace or repair the damaged part with a part of our choice or Your authorised dealer has to fully set up and a new part equal to the old one (warranty ob- adjust your bicycle, so that safe function is ligation). -
Page 94: Warranty Pass
Warranty pass Your personal warranty pass Name: With the HP V Warranty Pass you ELOTECHNIK can assure the safety and proper function of your tricycle for many years. Like any other vehicle your tricycle has to be checked for safe operation before riding. Your Address: bicycle has to be maintained at regular inter- vals, at least once a year you will have to take... - Page 95 Warranty pass Service at delivery 1st service No later than 300 kilometres or 2 months At the delivery of a new tricycle: after the purchase. Model: Order No.: Order No.: Mileage approx. km: Date: Date: Dealer's stamp and signature: Dealer's stamp and signature: Exchanged or additionally mounted parts: Exchanged, repaired or additionally mounted parts:...
- Page 96 Warranty pass 2nd service 3rd service No later than 3000 kilometres or one year No later than 6000 kilometres or two years after the purchase. after the purchase. Order No.: Order No.: Mileage approx. km: Mileage approx. km: Date: Date: Dealer's stamp and signature: Dealer's stamp and signature: Exchanged, repaired or additionally mounted...
- Page 97 Warranty pass 4th service 5th service No later than 9000 kilometres or three years No later than 12000 kilometres or four years after the purchase. after the purchase. Order No.: Order No.: Mileage approx. km: Mileage approx. km: Date: Date: Dealer's stamp and signature: Dealer's stamp and signature: Exchanged, repaired or additionally mounted...
- Page 98 Warranty pass 6th service 7th service No later than 15000 kilometres or five years No later than 18000 kilometres or six years after the purchase. after the purchase. Order No.: Order No.: Mileage approx. km: Mileage approx. km: Date: Date: Dealer's stamp and signature: Dealer's stamp and signature: Exchanged, repaired or additionally mounted...
- Page 99 Warranty pass 8th service 9th service No later than 21000 kilometres or seven No later than 24000 kilometres or eight years years after the purchase. after the purchase. Order No.: Order No.: Mileage approx. km: Mileage approx. km: Date: Date: Dealer's stamp and signature: Dealer's stamp and signature: Exchanged, repaired or additionally mounted...
- Page 100 Warranty pass 10th service 11th service No later than 27000 kilometres or nine years No later than 30000 kilometres or ten years after the purchase. after the purchase. Order No.: Order No.: Mileage approx. km: Mileage approx. km: Date: Date: Dealer's stamp and signature: Dealer's stamp and signature: Exchanged, repaired or additionally mounted...
- Page 101 Warranty pass 12th service 13th service No later than 33000 kilometres or eleven No later than 36000 kilometres or twelve years after the purchase. years after the purchase. Order No.: Order No.: Mileage approx. km: Mileage approx. km: Date: Date: Dealer's stamp and signature: Dealer's stamp and signature: Exchanged, repaired or additionally mounted...
- Page 102 Warranty pass 14th service 15th service No later than 39000 kilometres or thirteen No later than 42000 kilometres or fourteen years after the purchase. years after the purchase. Order No.: Order No.: Mileage approx. km: Mileage approx. km: Date: Date: Dealer's stamp and signature: Dealer's stamp and signature: Exchanged, repaired or additionally mounted...
-
Page 103: Service Plan
Service plan The service plan on the next pages is intended Please follow at any rate the manuals of the to give you a rough overview over the re- parts manufacturers. quired maintenance and service works. In no The service intervals given in this Warranty case it can replace the detailed instructions in Pass refer to an average use and a riding per- this manual! - Page 104 Service plan part work lighting system check function adjust headlamp and rear light, check cable contacts clean reflectors, replace missing reflectors tires check air pressure check tread and sidewalls e-drive system check the state of charge of the battery check the cabling and physical connections of the drive system brakes check for damages check for leaking oil...
- Page 105 Service plan see page before every ride monthly annually Note every 6 months 25, 84 7, 87 recommended interval to replace aluminium stem: 2 years 47, 50...
- Page 106 ...
Need help?
Do you have a question about the Gekko 26 and is the answer not in the manual?
Questions and answers