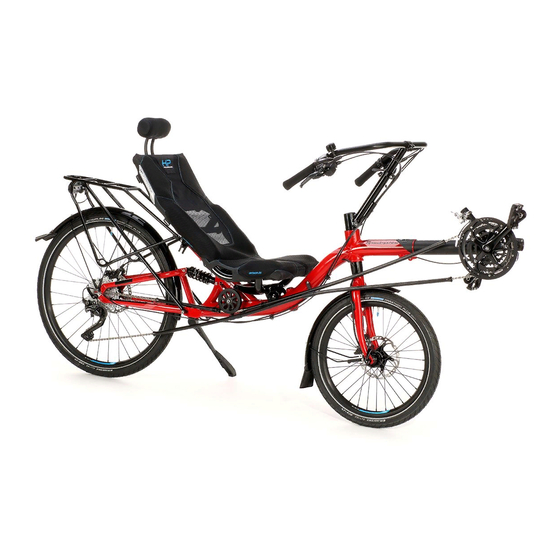
HP Velotechnik Grasshopper fx Operating Manual And Service Instructions
Recumbent bicycles
Hide thumbs
Also See for Grasshopper fx:
- Operating instruction and service instructions manual (72 pages) ,
- Operating and assembly instructions manual (12 pages) ,
- Operating manual (72 pages)
Table of Contents
Advertisement
Quick Links
Download this manual
See also:
Operating Manual
Advertisement
Table of Contents

Subscribe to Our Youtube Channel
Related Manuals for HP Velotechnik Grasshopper fx


Summary of Contents for HP Velotechnik Grasshopper fx
- Page 1 2017 recumbent technology Operating manual and service instructions for HP Velotechnik recumbent bicycles Velotechnik version: February 2017...
- Page 3 Introduction Dear customer, Thank you for buying a recumbent bicycle designed by HP V and congratulations on the purchase of your new ELOTECHNIK recumbent bicycle! With this high-quality touring bicycle, you will enjoy many years of exhilarating riding pleasure. Your safety and your satisfaction are our main concern. On the fol- lowing pages, this manual will inform you about important safety is- sues as well as maintenance and care instructions.
- Page 4 Grasshopper fx Streetmachine Gte Speedmachine Velotechnik...
-
Page 5: Table Of Contents
Before the first ride Suspension Before every ride Suspension and damping How to ride correctly and safely Suspension fork on Grasshopper fx and Protective clothing, clipless pedals and strain Streetmachine Gte Adjusting your recumbent bicycle 17 Concept spring fork on Speedmachine... -
Page 6: Safety Instructions
Safety instructions General safety instructions General safety instructions The manuals of component manufacturers On special demand HP V delivers ELOTECHNIK such as the brake manufacturer, the gear frame kits to put a specialist dealer in a posi- system manufacturer, and the pedal manufac- tion to assemble a bicycle individually. -
Page 7: Intended Use
Your HP V bicycle is made for use Model Weight ELOTECHNIK on streets and on paved roads. Grasshopper fx: from 15,2 kg Speedmachine: from 13,5 kg This bicycle is not designed for the use in Streetmachine GTe: from 14,6 kg... -
Page 8: Final Assembly
General safety instructions The load should be placed as close to the manuals of the parts manufacturers that come body of the rider as possible, since this leads with this manual. to a more stable performance. You can also improve the handling of the bike by position- Attention! Please follow the instruc- ing the centre of gravity of the luggage as low tions in the manuals of the parts manufac-... -
Page 9: Quick Release Levers
General safety instructions Always check the screws very diligently for Check the security of the lever by attempting signs of corrosion. Rust at the screw heads to twist the lever. If the lever can be made to may also lead to the screw seizing in the pivot around in a circle the clamping is too thread. -
Page 10: The First Miles
General safety instructions Attention! All quick releases must be locked tightly before you start riding. When closed the quick release lever must be close to the frame or fork. When closed the quick relase lever's tip must face rearwards. This avoids unwanted opening through contact with obstacles. -
Page 11: Safety Instructions (Bicycle)
Safety instructions (bicycle) Safety instructions (bicycle) Legal requirements Traffic regulations may change. Please check currently valid regulations or ask your special- When you ride your bicycle on public roads it ist dealer. must comply with national legislation and guidelines in your country. No alteration of parts In general, there are minimum standards for Attention! You are not allowed to... -
Page 12: Fairings
As a front fairing for recumbent bicycle a total failure of the part and you may be Grasshopper fx or Streetmachine, you may seriously injured! use the Streamer fairing offered by... -
Page 13: Electric Assist Systems
Safety instructions (bicycle) Make sure you can ride your bicycle safely and feel comfortable with the behavior in a safe area before riding in public traffic. Electric assist systems HP V recumbent bicycles can be ELOTECHNIK equipped with electric assistance systems. Instructions for the use and safety of the optional electric assist systems are included in the systems manufacturer's manuals. -
Page 14: Riding A Recumbent Bicycle
Riding a recumbent bicycle Riding a recumbent bicycle Before the first ride with a lot of force and immediately put your second foot on the other pedal. Before you mount your bike and enjoy your first ride please make yourself familiar with Do not care on which side of pedal you are the instructions on the riding technique and currently pedalling in the beginning. -
Page 15: Before Every Ride
In order to ride safely you have to keep both information about lighting systems from hands at the handlebar. Even when signalling HP Velotechnik on page 36. keep at least one hand at the handlebar. Before every ride Danger! Otherwise, unforseen... - Page 16 Riding a recumbent bicycle tight and is reflective. If you're wearing wide acquired some training do increase the strain pants use clips to protect them from getting slowly. caught in the chain - or use an old fashioned When you ride on a recumbent you use method and put the pants in your sockets.
-
Page 17: Adjusting Your Recumbent Bicycle
Adjusting your recumbent bicycle Adjusting the seat Adjusting the seat Danger! All procedures described here require a certain degree of skill, suit- able tools and mechanical aptitude. After any adjustment perform a static check and take a test ride on a quiet street, away from traffic. - Page 18 Adjusting the seat Length adjustment of the Airflow cushion edge on the back of your legs. With a higher front seat edge, the seat will give more sup- The optional Airflow-cushion consists of two port and avoid the feeling of „sliding down the parts that connect in a V-type shape.
-
Page 19: Seat Cushion
Adjusting the seat Attention! The three quick releases Attention! Never expose the seat have to be closed firmly (tightening force cushion to extreme heat or focused sun- 15-20 kg / 45 lbs) to safely hold the seat. light. The material warms up considerably. You must not open them while riding. -
Page 20: The Ergomesh Seat
Adjusting the seat The ErgoMesh seat The ErgoMesh seat is ergonomically shaped and supports the natural S-curve of your spine. ErgoMesh XL seat is wider, but might not be compatible with underseat steering. Forces from pedalling are supported in the area of your lower back just above your hips (lumbar support). -
Page 21: The Headrest
Adjusting the seat The headrest Both seat types can be equipped with a head / neck rest, which is adjustable in height and angle, to relax the muscles in your neck on long rides. Its height and inclination is adjustable at the clamp. -
Page 22: Adjusting The Front Boom
Adjusting the front boom Adjusting the front boom Adjusting the front boom to your leg It is important that your leg is not fully length straightened when the crank is in the fore- most position. If the distance is too long it is In order to adjust the leg length you have to difficult to overcome this dead point, pedalling move the front boom (the front part of the... - Page 23 Adjusting the front boom Attention! When you insert the front boom, the front boom and the inner wall of the tube must be totally free from grease, otherwise it won’t clamp properly and turn while you are riding. Look beyond the bottom bracket shell at the rear wheel axle and align the front boom parallel to it.
- Page 24 Adjusting the front boom Danger! If the bolts are tightened Attention! Take care that the chain too much or bent, the screw or the frame tubes have a clearance of at least 5 cm (2") can break! If the clamping is insufficient the to the rear derailleur and the front derail- front boom can turn during a ride which leur even under maximum tension of the...
-
Page 25: Adjusting The Front Boom With Quick Adjust
Adjusting the front boom little pressure. Pedalling with too much pres- time, else the tensioned chain will balk the sure may also lead to pain in the knees. motion. Adjusting the front boom with quick Moving the front boom is easier when turning adjust it a little bit from side to side. -
Page 26: Adjusting The Handlebars
The Tiller steering on Tiller steering: Streetmachine Gte and Grasshopper fx comes Turn the handlebars so that the grips point with the foldable Terracycle Glideflex stem. downward or slightly forwards. Your wrists... -
Page 27: Above Seat Tiller Handlebar Steering
Above seat Tiller handlebar steering Our recumbent bicycles with Tiller steering are equipped with a height adjustable stem. On Streetmachine Gte and Grasshopper fx it comes with the Glideflex folding pivot from . Folding the handlebar forward ERRACYCLE... -
Page 28: Above Seat Aerobar Steering
After folding the Grasshopper fx frame the Danger! The stem extension must stem may be stored on a special bracket with not be positioned higher than the „max“... - Page 29 Put the stem on the bracket and Alignment of the stem to the front wheel close the quick release. (Grasshopper fx) Assembly is done in reversed order. Make For parallel alignment between stem and front sure the alignment bolt in the clamp fits the wheel the bolt of the lower clamp must be hole in the stem clamp correctly.
- Page 30 Adjusting the handlebars Adjusting the stem length ing torque the clamping does not reach the necessary strength and this can result in a The tube with the handlebar clamp can be slid twisting of the handlebar or the stem while inside the stem tube telescopically to adjust riding.
-
Page 31: Underseat Steering (Direct Steering)
40 mm (1 5/8 ") nection. Do not loosen the screw in the on Grasshopper fx and 50 mm (2") on headset cap. Sit on the bike, hold the front Speedmachine. In no case may the rear end... - Page 32 Adjusting the handlebars Alignment of the stem to the front wheel with the steerer tube clamping (Grasshopper fx) To align the handlebars perpendicular to the front wheel, turn the adaptor for indirect steering clamped into the bottom end of the fork steerer tube.
-
Page 33: Adjusting The Cable Length
Adjusting the handlebars Adjusting the cable length You can make smaller adjustments by moving the cables in their guides at the frame and the stem, so there is enough clearance for all movements. If this is not the case you will have to have your specialist dealer shorten the cables or replace them by longer ones. -
Page 34: Handling Instructions
Unscrew the nut of the upper seat quick release approximately 4 turns. Turn the quick release levers of the middle and lower Folded Grasshopper fx with tiller steering seat quick release counter clockwise approx- 3b) Stow the Aerobar steering imately 4 turns. -
Page 35: Unfolding
If you have above seat steer- ing, secure the handlebar with the attached Folded Grasshopper fx with underseat steering Velcro strap to the rear rack or rear wheel. A shoulder strap and bag for transport of the... -
Page 36: Lighting
Lighting Lighting Lighting systems HP V offers a dynamo light sys- ELOTECHNIK tems with a tire dynamo or a hub dynamo. The Pedelec lighting system is powered by the propulsion system’s battery. If you want to ride your bicycle on public streets, it must be equipped with a legal light- ing system. - Page 37 Lighting display will still be active for a longer time, too. However, you should connect the battery to a charger soon to avoid exhaustive discharging. Please pay attention to the electric assist system manufacturer's manual. Danger! Don't try to switch the light on or off while riding.
-
Page 38: Brakes
Brakes Brakes Handling of the brakes Danger! Please note that the braking Your bicycle is equipped with a powerful high- distance is much longer when it is wet or quality brake system. You may choose be- when the bike is heavily loaded. When rid- tween rim brakes and disc brakes. -
Page 39: Maintenance Of The Brakes
Brakes • check the hydraulic braking system for the Danger! Never touch neither the correct pressure by pulling the lever, hold- brake disc nor the brake caliper after long ing the pressure and checking the hose braking as this may cause serious injury connections, bleeding screw and compen- (risk of burns). -
Page 40: Hydraulic Brakes
Brakes Mechanical disc brakes are subject to wear, therefor regularly check the thickness of your brake pads and discs and To readjust the brake pads you have to use replace them if necessary. The minimum the big red knobs on each side of the brake thickness of the brake pad is 1 mm, of the caliper. -
Page 41: Gear System And Chain
Gear system and chain Gear system and chain Handling of the gear system under pressure it may be helpful for changing gears quickly to turn the bar end shifter a With the gear system you can adjust the little bit farther than necessary to select a pedalling frequency, i.e. -
Page 42: Chain
Gear system and chain corrosion when the bicycle is often parked Attention! Please read the manual of outside in bad weather conditions. the gear system manufacturer carefully before working on the gear system. Attention! Damaged cables that show for example single wires have to be Adjusting the gear indexing for the rear derail- changed immediately. - Page 43 Gear system and chain Do not use any solvents to clean the chain! Only use chains that are suitable for the gear The solvent washes the oil off the bearing system of your bicycle. Otherwise a precise parts, stays there and dilutes the fresh oil so gear shifting is not guaranteed any more.
-
Page 44: Chain Tubes
Gear system and chain Make sure that any chain links in the chain are not stiff, as this can cause some annoying and not obvious problems with the gear system. Attention! The rear ends of the up- per chain tube have to be secured against Make sure that you have not twisted the chain moving with a tight rubber tube over the 180 degrees before joining it back together. -
Page 45: Replacing The Chain Tubes
Secure Changing the complete upper chain protec- the thread with threadlocker and tighten the tion or the retention spring (Grasshopper fx) nut with 17–19 Nm. Disassemble the chain roller. For this purpose Changing the complete upper chain protec-... -
Page 46: Chain Roller
Dismounting and mounting of the chain roller smoothly as possible. Due to this higher area The chain roller of the Grasshopper fx is the chain does not lie on the roller with its mounted with a special high strength screw of sharp edged links but with the bushes in the the German strength grade 12.9 and it may... -
Page 47: Wheels
On the front wheel you have to use tires of mediately after service and check their func- ISO size 406 (20"). On the rear wheel of tion. Grasshopper fx you have to use tires of ISO size 406 (20"). Tires and tubes On the rear wheel of Speedmachine and... -
Page 48: Repairing A Flat Tire
Wheels Wheels can be fastened with a quick release Slowly inflate the tire, checking the tire is mounting and therefor they are susceptible to seated properly and not pinched as the tire is theft. For this reason always lock the wheels inflated. -
Page 49: Headset And Pedals
Tiller steering and Streetmachine Gte under- seat steering: Under seat steering (Grasshopper fx): Loosen the clamping screws facing sidewards at the steerer tube and tighten the screw in Loosen the bolt of the clamp above the head- the A-head cap a bit more. -
Page 50: Adjusting The Headset (Speedmachine)
Headset and Pedals Adjusting the headset (Speedmachine) The headset of the Concept Spring contains two not adjustable, industrial bearings. To adjust the play of the fork bearing, please pay attention to the chapter on page 56ff. Danger! The headset, handlebar, and stem are relevant for the safety of your bicycle. -
Page 51: Suspension
Suspension Suspension Suspension and damping the initial position or even further than that after having passed a bump. The damper Your bicycle is equipped with a rear swingarm converts spring energy into friction and finally for the suspension of the rear wheel and into heat, and thus takes away energy from (optionally) a suspension fork for the front the suspension system. -
Page 52: Suspension Fork On Grasshopper Fx And Streetmachine Gte
Suspension fork on Grasshopper fx and In order to compensate the variations in the Streetmachine Gte load you can change the pre-load. For details see the following chapter. - Page 53 Suspension The suspension travel of the S fork is please have your bicycle mechanic do the PINNER 45 mm. work. The suspension fork should compress by 30% If your suspension fork comes with a dust with rider and luggage on the bike, which boots please clean the lower and upper leg corresponds to 12-15 mm (1/2").Attach a zip and the seal under the dust boots every four...
- Page 54 Suspension Assembly drawing of the suspension fork opened. In case of damage the whole car- tridge has to be replaced. Danger! After you have removed the adjustment screw (5) you'll see a small hex-headed screw in the piston rod of the damper: never undo this screw.
- Page 55 Suspension of the bike, the amount of dirt on it and the maintenance and lubrication how long it lasts. After 3000 km the damper must receive an inspection by a trained mechanic, worn out parts can be replaced then. After you have relaxed the preload unit of the spring you can turn off the entire unit.
-
Page 56: Concept Spring Fork On Speedmachine
Suspension Concept spring fork on Speedmachine Then remove the snap ring inside the lower end of the steerer tube. Shock boot Please keep in mind that there is a slight The dust boot is very important for the func- preload on the spring and that it comes out tionality and the lasting of your fork. - Page 57 Suspension Lubrication guide of the lower bushing must not be dam- aged while inserting in the steerer tube. After some use it may be advantageous for the performance to lubricate the fork after it The conical ring below the upper bushing has been dismounted and after the bushings must face downward with the slope surface.
- Page 58 Suspension This is not necessary when you only want to the stem on the outer tube and press all adjust the fork play. bearings into their beadings by hitting lightly on the tool. Adjusting the bushing In order to check the correct fitting of the The lower bushing is conically shaped at the bearings see if the following criteria are ful- outside.
- Page 59 Suspension Assembly and parts list of the Concept fork for Speedmachine Velotechnik...
-
Page 60: Rear Suspension Element
Suspension Rear suspension element weight. (In "Changing the steel spring (DV- 22)" on page 61 you will find more infor- mation about changing the springs). Danger! While adjusting the rear suspension element never load the bicycle Measure the distance between the two sus- e.g. - Page 61 Load Spring stiffness Danger! Take care that the rear wheel or mudguard or suspension element Grasshopper fx: never hit the frame, seat, rear rack or lug- • up to 80 kg: 450 lbs/inch gage box while the suspension is fully com- •...
- Page 62 Suspension Spring length: Move the rear swingarm down carefully. DV22: 83 mm (70-90 mm) While doing this, take care that you don't bend or stretch any cables. In order to change the spring you will have to remove the rear screw and swivel away the Remove the spring from the suspension ele- rear frame.
-
Page 63: Air Shock Rockshox Monarch
Suspension For that purpose dismount the suspension This rear shock contains pressurized air in a element as described under "Changing the main ("positive") air chamber as suspension steel spring" on page 61. medium. Air shocks are lighter than steel spring rear shocks. Another advantage is that Remove the plastic spacers and pull the metal the spring stiffness can be easily adjusted with tube out off the bushing. - Page 64 Load Positive chamber adjustment of the damping may even give you Grasshopper fx: more riding comfort. • up to 80 kg: 7,5 bar Finally, the oil used in the damper becomes •...
- Page 65 Suspension Adjust the damping of the R Monarch by turning the red knob. The shock must be installed with the lock-out lever on the backside facing upwards A good setting for maximum comfort is achieved when the rear wheel decompresses completely after a shock and then oscillates only once.
-
Page 66: Swingarm Pivot
Swingarm pivot Swingarm pivot Swingarm pivot Attention! There has to be a big The rear swingarm pivot comes with mainte- washer between the main frame and the nance free bushings. They feature a self lubri- end of the bushing else the bushing is not cating system with Teflon particles. -
Page 67: Kickstand, Mudguards, Water Bottle Cage
Kickstand, Mudguards, Water bottle cage Kickstand Attention! You must not mount additional parts like rear lights or reflec- Danger! Before every ride check tors to the mudguards since they may whether the kickstand is lifted up to its break then. riding position. - Page 68 Kickstand, Mudguards, Water bottle cage Water bottle cages for ErgoMesh seats You can mount up to four water bottle cages with a special bracket behind the seat. There are threads in the back of ErgoMesh seat frames to mount the water bottle brackets in an upper or lower position.
-
Page 69: Maintenance Routine
Maintenance routine Maintenance routine Regular maintenance Carbon parts Your bicycle is equipped with the latest bicy- Carbon bicycle parts need special care. Please cle technology that does not require much pay attention to the following instructions on maintenance. storing, assembly and maintenance. However, you will have to maintain your Check carbon parts carefully after crashes. -
Page 70: Storing The Bicycle
Attention! Take care that after fold- ing the Grasshopper fx there are no parts rubbing against the frame. This may dam- Attention! Any damage of the age the paintwork. -
Page 71: Transport In The Car
Maintenance routine • Store your bicycle in a dry and warm place. Avoid direct sun and storage close to the heating since it affects the rubber of your tires. • Choose the smallest sprocket and the smallest chainring. That way the cables are in the most relaxed position. -
Page 72: Tightening Torques
4 Nm dynamo dynohub/mounting sheet M6 size 5 6–8 Nm mounting sheet/frame M5 size 4 4–6 Nm folding hinge (Grasshopper fx) locking wedge screw M6 size 4 6 Nm suspension element frame/susp. element/swingarm M6 size 4 6–8 Nm rear rack... -
Page 73: Warranty
Warranty Warranty policy Warranty policy Your authorised dealer has to fully set up In the event of any action that falls under and adjust your bicycle, so that safe function warranty the original warranty period will is guaranteed. The dealer has to make a final not be prolonged and no new warranty will safety check and carry out a test ride. -
Page 74: Warranty Pass
Warranty pass Warranty pass With the HP V Warranty Pass name: ELOTECHNIK you can assure the safety and proper func- tion of your bicycle for many years. Like any other vehicle your bicycle has to be checked for safe operation before riding. Your bicycle has to be maintained at regular address: intervals, at least once a year you will have to... - Page 75 Warranty pass Service at delivery 1st. service At the delivery of the new bicycle No later than 300 kilometres or 2 months after the purchase. Order No.: Order No.: mileage approx. km: mileage approx. km: Date: Date: Dealer's Stamp and Signature: Dealer's Stamp and Signature: Exchanged or additionally mounted parts: Exchanged or additionally mounted parts:...
- Page 76 Warranty pass 2nd. service 3rd. service No later than 3000 kilometres or one year No later than 6000 kilometres or two years after the purchase. after the purchase. Order No.: Order No.: mileage approx. km: mileage approx. km: Date: Date: Dealer's Stamp and Signature: Dealer's Stamp and Signature: Exchanged or additionally mounted parts:...
- Page 77 Warranty pass 4th. service 5th. service No later than 9000 kilometres or three years No later than 12000 kilometres or four years after the purchase. after the purchase. Order No.: Order No.: mileage approx. km: mileage approx. km: Date: Date: Dealer's Stamp and Signature: Dealer's Stamp and Signature: Exchanged or additionally mounted parts:...
- Page 78 Warranty pass 6th. service 7th. service No later than 15000 kilometres or five years No later than 18000 kilometres or six years after the purchase. after the purchase. Order No.: Order No.: mileage approx. km: mileage approx. km: Date: Date: Dealer's Stamp and Signature: Dealer's Stamp and Signature: Exchanged or additionally mounted parts:...
- Page 79 Warranty pass 8th. service 9th. service No later than 21000 kilometres or seven No later than 24000 kilometres or eight years after the purchase. years after the purchase. Order No.: Order No.: mileage approx. km: mileage approx. km: Date: Date: Dealer's Stamp and Signature: Dealer's Stamp and Signature: Exchanged or additionally mounted parts:...
- Page 80 Warranty pass 10th. Service 11th. service No later than 27000 kilometres or nine years No later than 30000 kilometres or ten years after the purchase. after the purchase. Order No.: Order No.: mileage approx. km: mileage approx. km: Date: Date: Dealer's Stamp and Signature: Dealer's Stamp and Signature: Exchanged or additionally mounted parts:...
- Page 81 Warranty pass 12h. Service 13h. service No later than 27000 kilometres or nine years No later than 30000 kilometres or ten years after the purchase. after the purchase. Order No.: Order No.: mileage approx. km: mileage approx. km: Date: Date: Dealer's Stamp and Signature: Dealer's Stamp and Signature: Exchanged or additionally mounted parts:...
-
Page 82: Service Plan
Service plan Service plan Service plan part work lighting system check function adjust headlamp and rear light, check cable contacts clean reflectors, replace missing reflectors tires check air pressure check tread and sidewalls brakes check for damages check for leaking oil check rigid feel brake lever blades when pads reach rotor check brake pads for wear suspension element... - Page 83 Service plan see page before every monthly annually note ride 52ff every 6 months recommended interval to replace aluminium stem: 2 years 39/41 Velotechnik...
- Page 84 2017 recumbent technology Velotechnik HP Velotechnik OHG Kapellenstr. 49 D-65830 Kriftel ● ● phone: +49 61 92 - 97 99 20 fax +49 61 92 - 97 99 2 299 www.hpvelotechnik.com ● ●...
Need help?
Do you have a question about the Grasshopper fx and is the answer not in the manual?
Questions and answers