
Related Manuals for Safeway Cosmos


Summary of Contents for Safeway Cosmos
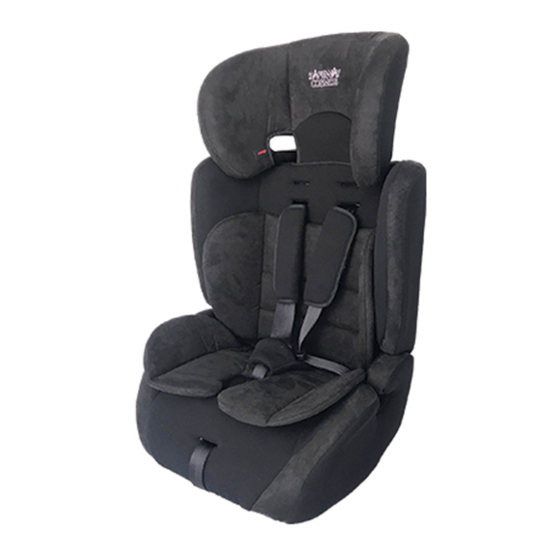
- Page 1 Created with Passion, Designed for Safety INSTALLATION INSTRUCTIONS GROUPS 1 / 2 / 3 (9 - 36kg) Forward facing 9 to 18kg Booster Seat 15 to 36kg...
-
Page 2: Table Of Contents
Contents Introduction Important Notices 3 - 4 Restraint Features 5 - 6 Use of the Child Restraint in the Vehicle Adjusting the Height of the Harness System Using the Harness Buckle Adjusting the Height of the Headrest Using the Comfort Pad Securing your Child in the Child Seat Install for Group 1 (9 to 18kg) - Use with Internal Harness 11 - 12... -
Page 3: Introduction
Introduction Dear parents Congratulations on the purchase of your Child Safety Seat. Safety, comfort and user-friendliness have at all times played an important role in the development of the Child Safety Seats. This product meets the most stringent safety regulations and has passed the most stringent compulsary safety testing required by law. -
Page 4: Important Notices
Important Notices • WARNING: Read this instruction manual carefully. Study the illustrations in this instruction manual before use, and, when installing the car seat. The Child Safety Seat is a safety product and is only safe when used according to the instructions. - Page 5 Important Notices • It is recommended that child safety seats not be used longer than 10 years after the date of purchase. The product properties may deteriorate due to ageing of the plastic and/or sunlight, without this being visibly apparent. •...
-
Page 6: Restraint Features
Restraint Features A - Headrest H - Shoulder pads B - Harness Slots I - Harness Straps C - Backrest J - Buckle tongues D - Armrest K - Buckle E - Seat belt guide L - Crotch strap F - Harness adjuster buckle M - Crotch pad G - Headrest seat belt guide N - Harness adjuster strap... - Page 7 Restraint Features O - Headrest Handle P - Cover securing plug Q - Seat belt guide R - Seat belt routing slots S - Metal yoke T - Backrest & base connection U - Seat belt tongue V - Seat belt buckle...
-
Page 8: Use Of The Child Restraint In The Vehicle
Use of the Child Restraint in the Vehicle IMPORTANT: The child seat MUST be installed using a 3-Point Seat Belt. A 2-Point seat belt may not be used. Please observe the regulations applicable to your particular country. The safety belt must be approved to ECE R 16 or a comparable standard . You can use your child car seat as follows: Use in vehicle: Rearward facing child seat... -
Page 9: Adjusting The Height Of The Harness System
Adjusting the Height of the Harness System The Shoulder Straps must be inline or just above your childs’ shoulders (Fig.1). To adjust the height of the shoulder straps : 1 - Press the harness adjuster buckle and pull the shoulder straps forward to loosen the harness (Fig.2). -
Page 10: Using The Harness Buckle
Using the Harness Buckle 1 - First join the 2 tongues together (Fig.1). 2 - Insert the tongues into the buckle (Fig.2). Adjusting the Height of the Headrest 1 - At the back of the headrest, pull the handle outwards (Fig.1). 2 - Move the headrest up or down to the required height (Fig.2&3). -
Page 11: Securing Your Child In The Child Seat
Securing your Child in the Child Seat 1 - Loosen the harness by pressing the Harness Adjuster Buckle located at the front of the seat, then pull the harness straps forward (Fig.1). 2 - Unfasten the harness buckle by pressing the red button and remove the tongues (Fig.2). -
Page 12: Install For Group 1 (9 To 18Kg) - Use With Internal Harness
Install for Group 1 (9 to 18kg) - Use with Internal Harness... - Page 13 Install for Group 1 (9 to 18kg) - Use with Internal Harness 1 - Pull the vehicle seat belt out as far as possible. 2 - Guide the vehicle seat belt tongue from the front of the seat through the slot on the side of the seat.
-
Page 14: Install For Group 2/3 (15 To 36Kg) - Use With Vehicle Seat Belt
Install for Group 2/3 (15 to 36kg) - Use with Vehicle Seat Belt FIRST REMOVE THE INTERNAL HARNESS SYSTEM SEE PAGE 15... - Page 15 Install for Group 2/3 (15 to 36kg) - Use with Vehicle Seat Belt 1 - Remove the harness system (Fig.1) [See page 15]. 2 - Adjust the headrest to the correct height (Fig.2&3) [ See pages 8 & 9]. 3 - Guide the vehicle seat belt through the headrest belt guide (Fig.4). 4 - Place your child in the seat and fasten the seat belt (Fig.5).
-
Page 16: Removing The Harness System
Removing the Harness System 1 - Press the harness adjuster buckle and pull the shoulder straps forward to loosen the harness (Fig.2). 2 - At the back of the seat, remove the shoulder straps from the metal yoke (Fig.3). 3 - Pull the shoulder straps forward out of the seat (Fig.3). 4 - Remove the tongue’s from the shoulder straps, roll the straps up and place them underneath the cover (Fig.4) NOTE: Clip the tongues back into the buckle so they do not get lost. -
Page 17: Removing The Cover
Removing the Cover 1 - Adjust the headrest upwards and remove the cover (Fig.1). 2 - Remove the harness system (Fig.2) [See page 15]. 3 - Remove the connection clips (Fig.3). 4 - Remove the connection clips on the backrest and remove cover (Fig.4). 5 - Push the backrest bacwards away from the base (Fig.5). -
Page 18: Care & Maintenance
Care & Maintenance Care for the harness buckle It is vital for the safety of your child that the harness buckle works correctly. Malfunctions of the harness buckle are usually caused by accumulations of dirt or foreign bodies. Malfunctions are as follows: •... -
Page 19: Warranty
Warranty • The warranty period starts from the date of purchase and is valid for a period of 12 months. • The warranty applies to material and manufacturing defects only. • The date of purchase can only be determined with an original sales receipt. •...
Need help?
Do you have a question about the Cosmos and is the answer not in the manual?
Questions and answers