
Related Manuals for DENTAURUM desktop Compact


Summary of Contents for DENTAURUM desktop Compact
- Page 1 More than 20 years of Dentaurum laser welding technology. Instructions for use Turnstr. 31 I 75228 Ispringen I Germany I Phone + 49 72 31 / 803 - 0 I Fax + 49 72 31 / 803 - 295 www.dentaurum.com I info@dentaurum.com...
-
Page 2: Table Of Contents
........................ Basics of the laser and welding process .................... Machine description ..........................Overview ..............................The working chamber ..........................Design of the desktop Compact ......................External connections ..........................Installation and starting operation ......................Operating the desktop Compact ......................The stereo microscope ......................... - Page 3 10.3 Changing the protective glass ......................... 10.4 Check and change the filter for welding fumes ..................10.5 Opening the desktop Compact ....................... 10.6 Changing cooling water and particle filter ....................10.7 Adjustment of laser welding spot according to the reticule in the stereo microscope .......
-
Page 4: General Information
1. General information Thank you for choosing the Dentaurum laser welding unit. In order for you to enjoy your laser welding unit in the future, please take time to observe all the information in these operating instructions. According to the EC guidelines, the Dentaurum laser welding unit is a piece of working equipment specifically designed for use in... -
Page 5: Safety Information
2.2 Intended use The desktop Compact is designed exclusively for welding metals. To use it for any other purpose or for anything beyond this is to use it improperly. Dentaurum is not liable for damages caused by this. Proper use also includes heeding all information of this manual and regular inspections and maintenance work. -
Page 6: Employer's Obligations
2.4 Employer‘s obligations The employer will only allow personnel to work with this unit who · are familiar with the basic regulations concerning safety at work and accident prevention and have been instructed in the use of this unit · have read and understood the safety information and the warnings in this manual and have confirmed this by their signature (see the chapter “Confirmation of Instructions“) ·... -
Page 7: Protection Of The Eyes Against Laser Radiation
2.7 Protection of the eyes against laser radiation The unit is equipped to protect the eyes of the operator and other personnel around the unit. Safety shutter The safety shutter prevents generation of laser pulses or the unintended emission of laser radiation from the laser source and closes, ·... -
Page 8: Protection Of The Skin Against Laser Radiation
2.8 Protection of the skin against laser radiation The unit has been developed for dental applications. Every workpiece is an individual part, the processes cannot be automated. The dental workpiece must be held with the hands as a large number of various materials with different measurements, appearances, surface compositions and fitting tolerances are connected together in various combinations or have to be processed at their surfaces. -
Page 9: Further Important Safety Issues, Welding Fume Extraction
In order to re-start the unit, turn the switch in the direction of the arrow, it will automatically jump back into place. Electrical Safety The desktop Compact laser is driven by AC voltage 1-phase 200 - 240 V / 50 - 60 Hz, 10 A. In the laser there are voltages of up to 400 V. -
Page 10: Laser Warning Signs
2.11 Laser warning signs ➀ Invisible laser radiation Avoid eye or skin exposure ➁ to direct or scattered radiation Laser Class 4 ➂ Avoid irradiation Emission of invisible laser radiation... -
Page 11: Position Of Laser Warning Signs
2.12 Position of the laser warning signs ➀ ➂ ID of the exit Laser warning lamp ➀, ➁ On the feed flap Fig. 1: Position of the laser warning signs... -
Page 12: Basics Of The Laser And Welding Process
3. Basics of the laser and welding process LASER = L ight mplification by timulated mission of adiation It is a light amplification caused by stimulated emission of radiation. The light amplifier of the laser is a rod shaped crystal of neodymium-doped yttrium aluminum garnet (Nd: YAG) stimulated by a light pulse from an external rod shaped flash lamp. -
Page 13: Machine Description
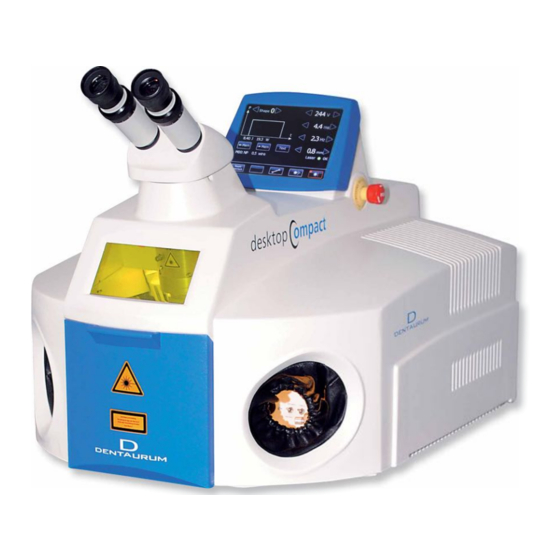
4.1 Overview The desktop Compact laser welder is a very compact table-top unit for manual use. It supplies short, energy-rich invisible laser pulses at a wavelength of 1064 nm for welding metals. Fig. 2 shows a view of the device with all of the essential controls. - Page 14 Fig. 3: desktop Compact with open feed flap Any inert gas that may be required as well as the laser pulse are turned on and triggered using a two-stage foot switch. During and after processing, the welding fume is automatically drawn off and filtered.
-
Page 15: The Working Chamber
4.2 The working chamber The desktop Compact working chamber contains all controls necessary for easy manual laser welding. To provide a view of all of them, the working chamber in fig. 4 is shown from below. At the top middle, the laser beam leaves through a focusing lens protected by protective glass. -
Page 16: Design Of The Desktop Compact
4.3 Design of the desktop Compact All functions for operating the desktop Compact are integrated in the compact housing. Fig. 5 shows a block diagram of the construction. The heart of the unit is a solid-state laser. It is pumped with a flash lamp operated by a power supply with a high electrical efficiency. -
Page 17: External Connections
Connection for Cooling air two-stage foot switch Fig. 6: Connections on the back of the desktop Compact The gas connections have a connector for tubes with a diameter of 6 mm. Inert gas: Recommended inert gas: Argon 4.6 (99.996 % purity) according to DIN EN ISO 14175:2008-06. -
Page 18: Installation And Starting Operation
Electrical connections Before connecting to the mains, make sure that the line voltage is appropriate for the desktop Compact. The unit is operated with 200 - 240 V, 50 - 60 Hz, 10 A, single-phase. Connect the two-stage foot switch to the 15-pin socket next to the power connection. When the two-stage foot... -
Page 19: Operating The Desktop Compact
4.6 Operating the desktop Compact The desktop Compact was designed to be very easy to use. You will quickly achieve successful welding results when you observe the following points. The subsequent chapters offer detailed descriptions of each step. Quick start for experienced users... - Page 20 Inert gas The connection for the inert gas supply is on the back of the unit (see fig. 6 on page 16). The flow of gas to the workpiece is turned on as long as the two-stage foot switch is pressed to the first stage. The inert gas can be directed to the welding point through both a swivelling and flexible nozzle in the working chamber (see fig.
-
Page 21: The Stereo Microscope
5. The stereo microscope The stereo microscope is used to place the required area on the piece of work in the direct path of the laser. Protective filters are integrated in the stereo microscope which protect the eyes against the laser radiation and intensive radiation which is always generated during welding processes. - Page 22 Fig. 8: Adjust the reticule according to the division scale...
-
Page 23: Setting The Pulse Parameters
6. Setting the pulse parameters For welding to be successful, the appropriate laser pulses must be used. The proper laser pulses depend on the joint partners and their thicknesses. The best values can only be found when fine adjustments are made on the work piece. - Page 24 Special note 1. You cannot set both, high voltage and long pulses at the same time. In some cases the actual limit for the parameters voltage and pulse length can be lower than its maximum value. 2. In some cases, the pulse rate will be decreased automatically when the voltage or the pulse length are increased, i.e.
- Page 25 Pulse shape Four different pulse shapes can be selected that are identified by symbols: indicates an uninfluenced pulse (Shape 0) indicates a pulse that grows weaker in steps (Shape 1) indicates a pulse that is weaker at the end (Shape 2) indicates a pulse that is weaker at the beginning (Shape 3) Switch for selecting saved parameter sets...
-
Page 26: Operating The Touch Screen / Working Chamber
7. Operating the touch screen / working chamber After turning on the desktop Compact, the main menu is displayed on the touch screen. Display and selection of Display and arrow pulse shape keys to set pulse parameters Display of active... -
Page 27: Opening / Closing Safety Shutter On Touch Screen
7.3 Saving / loading parameter sets on touch screen or in working chamber Saving and loading parameter sets on touch screen You can save and load pulse parameters that you use frequently as parameter set in the desktop Compact database. Fig. 13: Keys to save pulse parameters “Mxx:“... - Page 28 1. Press the “Save parameter set“ key . The arrow key turns orange for a moment and the two keys to the right and left change their functions. Use these keys to select the number of storage space. In addition, two keys in the menu bar change their function (see fig.
-
Page 29: Resetting Error Message On Touch Screen
Whilst in this modus, the position of the joystick has the following functions: Hz- “DataOut” is used to confirm the choice of parameter set and Hz+ (ESC) is used to exit the modus. Modifying description text of active parameter set on touch screen 1. -
Page 30: Displaying And Modifying Basic Settings On Touch Screen
7.5 Displaying and modifying basic settings on touch screen Open options menu with to display and modify basic settings of the desktop Compact. Arrow keys: - Up / Down: navigating to the desired menu item - Left / Right: selecting decimal place in... -
Page 31: Welding
8. Welding To weld, you need to open the safety shutter by pressing the “Shutter open” key (bottom menu bar). The “Shutter open” key must light up green and the red light of the “Shutter close” key turn off Through the stereo microscope, observe the site to be welded on the workpiece. The microscope cannot be moved. You need to move the workpiece into the line of vision and adjust the sharpness by changing the distance. -
Page 32: Maintenance Advice
Never work alone on any service or maintenance activities! Various work on electrical parts, optical components and structure of the machine may only be carried out by authorized, qualified personnel or by the Dentaurum service technicians. Hotline: + 49 72 31 / 803 - 211... -
Page 33: Check Lists 1, 2 And 3
10.1 Check lists 1, 2 and 3 Check list 1 Regular maintenance guarantees a long service-life of your desktop Compact – it is advisable to observe the following points! The following laser modules are required to be checked every day before starting to work: ·... -
Page 34: Test Of Laser Adjustment And Beam Path
10.2 Test of laser adjustment and beam path Check the laser adjustment once a week or when the welding results are unsatisfactory under normal laser settings. Make sure the protective glass is clean during adjustment. Place laser photo paper on the floor of the working chamber. Set the beam diameter to 2.0 mm, the voltage to 300 V and the pulse duration to 1 ms. -
Page 35: Check And Change The Filter For Welding Fumes
10.4 Check and change the filter for welding fumes To ensure that the welding fumes are completely drawn off, the filter has to be checked regularly and changed if necessary. The filter consists of a pre-filter fleece for larger particles and a particulate filter of class EU 13 / K2. The filter is located at the upper rear of the working chamber. -
Page 36: Opening The Desktop Compact
Before opening the unit, pull the power plug! Many of the parts of the desktop Compact that need to be serviced are under the housing cover. To open it, you first need to remove the top part of the stereo microscope: The set screw on the right under the stereo microscope is removed, and the stereo microscope is lifted to the right out of the dovetail guide. -
Page 37: Changing Cooling Water And Particle Filter
10.6 Changing cooling water and water filter Open the cover of the desktop Compact (see chapter 10.5 on page 35). The cooling water container is on the left to the rear. It holds 4.5 l de-ionized water. To open it, unscrew three screws in the lid, and carefully lift the lid upward with a broad blade screwdriver. -
Page 38: Adjustment Of Laser Welding Spot According To The Reticule In The Stereo Microscope
10.7 Adjustment of laser welding point according to the reticule in the stereo microscope Using the bending mirror the laser beam can be easily brought into line with the reticule in the ocular of the stereo microscope. Incorrect Correct Adjustable focusing device Fig. -
Page 39: Possible Faults, Causes And Elimination
11. Possible faults, causes and elimination Fault / Symbol Further symptoms Possible cause Elimination Who? Feed flap is open. Close feed flap. Customer Box open “Shutter close” key lights up “Shutter open” key flashes The safety circuit cannot be Check the two Customer Safety Loop Error closed because one of the... - Page 40 Fault / Symbol Further symptoms Possible cause Elimination Who? Flash lamp failed to ignite Replace flash lamp. Service Ignition fail automatically. Flash lamp, laser power supply or starter is “Shutter close” key lights up defective. “Reset Interlock“ key lights up yellow “Laser OK”...
- Page 41 Fault / Symbol Further symptoms Possible cause Elimination Who? Flow monitor is defective. Press the “Reset Interlock” Customer, HEX FlowRate Ilck Service . Release the jammed flow monitor. If this does not “Laser OK” key lights up red help, contact Service. “Reset Interlock”...
- Page 42 Fault / Symbol Further symptoms Possible cause Elimination Who? None Laser system does Mains plug not plugged in. Plug in mains plug. Customer not move, Pump not No power to power socket. Check power socket. Customer working, Fan fails to start, Lighting not Defective RCD in power Plug the RCD back in.
-
Page 43: Spare Part List
Adjustable focusing device ......................... 090-525-00 13. Environment and disposal Return the desktop Compact laser to your dealer or manufacturer for disposal. Please note that the desktop Compact laser should be used for commercial or industrial purposes only. Disposal via public disposal... -
Page 44: Technical Data
14. Technical Data Laser: Laser crystal Nd: YAG Wavelength 1064 nm Max. average power 60 W Pulse energy 50 J Pulse peak power 7.5 kW Pulse duration 0.5 - 20 ms Pulse rate single pulse … 25 Hz Pulse shape 4 pre-formed pulse shapes Laser cooling integrated water-air-heat exchanger... -
Page 45: Ec Declaration Of Conformity
EC-Declaration of Conformity according Machinery Directive 2006/42/EC, Annex IIA DENTAURUM GmbH & Co. KG Turnstr. 31 75228 Ispringen hereby declares that the design and construction of the laboratory equipment described below, including the version marketed by us, comply with the basic regulations governing safety and health as stated in the EC Guidelines. -
Page 46: Confirmation Of Instruction
The following list of persons confirm hereby with their signature that they have read the operating instructions and have been instructed about the regulations of use and the safety precautions: Dentaurum laser welding unit desktop Compact, unit no: Family name...
Need help?
Do you have a question about the desktop Compact and is the answer not in the manual?
Questions and answers