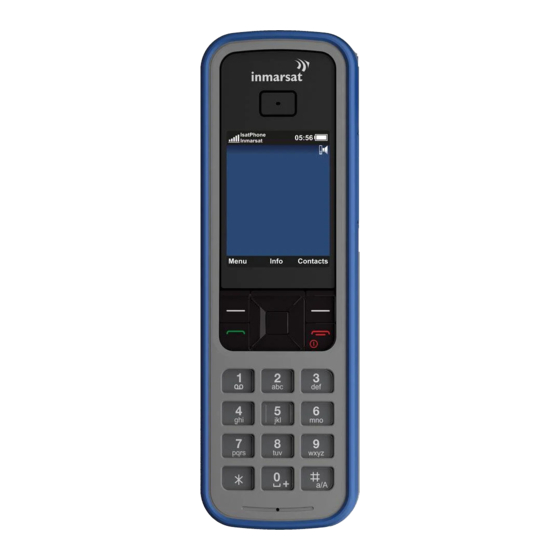
Inmarsat IsatPhone Pro Repair Training
Hide thumbs
Also See for IsatPhone Pro:
- User manual (68 pages) ,
- Quick start manual (4 pages) ,
- Faq (5 pages)
Advertisement
Quick Links
Advertisement

Summary of Contents for Inmarsat IsatPhone Pro
- Page 1 IsatPhone Pro Repair Partner Training June 2012 © Inmarsat confidential...
- Page 2 Tools, repair kits and workshop requirements Troubleshooting to establish repair action Warranties Keypad replacement Connector cover replacement Back cover and protection plug replacement GMR antenna and antenna cable replacement A-cover, B-cover and keypad replacement Battery-cover replacement Procedure for logging repairs and restrictions © Inmarsat confidential...
- Page 3 Sasken and Celestica and should be used for your own repair The work instructions/repair guide must be followed A number of repair kits are available for the IsatPhone Pro from the Inmarsat Webshop – min order 10 © Inmarsat confidential...
- Page 4 Tools needed for replacement operations TX8 size screw driver Calibrated torque screwdriver to 0.3Nm with TX8 screw head Small flat head screw driver Medium flat head screw driver Tweezers Parker O lube – not used in training Soft cloth for cleaning © Inmarsat confidential...
-
Page 5: Repair Kits
Antenna repair kit including RF cable contains 2 antennas and cables Mechanical parts front and back cover (no antenna) contains 1 Battery cover contains 10 covers Keypad Each dual language keypad has different product code All ordered through the Inmarsat Webshop © Inmarsat confidential... - Page 6 Celestica Any amendments to the guides will be advised by Celestica and replacement guides will be made available In the event of any design change Celestica will revise the repair guides Please follow to the letter! © Inmarsat confidential...
- Page 7 Data protection for repair databases etc Process Control repair guides, tool control, work instruction, product identification and product handling Facilities and utilities ESD sensitive working area equipment and precautions, lighting conditions, dust free work environment, clear layout Housekeeping © Inmarsat confidential...
-
Page 8: Electrostatic Discharge (Esd)
ESD is a serious issue in solid state electronics, such as integrated circuits – 10v can be enough to cause damage Dust free ESD protected working area / ESD protected table ESD jacket, ESD shoes and ESD gloves © Inmarsat confidential... -
Page 9: Warranty
Warranty Inmarsat Standard Warranty Between Inmarsat and the Distribution Partner 15 months from the date of delivery Begins when handset leaves BrightPoint to the Distribution Partner End User Warranty Between the end user and the Distribution Partner/Service Provider 12 months from the date of purchase... - Page 10 Celestica will cross check handsets with “Repaired” stickers against the online repair register Replacement IMEI stickers will be in the repair kits First 8 digits and other required information ready printed Remaining digits to be entered in permanent marker © Inmarsat confidential...
- Page 11 Component failure Antenna A & B cover (speaker and microphone Keypad Antenna repair – establish that the antenna is the component at fault Connecting to an external antenna Run FDL logs and send to Batam to confirm repair © Inmarsat confidential...
- Page 12 Repairs © Inmarsat confidential...
- Page 13 Collecting the FDL logs © Inmarsat confidential...
- Page 14 Setup Install the Field Debug Log (FDL) application onto PC Install the IsatPhone Pro USB driver and hardware onto PC Identify the COM PORT for the Serial interface Activate FDL logging on the UT Activate *7415369*1# Deactivate *7415369*0# Run the FDL software Click ©...
- Page 15 Select the COM port the COM port that was mapped the USB connection on the PC after the USB drivers were installed The COM port can be found by checking: Ports> COM & LPT in the device manager on the PC Inmarsat confidential © Inmarsat confidential...
- Page 16 FDL File Creation Create a folder to file the logs Click the blue icon in the Log Directory field Click FDLGUI_V_1_2 Make New Folder Name the folder for example IMEI – ANTENNA FAILURE Inmarsat confidential © Inmarsat confidential...
- Page 17 Live Logging Power down the UT and switch on When the Inmarsat logo appears connect the USB lead Click connect on the FDL GUI Select Live Logging Select Profile and choose Load Conf file gmr2p_ps_l1_medium_config_file.cfg Select Profile again and choose Load UTH...
- Page 18 Send the files to Batam Batam engineers will review the logs Establish if repair is necessary Advise on the appropriate course of action © Inmarsat confidential...
- Page 19 All repairs must be entered onto the online Repair Register Failure to record repairs will invalidate the warranty The register can be found on the Inmarsat Connect site The link to the Repair Register will be provided in the formal...
- Page 20 © Inmarsat confidential...
- Page 21 DP representatives letter sent in the next 2 weeks containing Confirmation of training Self-certification checklist Check list must be returned to Inmarsat Once all documentation has been returned a formal acceptance letter will be sent to the company representatives Order repair kits from the Webshop through your DP representative ©...


Need help?
Do you have a question about the IsatPhone Pro and is the answer not in the manual?
Questions and answers