Advertisement
Quick Links
Advertisement

Subscribe to Our Youtube Channel
Related Manuals for Ryobi RLT-350


Summary of Contents for Ryobi RLT-350
- Page 1 RLT-350 6986685 (STD) 02-13...
- Page 3 SAFETY ALERT SYMBOL Indicates danger, caution or warning. May be used in conjunction with other symbols or pictures.
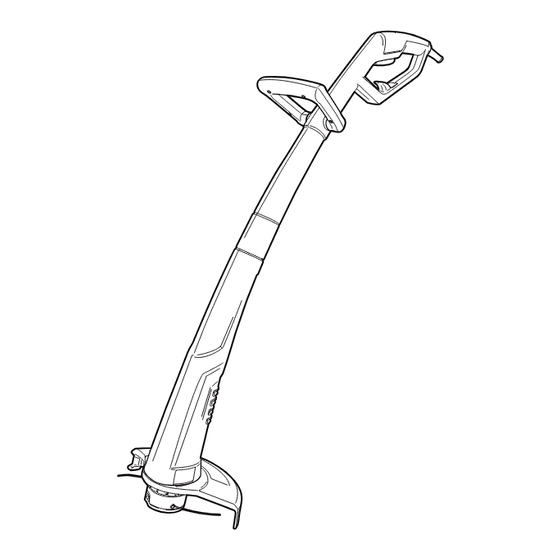
- Page 7 description 1. Cable strain relief 2. Trigger switch 3. Handle part 4. Motor part 5. Safety guard 6. Trimmer head 7. Auxiliary handle 8. Auxiliary handle bracket...
- Page 8 prepArAtion WArninG! do not connect the machine to the mains socket before it is completely assembled. AsseMBLinG triMMer (Fig. 1, 2) Insert the motor part (4) into the handle part (3), making sure the handle are locked-in. Fig. 1 Fig. 2 FittinG sAFetY GUArd (Fig.
- Page 9 prepArAtion connectinG to tHe poWer sUppLY (Fig. 6) WArninG! For your safety, it is required that the plug attached to the trimmer is always connected to an extension cord. the extension cord must be suitable for outdoor use with sockets protected against water splashing. the extension cord must always be used with the cable strain relief.
-
Page 10: Operation
operAtion cAUtion: Always wear eye protection. stArtinG And stoppinG (Fig. 7) 1. Squeeze the trigger switch (2) to start the trimmer. 2. Release the trigger switch to stop the trimmer. Fig. 7 triMMinG 1. Use the trimmer at an angle of approximately 15-degree to the working area (Fig.8). 2. - Page 11 operAtion repLAce spooL or cUttinG Line (Fig.12) Warning: Unplug the mains supply cable before attempting to change the line. 1. Turn the trimmer over to access the cutting line. 2. With one hand hold the cutting head steady, and with the other hand release the cutting head cover (a) by pressing the locking mechanism on both sides.
-
Page 12: Maintenance
8. There are no user serviceable parts in the trimmer. If a fault is suspected return the trimmer to an authorized dealer for repair. IMPORTANT : To assure product safety and reliability, repairs, maintenance and adjustment should be performed by RYOBI authorized service centers or other qualified service organization, always using identical replacement parts. troUBLesHootinG 1. - Page 13 notes...
- Page 14 notes...
- Page 15 notes...
-
Page 16: Warranty
RYOBI tool (hereinafter called “the Product”), for which it was not designed, or is not suited is warranted by Ryobi (herein called “the and no repairs, alterations or modifications Company”) to be free from defects in material...
Need help?
Do you have a question about the RLT-350 and is the answer not in the manual?
Questions and answers