AVS Ventvisor Installation Instructions Manual
Deflector
Hide thumbs
Also See for Ventvisor:
- Installation instructions manual (13 pages) ,
- Installation instructions manual (10 pages) ,
- Installation instructions manual (7 pages)
Table of Contents
Advertisement
Available languages
Available languages
Quick Links
For proper installation and best possible fit, please read all instructions BEFORE you begin.
For technical assistance or to obtain missing parts, please call Customer Relations at 1-800-241-7219.
Important Safety Information
• CAUTION - Before driving, ensure that the vent visor is properly secured to vehicle.
• Do not use automatic "brush-style" car washes.
• Do not use cleaning solvents of any kind.
• Periodically check all components for tightness.
Contents - 2 Piece Set
Front Driver
Side Visor
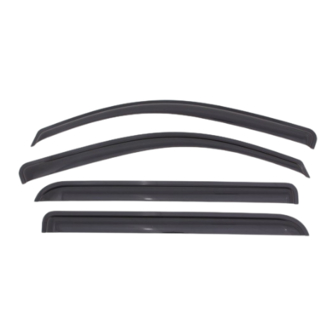
Contents - 4 Piece Set
Front Driver
Side Visor
Tools Required
Preparation Before Painting / Installation
• A trial fit is recommended to ensure proper positioning and fit.
• Check fit of parts before painting as we will not accept the return of modified or painted parts.
• Wash and dry your vehicle to remove any debris and/or dirt from the installation area.
Installation Steps
Buff the OUTSIDE of the rubber window channel with
the scotch brite scuff pad. Then clean with an alcohol
pad and dry with a soft cloth.
1
Installation Instructions
Ventvisor
NOTE: Actual product may vary from illustration.
Front Passenger
Side Visor
Car Wash Supplies
NOTE: Actual application may vary slightly from illustrations.
Deflector
®
Front Passenger
Side Visor
Rear Driver's
Visor
Rear Passenger's
Visor
Clean Towel
(1) Remove the triangular plastic mirror cap from the
INSIDE of the door. (2) Loosen but do not remove the
mirror mounting screws using a phillips screwdriver or
2
Page 1 of 3
I - Sheet Number VV93 Rev.A
Alcohol Pad x2
Scotch Brite Pad
Scotch Brite Pad
Alcohol Pad x4
nut driver as applicable.
Step 1
Step 2
Advertisement
Table of Contents

Related Manuals for AVS Ventvisor


Summary of Contents for AVS Ventvisor
- Page 1 Installation Instructions I - Sheet Number VV93 Rev.A Ventvisor Deflector ® For proper installation and best possible fit, please read all instructions BEFORE you begin. For technical assistance or to obtain missing parts, please call Customer Relations at 1-800-241-7219. Important Safety Information •...
-
Page 2: Installation Steps
Installation Steps NOTE: Actual application may vary slightly from illustrations. Remove tape liner from rear flange of visor. Peel back 2” (5 cm) Align visor to the previously cleaned surface. The lateral flange will of tape liner from each end of the lateral flange. attach to the black metal door frame. -
Page 3: Care And Cleaning
655 Raco Drive, Lawrenceville, GA 30045 800-241-7219 • Fax 770-339-5839 • Visit us at lundinternational.com © 2005 Lund International, Inc. All rights reserved. ™ Auto Ventshade , the Auto Ventshade logo and the AVS logo are trademarks of Lund International, Inc. Page 3 of 3... -
Page 4: Instructions D'installation
Instructions d’installation I – Feuille numéro VV93 Rév.A Ventvisor Deflector ® Pour obtenir une installation correcte et le meilleur ajustement possible, lire toutes les instructions AVANT de commencer. Pour toute assistance technique ou obtention de pièces manquantes, appeler le service des relations avec la clientèle au 1-800-241-7219. -
Page 5: Étapes D'installation
Étapes d’installation REMARQUE : La méthode d’application peut être légèrement différente de celle représentée par les illustrations. Retirer la protection d’adhésif du rebord arrière de la visière. Aligner la visière et la surface précédemment nettoyée. Le rebord Décoller 5 cm (2 po) de protection d’adhésif à chaque extrémité latéral se fixe sur le cadre métallique noir de la portière. -
Page 6: Entretien Et Nettoyage
800-241-7219 • Fax 770-339-5839 • Visitez notre site lundinternational.com © 2005 Lund International, Inc. Tous droits réservés. ™ Auto Ventshade , le logo Auto Ventshade et le logo AVS sont des marques déposées de Lund International, Inc. Page 3 de 3... -
Page 7: Instrucciones De Instalación
Instrucciones de instalación Hoja informativa N.° VV93 Rev. A Ventvisor Deflector ® Para una instalación adecuada y el mejor ajuste posible, lea todas las instrucciones ANTES de comenzar. Si desea recibir asistencia técnica u obtener piezas faltantes, llame al Servicio al cliente al 1-800-241-7219. -
Page 8: Pasos De Instalación
Pasos de instalación AVISO: La colocación real puede variar con respecto a las ilustraciones. Quite la cinta protectora del reborde trasero de la visera. Alinee la visera con la superficie que limpió anteriormente. Retire 2” (5 cm) de cinta protectora de cada uno de los extremos El reborde lateral se unirá... -
Page 9: Cuidado Y Limpieza
800-241-7219 • Fax 770-339-5839 • Visite nuestro sitio Web: lundinternational.com © 2005 Lund International, Inc. Todos los derechos reservados. ™ Auto Ventshade , el logo de Auto Ventshade y el logo de AVS son marcas comerciales de Lund International, Inc. Página 3 de 3...
Need help?
Do you have a question about the Ventvisor and is the answer not in the manual?
Questions and answers