Table of Contents
Advertisement
Quick Links
Advertisement
Table of Contents

Summary of Contents for KitchenAid KHDD2 38510
- Page 1 | www.kitchenaid.co.nz Instructions for Use Page | 1...
- Page 2 | www.kitchenaid.co.nz Page | 2...
-
Page 3: Table Of Contents
| www.kitchenaid.co.nz Product description and symbols ..............4 Control Symbols ..................... 4 Using the burners ................... 4 Practical advice on using the hob ..............5 Positioning the pan supports ................5 Hood and cabinetry clearances (mm) ............. 6 Gas Consumption and Injectors table ............. 7 Warnings and Suggestions ................ -
Page 4: Product Description And Symbols
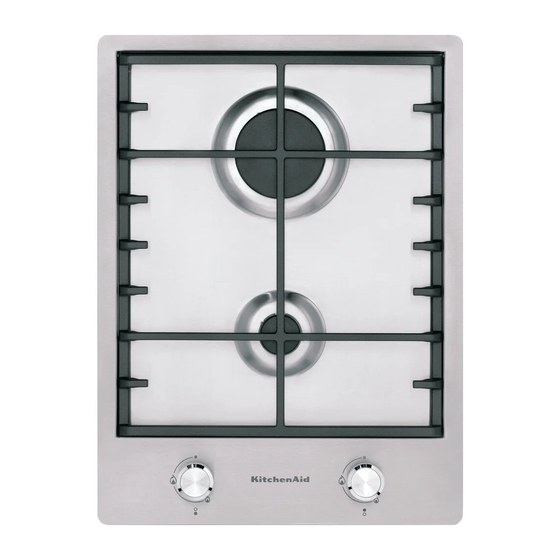
| www.kitchenaid.co.nz Product description and symbols 1. Removable grids 2. Auxiliary burner 3. Rapid burner 4. Auxiliary burner control knob 5. Rapid burner control knob Control Symbols Maximum flame Minimum flame Using the burners To turn on one of the burners:... -
Page 5: Practical Advice On Using The Hob
| www.kitchenaid.co.nz Practical advice on using the hob Read the instructions to get the best out of your Important: hob. Do not rest or drag the pan supports upside down Use pans with a similar diameter to the on the hob as this could scratch it. -
Page 6: Hood And Cabinetry Clearances (Mm)
| www.kitchenaid.co.nz Hood and cabinetry clearances (mm) This appliance is not provided with a combustion product discharge. It is recommended that it be installed insufficiently aerated places, in terms of the laws in force. Gas appliance air shall not be contaminated. -
Page 7: Gas Consumption And Injectors Table
| www.kitchenaid.co.nz Gas Consumption and Injectors table Model KHDD2 38510 Gas Type Natural @ 1.00 kPa Universal LP @ 2.75 kPa (test point pressure) (inlet pressure) Burner Nominal Gas Nominal Injector Nominal Gas Nominal Injector Consumption Size (mm) Consumption... -
Page 8: Safeguarding The Environment
| www.kitchenaid.co.nz • Do not let children play with the pan supports. The • In the event of prolonged usage, additional rubber feet on the underneath of the pan supports ventilation may be required (opening a could be swallowed by small and cause serious injury or suffocation. -
Page 9: Installation
- Protected by plastic grill, metallic netting etc. that • This hob is designed to operate perfectly should not reduce the 100cm2 cross section with any oven in the KitchenAid range. The - Located in such a position so as not to interfere Manufacturer declines all responsibility with the extraction of the products of combustion. -
Page 10: Gas Connection
| www.kitchenaid.co.nz Gas connection WARNING! This operation must be performed by a qualified technician. • Before Installation make sure that local gas delivery conditions (nature and pressure) are compatible with the setting of the hob (see the gas consumption and injector size table on page 7). -
Page 11: Electrical Connection
| www.kitchenaid.co.nz • In some cases burner will fail to ignite immediately and will seem to blow’s lightly when do ignite, this is usually due to the air in the gas pipe which should clear itself within seconds of operation. -
Page 12: Installation
| www.kitchenaid.co.nz Installation The cook top is designed to be built in to a work surface as shown in the figure. Before installing the cook top, install the gasket seal “X” around the entire perimeter of the hole where it will be inserted. -
Page 13: Replacing The Injectors
| www.kitchenaid.co.nz Replacing the injectors Note: Refer to the injector table earlier in the manual to ensure the correct type of injector is to be fitted. Traditional burners (T) 1. Remove the cap (A). 2. Remove the spreader (B). -
Page 14: Care And Maintenance
| www.kitchenaid.co.nz Care and Maintenance Before any cleaning and/or maintenance - Do allow acid or alkaline substances, such as operation, disconnect the hob from power vinegar, mustard, salt or lemon juice to come into supply and wait until it is cold. -
Page 15: Troubleshooting Guide
| www.kitchenaid.co.nz Troubleshooting guide If the hob is not working properly work 2. the burner’s openings are not blocked in relation through this guide before contacting our to the thermocouple. Customer Care Centre. 3. the end part of the thermocouple is clean. - Page 16 | www.kitchenaid.co.nz Printed in Italy 10/16 851321077167 Page | 16...


Need help?
Do you have a question about the KHDD2 38510 and is the answer not in the manual?
Questions and answers