
Related Manuals for Dometic SLIDE TOPPER


Summary of Contents for Dometic SLIDE TOPPER
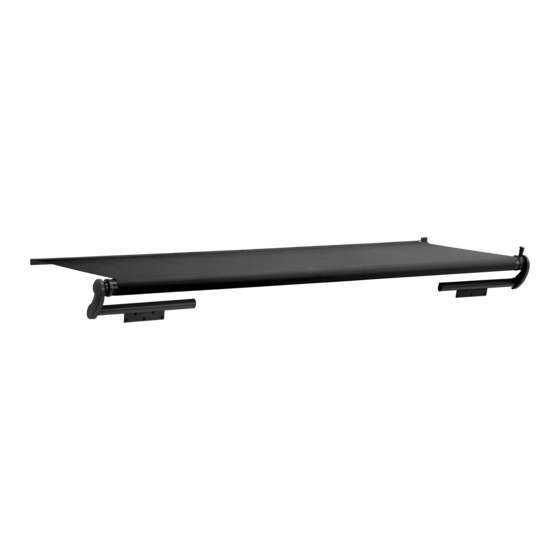
- Page 1 SLIDE TOPPER™ Hardware: 98000(LL).40(Y)(#) Fabric Roller Tube Assembly: 98(X)0(Z)(YY).(LLL)(#) Slide Topper Installation and Operation Manual . . . . . . . .2 REVISION E Form No. 3314719.000 08/19 | ©2019 Dometic Corporation...
-
Page 2: Table Of Contents
Contents Slide Topper 1 Explanation of Symbols and Service Center & Dealer Locations Visit: www.dometic.com Safety Instructions Read these instructions carefully. These instructions This manual has safety information and instructions to MUST stay with this product. help you eliminate or reduce the risk of accidents and Contents injuries. -
Page 3: General Safety Messages
U.S.A. caution could result in minor or moderate injury. – ANSI/NFPA70, National Electrical Code (NEC) Do not face the slide-out room or Slide Topper – ANSI/NFPA 1192, Recreational Vehicles Code toward permanent objects that my interfere with – ANSI Z21.57, Recreational Vehicles Code the operation. -
Page 4: Identifying The Model
Intended Use Optional Kits Part Number Quantity This Slide Topper is designed and intended for use on a Mounting Bracket Spacer Kit 3107940.003 recreational vehicle (hereinafter referred to as “RV”). Use 0.75 in. (19 mm) thick these instructions to ensure the correct installation and Mounting Bracket Spacer Kit 3310066.000#... -
Page 5: Extending The Slide-Out Room
0.25 in. (0.6 cm) min. Extension to select the fabric, mounting brackets, and optional Mounting Bracket Mounting Bracket spacers needed for the installation of the Slide Topper. Slide-Out Room Flange Rotating Assembly 3.2 Identifying the Required Awning Rail 0.5 in. (1.3 cm) min. -
Page 6: Identifying The Bracket Configuration
RV slide-out room, and all obstructions on the stationary wall. Confirm the identified clearances. In addition, the Slide Topper must have a 0.5 in. (1.3 cm) minimum clearance between the Slide Topper rotating assembly, all obstructions on the RV slide-out room, and all obstructions on the stationary wall. -
Page 7: Using An Optional Mounting Bracket
Slide Topper Pre-Installation 3.5 Marking the Mounting Bracket Dimension Extension Specifications Ref. Bracket Position Location Position Tall Standard Standard 1.79 in. 5.33 in. Use this section to mark the location of the mounting (4.5 cm) (13.5 cm) brackets that were selected for the installation of the... -
Page 8: Preparing The Hardware Assembly
4. Verify the mounting brackets are positioned at the • Make sure there are no obstacles like wires or pipes in correct height in relation to the Slide Topper arms the way of the drill locations. and extension. -
Page 9: Installing The Awning Rail And The Fabric
7. Widen the end of the rail with a flat screwdriver and and extensions, is installed on the mounting brackets. file off any sharp edges. Failure to control the Slide Topper at this point can result in product damage. • The cotter pins must be removed from the Slide Topper end caps before operating the slide-out room. -
Page 10: Installing The Mounting Brackets
10. While one person guides the awning fabric (or awning roller cover, if applicable) into the awning rail, carefully slide the Slide Topper until the fabric is in the desired position. A stepladder may be necessary to guide the fabric. -
Page 11: Installing The Anti-Billow Stop
Slide Topper Installation 1. Determine onto which end cap the anti-billow stop WARNING: IMPACT OR PINCH HAZARD. will be installed. Do not remove the cotter pin from the torsion rod until the awning fabric is attached to the awning Slide Toppers 198 in. (503 cm) or wider require an... -
Page 12: Securing The Awning Fabric To The Awning Rail
Installation Slide Topper 4.4 Securing the Awning Fabric to the Awning Rail 1. Verify the cotter pins have been removed from the end caps. 2 in. 15 Securing the Anti-Billow Bracket Anti-Billow Bracket Up (Resting Position) Anti-Billow Spacer #10 – 12 x 3/4 in. -
Page 13: Operation
Use this section for securing the awning fabric to the damage to wiring (if applicable), and other critical awning rail if the Slide Topper does not have metal slats. parts. Critical parts include awning fabric, brackets, 1. Mark the location of the awning fabric. -
Page 14: Maintaining The Hardware
Slide Topper 6.2.1 Cleaning the Fabric • If it is necessary to temporarily roll up the Slide Topper while it is wet, make sure you roll it out and let it dry (as Perform the following actions to clean the awning fabric: soon as conditions allow) before rolling it up again. -
Page 15: Disposal
Slide Topper Disposal 8 Disposal Place the packaging material in the appropriate recycling waste bins, whenever possible. Consult a local recycling center or specialist dealer for details about how to dispose of the product in accordance with all applicable national and local regulations. - Page 16 Mobile living made easy. dometic.com YOUR LOCAL YOUR LOCAL YOUR LOCAL DEALER SUPPORT SALES OFFICE dometic.com/dealer dometic.com/contact dometic.com/sales-offices...
Need help?
Do you have a question about the SLIDE TOPPER and is the answer not in the manual?
Questions and answers