Overland Storage SnapServer Quick Start Manual
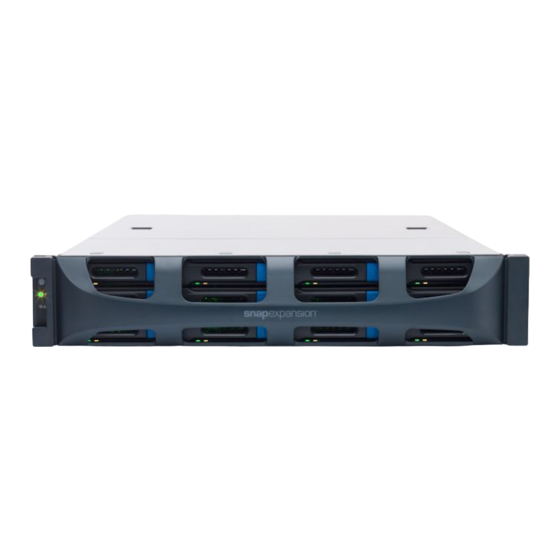
2u storage appliance
Hide thumbs
Also See for SnapServer:
- Administrator's manual (326 pages) ,
- Quick start manual (2 pages) ,
- Administrator's manual (289 pages)
Table of Contents
Advertisement
Quick Links
Quick Start Guide
SnapServer
®
2U Storage Appliance
Step 1
Registration
It is essential that you activate your warranty. Technical and warranty support are
not available until the warranty is active:
1. Go to
http://www.overlandstorage.com/
and select
Service & Support > My Products
.
2. At the
Site
Login, enter your e-mail address and
password, and click
GO
.
3. Click
Register New Product
.
4. Fill in the information (including serial number)
and click
Submit
.
NOTE: You'll receive a confirmation email from Overland with instructions on how to
complete the registration process.
Step 2
Optional Components
WARNING:
To reduce the risk of electric shock or damage to equipment, always
remove any power cords while working with the unit.
WARNUNG:
Um das Risiko eines elektrischen Schlags oder Schäden am Gerät zu
vermeiden, ziehen Sie stets den Netzstecker, bevor Sie an der Einheit arbeiten.
AVERTISSEMENT:
Pour réduire le risque de choc électrique ou endommagement de
l'équipement, retirez toujours les cordons électriques en travaillant avec l'appareil.
Any optional internal components, such as expansion cards and extra memory, need to
be installed before continuing. Refer to the installation instructions and warnings that
are packaged with the components.
Step 3
The SnapServer 2U appliance comes with a sliding rail rack kit for easy installation
into a 19-inch (EIA-310) rack. The two rails are identical; install them with the end
flanges pointed outward from the SnapServer.
– 1 –
IMPORTANT: Two-post telco-style or other racks less than 29 inches in depth will NOT
support this unit.
Attach the Inner Rail to the SnapServer
*10400742-004*
1. Select a rail assembly and slide the inner rail out until it stops.
10400742-004
2. Slide the inner rail release latch forward (1) and remove the inner rail.
3. To retract the middle rail, release the lock (2) and slide it into (3) the outer rail.
4. Repeat
Steps 1–3
5. Align the inner rail against the side of the unit.
6. Using the supplied screws, secure the rail.
7. Repeat
Steps 5–6
Enter
Enter
Optional Steps for Thicker Rack Rails
For rack rails thicker than 3mm, the sliding rail anchors cannot be seated without
exerting excessive force and potentially damaging the sliding rail kit. The brackets
need to be removed from each end of the slide rails to make the anchors seat securely.
For standard rack rail sizes 3mm or less, skip this procedure and proceed to
Outer Rails to Square-holed Rack."
1. Locate the bracket on the end of a slide rail.
2. Remove the screw securing the bracket to the rail.
3. Push the bracket toward the end of the rail, prying the back of the bracket
upward to unseat and remove it.
4. Repeat
Steps 1–3
Attach Outer Rails to Square-holed Rack
WARNING:
It is recommended that a mechanical lifter (or at least two people) be
used to raise and align the unit to prevent injury during installation. Use care when
inserting or removing a unit into or out of a rack to prevent the accidental tipping of
the rack, causing damage or personal injury.
WARNUNG:
Um Verletzungen zu vermeiden, empfehlen wir zur Rack-Installation oder
-Deinstallation die Nutzung einer mechanischen Hebehilfe (oder mindestens zwei
Personen). Seien Sie vorsichtig bei der Rack-Installation oder -Entnahme, um ein
versehentliches Kippen des Racks zu vermeiden und das Rack nicht zu beschädigen
bzw. sich selbst zu verletzen.
AVERTISSEMENT:
recommande d'utiliser un monte-charge (ou au moins deux personnes) pour élever
ou aligner l'appareil. Faites attention lorsque vous insérez ou retirez l'appareil d'un
support, pour empêcher le déversement accidentel de la crémaillère causant des
dommages et des blessures.
1
2
3
for the other rail assembly.
for the left rail.
"Attach
for each end of both rails.
Afin d'éviter des blessures pendant l'installation, il est
– 2 –
1. Position the front of one of the rails in line with the front vertical rail mounting
holes (1) and move it forward until the rail anchors are through the holes.
1
2
2. Push the rail toward the outside of the rack (2) until the rail locks snap into
place.
3. At the rear (3), slide the outer rail in or out to fit between the vertical rails (a) and
repeat
Steps 1–2
to secure it (b).
NOTE: Make sure the rear holes are the same height as the front holes so the rail is level.
4. For the other rail, repeat
Steps
1–3.
Install in Rack
1. Using the mechanical lifter, position the appliance in front of the rack.
2. Insert the inner rails into the outer rails and slide the unit into the rack.
3. Using four of the provided screws, secure the SnapServer to the front of the
rack.
4. Additional step for thicker rack rails: Using the two supplied screws,
secure the rear ends of the slide rails to the rack rails.
Step 4
Mount the Drives
CAUTION:
Do not remove Overland-certified drives from their carriers. Doing so voids
the drive warranty.
The SnapServer uses up to 12 disk drives. The drives can be either Certified Overland
drives or third-party drives selected from the qualified drive list. Overland-certified
drives come pre-installed in carriers while third-party drives must be installed in the
empty drive carriers shipped with the appliance.
Install 3.5-inch Drives in Drive Carriers
1. Align the drive's SATA connector with the opening at the rear of the empty carrier
and insert the drive.
– 3 –
Rear
3
View
b
a
Advertisement
Table of Contents

Related Manuals for Overland Storage SnapServer


Summary of Contents for Overland Storage SnapServer
- Page 1 2. Remove the screw securing the bracket to the rail. 3. Using four of the provided screws, secure the SnapServer to the front of the 3. Push the bracket toward the end of the rail, prying the back of the bracket Step 2 rack.
- Page 2 NOTE: SnapServers are configured to acquire an IP address from a DHCP server. If no DHCP https://community.sphere3d.com/community/documentation/nas/snapserver server is found on the network, the SnapServer defaults to an IP address in the range of Step 6 For information on contacting Overland Technical Support, see our Contact Support 169.254.xxx.xxx.
Need help?
Do you have a question about the SnapServer and is the answer not in the manual?
Questions and answers