Grundfos S Series Service Instructions Manual
Ranges 66 and 70
Hide thumbs
Also See for S Series:
- Installation and operating instructions manual (216 pages) ,
- Installation and operating instructions manual (17 pages) ,
- Installation and operating instructions manual (38 pages)

Related Manuals for Grundfos S Series


Summary of Contents for Grundfos S Series
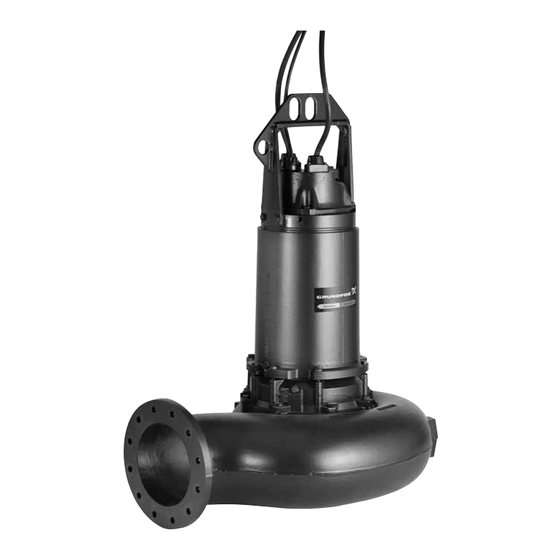
- Page 1 GRUNDFOS INSTRUCTIONS S-pumps, ranges 66 and 70 50/60 Hz Service instructions Installation and operating instructions in English and other languages for 50/60 Hz. http://net.grundfos.com/qr/i/96838602...
-
Page 2: Table Of Contents
- Action to avoid the hazard. Special torques and lubricants Quantities of grease in bearings 1.2 Notes Motor oil The symbols and notes below may appear in Grundfos installation and operating instructions, safety instructions and Service tools Standard tools service instructions. -
Page 3: Safety
2. Safety 4. Handling the pump S pumps weigh up to 2375 kg without accessories. It is therefore Pump installation in pits must be carried out by very important to use the right lifting equipment. specially trained persons. The pump weight is stated on the pump nameplate. See section Work in or near pits must be carried out according to Nameplate. -
Page 4: Raising The Pump To Upright Position
4.2.2 Lifting points (bottom) S pumps, ranges 66 and 70, are equipped with a lifting bracket on the motor top cover and on the lower bearing bracket. See fig. 2. Lifting points Raising the pump to upright position, step 2 Fig. -
Page 5: Identification
5.1.2 Sarlin version Pumps manufactured in 2001 and before. 5.1.1 Nameplate HELSINKI FINLAND TYPE r/min 20 m WEIGHT IP 68 Nameplate, Sarlin version Nameplate, Grundfos version Fig. 7 Fig. 6 Pos. Description Pos. Description Type designation Type designation Product number... -
Page 6: Type Keys
Sensor version necessarily available in all variants. Not in use S pump without built-in SM Code Explanation Designation 113 module. Grundfos sewage and 50 Hz wastewater pump Frequency [Hz] Pump type 60 Hz Multi-channel impeller pump 3 x 400 / 690 V, Y/D... - Page 7 5.3.2 Sarlin version (old) Code Explanation Designation Grundfos (or Sarlin) sewage and wastewater pump Pump type Multi-channel impeller pump installed in a column pipe Single-channel Impeller type SuperVortex Standard pump Pump version In conformity with the ATEX directive Motor power [kW]...
-
Page 8: Torques And Lubricants
6. Torques and lubricants This section shows the screws and nuts that must be tightened to a certain torque and the lubricants to be used. 6.1 Common torques (stainless steel screws) Dimension 1.1 ± 0.3 2.6 ± 0.6 5.2 ± 1 8.8 ±... -
Page 9: Service Tools
7. Service tools The following table shows standard and special tools for pump service. 7.1 Standard tools Standard tools Pos. Range Description Hexagon head driver Ratchet handle 1/2" Screwdriver Hexagon key Plastic hammer Puller for bearing Ring/open-end spanner Pinch bar Lock-ring pliers Multimeter Caliber... -
Page 10: Special Tools
7.2 Special tools Special tools Pos. Range Designation Description Part number Seal assembly tool for secondary shaft seal (PUR116) 96061560 Seal assembly tool for primary shaft seal (PUR121) 96061563 Bearing heater 7.3 Tightness test tools Tightness test tools Part Pos. Designation Description number Pressure gauge... -
Page 11: Service
Clean the vent hole before refitting the Except for replacement/dismantling of bearings, all valve after cleaning. other service work must be carried out by Grundfos 8.4 Annual maintenance or an authorised service workshop. Pumps in normal operation should be inspected once a year. If Service must be carried out by specially trained persons. -
Page 12: Oil Check And Oil Change
3. Check the oil level and take an oil sample to inspect the 8.5 Oil check and oil change condition of the oil. The oil becomes greyish white like milk if it The oil chamber is filled with oil acting as lubricant and coolant for contains water. -
Page 13: Inspection And Adjustment Of Impeller Clearance
8.6 Inspection and adjustment of impeller clearance The correct axial clearance is 0.7 mm ± 0.2. Reset the clearance Set screw if it is 0.7 mm or more. The method for resetting the clearance is different for submersible pumps, installation types S, C and ST, and for dry-installed pumps, installation types D and H. - Page 14 8.7.3 Checking the insulation resistance 8.7.5 Drying of the cable Insulation resistance can be measured from the cable end 1. See section 9.3.5 Removing the motor top cover. (control cabinet) or from the stator wires. Use a tester that can 2.
-
Page 15: Dismantling And Assembly Instructions
1. Slide cable entry (168) on the cable (181). There are several service videos available as guidance on Grundfos Product Center or YouTube. 2. Slide the cable clamp (180) and rubber seal (198) on the cable (181). 3. Fit the cable clamp (180) and rubber seal (198) on the cable 9.1 Checking and replacing the cable... -
Page 16: Replacing The Protection Sensors
Connecting the new cable - metal cable entry (non-Ex/Ex) 9.2 Replacing the protection sensors 9.2.1 Moisture switch To prepare a new cable (length of leads, cable clips, The standard pumps have one moisture switch under the motor cable markings, etc.), please use the old cable as top cover. - Page 17 Removing the moisture switch 9.2.4 Water-In-Oil sensor (WIO) 1. Disconnect the spade connectors from the switch. 2. Remove the mounting screw and lock washer from the mounting bracket. Remove the switch. 3. Remove the screw. 4. Remove the switch from the mounting bracket. Fitting a new moisture switch 5.
-
Page 18: Dismantling - S Pump
2. Remove the screws (178). Maintenance and service work on explosion-proof 3. Lift the motor top cover (164a) approx. 10 cm. Tap lightly, if pumps must be carried out by Grundfos or a service needed. workshop authorised by Grundfos. 4. Disconnect the cables. -
Page 19: Dismantling - St Pump
9.3.11 Removing the lower bearings 9.4 Dismantling - ST pump 1. See section 9.3.10 Removing the rotor. 9.4.1 Removing the outlet bowl 2. Remove the screws (182b). 1. Secure the pump on vertical from the lifting bracket (190) 3. Lower the bearing bracket cover (60) so that it is lying against position by means of hoist. -
Page 20: Assembling - S Pump
9.5 Assembling - S pump 9.5.2 Fitting the rotor 1. Fit and lubricate the O-rings (72 and 72a). The torques for the screws and the lubricants for the O-rings are specified in section 2. Fit the eye bolt in the shaft end and lift the rotor assembly into 6. - Page 21 9.5.6 Fitting the secondary shaft seal 9.5.9 Fitting the motor top cover 1. Place the motor in horizontal position. 1. Fit the O-ring (157) on the motor top cover (164a). 2. Make sure that the shaft is clean and smooth. 2.
-
Page 22: Assembling - St Pump
9.6 Assembling - ST pump Range 66 Pump outlet The torques for the screws and the lubricants for the O-rings are shown in section 6. Torques and lubricants. 9.6.1 Fitting the stator See section 9.5.1 Fitting the stator. Oil plugs (193) 9.6.2 Fitting the rotor See section 9.5.2 Fitting the... -
Page 23: Tightness Test
Maintenance and service work on explosion-proof 9. Lift the hose end out of the test basin. pumps must be carried out by Grundfos or a service 10. Disconnect the gas hoses and the test plugs. workshop authorised by Grundfos. -
Page 24: Drawings
11. Drawings Please note that the position numbers in the drawings on pages are listed in section 11.1.4 Position numbers and material specification. 11.1 Sectional drawings 11.1.1 Range 66 Fig. 23 Non-explosion-proof motor without cooling jacket... - Page 25 250a 250b 164a 190b 157b 150c 153a 181a 182a 182b 105b 190c 190a 176d 176c 173b 176a 176b 520b Fig. 24 Non-explosion-proof motor with cooling jacket...
- Page 26 Fig. 25 Explosion-proof motor without cooling jacket...
- Page 27 248a 190c 190b 250a 190a 250b 164a 157b 182b 150c 182a 180a 181a 153a 105b 176d 176c 173b 176a 176b 520b Fig. 26 Explosion-proof motor with cooling jacket...
- Page 28 11.1.2 Range 70 Fig. 27 Non-explosion-proof motor without cooling jacket...
- Page 29 Fig. 28 Non-explosion-proof motor with cooling jacket...
- Page 30 Fig. 29 Explosion-proof motor without cooling jacket...
- Page 31 Fig. 30 Explosion-proof motor with cooling jacket...
- Page 32 11.1.3 Sectional drawings - Pump Fig. 31 Submerged installation pump with cooling jacket...
- Page 33 Fig. 32 Dry installation pump with cooling jacket...
- Page 34 Fig. 33 Installation type S pump on auto coupling...
- Page 35 Fig. 34 Installation type D pump (1) Fig. 35 Installation type D pump (2)
- Page 36 Fig. 36 Dry, horizontal installation type H (1) 0 . 7 Fig. 37 Dry, horizontal, installation type H pump (2)
- Page 37 11.1.4 Position numbers and material specification Motor Pos. Component Material 190a Screw Stainless steel Pos. Component Material 190b Screw Stainless steel Rivet Stainless steel (1.4436/316) 190c Lifting bracket Galvanized steel Pressure test plug Stainless steel (1.4436/316) Plug Stainless steel (1.4408/316) Screw Stainless steel (1.4436/316) O-ring...
- Page 38 Pump Pos. Component Material Intermediate ring Cast iron Rivet Key (for keyway) Stainless steel (1.4436/316) Flange Cast iron Inlet cover Cast iron Adjusting screw Stainless steel (1.4436/316) Screw Stainless steel (1.4436/316) Screw Stainless steel (1.4436/316) Screw Stainless steel Screw Stainless steel O-ring NBR rubber O-ring...
-
Page 39: St Pumps
11.2 ST pumps For sectional drawings of motors see section 11.1.1 Range 66 11.1.2 Range 11.2.1 Sectional drawings - pump Fig. 38 Installation type ST... - Page 40 11.2.2 Position number and material specification Pump Pos. Component Material Intermediate ring Cast iron Stainless steel (1.4436/316) Inlet cover Cast iron Adjusting screw Stainless steel (1.4436/316) Screw Stainless steel (1.4436/316) Screw Stainless steel Screw Stainless steel O-ring NBR rubber O-ring NBR rubber O-ring NBR rubber...
-
Page 41: Sensor Positions
11.3 Sensor positions Fig. 39 Sensor positions Legend to figure 39: Pos. Description Moisture switch (Ex pumps two sensors) Pt100 on stator windings (optional) Moisture switch Pt100 on lower bearing bracket (optional) External WIO (optional) -
Page 42: Electrical Connections
S3.110.500.500... 1.210 0.213 0.780 0.119 S3.120.300.500... 1.210 0.213 0.780 0.119 S3.120.600.350... 1.910 0.270 S3.120.600.500... 1.210 0.213 0.780 0.119 ST3.110.1000.xxx... Contact Grundfos ST3.120.1000.xxx... S1.100.200.550/650... 0.780 0.079 0.780 0.064 1.170 0.079 S2.110.250.500... 1.210 0.228 0.780 0.136 1.820 0.228 S2.110.250.650... 0.780 0.079 0.780 0.064... - Page 43 Pump variant Standard GPA (Australia) Range Pump code Voltage Cable Winding Cable Winding Cable Winding [mΩ/m] [Ω] [mΩ/m] [Ω] [mΩ/m] [Ω] S1.100.200.850... 0.780 0.064 0.780 0.064 S2.90.200.1150... 0.390 0.044 0.390 0.044 S2.90.200.1600... 0.270 0.030 0.270 0.030 S2.100.200.1150... 0.390 0.044 0.390 0.044 S2.100.200.1600...
- Page 44 60 Hz Pump variant Standard Range Pump code Voltage Cable Winding Cable Winding [mΩ/m] [Ω] [mΩ/m] [Ω] S1.100.200.730... 0.780 0.054 0.550 0.042 S2.100.200.730... 0.780 0.054 0.550 0.042 S2.120.250.570... 1.210 0.132 0.780 0.085 380/660 V S2.145.300.320/410... 1.210 0.204 S2.145.300.570... 1.210 0.132 0.780 0.085 S3.115.500.570...
- Page 45 11.4.2 Cable ends 4 x ... 7 x ... 9 x ... T5 T4 7 x 6 +2 x 2,5 2 x 5 x ... 2 x 4 x ... + 3 x 2,5 Fig. 40 Cable ends seen from free end Wire always yellow-green.
- Page 46 11.4.3 Wiring diagrams Y/D connection - 7 wire Fig. 41 Diagram Y/D connection, 7 wire...
- Page 47 Y/D connection, 10 wire Fig. 42 Diagram for Y/D connection, 10 wire...
- Page 49 BOMBAS GRUNDFOS DO BRASIL Turkey Siu Wai Industrial Centre GRUNDFOS Pumper A/S Av. Humberto de Alencar Castelo Branco, GRUNDFOS POMPA San. ve Tic. Ltd. Sti. 29-33 Wing Hong Street & Strømsveien 344 Gebze Organize Sanayi Bölgesi CEP 09850 - 300...
- Page 50 96651031 0118 ECM: 1224434 www.grundfos.com...
Need help?
Do you have a question about the S Series and is the answer not in the manual?
Questions and answers