
Subscribe to Our Youtube Channel
Related Manuals for Tektronix MSO 5 Series


Summary of Contents for Tektronix MSO 5 Series
- Page 1 5 Series MSO Low Profile MSO58LP Installation and Safety Manual 5 シリーズ MSO ロー・プロファイル 設置と安全性に関するマニュアル MSO58LP 型 5 系列紧凑型 MSO MSO58LP 安装和安全手册 *P071356800* 071-3568-00...
- Page 3 5 Series MSO Low Profile MSO58LP Installation and Safety Manual Supports Product Firmware V1.4 and above. www.tek.com 071-3568-00...
- Page 4 Tektronix. All rights reserved. Licensed software products are owned by Tektronix or its subsidiaries or suppliers, and are protected by national copyright laws and international treaty provisions. Tektronix products are covered by U.S. and foreign patents, issued and pending. Information in this publication supersedes that in all previously published material. Specifications and price change privileges reserved.
- Page 5 Warranty Tektronix warrants that this product will be free from defects in materials and workmanship for a period of three (3) years from the date of shipment. If any such product proves defective during this warranty period, Tektronix, at its option, either will repair the defective product without charge for parts and labor, or will provide a replacement in exchange for the defective product.
-
Page 7: Table Of Contents
Table of Contents Important safety information ..........................General safety summary ..........................Service safety summary ..........................Terms in the manual ............................Terms on the product ............................ Symbols on the product ..........................Preface ................................Key features ..............................Related documents ............................Installing your instrument Check shipped accessories ........................... - Page 8 Table of Contents Cleaning the instrument Cleaning ............................... EMC, safety and environmental compliance Compliance Information ..........................EMC compliance ............................ Safety compliance ..........................Environmental compliance ........................MSO58LP Installation and Safety Manual...
-
Page 9: Important Safety Information
Connect and disconnect properly. Do not connect or disconnect probes or test leads while they are connected to a voltage source. Use only insulated voltage probes, test leads, and adapters supplied with the product, or indicated by Tektronix to be suitable for the product. - Page 10 WARNING. The product is heavy. To reduce the risk of personal injury or damage to the device get help when lifting or carrying the product. Use only the Tektronix rackmount hardware specified for this product. MSO58LP Installation and Safety Manual...
-
Page 11: Service Safety Summary
Important safety information Probes and test leads Before connecting probes or test leads, connect the power cord from the power connector to a properly grounded power outlet. Keep fingers behind the protective barrier, protective finger guard, or tactile indicator on the probes. Remove all probes, test leads and accessories that are not in use. -
Page 12: Terms In The Manual
Important safety information Terms in the manual These terms may appear in this manual: WARNING. Warning statements identify conditions or practices that could result in injury or loss of life. CAUTION. Caution statements identify conditions or practices that could result in damage to this product or other property. Terms on the product These terms may appear on the product: DANGER indicates an injury hazard immediately accessible as you read the marking. -
Page 13: Preface
To learn about Use this document How to use instrument 5 Series MSO MSO54, MSO56, MSO58, MSO58LP Help (Tektronix part number 077-1303-xx; functions Printable version of the instrument Help; available at www.tektronix.com/downloads) 5 Series MSO MSO58LP Installation and Safety Manual (Tektronix part number 071-3568-xx);... - Page 14 Verification Technical Reference (Tektronix part number 077-1306-xx; available at instrument meets www.tek.com/downloads) specifications Instrument theory of operation, 5 Series MSO MSO58LP Service Manual (Tektronix part number 077-1405-xx; available at troubleshooting, disassembly, www.tek.com/downloads) and replaceable parts ® Using the TLP058 Logic Probe TLP058 FlexChannel Logic Probe Instructions (Tektronix part number 071-3515-xx;...
-
Page 15: Installing Your Instrument
Installing your instrument Check shipped accessories Make sure that you received everything you ordered. If anything is missing, contact Tektronix Customer Support. In North America, call 1-800-833-9200. Worldwide, visit www.tek.com to find contacts in your area. Check the packing list that came with your instrument to verify that you have received all standard accessories and ordered items. -
Page 16: Input Signal Requirements
The instrument ships with a bag of assorted bolts and washers for installing the instrument in the most common rack types. To use an MSO58LP on a bench, purchase and install the MSO58LP Benchtop Conversion kit (Tektronix part number 020-3180- xx). The kit includes chassis feet and a handle, and lets you stack instruments on a bench. -
Page 17: Secure (Lock) The Oscilloscope
Installing your instrument Use four bolts and washers from the supplied hardware to attach the front of the instrument to the rack. Tighten by hand to support the instrument. From the rear of the rack, slide the second rear rack bracket onto the instrument chassis rack bracket until the rear rack bracket is flush with the rear rack. -
Page 18: Powering The Oscilloscope
Check that the status of all power-on self tests are Passed. If one or more power-on self tests shows Failed: Power cycle the oscilloscope. Tap Utility > Self Test. If one or more power-on self tests still shows Failed, contact Tektronix Customer Support. MSO58LP Installation and Safety Manual... -
Page 19: Connecting Probes
® ® Connect TPP0500, TPP1000, TekVPI+ , TekVPI , or other supported Tektronix analog probes by pushing them into a ® FlexChannel connector. The probe base latch locks with a 'click' when the probe is fully seated. TekVPI probes automatically set the channel input parameters for that probe (bandwidth, attenuation, termination, and so on). If a probe has a Menu button, push that button to open an on-screen configuration menu. - Page 20 Installing your instrument MSO58LP Installation and Safety Manual...
-
Page 21: Getting Acquainted With Your Instrument
Getting acquainted with your instrument MSO58LP front panel connections The front panel connections are where you power on or off the instrument, connect signals with probes or cables, connect an external trigger input signal, insert USB devices, and access a probe compensation signal. ®... - Page 22 Getting acquainted with your instrument Probe Compensation connectors: The Probe Compensation connections provide a ground connector and 1 kHz square wave source for adjusting the high- frequency response of a passive probe (probe compensation). The oscilloscope uses this signal to automatically compensate supported probes.
-
Page 23: Rear Panel Connections
Connect a mouse (USB cable) or mouse dongle (for USB wireless mouse) to any USB port. Refer to the 5 Series MSO (MSO54, MSO56, MSO58) Installation and Safety Manual (Tektronix part number 071-3514-xx), available to download from www.tek.com/product-support, for details on understanding and using the graphical user interface. - Page 24 Getting acquainted with your instrument MSO58LP Installation and Safety Manual...
-
Page 25: Configure The Instrument
To remotely set this control or run this task on an MSO58LP, see the 5 Series MSO MSO54, MSO56, MSO58, MSO58LP Programmer Manual (Tektronix part number 077-1305-xx) for the correct command or commands to use. Double-tap the Date/Time badge (bottom-right of screen) to open the configuration menu. -
Page 26: Run Signal Path Compensation (Spc)
To remotely set this control or run this task on an MSO58LP, see the 5 Series MSO MSO54, MSO56, MSO58, MSO58LP Programmer Manual (Tektronix part number 077-1305-xx) for the correct command or commands to use. Signal Path Compensation (SPC) corrects for DC level inaccuracies in the internal signal path, caused by temperature variations and/or long-term signal path drift. -
Page 27: Compensate The Tpp0500B Or Tpp1000 Probes
To remotely set this control or run this task on an MSO58LP, see the 5 Series MSO MSO54, MSO56, MSO58, MSO58LP Programmer Manual (Tektronix part number 077-1305-xx) for the correct command or commands to use. The oscilloscope stores the compensation values for each probe/channel combination, and automatically recalls the compensation values when you plug in the probe. -
Page 28: Connect To A Network (Lan)
To remotely set this control or run this task on an MSO58LP, see the 5 Series MSO MSO54, MSO56, MSO58, MSO58LP Programmer Manual (Tektronix part number 077-1305-xx) for the correct command or commands to use. Work with your network administrator to obtain the required information to connect to your network (IP address, Gateway IP address, Subnet Mask, DNS IP address, and so on). -
Page 29: Remote Access From A Web Browser
Configure the instrument Obtain or enter the network address information: ■ If your network is DHCP-enabled, tap Auto to obtain the IP address information from the network. DHCP mode is the default mode. ■ If your network is not DHCP-enabled, or you need a permanent (non-changing) IP address for this instrument; tap Manual and enter the IP address and other values provided by your IT or system administrator resource. - Page 30 Configure the instrument MSO58LP Installation and Safety Manual...
- Page 31 Operating basics Refer to the 5 Series MSO (MSO54, MSO56, MSO58) Installation and Safety Manual (Tektronix part number 071-3514-xx), for details on understanding and using the graphical user interface to trigger on and acquire waveforms and take measurements. Refer to the 5 Series MSO MSO54, MSO56, MSO58, MSO58LP Programmer Manual (Tektronix part number 077-1305-xx) for the correct command or commands to use to remotely operate the instrument.
- Page 32 Operating basics MSO58LP Installation and Safety Manual...
-
Page 33: Cleaning The Instrument
Cleaning the instrument Cleaning Use a dry, soft cotton cloth to clean the outside of the unit. Do not use any liquid cleaning agents or chemicals that could damage the case, controls, markings or labels, or possibly infiltrate the case. MSO58LP Installation and Safety Manual... - Page 34 Cleaning the instrument MSO58LP Installation and Safety Manual...
-
Page 35: Emc, Safety And Environmental Compliance
This product is intended for use by professionals and trained personnel only; it is not designed for use in households or by children. Questions about the following compliance information may be directed to the following address: Tektronix, Inc. PO Box 500, MS 19-045 Beaverton, OR 97077, USA www.tek.com... -
Page 36: Safety Compliance
EMC, safety and environmental compliance EMC Compliance Meets the intent of Directive 2014/30/EU for Electromagnetic Compatibility when it is used with the product(s) stated in the specifications table. Refer to the EMC specification published for the stated products. May not meet the intent of the directive if used with other products. -
Page 37: Environmental Compliance
EMC, safety and environmental compliance Safety class Class 1 – grounded product. Pollution degree description A measure of the contaminants that could occur in the environment around and within a product. Typically the internal environment inside a product is considered to be the same as the external. Products should be used only in the environment for which they are rated. - Page 38 This symbol indicates that this product complies with the applicable European Union requirements according to Directives 2012/19/EU and 2006/66/EC on waste electrical and electronic equipment (WEEE) and batteries. For information about recycling options, check the Tektronix Web site (www.tek.com/productrecycling). Battery recycling This product contains a small installed lithium metal button cell.
- Page 39 Index remote access the oscilloscope (from Web), 15 run signal path compensation (SPC), 12 ACQ acquisition status LED, 7 set clock format (12/24 hr), 11 AFG Out (rear panel), 9 set time zone, 11 automatic probe compensation (TPP0500, TPP1000), 13 update firmware, 11 AUX Out (rear panel), 9 Aux Trig trigger input, 7...
- Page 40 Index AFG Out, 9 run signal path compensation, 12 AUX Out, 9 cable lock, 9 Display Port video output, 9 security cable lock, 9 DVI video output, 9 Ethernet port (RJ-45), 9 clock format (12/24 hr), 11 LAN port (RJ-45), 9 time zone, 11 power cord, 9 signal input levels, 2...
- Page 41 5 シリーズ MSO ロー・プロファイル MSO58LP 型 設置と安全性に関するマニュアル *P071356800* 071-3568-00...
- Page 43 5 シリーズ MSO ロー・プロファイル MSO58LP 型 設置と安全性に関するマニュアル ファームウェア V1.4 以降をサポート www.tek.com 071-3568-00...
- Page 44 © Copyright Tektronix.All rights reserved.使用許諾ソフトウェア製品は、Tektronix またはその子会社や供給者が所有するもの で、米国著作権法および国際条約の規定によって保護されています。Tektronix 製品は、登録済および出願中の米国その 他の国の特許等により保護されています。本書の内容は、既に発行されている他の資料の内容に代わるものです。また、 本製品の仕様および価格は、予告なく変更させていただく場合がございますので、予めご了承ください。 TEKTRONIX および TEK は Tektronix, Inc. の登録商標です。 TekSecure は Tektronix, Inc.の商標です。 FlexChannel、TekVPI、FastAcq、e*Scope は Tektronix, Inc.の登録商標です。 当社へのお問合せ Tektronix, Inc. 14150 SW Karl Braun Drive P.O. Box 500 Beaverton, OR 97077 製品情報、代理店、サービス、およびテクニカル・サポート:...
- Page 45 保証 当社では、本製品において、認定された当社代理店による出荷の日から 3 年間、材料およびその仕上がりについて欠陥 がないことを保証します。本保証期間中、かかる製品に欠陥があることが判明した場合、当社は、当社の判断にて、部品 および作業の費用を請求せずに当該欠陥製品を修理するか、または当該欠陥製品と交換に代替品を提供します。当社 が保証遂行のために使用する部品、モジュール、および代替品は、新品の場合もあれば、新品同様の性能を持つ再生品 の場合もあります。交換後、当社が引き取った部品、モジュール、および製品はすべて当社の所有物となります。 お客様が本保証に基づくサービスを受けるには、適用保証期間が満了する前に、当該欠陥について当社に通知し、サー ビス実施に関する適切な手配を行う必要があります。お客様には、当該欠陥製品を梱包していただき、送料元払いにて当 社指定のサービス受付センターに送付していただきます。製品をお客様に返送する際、返送先が当社サービス受付セン ターの所在国と同一国内にある場合には、当社がその返送費用を負担するものとします。上記以外の場所に返送される 製品については、すべての発送費用、関税、税、およびその他の費用を支払う責任はお客様が負うものとします。 製品の不適切な使用または整備点検の不足によって生じた欠陥、障害、または損傷は、本保証の対象外です。当社は、 a)当社担当者以外の者による本製品の設置、修理または整備の実施から生じた損傷に対する修理、b)不適切な使用ま たは互換性のない機器への接続から生じた損傷に対する修理、c)当社製以外のサプライ用品の使用により生じた損傷ま たは動作不良に対する修理。d)本製品が改造または他の製品と統合された場合において、かかる改造または統合の影 響により当該本製品の整備の時間または難易度が増加した場合の当該本製品に対する整備については、本保証に基づ くサービスを提供する義務を負わないものとします。 本保証は、明示であるか黙示であるかを問わず他のあらゆる保証の代わりに、本製品に関して当社がお客様に対して提 供するものです。テクトロニクスおよびその販売店は、商品性または特定目的に対する適合性についての一切の黙示保 証を否認します。不具合のある製品を修理または交換するという当社の責任行為は、本保証の義務違反に対してお客様 に提供される唯一の救済手段です。当社および当社代理店は、間接的、限定的、偶発的、または派生的な損害について は、かかる損害の可能性を事前に通知されていたか否かにかかわらず、一切責任を負わないものとします。 [W4 – 15AUG04]...
- Page 47 目次 ......................... 安全性に関する重要な情報 ........................安全にご使用いただくために ...................... 安全に保守点検していただくために ..........................本マニュアル内の用語 ............................ 本機に関する用語 ............................本製品の記号 ................................まえがき ..............................主な特長 ..........................関連するマニュアル 本機の設置 ..........................同梱アクセサリの確認 ..............................動作要件 ............................. 入力信号要件 ..........................機器のラックへの設置 ........................ オシロスコープの固定(ロック) ......................... オシロスコープへの電源投入 ............パワーオン・セルフ・テストでのオシロスコープの合格の確認 ............................プローブの接続 機器の詳細 MSO58LP 型の前面パネルの接続部 ..............................................
- Page 48 目次 基本操作 機器のクリーニング .............................. クリーニング EMC、安全、環境に関する適合性 ..........................適合性に関する情報 EMC 適合性 ........................................................... 安全性 ........................ 環境基準に対する適合性 MSO58LP 型の設置と安全性に関するマニュアル...
-
Page 49: 安全性に関する重要な情報
安全性に関する重要な情報 このマニュアルには、操作を行うユーザの安全を確保し、製品を安全な状態に保つために順守しなければならな い情報および警告が記載されています。 本機の点検にあたっては「安全にご使用いただくために」に続く「安全に保守点検していただくために」を参照し て、事故防止につとめてください。 安全にご使用いただくために 製品は指定された方法でのみご使用ください。人体への損傷を避け、本製品や本製品に接続されている製品の 破損を防止するために、安全性に関する次の注意事項をよくお読みください。すべての指示事項を注意深くお読 みください。必要なときに参照できるように、説明書を安全な場所に保管しておいてください。 本製品は該当する地域の条例や国内法令に従って使用しなければなりません。 本製品を正しく安全にご使用になるには、このマニュアルに記載された注意事項に従うだけでなく、一般に認めら れている安全対策を徹底しておく必要があります。 本製品は訓練を受けた専門知識のあるユーザによる使用を想定しています。 製品のカバーを取り外して修理や保守、または調整を実施できるのは、あらゆる危険性を認識した専門的知識の ある適格者のみに限定する必要があります。 使用前に、既知の情報源と十分に照らし合わせて、製品が正しく動作していることを常にチェックしてください。 本製品は危険電圧の検出用にはご利用になれません。 危険な通電導体が露出している部分では、感電やアーク・フラッシュによってけがをするおそれがありますので、 保護具を使用してください。 本製品をご使用の際に、より大きな他のシステムにアクセスしなければならない場合があります。他のシステムの 操作に関する警告や注意事項については、その製品コンポーネントのマニュアルにある安全に関するセクション をお読みください。 本機器をシステムの一部としてご使用になる場合には、そのシステムの構築者が安全性に関する責任を果たさ なければなりません。 火災や人体への損傷を避けるには 適切な電源コードを使用してください: 本製品用に指定され、使用される国で認定された電源コードのみを使用し てください。他の製品の電源コードは使用しないでください。 本製品を接地してください: 本製品は、電源コードのグランド線を使用して接地します。感電を避けるため、グラン ド線をアースに接続する必要があります。本製品の入出力端子に接続する前に、製品が正しく接地されているこ とを確認してください。電源コードのグランド接続を無効にしないでください。 電源を切断してください: 電源コードの取り外しによって主電源が遮断されます。スイッチの位置については、使 用説明書を参照してください。電源コードの取り扱いが困難な場所には設置しないでください。必要に応じてすぐ に電源を遮断できるように、ユーザが常にアクセスできる状態にしておく必要があります。 接続と切断の手順を守ってください: プローブとテスト・リードが電圧源に接続されている間は接続または切断し ないでください。絶縁型の電圧プローブ、テスト・リード、およびアダプタは、製品に付属する製品か、または当社 により特別に指定された製品のみを使用してください。 MSO58LP 型の設置と安全性に関するマニュアル... - Page 50 安全性に関する重要な情報 すべての端子の定格に従ってください: 発火や感電の危険を避けるために、本製品のすべての定格とマーキン グに従ってください。本製品に電源を接続する前に、定格の詳細について、製品マニュアルを参照してください。 測定カテゴリ(CAT)の定格および電圧と電流の定格については、製品、プローブ、またはアクセサリのうちで最も 低い定格を超えないように使用してください。1:1 のテスト・リードを使用するときは、プローブ・チップの電圧が直 接製品に伝わるため注意が必要です。 すべての端子の定格に従ってください: 発火や感電の危険を避けるために、本製品のすべての定格とマーキン グに従ってください。本製品に電源を接続する前に、定格の詳細について、製品マニュアルを参照してください。 コモン端子を含むいかなる端子にも、その端子の最大定格を超える電圧をかけないでください。 端子の定格電圧を超えてコモン端子をフローティングさせないでください。 本製品の測定端子は、AC 電源、カテゴリ II、III、および IV 回路には使用できません。 カバーを外した状態では使用しないでください: カバーやパネルを外した状態やケースを開いたまま動作させない でください。危険性の高い電圧に接触してしまう可能性があります。 露出した回路への接触は避けてください: 電源が投入されているときに、露出した接続部分やコンポーネントに触 れないでください。 故障の疑いがあるときは使用しないでください: 本製品に故障の疑いがある場合には、資格のあるサービス担当 者に検査を依頼してください。 製品が故障している場合には、使用を停止してください。製品が故障している場合や正常に動作していない場合 には、製品を使用しないでください。安全上の問題が疑われる場合には、電源を切って電源コードを取り外してく ださい。誤って使用されることがないように、問題のある製品を区別しておいてください。 使用前に、電圧プローブ、テスト・リード、およびアクセサリに機械的損傷がないかを検査し、故障している場合に は交換してください。金属部が露出していたり、摩耗インジケータが見えているなど、損傷が見られるプローブま たはテスト・リードは使用しないでください。 使用する前に、製品の外観に変化がないかよく注意してください。ひび割れや欠落した部品がないことを確認して ください。 指定された交換部品のみを使用するようにしてください。 保護メガネを着用してください: 強力な光線またはレーザー照射にさらされる危険性がある場合は、保護メガネを 着用してください。 湿気の多いところでは動作させないでください: 機器を寒い場所から暖かい場所に移動する際には、結露にご注 意ください。...
- Page 51 安全性に関する重要な情報 作業場が該当する人間工学規格を満たしていることを確認してください。ストレスに由来するけががないように、 人間工学の専門家に助言を求めてください。 製品を持ち上げたり運んだりする作業は慎重に行ってください。本製品には持ち運び用のハンドルが取り付けら れています 警告: 本機はかなりの重量があります。怪我をしたり装置が損傷することがないように、製品を持ち運ぶときには 誰かの手を借りてください。 本製品には指定された当社のラック取り付け金具のみを使用してください。 プローブとテスト・リード プローブやテスト・リードを接続する前に、電源コネクタからの電源コードを適切に接地されたコンセントに接続し てください。 感電を避けるために、常に指はプローブの指ガードまたは触覚段差より後方に保ってください。 使用しないプローブ、テスト・リード、アクセサリはすべて取り外してください。 測定に使用するプローブ、テスト・リード、アダプタは、測定カテゴリ(CAT)、電圧、温度、高度、アンペア数の定格 が適切なもののみを使用してください。 高電圧に注意: 使用するプローブの電圧定格について理解し、その定格を超えないようにしてください。特に次の 2 つの定格についてはよく理解しておく必要があります。 ■ プローブ・チップとプローブの基準リード間の最大測定電圧 ■ プローブ基準リードとアース間の最大フローティング電圧 上記の 2 つの電圧定格はプローブと用途によって異なります。詳細については、プローブのマニュアルの仕様関 連セクションを参照してください。 警告: 感電を防止するために、オシロスコープの入力 BNC コネクタ、プローブ・チップ、またはプローブ基準リード の最大測定電圧や最大フローティング電圧を超えないように注意してください。 接続と切断の手順を守ってください: プローブ出力を測定器に接続してから、プローブを被測定回路に接続してく ださい。被測定回路にプローブの基準リードを接続してから、プローブ入力を接続してください。プローブ入力とプ ローブの基準リードを被測定回路から切断した後で、プローブを測定器から切断してください。 プローブの基準リードは、グランドにのみ接続してください。 プローブとアクセサリを検査してください: 使用前には必ずプローブとアクセサリに損傷がないことを確認してくだ さい(プローブ本体、アクセサリ、ケーブル被覆などの断線、裂け目、欠陥)。損傷がある場合には使用しないでく...
-
Page 52: 安全に保守点検していただくために
安全性に関する重要な情報 安全に保守点検していただくために 「安全に保守点検していただくために」のセクションには、製品の保守点検を安全に行うために必要な詳細な情報 が記載されています。資格のあるサービス担当者以外は、保守点検手順を実行しないでください。保守点検を行 う前には、この「安全に保守点検していただくために」と「安全にご使用いただくために」をお読みください。 感電を避けるため、: 露出した接続部には触れないでください。 保守点検は単独で行わないでください。: 応急処置と救急蘇生ができる人の介在がない限り、本製品の内部点 検や調整を行わないでください。 電源を切断してください。: 保守点検の際にカバーやパネルを外したり、ケースを開く前に、感電を避けるため、製 品の電源を切り、電源コードを電源コンセントから抜いてください。 電源オン時の保守点検には十分注意してください。: 本製品には、危険な電圧や電流が存在している可能性が あります。保護パネルの取り外し、はんだ付け、コンポーネントの交換をする前に、電源の切断、バッテリの取り 外し(可能な場合)、テスト・リードの切断を行ってください。 修理後の安全確認。: 修理を行った後には、常にグランド導通と電源の絶縁耐力を再チェックしてください。 本マニュアル内の用語 本マニュアルでは以下の用語を使用しています。 警告: 人体や生命に危害をおよぼすおそれのある状態や行為を示します。 注意: 本機やその他の接続機器に損害を与えるおそれのある状態や行為を示します。 本機に関する用語 本機では次の用語を使用します。 ■ 危険: ただちに人体や生命に危険をおよぼす可能性があることを示します。 ■ 警告: 人体や生命に危険をおよぼす可能性があることを示します。 ■ 注意: 本製品を含む周辺機器に損傷を与える可能性があることを示します。 MSO58LP 型の設置と安全性に関するマニュアル... -
Page 53: 本製品の記号
安全性に関する重要な情報 本製品の記号 製品にこの記号が表記されているときは、マニュアルを参照して、想定される危険性とそれらを回避す るために必要な行動について確認してください(マニュアルでは、この記号はユーザに定格を示すため に使用される場合があります。) 本製品では、次の記号を使用します。 MSO58LP 型の設置と安全性に関するマニュアル... - Page 54 安全性に関する重要な情報 viii MSO58LP 型の設置と安全性に関するマニュアル...
-
Page 55: まえがき
まえがき 本マニュアルには、製品の安全とコンプライアンス、オシロスコープの接続方法と電源供給方法、機器の機能と制 御と基本操作の概要が記載されています。詳細については、製品の Help(ヘルプ)ファイルを参照してください。 主な特長 5 シリーズ MSO ロー・プロファイルをお買い求めいただきありがとうございます。5 シリーズ MSO ロー・プロファイ ® ル(MSO58LP 型)は、8 チャンネル式のオシロスコープで、入力は世界初の FlexChannel をベースとしており、実質 的にあらゆる設計において効率的かつ費用効果の高いミックスド・シグナル・デバッキングを実現します。 ■ 1GHz の帯域幅 ■ FlexChannel 入力の 8 チャンネル式 ® ■ 各 FlexChannel 入力はあらゆる組み合わせにおいて 1 アナログ・チャンネルまたは 8 デジタル・チャンネルに 対応 ® ® ■ FlexChannel 入力は... - Page 56 使用するマニュアル 『5 Series MSO MSO54, MSO56, MSO58, MSO58LP Help』(5 シリーズ MSO の MSO54 型、 機器の機能の使用方法 MSO56 型、MSO58 型、MSO58LP 型のヘルプ:当社部品番号 077-1303-xx、機器のヘ ルプの印刷可能バージョン、www.tektronix.com/downloads より入手可能)。『 5 Series MSO MSO58LP Installation and Safety Manual』(5 シリーズ MSO の MSO58LP 型 の設置と安全性に関するマニュアル:当社部品番号 071-3568-xx。機器に標準付 属)。英語版、日本語版、簡体字中国語版の 1 冊のマニュアル。ロシア語版は当社...
-
Page 57: 同梱アクセサリの確認
本機の設置 同梱アクセサリの確認 注文したものがすべてお手元に届いたことを確認してください。足りないものがある場合には、当社カスタマ・サポ ートにお問い合わせください。北米:1-800-833-9200 までお電話ください。世界の他の地域では、www.tek.com にアク セスし、お近くの代理店をお探しください。 本機の付属品一覧を見て、注文品とスタンダード・アクセサリがすべて届いているか確認してください。シリアル・ バスとトリガ・オプション、5-PWR 測定オプションなど工場出荷時実装オプションを購入した場合には、Help(ヘル プ)> About(概要)をタップして、そのオプションが Installed Options(実装オプション)表に掲載されているかを確認 してください。 MSO58LP 型のスタンダード・アクセサリ 品名 数量 当社部品番号 シリーズ MSO ( MSO58LP 型)の設置と安全性に関するマニュアル 1 071-3568-xx 電源ケーブル リージョンにより異な る 校正証明書 - 工場出荷時実装ライセンスのレポート - 動作要件 高い測定精度と安全な機器動作を確保するために、動作温度、電力、高度、信号入力電圧の各必須範囲内でこ のオシロスコープを使用してください。 環境要件 特性 説明 0℃~+... -
Page 58: 入力信号要件
本機の設置 電力要件 特性 説明 100V~240V 電源電圧 、±10%、単相 AC RMS 50/60Hz、100V~240V(90V~264V) 電源周波数 400Hz、115V(103V~127V) 全機種共通:最大 400W 消費電力 入力信号要件 入力信号を許容制限内に収めることで、正確な測定を確保し、アナログとデジタルのプローブまたは機器への損 傷を防ぎます。 入力信号が以下の要件の範囲内にあることを確認します。 入力 説明 300V アナログ入力チャンネル、1MΩ 設定、BNC で最大入力 測定カテゴリ II 電圧 アナログ入力チャンネル、50Ω 設定、BNC で最大入力 電圧 デジタル入力チャンネル、デジタル入力で最大入力電 プローブ定格の観察 TLP058;±42V 圧レンジ Ref In(基準入力):BNC で最大入力電圧(後部パネル) 7V ±5V AUX トリガ入力... - Page 59 本機の設置 警告: けがをしないように、本機の設置は 2 人で行ってください。 付属品のボルトとワッシャを 2 組使用して、リア・ラック固定用金具の 1 つをラックの後部に取り付けます。手 で締め付けます。 2 人で本機を支え、シャーシ・ラック固定用金具がリア・ラック固定用金具に差し込まれるようにラックの前面 から本機を挿入します。 本機がラックの前面と同一平面になるまで前面から押し込み続けます。 付属品のボルトとワッシャを 4 組使用して、本機の前面をラックに取り付けます。手で締め付け、本機を支え ます。 ラックの後部から、リア・ラック固定用金具がリア・ラックと同一平面になるまで 2 番目のリア・ラック固定用金 具を本機のシャーシ・ラック固定用金具にスライドします。 付属品のボルトとワッシャを 2 組使用して、2 番目のリア・ラック固定用金具をラックの後部に取り付けます。 手で締め付けます。 1.1Nm(ニュートン・メータ)まで手で締め付けます。 5/16 インチのレンチを使用して、両側のラック固定用金具アセンブリに付属の六角ボルトを 2 個取り付け、固 定用金具を所定の位置に固定し、前面ラックのネジが外れたときに本機が誤って分離しないようにします(以 下のイメージを参照)。両側に 4 カ所のボルト位置があります(イメージを参照)。0.7Nm(ニュートン・メータ)ま で固定用金具の固定ボルトを締め付けます。 必要に応じて後部シャーシに電源コードとケーブルを取り付けます。 ラック・マウントの指示終わり: MSO58LP 型の設置と安全性に関するマニュアル...
-
Page 60: オシロスコープの固定(ロック
本機の設置 オシロスコープの固定(ロック) プロパティの損失を防ぐために、オシロスコープをテスト・ベンチや設備ラックにロックします。 標準的なノートパソコン用セキュリティ・ロックをオシロスコープの後部パネルに取り付けて、オシロスコープを作 業台やラック、その他の場所に固定します。 オシロスコープへの電源投入 この手順では、オシロスコープをライン電源に接続し、オシロスコープへの電源の投入と遮断を行います。オシロ スコープを AC 電源に接続する時には必ず、本機に同梱されている電源コードを使用してください。 前提条件:オシロスコープに同梱されている AC 電源コードを使用してください。 付属の電源コードをオシロスコープの電源コネクタに接続します。 図 1 : MSO58LP 型の電源コード・コネクタと電源スタンバイ・スイッチ 電源コードを適切な AC 電源に接続します。 AC 電源コードが導通状態の電源回路に接続されると、電力が電源供給部とその他の基盤に供給され、本機 が Standby(スタンバイ)モードに入ります。 本機の電源をオンまたはオフにするには、前面パネルの電源ボタンを押します。 電源ボタンの色は本機の電源ステータスを示します。 無灯–AC 電力が投入されていない 黄色–スタンバイ・モード 青色 – 電源オン 本機の電源を完全に切るには、電源コードを抜きます。 MSO58LP 型の設置と安全性に関するマニュアル... -
Page 61: パワーオン・セルフ・テストでのオシロスコープの合格の確認
本機の設置 パワーオン・セルフ・テストでのオシロスコープの合格の確認 パワーオン・セルフ・テストでは、オシロスコープの全機種が起動後に正常に作動するかを確認します。 前提条件:モニタを後部パネルのビデオ出力に接続し、マウスを USB ポートに接続します。 オシロスコープの電源を入れて、オシロスコープのスクリーンに表示が出るまで待ちます。 上端のメニュー・バーで Utility(ユーティリティ)> Self Test(セルフ・テスト)を選択し、Self Test(セルフ・テスト) のコンフィグレーション・メニューを開きます。 すべてのパワーオン・セルフ・テストのステータスが Passed(合格)になっているかを確認します。 いずれかのパワーオン・セルフ・テストの結果が Failed(不合格)と表示されている場合: オシロスコープの電源を入れ直します。 Utility(ユーティリティ)> Self Test(セルフ・テスト)をタップします。それでもいずれかのパワーオン・セル フ・テストの結果が Failed(不合格)と表示される場合には、当社カスタマ・サポートに問い合わせてくださ い。 プローブの接続 プローブとケーブルを使ってオシロスコープを被測定装置(DUT)に接続します。プローブは信号測定のニーズに 最適なものを使用してください。 図 2 : MSO58LP 型へのプローブの接続 ® ® TPP0500 型、TPP1000 型、TekVPI+ 、TekVPI 、またはサポートされているその他の当社アナログ・プローブを ® FlexChannel コネクタに挿入して接続します。プローブは完全に挿入されると、プローブのベース・ラッチがカチッと... - Page 62 本機の設置 TekVPI プローブについては、このプローブのチャンネル入力パラメータ(帯域幅、減衰比、ターミネーションなど) が自動で設定されます。プローブに Menu(メニュー)ボタンがある場合、そのボタンを押してスクリーン上のコンフ ィグレーション・メニューを開きます。アクティブなプローブの取扱説明書に従ってパラメータ(自動ゼロ、デガウス など)を設定します。 ® TLP058 型 FlexChannel ロジック・プローブの接続方法 ロック・レバーをアンロック位置に移動させ、ロック・レバーが中央に戻るまで待ちます。 ® FlexChannel コネクタにプローブを挿入し、プローブが完全に挿入されてロック・メカニズムのカチッという音が するまで押し込みます。 ロック・レバーをロック位置に移動させます。ステータス・ライトが緑色に点灯します。 TLP058 プローブを取り外すには、ロック・レバーをアンロック位置に移動させたままプローブを引き抜きます。 プローブを取り外している時にリボン・ケーブルを引っ張らないでください。 BNC のプローブまたはケーブルをチャンネル BNC 差し込みコネクタに挿入して接続し、ロック・メカニズムをロック されるまで時計回りに回します。 注: プローブを接続しても、そのチャンネルは自動的に有効にはなりません。 MSO58LP 型の設置と安全性に関するマニュアル...
-
Page 63: Mso58Lp 型の前面パネルの接続部
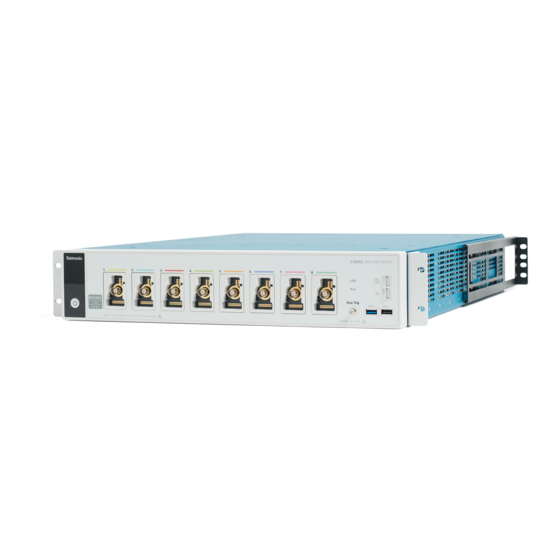
機器の詳細 MSO58LP 型の前面パネルの接続部 前面パネルの接続部では、本機の電源オン/オフ、プローブまたはケーブルを使用して信号を接続、外部トリガ の入力信号を接続、USB デバイスの装着、プローブ補正信号のアクセスを行います。 ® FlexChannel プローブ・コネクタ: ® FlexChannel コネクタは、TekVPI+測定プローブ、TekVPI 測定プローブ、BNC 受動プローブ、TLP058 型 ® FlexChannel ロジック・プローブ、BNC ケーブルのすべてに対応しています。プローブの接続は簡単で、プロー プローブの接続 (5 ページ)」を参照してくだ ブをカチッと音がするまでしっかりとコネクタに押し込むだけです。「 さい。 LAN ステータス LED: ネットワーク接続とアクティビティ・ステータスを示します: ■ オフ-本機に電力が供給されていない ■ 緑-ネットワーク接続良好 ■ 赤-ネットワーク接続不良または未接続 MSO58LP 型の設置と安全性に関するマニュアル... - Page 64 機器の詳細 プローブ補正コネクタ: プローブ補正用接続部には、グランド・コネクタと 1kHz の方形波ソースがあり、受動プローブの高周波数応答 の調整(プローブ補正)に使用します。オシロスコープはこの信号を利用して、サポートされているプローブの 型プローブまたは TPP1000 型プローブの補正 (13 ページ)」 を参照してくだ 自動補正を行います。「TPP0500B さい。 グランド・コネクタを使用して、帯電防止用リスト・ストラップを付けて、DUT を扱うまたは試験する際の静電気 損傷(ESD)の可能性を低減することも可能です。 USB ホスト・ポート: USB ポートは前面パネルの右下にあります。データ(機器のファームウェア更新、波形、設定、スクリーン・キ ャプチャなど)の保存やリコールが可能な USB フラッシュ・ドライブを接続するか、またはマウスやキーボード などの周辺機器を接続してください。 Aux Trig トリガ入力コネクタ: 外部トリガの入力信号を接続できる SMA コネクタ。AUX In トリガ信号はエッジ・トリガ・モードを指定して使用し ます。 Acq ステータス LED: 本機のトリガ/アクイジション・ステータスを示します: ■ 緑-トリガされている ■...
-
Page 65: 後部パネルの接続部
機器の詳細 後部パネルの接続部 後部パネルの接続部は、オシロスコープへの電源供給と、ネットワーク、USB デバイス、ビデオ、リファレンス信 号、AFG 出力の接続のために使用します。 電源コード・コネクタ:本製品用に指定され、使用される国で認定された電源コードのみを使用してください。 Ref In:高精度 10MHz リファレンス信号をオシロスコープに接続して測定の精度を確保します。 AUX Out:トリガ・イベントで信号トランジションを生成し、10MHz のリファレンス信号を出力、または AFG から同 期信号を出力します。 AFG Out:任意関数発生器(AFG)用の信号出力です。 ビデオ出力(ディスプレイ・ポート、VGA、DVI-D):外部のモニタまたはプロジェクタに接続してオシロスコープの 画面を表示します。 USB デバイス・ポート:USBTMC プロトコルを使用してオシロスコープを遠隔操作する場合に PC に接続しま す。 USB ホスト・ポート:USB メモリ・デバイス、キーボード、またはマウスを接続します。 LAN コネクタ(RJ-45):オシロスコープを 10/100/1000 Base-T ローカル・エリア・ネットワークに接続します。 セキュリティ・ロック・コネクタ:標準的な PC/ノートパソコン用ロック・ケーブルを使用して、オシロスコープを作 業台やその他の場所に固定します。 MSO58LP 型の設置と安全性に関するマニュアル... -
Page 66: グラフィカル・ユーザ・インタフェース
機器の詳細 グラフィカル・ユーザ・インタフェース MSO58LP 型はプログラム制御用に設計されていますが、製品のヘルプ・トピックを組み込んだグラフィカル・ユー ザ・インタフェースも備えています。モニタとマウスを機器に接続するか、ブラウザを使用してネットワーク接続され た機器にアクセスすることによってグラフィカル・インタフェースにアクセスできます。 最小解像度 1,920(水平)×1,080(垂直)ピクセル(高品位)のモニタ(標準またはタッチスクリーン)を後部パネルの ビデオ出力コネクタに接続します。 ブラウザからアクセスするには、機器の IP アドレスをブラウザのアドレス・フィールドに入力し、機器のブラウザの ® ようこそページを開きます。スクリーンの左側にある Instrument Control(機器制御)(e*Scope )リンクをクリックし、グ ラフィカル・インタフェースを開きます。 マウス(USB ケーブル)またはマウス・ドングル(ワイヤレス USB マウス用)を任意の USB ポートに接続します。 グラフィカル・ユーザ・インタフェースの概要と使用法について詳しくは、『5 Series MSO (MSO54, MSO56, MSO58) Installation and Safety Manual』(5 シリーズ MSO(MSO54 型、MSO56 型、MSO58 型)の設置と安全性に関するマニュア ル:当社部品番号 071-3514-xx)を参照してください。このマニュアルは www.tek.com/product-support からダウンロー ドできます。... -
Page 67: タイム・ゾーンとクロック・リードアウト・フォーマットの設定
本機の設定 タイム・ゾーンとクロック・リードアウト・フォーマットの設定 保存したファイルに正しい日時情報がマークされるように、お住いの地域にタイム・ゾーンを合わせます。また、タ イム・フォーマット(12 時間クロックまたは 24 時間クロック)も設定できます。 MSO58LP 型でユーザ・インタフェースにアクセスするには、本機後部のビデオ・ポートにモニタを接続し、任意の USB ホスト・ポートにマウスを接続します。リモート・モニタがタッチ操作に対応している場合、マウスを接続する必 要はありません。Web ブラウザに機器の IP アドレスを入力して、ネットワーク接続された機器のユーザ・インタフェ ースにリモート・アクセスすることもできます。 MSO58LP 型でこのコントロールをリモート設定するまたはこのタスクを実行するために使用する正しいコマンドに ついては、『 5 Series MSO MSO54, MSO56, MSO58, MSO58LP Programmer Manual』(5 シリーズ MSO MSO54 型、MSO56 型、MSO58 型、MSO58LP 型)のプログラマ・マニュアル(当社部品番号 077-1305-xx)を参照してください。 画面右下にある Date/Time(日時)バッジをダブルタップしてコンフィグレーション・メニューを開きます。 現地タイム・ゾーンとタイム・フォーマット(12 時間または 24 時間)を選択します。設定はすぐに反映されます。 画面上の日時を非表示にするには、Display(表示)ボタンをタップして... -
Page 68: 信号経路補正(Spc)の実行
本機の設定 USB ドライブ経由のオシロスコープ・ファームウェアの更新 前提条件:必ず、オシロスコープにインストールされているファームウェアの現在のバージョンを確認しておいてく ださい(Help(ヘルプ)> About(概要))。 PC で Web ブラウザを起動して、www.tek.com/product-support にアクセスします。 検索フィールドに MSO5 と入力し、ポップアップ・メニューからモデルを選択し、Go(実行)をクリックします。 スクリーンを下スクロールし、Software(ソフトウェア)タブをクリックします。 掲載されている入手可能なファームウェア・バージョンが、お使いのオシロスコープのものよりも新しい場合に は、そのファイルを選択して PC にダウンロードしてください。 ダウンロードしたファームウェアに付属するインストール方法の説明に従って、ファームウェア・インストール・ ファイルを作成します。 ファームウェア・インストール・ファイルを USB ドライブにコピーします。 USB ドライブをオシロスコープの USB ホスト・ポートに挿入します。オシロスコープが、ファームウェア・ファイル が保存されている USB ドライブを検出してインストール処理を開始します。 画面の指示に従ってファームウェアをインストールします。 注: ファームウェアのインストールが完了するまでは、オシロスコープの電源を切ったり、 USB フラッシュ・ドラ イブを取り外したりしないでください。オシロスコープの電源を切ってよい時期を知らせるメッセージがオシロ スコープに表示されます。 ファームウェアのインストールが完了したら、USB ドライブを取り外し、オシロスコープを再起動します。 ファームウェアが正しくインストールされたことを確認するには、メニュー・バーから... -
Page 69: Tpp0500B 型プローブまたは Tpp1000 型プローブの補正
本機の設定 Run SPC(SPC の実行)をタップします。SPC の実行中には、SPC Status(SPC ステータス)のリードアウトに Running(実行中)と表示されます。1 チャンネルあたりの SPC の実行には数分かかる場合があるため、SPC ステータスのメッセージが Pass(合格)に変わるまで待ってから、プローブを再接続してオシロスコープを使用 するようにしてください。 注意: Abort SPC ( SPC の中止)をタップすれば SPC 校正を中止できます。中止するとチャンネルは未補正の ままとなる可能性があり、その場合は測定の精度が下がるおそれがあります。 SPC を中止する場合には必 ず、本機を使用して測定を実施する前に SPC 手順を完全に実行してください。 SPC が完了したら Calibration(校正)コンフィグレーション・ダイアログを閉じます。 SPC に失敗した場合にはエラー・メッセージ・テキストを書き留めておいてください。プローブとケーブルがす べて取り外されていることを確認し、SPC をもう一度実行します。それでも SPC に失敗した場合には、当社カ スタマ・サポートに問い合わせてください。 TPP0500B 型プローブまたは TPP1000 型プローブの補正 高度な波形取り込みと高精度の測定を確保するために、プローブ補正によりプローブの高周波応答を調整しま... - Page 70 本機の設定 前提条件:プローブ補正を行う時には必ず、オシロスコープに電源を入れて少なくとも 20 分間待ってから補正を 開始してください。 サポートされているプローブを入力チャンネルに接続します。 プローブ・チップとそのプローブのグランド・リードを、オシロスコープの右下にある PROBE COMP(プローブ補 正)端子に接続します。 プローブ・チップを 1kHz ソースに接続し、グランド・クリップをグランドに接続します。最良の結果を得るため に、プローブ・チップのアクセサリをすべて取り外し、プローブ・チップを 1kHz コネクタに直接取り付けます。 注: PROBE COMP (プローブ補正)端子に同時に複数のプローブを接続することはできません。 すべてのチャンネルをオフにします。 プローブが接続されているチャンネルをオンにします。 メニュー・バーから File(ファイル) > Autoset(オートセット)を選択します。スクリーンに方形波が表示されま す。 補正するチャンネルのバッジをダブルタップします。 Probe Setup(プローブ・セットアップ)パネルをタップします。 Probe Compensation Status(プローブ補正ステータス)に Pass(合格)と表示されている場合、そのプローブはこ のチャンネルに対してすでに補正されています。このプローブを別のチャンネルに移動させてステップ 1 から もう一度始めるか、または別のプローブをこのチャンネルに接続してステップ 1 から始めることができます。 Probe Compensation Status(プローブ補正ステータス)に...
-
Page 71: ネットワークヘの接続(Lan
本機の設定 11. 上記ステップを繰り返して、サポートされているそれぞれの受動プローブをこのチャンネルに対して補正しま す。 12. 上記ステップを繰り返して、サポートされている受動プローブをこのオシロスコープのその他のチャンネルに 対して補正します。 注: 高精度の測定を実現するために、プローブをチャンネルに取り付けたときには、 Probe Setup (プローブ・セ ットアップ)パネルを開いて、 Probe Compensation Status (プローブ補正ステータス)に Pass (合格)と表示されて いるかを確認してください。 ネットワークヘの接続(LAN) ネットワークに接続すると、本機への遠隔アクセスが可能になります。 MSO58LP 型でユーザ・インタフェースにアクセスするには、本機後部のビデオ・ポートにモニタを接続し、任意の USB ホスト・ポートにマウスを接続します。リモート・モニタがタッチ操作に対応している場合、マウスを接続する必 要はありません。Web ブラウザに機器の IP アドレスを入力して、ネットワーク接続された機器のユーザ・インタフェ ースにリモート・アクセスすることもできます。 MSO58LP 型でこのコントロールをリモート設定するまたはこのタスクを実行するために使用する正しいコマンドに ついては、『 5 Series MSO MSO54, MSO56, MSO58, MSO58LP Programmer Manual』(5 シリーズ MSO MSO54 型、MSO56 型、MSO58 型、MSO58LP 型)のプログラマ・マニュアル(当社部品番号... -
Page 72: Web ブラウザからのリモート・アクセス
本機の設定 Web ブラウザからのリモート・アクセス Web ブラウザからネットワーク接続されたオシロスコープを遠隔操作することができます。Web ブラウザに IP アド レスを入力してオシロスコープ・スクリーンを表示し、マウスを使って、オシロスコープ上のスクリーン・ベースのコ ントロールと項目のすべてにアクセスできます。 前提条件: ■ オシロスコープは、その PC が接続されているネットワークに接続されており、そのネットワークからアクセス ネットワークヘの接続( LAN ) (15 ページ)を参照してください: できる状態でなければなりません。 ■ アクセスするオシロスコープの IP アドレス:オシロスコープの IP アドレスを確認するには、オシロスコープのメ ニュー・バーから Utility(ユーティリティ)> IO(入出力)を選択し、LAN パネルのネットワーク設定を確認しま す。 オシロスコープと同じネットワークに接続されている PC 上で Web ブラウザを開きます。 ブラウザの URL ラインにオシロスコープの IP アドレスを入力して Enter キーを押します。たとえば、 「135.62.88.157」のように入力します。... - Page 73 基本操作 グラフィカル・ユーザ・インタフェースを使用してトリガをオンにし、波形を取り込み、測定を行う方法について詳しく は、『5 Series MSO (MSO54, MSO56, MSO58) Installation and Safety Manual』(5 シリーズ MSO(MSO54 型、MSO56 型、 MSO58 型)の設置と安全性に関するマニュアル:当社部品番号 071-3514-xx)を参照してください。 機器を遠隔操作するために使用する正しいコマンドについては、『 5Series MSO MSO54, MSO56, MSO58, MSO58LP Programmer Manual』(5 シリーズ MSO(MSO54 型、MSO56 型、MSO58 型、MSO58LP 型)のプログラマ・マニュアル: 当社部品番号 077-1305-xx)を参照してください。 どちらのマニュアルも www.tek.com/product-support からダウンロードできます。 MSO58LP 型の設置と安全性に関するマニュアル...
- Page 74 基本操作 MSO58LP 型の設置と安全性に関するマニュアル...
-
Page 75: クリーニング
機器のクリーニング クリーニング 機器の外部の清掃には、乾いた柔らかい綿布を使用してください。化学洗浄剤は使用しないでください。ケース、 コントロール類、マーキングやラベルが損傷したり、ケースの中に染み込む恐れがあります。 MSO58LP 型の設置と安全性に関するマニュアル... - Page 76 機器のクリーニング MSO58LP 型の設置と安全性に関するマニュアル...
-
Page 77: Emc、安全、環境に関する適合性
EMC、安全、環境に関する適合性 適合性に関する情報 このセクションでは、本製品が適合している EMC 基準、安全基準、および環境基準について説明します。この製 品は専門家および訓練を受けた人のみが使用することを目的としています。家庭での使用や子供による使用に 対応して設計されていません。 以下の適合性に関するご質問は、以下の住所宛に、直接お問い合わせいただくこともできます: Tektronix, Inc. PO Box 500, MS 19-045 Beaverton, OR 97077, USA www.tek.com EMC 適合性 欧州 EMC 指令 指令 2014/30/EU 電磁環境両立性に適合します。『Official Journal of the European Communities』に記載の以下の基準 に準拠します。 1 2 3 4 EN 61326-1、EN 61326-2-1. 測定、制御、および実験用途の電子機器を対象とする EMC 基準:... -
Page 78: 安全性
EMC、安全、環境に関する適合性 EMC 適合性 仕様表の記載製品と共に使用した場合は、指令 2014/30/EU 電磁環境両立性に適合します。記載製品の公開 EMC 仕様を参照してください。その他の製品と共に使用した場合、指令に適合しない可能性があります。 オーストラリア/ニュージーランド適合宣言―EMC ACMA に従い、次の規格に準拠することで Radiocommunications Act の EMC 条項に適合しています。 ■ EN 61326-1 および EN 61326-2-1:グループ 1、クラス A、放射および伝導エミッション 安全性 このセクションでは、製品が適合している安全規格およびその他の基準について説明します。 EU 適合宣言 - 低電圧 『Official Journal of the European Union』にリストされている次の仕様に準拠します。 低電圧指令 2014/35/EU: ■ EN 61010-1: 測定、制御、および実験用途の電子装置に対する安全基準 – 第 1 部:一般要件。 ■... -
Page 79: 環境基準に対する適合性
EMC、安全、環境に関する適合性 汚染度について 製品内部およびその周辺で発生する可能性がある汚染度の尺度です。通常、製品の内部環境は外部環境と同 じ規定が適用されるものとみなされます。製品は、その製品に指定されている環境でのみ使用してください。 ■ 汚染度 1:汚染なし、または乾燥した非伝導性の汚染のみが発生します。このカテゴリの製品は、通常、被包 性、密封性のあるものか、クリーン・ルームでの使用を想定したものです。 ■ 汚染度 2:通常、乾燥した非導電性の汚染のみが発生します。ただし、結露によって一時的な導電性が発生 することもまれにあります。これは、標準的なオフィスや家庭内の環境に相当します。一時的な結露は製品非 動作時のみ発生します。 ■ 汚染度 3:伝導性のある汚染、または結露のために伝導性のある汚染となる乾燥した非伝導性の汚染。これ らは、温度、湿度のいずれも管理されていない屋内環境に相当します。日光や雨、風に対する直接の曝露か らは保護されている領域です。 ■ 汚染度 4:伝導性のある塵、雨、または雪により持続的に伝導性が生じている汚染。これは一般的な屋外環 境に相当します。 汚染度 汚染度 2(IEC 61010-1 の定義による)注:乾燥した屋内でのみ使用できます。 IP 定格 IP20(IEC 60529 で定義)。 測定および過電圧カテゴリについて 本製品の測定端子は、測定する電源電圧について次の 1 つまたは複数のカテゴリに評価されます(製品やマニ ュアルへの特定の評価を参照)。 ■ 測定カテゴリ II:低電圧インストレーションに直接接続された回路で実施する測定用。 ■... - Page 80 EMC、安全、環境に関する適合性 使用済み製品の処理方法 機器またはコンポーネントをリサイクルする際には、次のガイドラインを順守してください。 機器のリサイクル. 本製品の製造には天然資源が使用されています。この製品には、環境または人体に有害とな る可能性のある物質が含まれているため、製品を廃棄する際には適切に処理する必要があります。有害物質の 放出を防ぎ、天然資源の使用を減らすため、本製品の部材の再利用とリサイクルの徹底にご協力ください。 このマークは、本製品が WEEE(廃棄電気・電子機器)およびバッテリに関する指令 2012/19/EC およ び 2006/66/EC に基づき、EU の諸要件に準拠していることを示しています。リサイクル方法について は、当社の Web サイトのサービス・セクション(www.tek.com/productrecycling)を参照してください。 バッテリのリサイクル 本製品には小型のリチウム・メタル・ボタン電池が内蔵されています。使用済み電池の廃棄については、お住ま いの地域の所轄官庁にお尋ねください。 過塩素酸塩の取り扱い. 本製品には CR リチウム電池が搭載されています。CR リチウム電池はカリフォルニア州 法により過塩素酸塩材として規定され、特別な取り扱いが求められています。詳細については、www.dtsc.ca.gov/ hazardouswaste/perchlorate を参照してください。 バッテリの輸送 本機に含まれる小型リチウム一次ボタン電池のリチウム金属の含有量はセルあたり 1g を超えていません。ま た、メーカによりセルの種類が表記されており、UN Manual of Tests and Criteria Part III, Sub-section 38.3 の該当する要 件を満たしています。リチウム・バッテリの輸送に際しては、その輸送手段に関わらず、製品を発送する前に、再...
- Page 81 索引 い ACQ アクイジション・ステータス LED, 7 AFG Out(後部パネル), 9 イーサネット・ポート(後部パネル), 9 AUX Out(後部パネル), 9 イーサネット、接続, 15 Aux Trig トリガ入力, 7 く クロック・フォーマット(12/24 時間)、設定方法, 11 DVI ビデオ出力(後部パネル), 9 け ケーブル・ロック, 9 e*Scope, 16 す スタンダード・アクセサリ, 1 FlexChannel 入力, 7 せ LAN、接続, 15 セキュリティ・ケーブル・ロック, 9 LAN ステータス...
- Page 82 索引 ふ り ファームウェア、更新方法, 11, 12 プローブ、接続, 5 リモート・アクセス(e*Scope), 16 プローブの接続, 5 リモート・アクセス(Web ベース), 16 プローブ補正(TPP0500 型、TPP1000 型), 13 プローブ補正コネクタ, 7 ろ へ ロック・ケーブルの接続, 4 ベンチやラックへのロック, 4 MSO58LP 型の設置と安全性に関するマニュアル...
- Page 83 5 系列紧凑型 MSO MSO58LP 安装和安全手册 *P071356800* 071-3568-00...
- Page 85 5 系列紧凑型 MSO MSO58LP 安装和安全手册 支持产品固件 V1.4 及以上版本。 www.tek.com 071-3568-00...
- Page 86 © Copyright Tektronix.保留所有权利。许可软件产品由 Tektronix、其子公司或提供商所有,受国家版权法及国际条约规定 的保护。Tektronix 产品受美国和外国专利权(包括已取得的和正在申请的专利权)的保护。本文中的信息将取代所有 以前出版的资料中的信息。保留更改技术规格和价格的权利。 TEKTRONIX 和 TEK 是 Tektronix, Inc. 的注册商标。 TekSecure 是 Tektronix, Inc. 的商标。 FlexChannel、TekVPI、FastAcq 和 e*Scope 均是 Tektronix, Inc. 的注册商标。 泰克联系信息 Tektronix, Inc. 14150 SW Karl Braun Drive P.O. Box 500 Beaverton, OR 97077 USA(美国)...
- Page 87 保修 泰克保证,本产品自发货之日起三 (3) 年内不会出现材料和工艺缺陷。如果在保修期内证明任何此类产品有缺陷,泰 克将会选择对缺陷产品进行维修或更换,不收部件和人工费用,或者更换有缺陷的产品。泰克用作保修用途的部件、 模块和替代品可能是全新的,或者经修理具有相当于新产品的性能。所有更换的部件、模块和产品将成为泰克的财 产。 为获得本保修所承诺的服务,客户必须在保修期内向泰克通报缺陷,并为服务的履行做出适当安排。客户应负责包 装缺陷产品并托运到泰克指定的维修中心,同时预付运费。如果产品要运送到泰克维修中心所在国内的地点,泰克 应支付向客户送返产品的费用。如果产品送返到任何其他地点,客户应负责支付所有的运费、关税、税金及任何其 他费用。 本保修不适用于由于使用不当或者维护保养不当或不足所造成的任何缺陷、故障或损坏。泰克在此保修下无义务提 供以下服务:a) 修理由非泰克服务代表人员对产品进行安装、修理或维护所导致的损坏;b) 修理由于使用不当或与不 兼容的设备连接造成的损坏;c) 修理由于使用非泰克提供的电源而造成的任何损坏或故障;d) 维修已改动或者与其他 产品集成的产品(如果这种改动或集成会增加产品维修的时间或难度) 。 本保修由泰克针对本产品而订立,用于替代任何其他明示或暗示的保证。泰克及其供应商拒绝对适销性或用于特殊 目的适用性作出任何暗示的保证。对于违反本保修的情况,泰克负责修理或更换缺陷产品是提供给客户的唯一和全 部补救措施。无论泰克及其供应商是否被预先告知可能发生任何间接、特殊、偶然或必然的损坏,泰克及其供应商 对这些损坏概不负责。 [W4 – 15AUG04]...
- Page 89 目录 ..............................重要安全信息 ............................常规安全概要 ............................. 维修安全概要 ............................手册中的术语 ............................产品上的术语 ............................产品上的符号 ................................... 前言 ..............................主要特点 ..............................相关文档 安装仪器 ............................检查附带的附件 ..............................操作要求 ............................. 输入信号要求 ............................ 在机架中安装仪器 ......................确保示波器安全(将其锁定) ............................接通示波器电源 ........................确认示波器通过开机自检 ..............................连接探头 熟悉仪器 MSO58LP 前面板连接端口 .......................................................
- Page 90 目录 操作基础 清洁仪器 ................................清洁 EMC、安全和环境合规性 ............................... 合规性信息 EMC 合规性 ........................................................安全标准 ............................环境合规性 MSO58LP 安装和安全手册...
-
Page 91: 重要安全信息
如果存在危险带电导体暴露,请使用个人保护装备以防电击和电弧爆炸伤害。 使用本产品时,您可能需要使用一套大型系统的其他部件。有关操作这类系统的警告和注意事项,请阅读其 他器件手册的安全性部分。 将本设备集成到某系统时,该系统的安全性由系统的组装者负责。 避免火灾或人身伤害 使用合适的电源线: 只能使用本产品专用并经所在国家/地区认证的电源线。不要使用为其他产品提供的电 源线。 将产品接地: 本产品通过电源线的接地导线接地。为避免电击,必须将接地导线与大地相连。在对本产品的 输入端或输出端进行连接之前,请务必将本产品正确接地。不要切断电源线的接地连接。 断开电源: 电源线可以使产品断开电源。请参阅有关位置的说明。请勿将设备放在难以操作电源线的位置; 必须保证用户可以随时操作电源线,以便需要时快速断开连接。 正确连接并正确断开连接: 探头或测试导线连接到电压源时请勿插拔。仅使用产品附带的或 Tektronix 指明适 合产品使用的绝缘电压探头、测试导线和适配器。 遵守所有终端额定值: 为避免火灾或电击危险,请遵守产品上的所有额定值和标记说明。在连接产品之前, 请先查看产品手册,了解额定值的详细信息。请勿超过产品、探头或附件中各器件中额定值最低者的测量类 别 (CAT) 额定值和电压或电流额定值。在使用 1:1 测试导线时要小心,因为探头端部电压会直接传输到产品 上。 遵守所有终端额定值: 为避免火灾或电击危险,请遵守产品上的所有额定值和标记说明。在连接产品之前, 请先查看产品手册,了解额定值的详细信息。 对任何终端(包括公共终端)施加的电势不要超过该终端的最大额定值。 请勿将公共终端的电压浮动到该终端的额定电压以上。 本产品的测量端子额定值不适用于连接到市电或 II、III 或 IV 类型电路。 请勿开盖操作: 请勿在外盖或面板拆除或机壳打开的状态下操作本产品。可能有危险电压暴露。... - Page 92 重要安全信息 远离外露电路: 电源接通后请勿接触外露的接头和器件。 怀疑产品出现故障时,请勿进行操作: 如果怀疑本产品已损坏,请让合格的维修人员进行检查。 产品损坏时请勿使用。本产品损坏或运行错误时请勿使用。如果怀疑产品存在安全问题,请关闭产品并断开 电源线。在产品上做清晰标记以防其再被使用。 在使用之前,请检查电压探头、测试导线和附件是否有机械损坏,如损坏则予以更换。如果探头或测试导线 损坏、金属外露或出现磨损迹象,请勿使用。 在使用之前请先检查产品外表面。查看是否有裂纹或缺失部件。 仅使用规定的替换部件。 佩戴护目用具: 如果暴露在高强度光线中或存在激光辐射,请佩戴护目用具。 请勿在潮湿环境下操作: 请注意,如果某个单元从冷处移到暖处,则可能产生冷凝水。 请勿在易燃易爆的环境下操作: 请保持产品表面清洁干燥: 清洁本产品前,请移除输入信号。 请适当通风: 有关如何安装产品使其保持适当通风的详细信息,请参阅手册中的安装说明。 所提供的狭槽和开口用于通风,不得遮盖或阻挡。请勿将物体放进任何开口。 提供安全的工作环境: 始终将产品放在方便查看显示器和指示器的地方。 避免对键盘、指针和按钮盘使用不当或长时间使用。键盘或指针使用不当或长时间使用可能导致严重损伤。 请确保工作区符合适用的人体工程学标准。请咨询人体工程学专家,以避免应激损伤。 抬起或搬运产品时请小心谨慎。本产品带有便于抬起和搬运的手柄。 警告: 本产品较重。为了降低人身伤害或设备损坏的风险,在抬起或搬运产品时请寻求帮助。 仅限使用为本产品指定的泰克机架安装硬件。 探头和测试导线 连接探头或测试导线之前,请将电源线从电源连接器连接到正确接地的电源插座。 请将手指放在探头上保护屏障、手指防护装置或触觉指示器的后面。 拔掉所有不用的探头、测试导线和附件。 仅使用正确的测量类别 (CAT)、电压、温度、海拔高度和电流额定的探头、测试导线和适配器进行测量。 MSO58LP 安装和安全手册...
-
Page 93: 维修安全概要
重要安全信息 小心高电压: 了解您正在使用的探头的额定电压,请不要超出这些额定值。重要的是知道并理解两个额定 值: ■ 探头端部到探头参考导线的最大测量电压 ■ 探头参考导线到大地的最大浮动电压 这两个额定电压取决于探头和您的应用。请参阅手册的“技术规格”部分了解更多详情。 警告: 为防止电击,请不要超出示波器输入 BNC 连接器、探头端部或探头参考导线的最大测量电压或最大 浮动电压。 正确连接并正确断开连接: 将探头连接到被测电路之前,先将探头输出端连接到测量产品。在连接探头输入 端之前,请先将探头参考导线与被测电路连接。将探头与测量产品断开之前,请先将探头输入端及探头参考 导线与被测电路断开。 只能将探头参考导线连接到大地。 检查探头和附件: 在每次使用之前,请检查探头和附件是否损坏(探头本体、附件、电缆外壳等的割裂、破 损、缺陷) 。如果损坏,请勿使用。 使用以地为参考的示波器: 在使用以地为参考的示波器时,不要将此探头的参考引线浮地。参考引线必须连 接到大地电势 (0 V)。 浮动测量使用: 不要将此探头的参考引线浮动到额定浮动电压之上。 维修安全概要 维修安全概要 部分包含安全执行维修所需的其他信息。只有合格人员才能执行维修程序。在执行任何维修 维修安全概要 和 常规安全概要 。 程序之前,请阅读此 避免电击: 接通电源时,请勿触摸外露的连接。 请勿单独进行维修:... -
Page 94: 手册中的术语
重要安全信息 手册中的术语 本手册中可能出现这些术语: 警告: “警告”声明指出可能会造成人身伤害或危及生命安全的情况或操作。 注意: “注意”声明指出可能对本产品或其他财产造成损坏的情况或操作。 产品上的术语 产品上可能出现这些术语: DANGER(危险)表示您看到该标记时可直接导致人身伤害的危险。 ■ WARNING(警告)表示您看到该标记时不会直接导致人身伤害的危险。 ■ CAUTION(注意)表示可能会对本产品或其他财产带来的危险。 ■ 产品上的符号 产品上标示此符号时,请确保查阅手册,以了解潜在危险的类别以及避免这些危险需采取的措施。 (此符号还可能用于指引用户参阅手册中的额定值信息。 ) 产品上可能出现以下符号: MSO58LP 安装和安全手册... -
Page 95: 主要特点
需了解的信息 使用以下文档 系列 MSO MSO54 、 MSO56 、 MSO58 、 MSO58LP 帮助 (泰克部件编号 077-1303-xx; 如何使用仪器功能 仪器帮助的可印刷版本;可以从 www.tektronix.com/downloads 下载) 系列 MSO MSO58LP 安装和安全手册 (泰克部件编号 071-3568-xx) ;标配附件与仪 器。一份文档提供英文、日文和简体中文语言。俄语版本可以从泰克网站下载 (泰克部件编号 077-1404-xx) 系列 MSO MSO54 、 MSO56 、 MSO58 、 MSO58LP 程序员手册 (泰克部件编号 077-1305- 如何远程控制仪器... - Page 96 前言 需了解的信息 使用以下文档 系列 MSO MSO54 、 MSO56 、 MSO58 、 MSO58LP 技术规格和性能验证技术参考 (泰 仪器技术规格以及验证仪 器是否符合技术规格的流 克部件编号 077-1306-xx;可以从 www.tek.com/downloads 下载) 程 系列 MSO MSO58LP 维修手册 (泰克部件编号 077-1405-xx;可以从 www.tek.com/ 仪器工作原理、故障排除、 拆卸和可更换部件 downloads 下载) ® 使用 TLP058 逻辑探头 TLP058 FlexChannel 逻辑探头说明 (泰克部件编号 071-3515-xx;可以从 www.tek.com/ downloads 下载)...
-
Page 97: 检查附带的附件
安装仪器 检查附带的附件 确保您已收到所有订购物品。如果有任何缺失,请联系泰克客户支持。在北美地区,请拨打 1-800-833-9200。 其他地区用户请访问 www.tek.com 查找当地的联系信息。 请核对仪器随附的包装清单,以确认是否收到所有标配附件和订购物品。如果您购买了出厂安装的选件(如 串行总线和触发选件或 5-PWR 功率测量选件) ,请点击 Help(帮助)> About(关于)以确认选件已在 Installed Options(已安装选件)表中列出。 MSO58LP 标配附件 项目 数量 泰克部件编号 071-3568-xx 系列 MSO MSO58LP 安装和安全手册 电源线 取决于区域 校准证书 不适用 出厂安装许可的报告 不适用 操作要求 请根据操作温度、电源、海拔高度和信号输入电压范围要求使用示波器,以提供最准确的测量并确保仪器操 作安全。 环境要求 特性 说明 0℃ 至 +50℃(+32℉ 至 +122℉) 工作温度... -
Page 98: 输入信号要求
安装仪器 电源要求 特性 说明 100 V - 240 V 电源电压 ,±10%,单相 AC RMS 50/60 Hz,100-240 V (90-264 V) 电源频率 400 Hz,115 V (103-127 V) 所有型号:最高 400 W 功耗 输入信号要求 将输入信号控制在允许的限制范围内,以确保最精确的测量并防止损坏模拟或数字探头或仪器。 确保输入信号满足以下要求。 输入 说明 模拟输入通道,1 M Ω 设置,BNC 提供最大输入电压 300 V 测量类别... - Page 99 安装仪器 警告: 为了防止受伤,需要两人安装仪器。 使用附带五金件中的两颗螺栓和垫片将一个后机架托架装在机架后部。用手拧紧。 由两人扶住仪器,从机架前部插入仪器,使底盘机架托架插入后机架托架中。 继续从前部推入,直至仪器与机架的前部齐平。 使用附带五金件中的四颗螺栓和垫片将仪器前部装在机架后部。用手拧紧以支撑仪器。 从机架后部,将第二个后机架托架滑到仪器底盘机架托架上,直至后机架托架与后机架齐平。 使用附带五金件中的两颗螺栓和垫片将第二个后机架托架装在机架后部。用手拧紧。 将所有螺栓拧至 1.1 N·m。 使用 5/16 英寸扳手将附带的两颗六角螺栓装在每侧的后机架上,以便锁紧机架并防止在拆下前机架螺钉 后无意拆下仪器(见下图) 。每侧共有四个螺栓位置(如图所示) 。将托架锁紧螺栓拧至 0.7 N·m。 根据需要,将电源线和电缆连接后底盘。 机架安装说明结束。 MSO58LP 安装和安全手册...
-
Page 100: 确保示波器安全(将其锁定
安装仪器 确保示波器安全(将其锁定) 将示波器锁定到测试工作台或设备机架以防止造成财产损失。 将标准笔记本电脑安全锁定到示波器后面板,以便将示波器固定到工作台机架或其他位置。 接通示波器电源 使用此步骤将示波器连接到市电电源,然后打开和关闭示波器。请始终使用仪器附带的电源线将示波器连接 到交流电源。 前提条件:使用示波器附带的交流电源线。 将附带的电源线连接到示波器电源连接器。 图 1: MSO58LP 电源线连接器和电源待机开关 将电源线连接到合适的市电电源。 每当将交流电源线连接到市电供电电路并将仪器置于待机模式时,将会为电源和其他一些电路板供电。 按下前面板电源按钮来打开和关闭仪器电源。 电源按钮颜色指示仪器电源状态: 不亮 – 未提供交流电源 黄色– 待机模式 蓝色 – 已通电 要从仪器上完全断开电源,请断开电源线。 MSO58LP 安装和安全手册... -
Page 101: 确认示波器通过开机自检
安装仪器 确认示波器通过开机自检 开机自检将确认所有示波器模块在开机后是否正常工作。 前提条件:将显示器连接到后面板的视频输出端口并将鼠标连接 USB 端口。 接通示波器电源并等到出现示波器屏幕。 从顶部 Menu(菜单)栏中选择 Utility(辅助功能)> Self Test(自检)来打开 Self Test(自检)配置菜单。 确认开机自检的状态为 Passed(通过) 。 如果一次或多次开机自检均显示 Failed(失败) : 重新接通示波器电源。 点击 Utility(辅助功能)> Self Test(自检) 。如果一次或多次开机自检仍显示 Failed(失败) ,请联系 泰克客户支持。 连接探头 探头和电缆将示波器连接到您的被测设备 (DUT)。使用能够最好匹配您的信号测量要求的探头。 图 2: 将探头连接 MSO58LP ® ® ® 将 TPP0500、TPP1000、TekVPI+ 或其他支持的泰克模拟探头推入... - Page 102 安装仪器 ® 要连接 TLP058 FlexChannel 逻辑探头,请执行以下操作: 将锁定杆移动到未锁定位置,然后释放以将锁定杆重置到中心位置。 ® 将探头插入 FlexChannel 连接器,直到完全到位并听到锁定机制发出“咔”的声音。 将锁定杆移动到锁定位置。状态灯应呈恒绿色。 要断开 TLP058 探头,请将锁定杆移动到未锁定位置并按住,然后拉出探头。取下探头时不要拉扯排线。 将 BNC 探头或电缆推入通道 BNC 卡口连接器将其连接,然后顺时针旋转锁定机制直至锁定。 注意: 连接探头时不会自动启用该通道。 MSO58LP 安装和安全手册...
-
Page 103: Mso58Lp 前面板连接端口
熟悉仪器 MSO58LP 前面板连接端口 前面板连接端口包括接通或断开仪器电源、向探头或电缆传送信号、连接外部触发输出信号、插入 USB 设备 和访问探头补偿信号的端口。 ® FlexChannel 探头连接器: ® ® FlexChannel 连接器支持所有 TekVPI+ 和 TekVPI 测量探头、BNC 无源探头、TLP058 FlexChannel 逻辑探头和 BNC 电缆。连接大多数探头时,只需将其推入连接器直到完全到位并听到“咔”的声音。请参阅 连接探 头 第 5 页 LAN 状态 LED: 显示网络连接和活动状态: 不亮 - 仪器未通电 ■ 绿色 - 网络连接正常 ■ 红色... - Page 104 熟悉仪器 探头补偿连接器: 探头补偿连接提供了一个接地连接器和 1kHz 方形波源,可用于调节无源探头的高频率响应(探头补偿) 。 补偿 TPP0500B 或 TPP1000 探头 示波器使用该信号自动补偿支持的探头。请参阅 第13 页。 您也可以使用接地连接器连接防静电手环,在搬运或探测 DUT 时,减少静电损坏 (ESD) 的机会。 USB 主控端口: USB 端口位于前面板右下角上。连接可保存或调出数据(如仪器固件更新、波形、设置和屏幕捕获)的 U 盘,或连接鼠标或键盘等外围设备。 Aux Trig 触发输入连接器: 用于连接外部触发输入信号的 SMA 连接器。配合使用 AUX In 触发信号与边沿触发模式。 采集状态 LED: 显示仪器触发/采集状态: 绿色 - 触发 ■...
-
Page 105: 后面板连接
熟悉仪器 后面板连接 后面板连接可为示波器供电并提供网络、USB 设备、视频、参考信号和 AFG 输出的连接器。 电源线连接器。只能使用本产品专用并经所在国家/地区认证的电源线。 Ref In 用于将高精度 10MHz 参考信号连接到示波器,以提高测量准确度。 AUX Out 可对触发事件生成跳变,输出 10 MHz 参考信号或从 AFG 输出同步信号。 AFG Out 是任意函数发生器 (AFG) 的信号输出。 视频输出(显示端口、VGA 和 DVI-D)用于连接外部监视器或投影仪来显示示波器屏幕。 USB 设备端口用于连接到一台 PC,以使用 USBTMC 协议远程控制示波器。 USB 主控端口用于连接 USB 内存设备、键盘或鼠标。 LAN 连接器 (RJ-45) 将示波器连接到 10/100/1000 Base-T 局域网。 安全锁连接器用于使用标准... - Page 106 熟悉仪器 MSO58LP 安装和安全手册...
-
Page 107: 设置时区和时钟读数格式
配置仪器 设置时区和时钟读数格式 将时区设置为您所在区域,以便为已保存的文件标记正确的日期和时间信息。您还可以设置时间格式(12 或 24 小时制) 。 要在 MSO58LP 上访问用户界面,请将显示器连接仪器后部的视频端口并将鼠标连接任一 USB 主控端口。如 果远程显示器支持触摸操作, 则无需连接鼠标。您也可以在 web 浏览器中输入仪器的 IP 地址来远程访问联网 仪器的用户界面。 要远程设置此控件或在 MSO58LP 上执行此任务,请参阅 5 系列 MSO MSO54 、 MSO56 、 MSO58 、 MSO58LP 程序 员手册 (泰克部件编号为 077-1305-xx)了解需使用的正确命令。 双击日期/时间标记(屏幕右下方) ,打开配置菜单。 选择当地时区和时间格式(12/24 小时制) 。设置将立即生效。 要关闭在屏幕上显示日期和时间,请将... -
Page 108: 运行信号路径补偿 (Spc)
配置仪器 从 U 盘更新示波器固件 前提条件:确定示波器上已安装的当前固件版本(Help(帮助)> About(关于) ) 打开 PC 中的 Web 浏览器访问 www.tek.com/product-support。 在搜索字段中输入 MSO5,从弹出菜单中选择模式,然后,单击 Go(前往) 。 向下滚动屏幕并单击 Software(软件)选项卡。 如果列出的可用固件版本高于示波器中的版本,请选择并下载该文件到您的 PC。 请按照下载固件随附的安装说明创建固件安装文件。 将固件安装文件复制到 U 盘。 将 U 盘插入任何示波器 USB 主控端口。示波器将检测到含固件文件的 U 盘并开始安装过程。 按照屏幕说明安装固件。 注意: 在示波器完成固件安装之前,请勿关闭示波器电源或移除 U 盘。示波器将在可以关闭示波器时显 示一条消息。 完成固件安装后,请移除 U 盘并重启示波器。 要确认固件安装,请执行以下操作:... -
Page 109: 补偿 Tpp0500B 或 Tpp1000 探头
配置仪器 请在完成 SPC 时关闭校准配置对话框。 如果 SPC 失败,请记下所有错误消息文本内容。确认已断开所有探头和电缆,然后重新运行 SPC。如果 SPC 仍然失败,请联系泰克客户支持。 补偿 TPP0500B 或 TPP1000 探头 探头补偿将调整探头的高频率响应, 以获得最佳波形捕获和测量精度。示波器可为无限数量的探头/通道组合 自动测试和存储补偿值。 要在 MSO58LP 上访问用户界面,请将显示器连接仪器后部的视频端口并将鼠标连接任一 USB 主控端口。如 果远程显示器支持触摸操作, 则无需连接鼠标。您也可以在 web 浏览器中输入仪器的 IP 地址来远程访问联网 仪器的用户界面。 要远程设置此控件或在 MSO58LP 上执行此任务,请参阅 5 系列 MSO MSO54 、 MSO56 、 MSO58 、 MSO58LP 程序 员手册... -
Page 110: 连接到网络 (Lan)
配置仪器 将探头端部连接 1kHz 信号源并将接地夹接地。为获得最佳效果, 请取下所有探头端部附件并将探头端部 直接连接 1kHz 连接器。 注意: 每次仅将一个探头连接到探头补偿终端上。 关闭所有通道。 打开与探头连接的通道。 从菜单栏中选择 File(文件)> Autoset(自动设置) 。屏幕显示一个方波。 双击要补偿的通道的标记。 点击 Probe Setup(探头设置)面板。 如果 Probe Compensation Status(探头补偿状态)显示 Pass(通过) ,则探头已补偿该通道。您可以将探头 移动到另一个通道并从第 1 步重新开始操作,或者将不同的探头连接到该通道并从第 1 步开始操作。 如果 Probe Compensation Status(探头补偿状态)显示 Default(默认) ,请继续该步骤。 点击 Compensate Probe(补偿探头)打开 Probe Compensation(探头补偿)对话框。 点击... -
Page 111: 从 Web 浏览器远程访问
配置仪器 获取或输入网络地址信息: 如果您的网络已启用 DHCP,请点击 Auto(自动)获取网络 IP 地址。DHCP 模式为默认模式。 ■ 如果您的网络未启用 DHCP 或者您需要为该仪器设置永久(不变)的 IP 地址,请点击 Manual(手动) ■ 并输入您的 IT 或系统管理员提供的 IP 地址及其他值。 点击 Test Connection(测试连接)以验证该网络连接正常工作。仪器成功连接网络后,LAN 状态图标将变 为绿色。如果在连接网络时遇到问题,请联系您的系统管理员以获取帮助。 前面板 LAN 状态 LED 颜色: 不亮 - 仪器未通电 ■ 绿色 - 网络连接正常 ■ 红色 - 网络连接出现故障或未连接 ■... - Page 112 配置仪器 MSO58LP 安装和安全手册...
- Page 113 操作基础 有关理解和使用图形用户界面来触发和获取波形并进行测量的详情,请参阅 5 系列 MSO ( MSO54 、 MSO56 、 MSO58 )安装和安全手册 (泰克部件编号 071-3514-xx) 。 有关正确操作仪器所用的正确命令,请参阅 5 系列 MSO MSO54 、 MSO56 、 MSO58 、 MSO58LP 程序员手册 (泰 克部件编号为 077-1305-xx) 。 这两本手册均可从 www.tek.com/product-support 下载。 MSO58LP 安装和安全手册...
- Page 114 操作基础 MSO58LP 安装和安全手册...
- Page 115 清洁仪器 清洁 使用柔软的干棉布清洁设备外部。请勿使用任何可能损坏、外壳、控件、标记或标签或者可能渗入外壳的液 体清洁剂或化学品。 MSO58LP 安装和安全手册...
- Page 116 清洁仪器 MSO58LP 安装和安全手册...
-
Page 117: Emc、安全和环境合规性
EMC、安全和环境合规性 合规性信息 此部分列出仪器遵循的 EMC (电磁兼容性) 、 安全和环境标准。本产品仅供专业人员和受过培训的人员使用; 不得在家中或供儿童使用。 如果对以下合规性信息的存在疑问,可以联系以下地址: Tektronix, Inc. PO Box 500, MS 19-045 Beaverton, OR 97077, USA(美国) www.tek.com EMC 合规性 EU EMC 指令 符合 Directive 2014/30/EU 有关电磁兼容性的要求。已证明符合《欧洲共同体公报》中所列的以下技术规格: 1 2 3 4 EN 61326-1、EN 61326-2-1. 测量、控制和实验室用电气设备的 EMC 要求。... -
Page 118: 安全标准
EMC、安全和环境合规性 EMC 合规性 随“技术规格”表中指明的产品使用时,符合 2014/30/EU 指令中有关电磁兼容性的要求。请参阅针对指出的 产品发布的 EMC 技术规格。随其他产品使用时,可能不符合该指令的要求。 澳大利亚/新西兰一致性声明 – EMC 根据 ACMA,符合《无线电通信法》有关 EMC 规定的以下标准: EN 61326-1 和 EN 61326-2-1。放射和传导辐射量,组 1,A 类。 ■ 安全标准 本部分列出了产品遵循的安全标准及其他安全合规性信息。 欧盟一致性声明 - 低电压 经证明符合《欧盟官方公报》中所列的以下技术规格: 低电压指令 2014/35/EU。 EN 61010-1。 测量、控制和实验室用电气设备安全要求 – 第 1 部分:总体要求。 ■ EN 61010-2-030。... -
Page 119: 环境合规性
EMC、安全和环境合规性 污染度说明 对产品周围和产品内部环境中可能出现的污染的一种量度。通常认为产品的内部环境与外部环境相同。产 品只应该在其规定环境中使用。 污染度 1。无污染或仅发生干燥、非导电性污染。此类别产品通常予以封装、密封或被置于干净的房间 ■ 中。 污染度 2。通常只发生干燥、非导电性污染。偶尔会发生由凝结引起的临时传导。典型的办公室/家庭环 ■ 境属于这种情况。只有当产品处于非使用状态时,才会发生临时凝结。 污染度 3。导电性污染,或干燥、非导电性污染,由于凝结后者会变成导电性污染。此类场所为温度和 ■ 湿度不受控制的建有遮盖设施的场所。此类区域不受阳光、雨水或自然风的直接侵害。 污染度 4。通过传导性的尘埃、雨水或雪产生永久性可导性的污染。户外场所通常属于这种情况。 ■ 污染度评级 污染度 2(如 IEC 61010-1 中定义) 。注:仅适合在室内的干燥场所使用。 IP 额定值 IP20(如 IEC 60529 中定义) 。 测量和过压类别说明 本产品上的测量端子可能适合测量以下一种或多种类别的市电电压(请参阅产品和手册中标示的具体额定 值) 。 测量类别 II。用于在与低电压安装直接相连的电路上执行的测量。 ■ 测量类别... - Page 120 EMC、安全和环境合规性 此符号表示该产品符合欧盟有关废旧电子和电气设备 (WEEE) 以及电池的 2012/19/EU 和 2006/66/ EC 号指令所规定的相关要求。有关回收选项的信息,请登录泰克网站 (www.tek.com/ productrecycling) 查看。 电池回收 本产品装有小型锂金属纽扣电池。如果电量用尽,请根据当地政府法规正确处理或回收此电池。 高氯酸盐材料. 此产品包含一个或多个 CR 型锂电池。按照加州规定,CR 锂电池被归类为高氯酸盐材料,需 要特殊处理。详情参阅 www.dtsc.ca.gov/hazardouswaste/perchlorate。 运输电池 本设备的小型纽扣锂原电池的锂金属含量不超过 1 g/电池,制造商已经表示此类电池满足联合国《试验和标 准手册》第 3 部分第 38.3 节中的适用要求。在采用任一运输方式重新运输产品前,请咨询承运公司确定哪些 锂电池运输要求适用于您的配置,包括重新包装和重新贴标 MSO58LP 安装和安全手册...
- Page 121 索引 ACQ 采集状态 LED, 7 后面板 AFG Out, 9 AFG OUT(后面板), 9 AUX Out, 9 AUX OUT(后面板), 9 DVI 视频输出, 9 Aux Trig 触发输入, 7 LAN 端口 (RJ-45), 9 安全电缆锁, 9 USB 设备端口, 9 USB 主控端口, 9 VGA 视频输出, 9 标配附件, 1 安全电缆锁, 9 补偿...
- Page 122 索引 连接网络, 14 设置时区, 11 设置时钟格式(12/24 小时制), 11 网络,连接到, 14 下载和安装固件, 11, 12 远程访问示波器(从 Web), 15 运行信号路径补偿 (SPC), 12 显示端口视频输出(后面板), 9 信号输入电平, 2 SPC(信号路径补偿), 12 设置 时区, 11 时钟格式(12/24 小时制), 11 要求 电源, 1, 2 时区,如何设置, 11 海拔高度, 1, 2 时钟格式(12/24 小时制)...
Need help?
Do you have a question about the MSO 5 Series and is the answer not in the manual?
Questions and answers