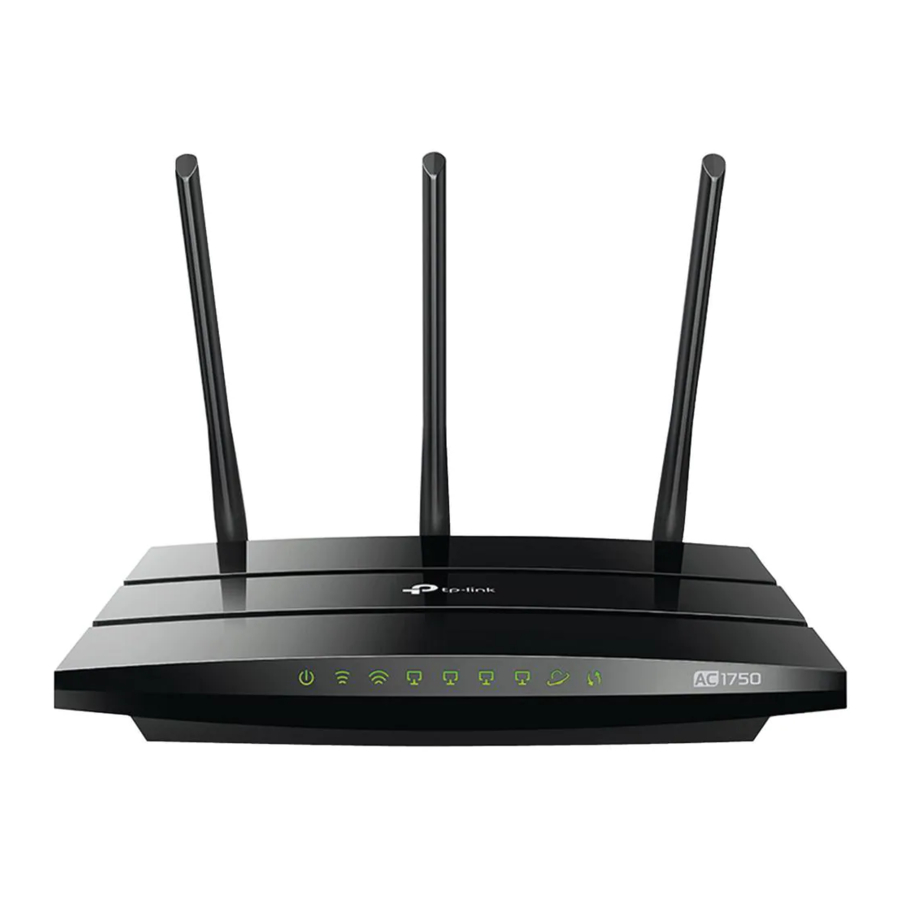
The Quick Installation Guide can be found where you find this guide or inside the package of the router. Specifications can be found on the product page at https://www.tp-link.com. A community is provided for you to discuss our products at https://community.tp-link.com.
Page 6
Speed/Coverage Disclaimer *Maximum wireless signal rates are the physical rates derived from IEEE Standard 802.11 specifications. Actual wireless data throughput and wireless coverage are not guaranteed and will vary as a result of 1) environmental factors, including building materials, physical objects, and obstacles, 2) network conditions, including local interference, volume and density of traffic, product location, network complexity, and network overhead, and 3) client limitations, including rated performance, location, connection, quality, and client condition.
Chapter Get to Know About Your Router This chapter introduces what the router can do and shows its appearance. It contains the following sections: • Product Overview • Appearance...
Ethernet ports supply high-speed connection to your wired devices. Moreover, it is simple and convenient to set up and use the TP-Link router due to its intuitive web interface and the powerful Tether app.
Chapter 1 Get to Know About Your Router Name Status Indication The 2.4GHz wireless band is enabled. (2.4GHz Wireless) The 2.4GHz wireless band is disabled. The 5GHz wireless band is enabled. (5GHz Wireless) The 5GHz wireless band is disabled. Green On Internet service is available.
Page 10
Chapter 1 Get to Know About Your Router The router’s ports (view from left to right) are located on the rear panel. Item Description Power Port For connecting the router to a power socket via the provided power adapter. Power On/Off Button Press this button to power on or off the router.
Chapter 2 Connect the Hardware Position Your Router • The product should not be located in a place where it will be exposed to moisture or excessive heat. • Place the router in a location where it can be connected to multiple devices as well as to a power source.
Page 13
Chapter 2 Connect the Hardware 5. Verify that the following LEDs are on and solid to confirm the hardware is connected correctly. Power 2.4G Internet Note: If the 2.4G LED and 5G LED are off, press and hold the WPS/Wi-Fi button on the back for more than 2 seconds. Both the LEDs should turn solid on.
Page 14
Chapter 2 Connect the Hardware 1 ) Tab the WPS icon on the device’s screen. Here we take an Android phone for instance. 2 ) Within two minutes, press the Reset/WPS button on your router. close to...
Page 16
• If the login window does not appear, please refer to the Section. • If you have registered a TP-Link ID and bound your cloud router to it, the login password you created here will be invalid. Please log in to the cloud router using your TP-Link ID.
Chapter Set Up Internet Connection This chapter introduces how to connect your router to the internet. The router is equipped with a web-based Quick Setup wizard. It has necessary ISP information built in, automates many of the steps and verifies that those steps have been successfully completed.
ISP. Follow the steps below to check or modify your internet connection settings. 1. Visit http://tplinkwifi.net, and log in with your TP-Link ID or the password you set for the router.
Page 19
Chapter 4 Set Up Internet Connection Note: If you are unsure of what your connection type is, click Auto Detect. Since different connection types require different cables and connection information, you can also refer to the demonstrations in Step 4 to determine your connection type.
Page 20
Chapter 4 Set Up Internet Connection 3 ) If you choose PPPoE, enter the username password provided by your ISP. PPPoE users usually have DSL cable modems. 4 ) If you choose L2TP, enter the username password and choose the Secondary Connection provided by your ISP.
Page 21
Chapter 4 Set Up Internet Connection 5 ) If you choose PPTP, enter the username and password, and choose the Secondary Connection provided by your ISP. Different parameters are needed according to the Secondary Connection you have chosen. 5. Click Save. 6.
Your ISP provides information about one of the following IPv6 internet connection types: PPPoE, Dynamic IP(SLAAC/DHCPv6), Static IP, 6to4 tunnel, Pass-Through (Bridge). 1. Visit http://tplinkwifi.net, and log in with your TP-Link ID or the password you set for the router.
Page 23
Chapter 4 Set Up Internet Connection Dynamic IP(SLAAC/DHCPv6): Click Advanced to input further information if your ISP requires. Click Save and then click Renew. PPPoE: By default, the router uses the IPv4 account to connect to the IPv6 server. Click Advanced to input further information if your ISP requires.
Page 24
Chapter 4 Set Up Internet Connection 6to4 Tunnel: An IPv4 internet connection type is a prerequisite for this connection type (Manually Set up Your Internet Connection). Click Advanced input further information if your ISP requires. Click Save and then click Connect. Pass-Through (Bridge): Click Save...
Chapter 4 Set Up Internet Connection 5. Configure LAN ports. Windows users are recommended to choose from the first two types. Fill in Address Prefix provided by your ISP, and click Save. Tips: Find Help on the management interface to know more about items. 6.
Page 26
Chapter 4 Set Up Internet Connection 2. Visit http://tplinkwifi.net, and log in with your TP-Link ID or the password you set for the router. 3. Go to Advanced > Operation Mode, select Access Point and click Save. Log in to the router via http://tplinkwifi.net...
TP-Link Cloud service provides a better way to manage your cloud devices. Log in to your router with a TP-Link ID, and you can easily monitor and manage your home network when you are out and about via the Tether app. To ensure that your router stays new and gets better over time, the TP-Link Cloud will notify you when an important firmware upgrade is avaliable.
Manage the User TP-Link IDs. • Once the router is bound to your TP-Link ID, you need to log in to the router with the TP-Link ID. • You can register another TP-Link ID via the Tether APP. Please refer to...
The first-time login TP-Link ID will be bound automatically to your router as an Admin account. An admin account can add or remove other TP-Link IDs to the same router as Users. The admin account and User accounts both can monitor and manage the router locally or remotely, but user accounts cannot: •...
Manage the Router via the TP-Link Tether App to install the app and register a new one. 4. The new TP-Link ID will be displayed in the Bound Accounts table as a User. 5 3 2 Remove TP-Link ID(s) from Managing the Router 1.
QR code to download and install the app. 2. Connect your device to the router’s wireless network. 3. Launch the Tether app, select the model of your router and log in with your TP-Link ID or the password you set for the router.
Chapter Work with Alexa This chapter will show you how to configure your router to work with Alexa.
Page 33
LED or ask Alexa to read out the password of the guest network, all without stopping what you’re doing. 1. Visit http://tplinkwifi.net, and log in with your TP-Link ID or the password you set for the router. 2. Go to Advanced >...
Chapter OneMesh with Seamless Roaming This chapter introduces the TP-Link OneMesh feature. It contains the following sections: • Set Up a OneMesh Network • Manage Devices in the OneMesh Network...
Unified OneMesh Network SAME Network Name & Password for seamless roaming Set Up a OneMesh Network 1. Visit http://tplinkwifi.net, and log in with your TP-Link ID or the password you set for the router. 2. Go to Basic > OneMesh Advanced >...
3. Connect one or more OneMesh extenders to this router by following the setup instructions in the extenders’ manuals. Note: To check full list of TP-Link OneMesh devices, visit https://www.tp-link.com/onemesh/compatibility. 4. If you have set up an extender to join the OneMesh network, it will be listed in the Devices in OneMesh Network list.
Page 37
Chapter 7 OneMesh with Seamless Roaming • To view all mesh devices and clients in the OneMesh network: 1. Visit http://tplinkwifi.net, and log in with your TP-Link ID or the password you set for the router. 2. Go to Basic >...
Page 38
Chapter 7 OneMesh with Seamless Roaming 3. Click a OneMesh device to view the device information, or click <number> Clients view the clients connected to this device. On the Device Info page, you can: • Click Manage Device to redirect to the web mangement page of this OneMesh device.
Chapter Guest Network This function allows you to provide Wi-Fi access for guests without disclosing your main network. When you have guests in your house, apartment, or workplace, you can create a guest network for them. In addition, you can customize guest network options to ensure network security and privacy.
Chapter 8 Guest Network Create a Network for Guests 1. Visit http://tplinkwifi.net, and log in with your TP-Link ID or the password you set for the router. 2. Go to Advanced > Guest Network. Locate the Wireless section. 3. Create a guest network as needed.
Page 41
Chapter 8 Guest Network • Allow guests to see each other Tick this checkbox if you want to allow the wireless clients on your guest network to communicate with each other via methods such as network neighbors and Ping. • Allow guests to access my local network Tick this checkbox if you want to allow the wireless clients on your guest network to communicate with the devices connected to your router’s LAN ports or main...
Chapter USB Settings This chapter describes how to use the USB port to share files and media from the USB storage devices over your home network locally, or remotely through the internet. The router supports USB external flash drives and hard drives. It contains the following sections: •...
Chapter 9 USB Settings Access the USB Storage Device Insert your USB storage device into the router’s USB port and then access files stored there locally or remotely. Tips: • If you use USB hubs, make sure no more than 4 devices are connected to the router. •...
Chapter 9 USB Settings • Method 2: Open the Windows Explorer (or go to Computer) and type the server address \\tplinkwifi.net ftp://tplinkwifi.net in the address bar, then press Enter. Windows computer 1 ) Select > Connect to Server. 2 ) Type the server address smb://tplinkwifi.net. 3 ) Click Connect.
Page 45
If your ISP assigns a private WAN IP address (such as 192.168.x.x or 10.x.x.x), you cannot use this feature because private addresses are not routed on the Internet. Follow the steps below to configure remote access settings. Visit http://tplinkwifi.net, and log in with your TP-Link ID or the password you set for the router. Go to Advanced >...
Visit http://tplinkwifi.net, and log in with your TP-Link ID or the password you set for the router.
Page 47
Chapter 9 USB Settings Now you can access the USB disk by visiting \\MyShare (for Windows) or smb:// MyShare (for Mac). • To Only Share Specific Content Focus on the Folder Sharing section. Click the button to disable Share All, then click to add a new sharing folder.
Page 48
Chapter 9 USB Settings • Enable Authentication: Tick to enable authentication for this folder sharing, and you will be required to log in to the Sharing Account to access the USB disk. Refer to To Set up Authentication for Data Security to learn more.
Page 49
Chapter 9 USB Settings Note: For Windows users, do not set the sharing username the same as the Windows username. Otherwise, Windows credential mechanism may cause the following problems: • If the sharing password is also the same as the Windows password, authentication will not work since the Windows will automatically use its account information for USB access.
Chapter 9 USB Settings Media Sharing The feature of Media Sharing allows you to view photos, play music and watch movies stored on the USB disk directly from DLNA-supported devices, such as your computer, tablet and PS2/3/4. When your USB disk is inseted into the router, your DLNA-supoorted devices (such as your computer and pad) connected to the router can detect and play the media files on the USB disks.
• Before you physically disconnect a USB device from the router, safely remove it to avoid data damage: Go to Advanced > USB Settings > Device Settings and click Visit http://tplinkwifi.net, and log in with your TP-Link ID or the password you set for the router. Go to Advanced > USB Settings >...
Page 52
Chapter 9 USB Settings • Maximum Number of Active Downloads: Enter a value between 1 and 10 to set the maximum number of active downloads. Click Add, then select the source of your download. If it is a torrent file, select its location;...
Chapter Parental Controls This function allows you to set up unique restrictions on internet access for each member of your family. You can block inappropriate content, set daily limits for the total time spent online and restrict internet access to certain times of the day. It contains the following sections: •...
2 hours every day and block internet access during bed time (10 PM to 7 AM) on school nights (Sunday to Thursday). How can I do that? 1 Visit http://tplinkwifi.net, and log in with your TP-Link ID or the password you set for the router. 2 Go to Basic >...
Page 55
Chapter 10 Parental Controls 5 ) Add one or more keywords. All websites containing the keywords will be blocked. 6 ) Click Next. 6 Set time restrictions on internet access.
Check which websites my child has visited and how much time they have spent online recently. How can I do that? 1 Visit http://tplinkwifi.net, and log in with your TP-Link ID or the password you set for the router. 2 Go to Basic >...
Page 57
Chapter 10 Parental Controls 5 Use the drop-down menu behind Today to view the websites visited and time spent online for any of the last 7 days. Click to view a complete history. Click to block the corresponding content for this profile. Done! You can now check up on your child’s online activities.
Chapter QoS (Quality of Service) allows you to prioritize the internet traffic of specific devices to guarantee a faster connection when you need it the most. Devices set as high priority will be allocated more bandwidth even when there is heavy traffic on the network.
Page 59
Ensure a fast connection while I use my computer for the next 2 hours. How can I do that? 1 Visit http://tplinkwifi.net, and log in with your TP-Link ID or the password you set for the router. 2 Go to Advanced >...
Chapter Network Security This chapter guides you on how to protect your home network from cyber attacks and unauthorized users by implementing these three network security functions. You can protect your home network against DoS (Denial of Service) attacks from flooding your network with server requests using DoS Protection, block or allow specific client devices to access your network using Access Control, or you can prevent ARP spoofing and ARP attacks using IP &...
DoS Protection can protect your home network against DoS attacks from flooding your network with server requests. Follow the steps below to configure DoS Protection. Visit http://tplinkwifi.net, and log in with your TP-Link ID or the password you set for the router.
Block or allow specific client devices to access my network (via wired or wireless). How can I do that? 1 Visit http://tplinkwifi.net, and log in with your TP-Link ID or the password you set for the router. 2 Go to Advanced >...
Chapter 12 Network Security 3 ) Click Block above the Online Devices table. The selected devices will be added to Devices in Blacklist automatically. • To allow specific device(s) 1 ) Select Whitelist and click Save. 2 ) Click in the Devices in Whitelist section.
Page 64
Chapter 12 Network Security I want to: Prevent ARP spoofing and ARP attacks. How can I do that? 1 Visit http://tplinkwifi.net, and log in with your TP-Link ID or the password you set for the router. 2 Go to Advanced >...
The TP-Link router supports four forwarding rules. If two or more rules are set, the priority of implementation from high to low is Virtual Servers, Port Triggering, UPNP and DMZ.
WAN: 218.18.232.154 How can I do that? 1 Assign a static IP address to your PC, for example 192.168.0.100. 2 Visit http://tplinkwifi.net, and log in with your TP-Link ID or the password you set for the router. 3 Go to Advanced >...
VoIPs, video players and common applications including MSN Gaming Zone, Dialpad and Quick Time 4 players, etc. Follow the steps below to configure the Port Triggering rules: 1. Visit http://tplinkwifi.net, and log in with your TP-Link ID or the password you set for the router. 2. Go to Advanced >...
Chapter 13 NAT Forwarding 3. Click View Existing Applications, and select the desired application. The Triggering Port, External Port Protocol will be automatically filled in. The following picture takes application MSN Gaming Zone as an example. 4. Click OK. Tips: •...
DMZ host with all ports open. How can I do that? 1 Assign a static IP address to your PC, for example 192.168.0.100. 2 Visit http://tplinkwifi.net, and log in with your TP-Link ID or the password you set for the router. 3 Go to Advanced >...
Page 70
Therefore, you can play Xbox online games without a hitch. Internet XBOX Router If necessary, you can follow the steps to change the status of UPnP. 1. Visit http://tplinkwifi.net, and log in with your TP-Link ID or the password you set for the router. 2. Go to Advanced >...
Chapter VPN Server The VPN (Virtual Private Networking) Server allows you to access your home network in a secured way through internet when you are out of home. The router offers two ways to setup VPN connection: OpenVPN and PPTP (Point to Point Tunneling Protocol) VPN. OpenVPN is somewhat complex but with greater security and more stable.
OpenVPN connection. 14 1 1 Step1 Set up OpenVPN Server on Your Router 1. Visit http://tplinkwifi.net, and log in with your TP-Link ID or the password you set for the router. 2. Go to Advanced >...
Chapter 14 VPN Server 6. Select your Client Access type. Select Home Network Only if you only want the remote device to access your home network; select Internet and Home Network you also want the remote device to access internet through the VPN Server. 7.
Chapter 14 VPN Server 14 2 1 Step 1 Set up PPTP VPN Server on Your Router 1. Visit http://tplinkwifi.net, and log in with your TP-Link ID or the password you set for the router. 2. Go to Advanced >...
Chapter 14 VPN Server 1 ) Click Add. 2 ) Enter the Username Password to authenticate devices to the PPTP VPN Server. 3 ) Click OK. 14 2 2 Step 2 Configure PPTP VPN Connection on Your Remote Device The remote device can use the Windows built-in PPTP software or a third-party PPTP software to connect to PPTP Server.
Page 76
Chapter 14 VPN Server 3. Select Connect to a workplace and click Next. 4. Select Use my Internet connection (VPN).
Page 77
Chapter 14 VPN Server 5. Enter the internet IP address of the router (for example: 218.18.1.73) in the Internet address field. Click Next. 6. Enter the User name Password you have set for the PPTP VPN server on your router, and click Connect.
Page 78
Chapter 14 VPN Server 7. The PPTP VPN connection is created and ready to use.
Chapter Customize Your Network Settings This chapter guides you on how to configure advanced network features. It contains the following sections: • Change the LAN Settings • Configure to Support IPTV Service • Specify DHCP Server Settings • Set Up a Dynamic DNS Service Account •...
If the IP address conflicts with another device on your local network or your network requires a specific IP subnet, you can change it. 1. Visit http://tplinkwifi.net, and log in with your TP-Link ID or the password you set for the router. 2. Go to Advanced >...
Chapter 15 Customize Your Network Settings 2 ) Click Save. 3 ) After configuring IGMP proxy, IPTV can work behind your router now. You can connect your set-top box to any of the router’s Ethernet port. If IGMP is not the technology your ISP applies to provide IPTV service: 1 ) Tick Enable IPTV/VLAN.
Page 82
Chapter 15 Customize Your Network Settings 1. Visit http://tplinkwifi.net, and log in with your TP-Link ID or the password you set for the router. 2. Go to Advanced > Network > DHCP Server. • To specify the IP address that the router assigns: 1.
NO-IP or DynDNS. If you don’t have a DDNS account, you have to register first by clicking Go to register. Note: To enjoy TP-Link’s DDNS service, you have to log in with a TP-Link ID. If you have not logged in with one, click...
Page 84
Customize Your Network Settings 4. Click Register in the Domain Name List if you have selected TP-Link, and enter the Domain Name as needed. If you have selected NO-IP or DynDNS, enter the username, password and domain name of your account.
1 Change the routers’ LAN IP addresses to two different IP addresses on the same subnet. Disable Router B’s DHCP function. 2 Visit http://tplinkwifi.net, and log in with your TP-Link ID or the password you set for Router A. 3 Go to Network >...
Page 86
Chapter 15 Customize Your Network Settings Network Destination: The destination IP address that you want to assign to a static route. This IP address cannot be on the same subnet with the WAN IP or LAN IP of Router A. In the example, the IP address of the company network is the destination IP address, so here enter 172.30.30.1.
The preset SSID and password can be found on the label of the router. You can customize the wireless settings according to your needs. Visit http://tplinkwifi.net, and log in with your TP-Link ID or the password you set for the router.
Page 88
Chapter 15 Customize Your Network Settings 3. Keep the original or set a new SSID and password, then click Save. This SSID and password will be applied for both 2.4GHz and 5GHz wireless networks. • To change the wireless network name (SSID) and wireless password: 1.
Use WPS for Wireless Connection Wi-Fi Protected Setup (WPS) provides an easier approach to set up a security-protected Wi-Fi connection. 1. Visit http://tplinkwifi.net, and log in with your TP-Link ID or the password you set for the router. 2. Go to Advanced >...
Page 90
Chapter 15 Customize Your Network Settings Success will appear on the above screen and the WPS LED on the router will keep on for five minutes if the client has been successfully added to the network.
Chapter Manage the Router This chapter will show you the configuration for managing and maintaining your router. It contains the following sections: • Set Up System Time • Control LEDs • Test the Network Connectivity • Upgrade the Firmware • Backup and Restore Configuration Settings •...
Parental Controls. You can choose the way to obtain the system time as needed. 1. Visit http://tplinkwifi.net, and log in with your TP-Link ID or the password you set for the router.
The router‘s LEDs indicate router’s activities and status. You can turn on or turn off the LEDs either from the web management page or by pressing the LED button. 1. Visit http://tplinkwifi.net, and log in with your TP-Link ID or the password you set for the router.
Test the Network Connectivity Diagnostics is used to test the connectivity between the router and the host or other network devices. 1. Visit http://tplinkwifi.net, and log in with your TP-Link ID or the password you set for the router. 2. Go to Advanced >...
Backup your router configuration before firmware upgrade. • Do NOT turn off the router during the firmware upgrade. 16 4 1 Online Upgrade 1. Visit http://tplinkwifi.net, and log in with your TP-Link ID or the password you set for the router.
16 4 2 Manual Upgrade 1. Download the latest firmware file for the router from www.tp-link.com. 2. Visit http://tplinkwifi.net, and log in with your TP-Link ID or the password you set for the router. 3. Go to Advanced >...
Moreover, if necessary you can erase the current settings and reset the router to the default factory settings. 1. Visit http://tplinkwifi.net, and log in with your TP-Link ID or the password you set for the router.
Page 98
Note: • During the resetting process, do not turn off the router. • After reset, you can still use the current login password or the TP-Link ID to log in to the web management page. • To reset the router to factory default settings: 1.
The account management feature allows you to change your login password of the web management page. Note: If you are using a TP-Link ID to log in to the web management page, the account management feature will be disabled. To manage the TP-Link ID, go to Basic >...
This feature allows you to recover the login password you set for you router in case you forget it. Note: If you are using a TP-Link ID to log in to the web management page, the Password Recovery feature will be disabled. To manage the TP-Link ID, go to Basic >...
This feature allows you to limit the number of client devices on your LAN from accessing the router by using the MAC address-based authentication. 1. Visit http://tplinkwifi.net, and log in with your TP-Link ID or the password you set for the router.
6. Click OK. 16 10 Remote Management This feature allows you to control remote devices’ authority to manage the router. 1. Visit http://tplinkwifi.net, and log in with your TP-Link ID or the password you set for the router. 2. Go to Advanced >...
When the router does not work normally, you can save the system log and send it to the technical support for troubleshooting. • To save the system log in local: 1. Visit http://tplinkwifi.net, and log in your TP-Link ID or the password you set for the router. 2. Go to Advanced >...
Page 104
It would be great if the system logs could be sent to my mailbox at 8 a.m. every day. 1. Visit http://tplinkwifi.net, and log in with your TP-Link ID or the password you set for the router.
The Traffic Statistics page displays the network traffic of the LAN, WAN and WLAN sent and received packets, allowing you to monitor the volume of Internet traffic statistics. 1. Visit http://tplinkwifi.net, and log in with your TP-Link ID or the password you set for the router.
Page 106
Chapter 16 Manage the Router Click to reset the statistic information of the specific device. Click to delete the specific device item in the list.
Page 107
Q2 What should I do if I forget my web management password? • If you are using a TP-Link ID to log in, or you have enabled the Password Recovery feature of the router, click...
Page 108
4 ) Click LAN settings and deselect the following three options and click OK. 5 ) Go to Advanced > Restore advanced settings, click to save the settings.
Page 109
WDS bridging function can be enabled either in 2.4GHz frequency or 5GHz frequency for a dual-band router. We use the WDS bridging function in 2.4GHz frequency as example. 1. Visit http://tplinkwifi.net, and log in with your TP-Link ID or the password you set for the router.
Page 110
Run, it means WDS bridging is successfully built. Q5 What should I do if I cannot access the internet even though the configuration is finished? Visit http://tplinkwifi.net, and log in with your TP-Link ID or the password you set for the router. Go to Advanced >...
Page 111
• Your computer might not recognize any DNS server addresses. Please manually configure the DNS server. 1 ) Go to Advanced > Network > DHCP Server. 2 ) Enter 8.8.8.8 as Primary DNS, click Save. Tips: 8.8.8.8 is a safe and public DNS server operated by Google. •...
Page 112
• Make sure the physical connection between the router and the modem is proper. • Clone the MAC address of your computer. 1 ) Visit http://tplinkwifi.net, and log in with your TP-Link ID or the password you set for the router.
Page 113
• Modify the LAN IP address of the router. Note: Most TP-Link routers use 192.168.0.1/192.168.1.1 as their default LAN IP address, which may conflict with the IP range of your existing ADSL modem/router. If so, the router is not able to communicate with your modem and you can’t access the internet.
Page 114
6 ) Restart the modem and the router again. • Please upgrade the firmware of the router. If you’ve tried every method above but still cannot access the internet, please contact the technical support. Q6 What should I do if I cannot find my wireless network or I cannot connect the wireless network? If you fail to find any wireless network, please follow the steps below: •...
Page 115
If you can find your wireless network but fail to connect, please follow the steps below: • Authenticating problem/password mismatch: 1 ) Sometimes you will be asked to type in a PIN number when you connect to the wireless network for the first time. This PIN number is different from the Wireless Password/Network Security Key, usually you can only find it on the label of your router.
Page 116
• Check the wireless signal strength of your network. If it is weak (1~3 bars), please move the router closer and try again. • Change the wireless Channel of the router to 1, 6 or 11 to reduce interference from other networks. •...
Page 117
Specifications are subject to change without notice. is a registered trademark of TP-Link Technologies Co., Ltd. Other brands and product names are trademarks or registered trademarks of their respective holders. No part of the specifications may be reproduced in any form or by any means or used to make any derivative such as translation, transformation, or adaptation without permission from TP-Link Technologies Co., Ltd.
Page 118
Component Name Model I.T.E. Power Supply T120150-2B1 Responsible party: TP-Link USA Corporation, d/b/a TP-Link North America, Inc Address: 145 South State College Blvd. Suite 400, Brea, CA 92821 Website: http://www.tp-link.com/us/ Tel: +1 626 333 0234 Fax: +1 909 527 6803 E-mail: sales.usa@tp-link.com...
Page 119
20 cm from all persons and must not be co- located or operating in conjunction with any other antenna or transmitter.” We, TP-Link USA Corporation, has determined that the equipment shown as above has been shown to comply with the applicable technical standards, FCC part 15. There is no unauthorized change is made in the equipment and the equipment is properly maintained and operated.
Page 120
Any changes or modifications not expressly approved by the party responsible for compliance could void the user’s authority to operate the equipment. We, TP-Link USA Corporation, has determined that the equipment shown as above has been shown to comply with the applicable technical standards, FCC part 15. There is no unauthorized change is made in the equipment and the equipment is properly maintained and operated.
Page 121
2400 MHz -2483.5 MHz (20dBm) 5150 MHz -5250 MHz (23dBm) EU declaration of conformity TP-Link hereby declares that the device is in compliance with the essential requirements and other relevant provisions of directives 2014/53/EU, 2009/125/EC, 2011/65/EU and (EU)2015/863. The original EU declaration of conformity may be found at http://www.tp-link.com/en/ce RF Exposure Information This device meets the EU requirements (2014/53/EU Article 3.1a) on the limitation of...
Page 122
aux appareils radio exempts de licence. L’exploitation est autorisée aux deux conditions suivantes : 1. L’appareil ne doit pas produire de brouillage; 2. L’appareil doit accepter tout brouillage radioélectrique subi, même si le brouillage est susceptible d’en compromettre le fonctionnement. Caution: 1.
Page 124
• Use only power supplies which are provided by manufacturer and in the original packing of this product. If you have any questions, please don’t hesitate to contact us. Explanations of the symbols on the product label Symbol Explanation DC voltage Indoor use only RECYCLING This product bears the selective sorting symbol for Waste electrical and electronic equipment...
Need help?
Do you have a question about the Archer C7 and is the answer not in the manual?
Questions and answers