Table of Contents
Advertisement
Quick Links
Advertisement
Table of Contents

Related Manuals for Robe ROBIN ParFect 150 TW


Summary of Contents for Robe ROBIN ParFect 150 TW
- Page 1 Version 1.2...
-
Page 2: Table Of Contents
3.1 Connection to the mains .................... 6 3.2 Installing barndoors and the gel frame ............... 7 3.3 Installing the eggcrate ....................8 3.4 Installing the diffuser 2° (Robin Parfect 150 TW only) ..........9 3.5 Rigging the fixture ....................10 3.6 DMX-512 connection ....................12 3.7. -
Page 3: Safety Instructions
FOR YOUR OWN SAFETY, PLEASE READ THIS USER MANUAL CAREFULLY BEFORE POWERING OR INSTALLING YOUR ROBIN ParFect 150 TW ! Save it for future reference. This device has left our premises in absolutely perfect condition. In order to maintain this condition and to en- sure a safe operation, it is absolutely necessary for the user to follow the safety instructions and warning notes written in this manual. - Page 4 Avoid brute force when installing or operating the fixture. This fixture was designed for indoor use only, do not expose this unit to rain or use near water. When choosing the installation spot, please make sure that the fixture is not exposed to extreme heat, moisture or dust.
-
Page 5: Fixture Exterior View
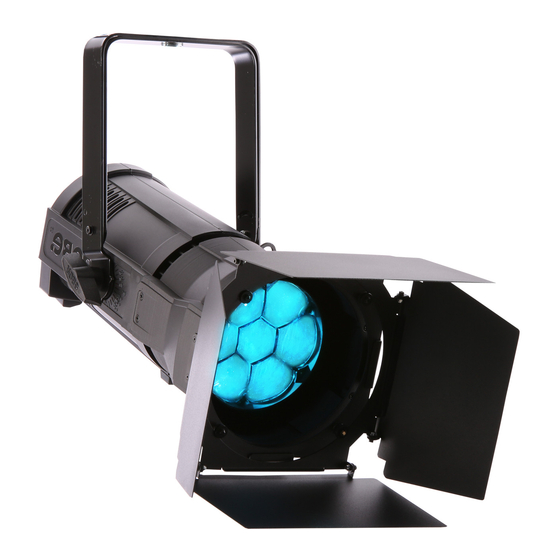
2. Fixture exterior view 1 - Mounting yoke 2 - Tilt locks 3 - Lenses array 4 - Safety wire securing accessory frame adaptor to the housing 5 - DMX OUT 6 - DMX IN 7 - Fuse holder 8 - Mains IN 9 - Mains OUT 10 - Display and control buttons 11 - Safety wire attachment point... -
Page 6: Installation
3. Installation Fixtures must be installed by a Qualified electrician in accordance with all national and local electrical and construction codes and regulations. 3.1 Connection to the mains For protection from electric shock, the fixture must be earthed! The ParFect 150 TW is equipped with auto-switching power supply that automatically adjusts to any 50-60Hz AC power source from 100-240 Volts. -
Page 7: Installing Barndoors And The Gel Frame
3.2 Installing barndoors and the gel frame Disconnect the fixture from mains before barndoors and the gel frame installation! DO NOT install the gel frame if the eggcrate has been installed on the fixture! 1. Unlock the spring lock (1) of the accessory frame adaptor (2) via pushing this spring lock as show red arrows on the picture. -
Page 8: Installing The Eggcrate
Note: the barndoors can be rotated to desired position and secured in this position via the securing screw (5). 3.3 Installing the eggcrate Disconnect the fixture from mains before eggcrate installation! DO NOT insert the gel frame after installing the eggcrate on the fixture! Screw the eggcrate (1) on the lens array module via the three screws (2). -
Page 9: Installing The Diffuser 2° (Robin Parfect 150 Tw Only)
3.4 Installing the diffuser 2° (Robin Parfect 150 TW only) Disconnect the fixture from mains before installing the diffuser. 1. Unscrew three screws (1) from fixture head and remove the plastic lens (2). 2. Place the diffuser 2° (3) to the fixture head, glossy side towards LEDs (correctly aim apertures (4) for screws). -
Page 10: Rigging The Fixture
3.5 Rigging the fixture A structure intended for installation of the fixture (s) must safely hold weight of the fixture(s) placed on it. The structure has to be certificated to the purpose. The fixture (fixtures) must be installed in accordance with national and local electrical and construction codes and regulation. - Page 11 For securing the fixture to the truss, install a safety wire which can hold at least 10 times the weight of the fixture. Use only the safety wire with a snap hook with screw lock gate. Fasten the safety cable in the attachment point and around the truss as shown on the picture below.
-
Page 12: Dmx-512 Connection
3.6 DMX-512 connection The fixture is equipped with 5-pin XLR sockets for DMX input and output. Only use a shielded twisted-pair cable designed for RS-485 and 5-pin XLR-plugs and connectors in order to connect the controller with the fixture or one fixture with another. DMX output DMX input XLR socket:... -
Page 13: Wireless Dmx Operation
3.7. Wireless DMX operation The external ROBE Wireless CRMX Dongle for compact ROBIN fixtures allows receiving wireless DMX. This device is equipped with the Lumen Radio CRMX module and antenna for receiving DMX signal. CRMX module operates on the 2.4 GHz band. -
Page 14: Control Menu Map
4. Control menu map Default settings=Bold print Level 1 Level 2 Level 3 Level 4 Level 5 Level 6 Level 7 DMXA Set DMXA 001-512 DMX Pres Mode 1 Mode 2 Mode 3 Info POn Time Total Reset DMX In Powr 0-255 Dim F... - Page 15 Level 1 Level 2 Level 3 Level 4 Level 5 Level 6 Level 7 Prog 3 Step 40 F.Tim 0-25.5 S.Tim 0-25.5 COPY Prg En 1-40 Special RDM Low RDM Hight Wireless Stat Unlink Adjust DMX Val Powr 0-255 Dim F 0-255 Clalib Cal Mech...
-
Page 16: Control Menu (Standard And Easy Control Mode)
5. Control menu (Standard and Easy control mode) The ParFect 150 TW is equipped with 2-row LCD display which allows to set the fixture´s behaviour according to your needs, obtain information on its operation, test its various parts and lastly program it, if it has to be used in a stand-alone mode. -
Page 17: Fixture Information (Info)
Please, be sure that you do not have any overlapping channels in order to control each ParFect 150 TW co- rrectly and independently from any other fixture on the DMX data link. If there is no data received at the DMX input, the display will start to flash "0001” with actually stored DMX address. DMX Pres - DMX preset. -
Page 18: Manual Control (Manual)
5.4 Manual Control (Manual) Use the menu to control all fixture channels by means of the control panel. 5.5 Test program (Test Prg) Use this menu to to run a special demo-test sequences without an external controller, which will show you some possibilities of using the ParFect 150 TW. -
Page 19: Special Functions (Special)
If you use the Robe Universal Interface, connect a USB port of your computer with the Robe Universal Interface by means of the USB cable and DMX input of the fixture with the DMX output of the Robe Universal Interface via a DMX cable. -
Page 20: Rdm
6. Select correct "COM " number if you use a Flash cable RS232/DMX or select "Robe Universal Interface 1 " if you use the Robe Universal Interface/Robe Universal Interface WTX and then click on the "Connect" button. 7. If the connection is OK, click the “Start Uploading" button to start software uploading. It will take several minutes to perform software update. -
Page 21: Technical Specifications
7. Error and information messages Short Err The message informs you that short circuit has occured on the LED PCB. 8. Technical Specifications Electrical Power supply:......electronic auto-ranging Input voltage range:....100-240V, 50-60Hz Fuse:........T 3.15A Max. power consumption ..220W (I=1A, power factor=0.96 at 230V) Mains input: CE - max. -
Page 22: Included Items
Dimensions (mm) ROBE Wireless CRMX Dongle for compact ROBIN fixtures Included items 1 x ROBIN Parfect 150 TW/ROBIN Parfect 150 FW TW 1 x Accessory frame adaptor for Parfect 150 (P/N 99015324), installed on the fixture 1 x User manual... -
Page 23: Maintenance And Cleaning
Optional accessories (P/N 10980127) ROBE Wireless CRMX Dongle for compact ROBIN fixtures (P/N 10980346) EggCrate for Robin LEDBeam 150/Parfect 150 (P/N 10980445) EggCrate for Robin LEDBeam 150, ParFect 150 white (P/N 10980348) HALO Frame adaptor for Robin ParFect 150 (P/N 10980349) Barndoor for Robin ParFect 150 black... -
Page 24: Replacing The Fuse
To preserve the environment please dispose or recycle this product at the end of its life according to the local regulations and codes. Copyright © 2019 Robe Lighting - All rights reserved Specifications are subject to change without notice. November 12, 2019 Made in ROBE Lighting s.r.o., Palackého 416, 757 01 Valašské Meziříčí, Czech Republic... - Page 25 DMX protocol Robin Parfect 150 TW /Robin Parfect 150 FW TW Version: 1.0 Mode 1-Standard 16-bit, Mode 2 -Reduced 8-bit, Mode 3 -Simple 8-bit Mode/channel Type of Function Value control Power/Special functions Reserved (0=default) To activate following functions, stop in DMX value for at least 3 s and shutter must be closed at least 3 sec.
- Page 26 Dimmer intensity from 0% to 100% (0=default) proportional Dimmer intensity - fine (16 bit) 0 - 255 Fine dimming (0=default) proportional Copyright © 2019 Robe Lighting s.r.o. - All rights reserved All Specifications subject to change without notice Page 2...
Need help?
Do you have a question about the ROBIN ParFect 150 TW and is the answer not in the manual?
Questions and answers