Advertisement
PORTABLE AIR CONDITIONER
Model# 048-TL-PAC08K
USER'S MANUAL
⚠CAUTION! WARNING: Do not use this device before reading these instructions.
NOTICE:
If your package is missing parts or you are having issues with assembly, please call Belleze Furniture directly at
(909)-595-5901. The Belleze Furniture customer service team will address any questions or concerns you may have.
Have this manual open and ready for reference.
CUSTOMER SERVICE:
909-595-5901
manufacturer@dellaproductsusa.com
9:00AM - 6:00PM PST (Monday - Friday)
www.dellaproductsusa.com
1
Advertisement
Table of Contents

Related Manuals for DELLA 048-TL-PAC08K


Summary of Contents for DELLA 048-TL-PAC08K
- Page 1 PORTABLE AIR CONDITIONER Model# 048-TL-PAC08K USER’S MANUAL ⚠CAUTION! WARNING: Do not use this device before reading these instructions. NOTICE: If your package is missing parts or you are having issues with assembly, please call Belleze Furniture directly at (909)-595-5901. The Belleze Furniture customer service team will address any questions or concerns you may have.
-
Page 2: Table Of Contents
Table of Contents Warnings & Precautions --------------------------------------------------------------------- Technical Specification ------------------------------------------------------------------------ Parts and Features ------------------------------------------------------------------------------ Installation guide ------------------------------------------------------------------------------ Control Panel ------------------------------------------------------------------------------------ Remote Control ------------------------------------------------------------------------------------ Care and Maintenance --------------------------------------------------------------------------- Troubleshooting ------------------------------------------------------------------------------- Error Code Chart --------------------------------------------------------------------------------... -
Page 3: Warnings & Precautions
When using electrical appliances, basic safety precautions should always be followed including the following: READ ALL INSTRUCTIONS BEFORE USE 1. To disconnect, turn off the unit and then unplug the power 11. Do not cover the air inlet or vents. cord. -
Page 4: Technical Specification
Specifications Model Number 048-TL-PAC08K Dimensions (W x D x H) 10.62”x27.36”x18.89” Net Weight 59.5 lb Gross Weight 66.1 lb Power Rating 914 W Voltage 115 V Frequency 60 Hz Capacity 8000 Btu/h... -
Page 5: Parts And Features
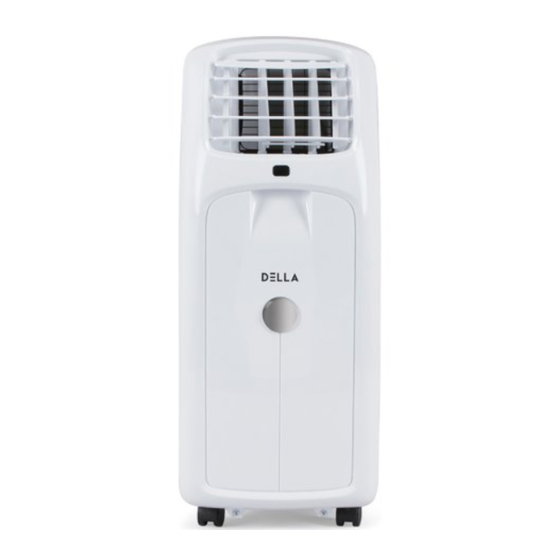
Parts & Features A. Control Panel F. Castor / Wheel B. Air Deflector G. Air Filter C. Air Intake Grill H. Air Exhaust D. Remote Control Receiver I. Power Cord E. Carrying Handle J. Condenser Drain Other Accessories includes: Exhaust Hose Exhaust Hose Inlet Connector Exhaust Hose Outlet Connector Window Slider Kit... -
Page 6: Installation Guide
Installation Guide Placing the Unit Place the unit on smooth level surface. Allow at least 12” of clearance around the unit. Plug the unit to a grounded power socket. Place the unit near window for exhaust installation. NOTE: This unit is intended for indoor use only. This unit works best in enclosed area. - Page 7 Installation Guide Window Kit Installation Slide the window slider kit panels together and screw to lock the panels in place. Installation in a top hung window 1. Open the window sash and place the window kit on the stool. Adjust the length of the kit accordingly. Lock the window kit by screwing down the two screw on it.
- Page 8 Installation Guide Drain Hose Installation Water need to be drain for “DRY” mode operation. To install drain hose, 1. Unscrew the drain cap from the drain outlet. 2. Connect one end of the garden hose (1/2” or 12.7mm in diameter. Not include) to the drain outlet, then lead the other end into a drain that is lower than the drain outlet.
- Page 9 User Instruction Power ON / OFF Plug the unit into a grounded socket. The screen will display “- -” and turn into stand by mode. Press the POWER button once to turn the unit on. Press the POWER button once more to turn the unit off. ⚠CAUTION! WARNING: DO NOT unplug the unit when it is still “ON”...
-
Page 10: Control Panel
User Instruction Insert or Replace Batteries on Remote Control Remove the cover on the back of the remote control; Replace the old batteries with two new AAA 1.5V batteries. Replace the cover. NOTE: Remove the batteries if the remote control is not use for an extended period of time. ⚠CAUTION! WARNING: DO NOT mix old and new batteries. - Page 11 User Instruction Power ON / OFF Plug the unit into a grounded socket. The screen will display “- -” and turn into stand by mode. Press the POWER button on the remote control once to turn the unit on. Press the POWER button once more on the remote control to turn the unit off.
- Page 12 User Instruction Start Up Timer Press the TIMER button twice when the unit is in stand by mode (plugged into power but have not power on) the arrow will point at The time indicator and the number of hours on the screen will flash. Tap or hold ▲ or ▼ to change the delay start timer from 0.5 hour up to 24 hours.
-
Page 13: Care And Maintenance
User Instruction Care and Maintenance Draining the unit: Condensate will residue inside the unit when operate. Condensate need to be drained to keep the unit working. Continue Drainage Garden hose can be installed on the unit to continue drainage. See drain hose installation for installation instruction. Manual Drainage Uncap the drain cap from the bottom drain outlet to drain. - Page 14 User Instruction Clearing the filter: To keep your air conditioner working efficiently, you should clean the filters every week of operation. Remove the air filter from the unit by sliding it out of the housing. Wash the filter using liquid dish-washing detergent and warm water (less than 40°C / 104°F).
-
Page 15: Troubleshooting
Trouble shooting Problem Possible Reasons Solutions Make sure the unit is plugged into No Power a grounded power socket Check the house fuse / circuit Electrical Protection breaker box. Unit does not work Water tank is full Drain the tank and reset setting. A 3 min protective time delay may Power Failure prevent the unit to operate after a... -
Page 16: Error Code Chart
Error Code Chart Error Code Description Solution Low Temperature Wait until the unit finish defrosting Probe Failure Damaged Sensor, contact customer service Full Tank Empty the water tank...
Need help?
Do you have a question about the 048-TL-PAC08K and is the answer not in the manual?
Questions and answers