
Related Manuals for Kuppersbusch EMWK 9600.0


Summary of Contents for Kuppersbusch EMWK 9600.0
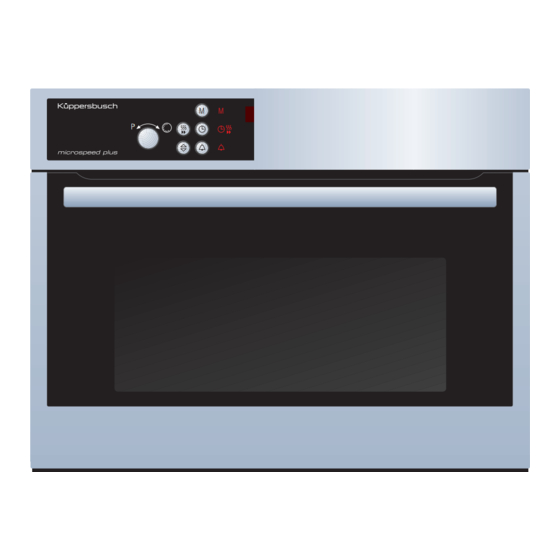
- Page 1 1 2 3 4 5 6 Microwave oven EMWK 9600.0 / 9800.0...
- Page 2 Service Manual: H4-72-02-03 Responsible: Dieter Rutz KÜPPERSBUSCH HAUSGERÄTE AG E-mail: dieter.rutz@kueppersbusch.de Phone: (0209) 401-733 Kundendienst Fax: (0209) 401-743 Postfach 100 132 Date: 17.03.2006 45801 Gelsenkirchen...
-
Page 3: Table Of Contents
H4-72-02-03 Contents Safety ..........................4 Microwave warnings ....................5 Electric connection ....................5 Converter switch warnings ..................5 Assembly ......................... 6 Disposing of the packaging and your old appliance ..........6 Technical Data....................... 6 Construction components ..................... 7 Power supply unit ....................7 Functions......................... -
Page 4: Safety
H4-72-02-03 Safety The purpose of this service manual is to provide the customer service technicians who already have the technical knowledge necessary to repair microwave ovens with specific information on the mode of operation of the EMWK 9600/9800.0. Danger Repairs may only be carried out by a qualified electrician! Incorrect repairs can be extremely dangerous for the user! To prevent electric shocks, please observe the following tips: •... -
Page 5: Microwave Warnings
H4-72-02-03 Microwave warnings • The microwave oven generates high voltages which may lead to serious or even fatal injury - it is essential to observe the safety regulations contained in this repair manual at all times. • Always disconnect the microwave from the mains prior to removing or installing components. Never attempt to measure voltage on the inverter, the magnetron or high-voltage conducting wire. -
Page 6: Assembly
Total electrical connection 900 W (max) (5 levels) Microwave output EMWK 9800.0 2500 W Grill levels EMWK 9600.0 2150 W 595 x 454 x 520 approx. Appliance dimensions (WxHxD) 562 x 450 x 550 mm approx. Niche dimensions (WxHxD) 424 x 221 x 520 approx. (42 litres capacity) Cooking cavity dimensions (WxHxD) EMWK 9800.0... -
Page 7: Construction Components
H4-72-02-03 Construction components Power supply unit The power supply unit is a part of the relay board. It is essential to connect an earthed conductor (PE) in order for the appliance to function properly. Possible consequences if there is no earthed conductor •... -
Page 8: Swelling Arrow (Emwk 9800.0 Only)
Oven safety shutdown 4.4.1 EMWK 9600.0 The safety cut-off device is activated after 8 hours of operation. Please note! The waiting time for the safety cut-off device is re-started every time a button is pushed (or a knob is turned)! 4.4.2... -
Page 9: Repairs
H4-72-02-03 Repairs Safety precautions - microwave energy Service technicians must never be exposed to the microwave radiation which can be emitted by the magnetron or other components producing microwaves if the appliance is not connected correctly or operated improperly. A i put a d utput c ecti s waveguides f a ges a d sea s are t be attached a d sea ed c rrect y... -
Page 10: Checking The Diode
H4-72-02-03 Checking the diode 1. Disconnect the high-voltage conducting wires from the magnetron. 2. Measure the resistance at the supply points. A good magnetron will have a heating filament resist- ance of less than 1 Ω. 3. Measure the resistance between each terminal and the magnetron shell. The resistance between each terminal and the shell of a good magnetron will be infinite. -
Page 11: Checking The Safety Switch
H4-72-02-03 Q701 / Q702 (for adjusting resistance on a 9-V measuring instrument) Normal Fault Forwards Back Forwards Back > 1k Ω > 1k Ω approx. 0 Ω approx. 0 Ω > 1k Ω > 1k Ω approx. 0 Ω approx. 0 Ω >... -
Page 12: Checking The Hot-Air Fan Motor
H4-72-02-03 Checking the hot-air fan motor 1. Disconnect the power supply cables from the motor. 2. Measure the resistance of the motor winding when cold. Normal: 150 Ω - 200 Ω ∞ Low Ω reading or Fault: Checking the antenna motor 3. -
Page 13: Checking The Power Connection
H4-72-02-03 Checking the power connection The following approximate voltages must be measured on the connection points when the mains plug is plugged in or when the mains cable has been connected. 400 V mains, 3-phase (most widely used in Germany and Europe) Terminals Reading X19 / X20... -
Page 14: Checking The Ring Heater
H4-72-02-03 Checking the ring heater 7. Disconnect the power supply cables from the heater. 8. Measure the resistance of the heater element when cold. Normal: 80 Ω - 90 Ω ∞ Low Ω reading or Fault: 5.10 Checking the grill heater 9. -
Page 15: Cleaning
H4-72-02-03 Cleaning Prior to all maintenance or cleaning work always pull out the mains plug and wait until the appli- ance has cooled down. The cavity is made of stainless steel and therefore cleaning is extremely easy. Always keep the cover panel of the microwave outlet opening free of oil and grease splashes. -
Page 16: Safety Precautions During Troubleshooting
H4-72-02-03 Safety precautions during troubleshooting Before it leaves the factory, every appliance is carefully checked but it must be correctly installed and operated. In spite of all safety measures, safety depends on correct installation and correct operation and maintenance by the customer. Service technicians must never be exposed to the microwave radiation which can be emitted by the magnetron or other components producing microwaves if the appliance is not connected correctly or operated improperly. -
Page 17: Testing The Individual Consumers
H4-72-02-03 Testing the individual consumers 7.2.1 EMWK 9600.0 Start up the test program. Buttons to press Symbols Clock Consumers displayed display Press the clock button once Press the plus or minus None Time, end (opener) button Cooling fan + magnetron fan + vapour fan... -
Page 18: Testing The Converter
Once the test has been completed a corresponding error message will be shown in the clock display. Possible error messages are indicated under ”10. Troubleshooting” on page 23 . Testing the control elements 7.4.1 EMWK 9600.0 Start up the test program. Symbols Buttons to press... - Page 19 H4-72-02-03 7.4.2 EMWK 9800.0 Start up the test program. Symbols Buttons to press Clock display Text display shown Turn the program knob clock- None Test wise (two lock-ins) Input Door contact open None Door contact closed None MW power button 90 W LED_MW1 11:11 MW power button 180 W...
-
Page 20: The Debug Mode
H4-72-02-03 The debug mode 7.5.1 EMWK 9600.0 Start up the test program. Symbol Clock Buttons to press Designation display display Press the clock button once None Start button Start the debug mode Any button None • Timer 10x faster Error has occurred Error •... -
Page 21: Leak Test (Leak Indicator Gauge)
H4-72-02-03 Leak test (leak indicator gauge) The rate of leak is understood as the microwave energy that escapes from the oven despite intact leak systems. It is measured with suitable measuring instruments as energy density at 5 cm intervals. A measuring unit is mW/cm . -
Page 22: Measuring The Output Power Of The Magnetron
H4-72-02-03 Measuring the output power of the magnetron The following procedure provides information on the working conditions of the magnetron but it does not reproduce an accurate measurement of the microwave output power. The test load is one litre (1000 ml) of water with a starting temperature of 15 - 24 °C in a container with a capacity of 1000 ml. -
Page 23: Troubleshooting
H4-72-02-03 Troubleshooting Cause / Remedy Fault The appliance does not work. • The door is not properly closed. • The plug is not properly inserted into the socket outlet. • There is no electricity in the socket outlet. (Check the house fuse.) Condensation on the cooking surface, inside the •... -
Page 24: Error Messages
H4-72-02-03 10.1 Error messages 10.1.1 EMWK 9600.0 Error specification Error code Possible causes of faults Possible repair measures MW operation, start sequence: magnetron does not start See fault-finding tree MW operation, start sequence: converter does not react when activated MW operation, run mode: microwave oven defect... - Page 25 H4-72-02-03 10.1.2 EMWK 9800.0 Error specification Error code Possible causes of faults Possible repair measures Oven temperature probe highly resistant Oven temperature probe defect Replace temperature probe Relay board defect Replace relay board E1 unstable MW leakage radiation (leak in the oven, etc.) Replace appliance Low-resistance oven temperature Oven temperature probe defect...
-
Page 26: Fault Tracing Tree
H4-72-02-03 10.2 Fault tracing tree 10.2.1 EMWK 9600.0 Appliance switches E7 off after 22 seconds or E8 off after 3 seconds in microwave operation. E 7, E 8 Switch-off after approx. 22 sec. Switch-off after approx. 3 sec. Power consumption <0.5A Power consumption <0.5A... - Page 27 H4-72-02-03 10.2.2 EMWK 9800.0 Appliance switches E10 off after 3 seconds or E9 off after 23 seconds in microwave operation. Switch-off after approx. 22 sec. Switch-off after approx. 3 sec. Power consumption <0.5A Power consumption <0.5A Check the power consumption Check the magnetron heating filament, earth connection and connection...
Need help?
Do you have a question about the EMWK 9600.0 and is the answer not in the manual?
Questions and answers