
Related Manuals for Kuppersbusch EMWK 6550.0 BC


Summary of Contents for Kuppersbusch EMWK 6550.0 BC
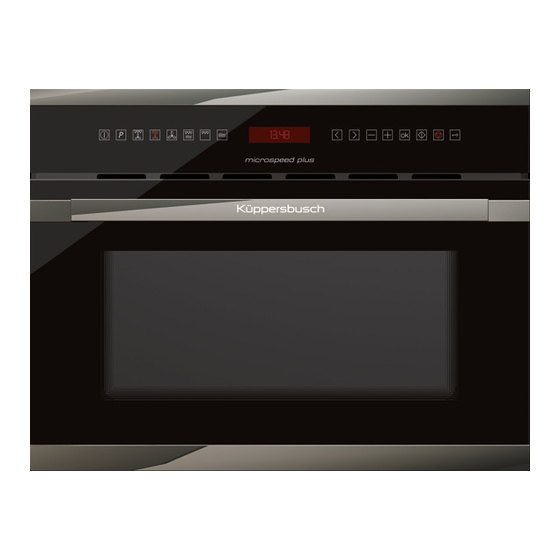
- Page 1 BEDIENUNGSANWEISUNG mit Montageanweisungen Instructions for use and installation instructions EMWK6550.0 BC...
-
Page 2: Table Of Contents
Contents Installation instructions ........................38 Before installation ............................38 After installation ............................38 Microwave safety ..........................39 The advantages of microwaves ....................... 41 Description of your oven ........................42 Basic controls ........................... 43 Setting the clock ............................43 Hiding/Displaying the Clock ......................... 43 Safety blocking ............................ -
Page 3: Installation Instructions
Installation instructions Before installation After installation Check that the input voltage indicated on the The oven is equipped with a power cable and a characteristics plate is the same as the voltage of plug for single phase current. the power outlet you are going to use. If the oven is to be installed on a permanent Open the oven door and take out all the basis it should be installed by a qualified... -
Page 4: Microwave Safety
Microwave safety Beware! Warning! Never leave oven unwatched, especially when using paper, Never heat baby foods or drinks in plastic or other combustible materials. bottles or jars with the teats or lids on These materials can char and may fire. them. - Page 5 Microwave safety The turntable and the grills can bear a This oven is exclusively for domestic use! maximum load of 8 kg. To avoid Use the oven only for preparing meals. damaging the oven, do not exceed this load. Avoid damaging the oven or other dangerous situations by following these instructions: Cleaning: Do not switch on the oven without the...
-
Page 6: The Advantages Of Microwaves
The advantages of microwaves In conventional ovens, heat radiated by electrical Why food heats up elements or gas burners slowly penetrates the Most foods contain water and water molecules food from outside to inside. On account of this vibrate when subjected to microwaves. there is a major amount of energy is wasted heating the air, the oven components and the food The friction between molecules produces heat... -
Page 7: Description Of Your Oven
Description of your oven 1. – Door window glass 8. – Lamp bulb 2. – Catches 9. – Control panel 3. – Turntable support 10. –Backing tray 4. – Turntable ring (Don’t use with microwaves) 11. – Rectangular rack 5. –Turntable plate (Don’t use with microwaves) 6.- Drop-down grill 12. -
Page 8: Basic Controls
Basic controls Setting the clock necessary when the oven is first plugged in After connecting the appliance to the network or after a power failure). or after a power failure the clock will flash 3. Press the “+” and “–” keys to set the hours. and thus shows that the time is not correct. -
Page 9: Stopping The Rotating Plate
Basic controls Stopping the rotating plate If the turntable rotation disturbs you, you can stop The turntable stops. it by proceeding as follows. If you want to allow the turntable to rotate, While the oven is being programmed or during the press again the “<”... -
Page 10: Basic Functions
Basic Functions Microwave oven Use this function to cook and heat vegetables, potatoes, rice, fish and meat. 1. Press the “On/Off” key to switch the oven on. 5. Press the “+” and “–” keys to set the required Microwave Power Level (see the chapter 2. -
Page 11: Grill
Basic Functions Grill Use this function to brown the top of food quickly. 1. Press the “Grill” function key. 3. Press the Start key. The oven will start to operate. 2. Press the “+” and “–” keys to set the desired Operating Time (for example 15 minutes). -
Page 12: Hot Air
Basic Functions Hot air Use this function to bake and roast. 1. Press the “On/Off” key to switch the oven on. 6. If you want to modify any of the above parameters, press the “<” or “>” keys to 2. Press the “Hot-Air” function key. select the parameter and then the “+”... -
Page 13: Grill With Fan
Basic Functions Grill with Fan Use this function for crispy roast meat, fish, poultry or French fries 1. Press the “On/Off” key to switch the oven 3. Press the “+” and “–” keys to set the desired Operating Time. 2. Press the “Grill + Fan” function key. 4. -
Page 14: Defrosting By Weight (Automatic)
Basic Functions Defrosting by weight (automatic) Use this function to defrost meat, poultry, fish, fruit and bread quickly. 1. Press the “On/Off” key to switch the oven on. 7. Press the “+” and “–” keys to set the desired Food Weight. 2. -
Page 15: Defrosting By Time (Manual)
Basic Functions Defrosting by time (manual) Use this function to defrost any type of food quickly. 1. Press the “On/Off” key to switch the oven on. 4. Press the “+” and “–” keys to set the desired Operating Time. 2. Press the “Auto-cook programs” key. 5. -
Page 16: Special Functions
Special functions Special Function P1: Heating food Use this function to heat various types of food. 1. Press the “On/Off” key to switch the oven on. 7. Press the “+” and “–” keys to set the desired Food Weight. 2. Press the “Auto-cook programs” key. 8. -
Page 17: Special Function F2: Cooking
Special functions Special Function P2: Cooking Use this function to cook fresh food. 1. Press the “On/Off” key to switch the oven on. 6. Press the “>” key to enter the weight parameters 2. Press the “Auto-cook programs” key. The 7. -
Page 18: Special Function F3: Defrosting & Toasting
Special functions Special Function P3: Defrosting & Toasting Use this function to cook and toast various types of food. 1. Press the “On/Off” key to switch the oven on. 7. Press the “+” and “–” keys to set the desired Food Weight. -
Page 19: When The Oven Is Working
When the oven is working... Interrupting a cooking cycle Cancelling a cooking cycle You can stop the cooking process at any time by If you wish to cancel the cooking process, press pressing the Stop key once or by opening the the Stop key for 3 seconds. -
Page 20: Defrosting
Defrosting The table below shows different defrosting and temperature is evenly distributed) for different types standing times (in order to ensure the food and weights of food, plus recommendations. Standing time Food Weight (g) Defrosting time (min) Recommendation (min) 5-10 Turn once 5-10 Turn once... -
Page 21: General Instructions For Defrosting
Defrosting General instructions for defrosting 1. When defrosting, use only dishes that are 8. Place poultry on an upturned plate so that the appropriate for microwaves (china, glass, meat juices can run off more easily. suitable plastic). 9. Bread should be wrapped in a napkin so that 2. -
Page 22: Cooking With A Microwave Oven
Cooking with a microwave oven Warning! Read the section “Microwave Safety” When heating liquids, use containers with a wide opening, so that the steam before cooking with your microwave. can evaporate easily. Follow these recommendations when cooking with Prepare the foods as per the instructions and your microwave: keep in mind the cooking times and power levels Before heating or cooking foods with peel... - Page 23 Cooking with a microwave oven Tables and suggestions – Cooking vegetables Addition of Power Time Standing Food Quantity (g) Instructions liquids (Watt) (min.) Time (min.) Cauliflower 100ml 9-11 Cut into slices. Keep covered Broccoli 50ml Turn once Mushrooms 25ml Cut into chunks or Peas &...
-
Page 24: Cooking With The Grill
Cooking with the grill For good results with the grill, use the grid iron 4. If the grill is used for extended period of time supplied with the oven. it is normal to find that the elements will switch themselves off temporarily due to the Fit the grid iron in such a way that it doesn’t safety thermostat. - Page 25 Cooking with the Grill Tables and suggestions – Grill without microwave Fish Quantity (g) Time (min.) Instructions Fish Bass Spread lightly with butter. After half of 18-24 cooking time turn spread with Sardines/gurnard 6-8 fish. 15-20 seasoning. Meat Sausages 6-8 units 22-26 Prick after half cooking time and turn.
- Page 26 Cooking with the Grill Tables and suggestions – Microwave + Grill The microwave + grill function is ideal for cooking The microwave and the grill work simultaneously. quickly and, at the same time, browning foods. The microwave cooks and the grill toasts. Furthermore, you can also grill and cook cheese covered food.
-
Page 27: Roasting And Baking
Roasting and baking Table and advices – Preparing meat and cake Microwave / Hot air Quantity Power Temperature Time Standing Food Instructions ºC (Min.) time (min.) Do not put lid on Roast beef 1000-1500 30-40 container Turn once Pork loin / Cutlet Do not put lid on or bones 800-1000... - Page 28 Roasting and baking Advice to roast - bake Advice on ovenware Turn the pieces of meat halfway through the Check that the ovenware fits inside the oven. cooking time. When the roasted meat is ready you Hot glass containers should be put on a dry should let it stand for 20 minutes in the oven with kitchen cloth.
- Page 29 Baking Table and advices – baking/hot air Type Container Level Temperature Time (min.) Walnut cake Spring-form type tin Turntable 170/180 30/35 Spring-form type tin Ø 28 Turntable, small Fruit tart 150/160 35/45 round grille Ring cake Spring-form type tin Turntable 170/190 30/45 Piquant cakes e.g.
-
Page 30: What Kind Of Ovenware Can Be Used
What kind of ovenware can be used? Microwave function Aluminium containers and foil For the microwave function, keep in mind that Pre-cooked food in aluminium containers or in microwaves are reflected by metal surfaces. aluminium foil can be put in the microwave if the Glass, china, clay,... - Page 31 What kind of ovenware can be used? Table of Ovenware The table below gives you a general idea of what type of ovenware is suitable for each situation. Operating Microwave mode Grill and Hot- Combined Defrosting / functions Cooking Type of heating ovenware Glass and china...
-
Page 32: Oven Cleaning And Maintenance
Oven Cleaning and Maintenance Cleaning is the only maintenance normally Oven interior required. After each time the oven is used, clean the inside Warning! Your microwave oven should be walls with a damp cloth since this is the easiest cleaned regularly, with all food remains being way to remove splashes or spots of food that may removed. -
Page 33: Oven Ceiling
Oven Cleaning and Maintenance The mica cover (3) located in the ceiling must Oven ceiling always be kept clean. Any food remains that If the oven ceiling is dirty, the grill can be lowered collect on the mica cover can cause damage or to make cleaning easier. -
Page 34: What Should I Do If The Oven Doesn't Work
What should I do if the oven doesn’t work? The food is too hot, dried out or burnt! WARNING! Any type of repair must only be Check if you selected the correct operating done by a specialised technician. Any repair time and power level. -
Page 35: Technical Characteristics
Technical characteristics Description of Functions Microwave Power Symbol Function Foods Output Slow defrosting for delicate foods; keeping food hot. 200 W Cooking with little heat; boiling rice. 400 W Rapid defrosting, heating baby food. Heating and cooking food. 600 W Microwave Cooking vegetables and food. -
Page 36: Installation
Einbau / Installation Die Mikrowelle in die Nische einschieben entsprechend anpassen. Tür Mikrowelle öffnen und das Gerät mit vier mitgelieferten Schrauben Küchenmöbel wie im Bild dargestellt befestigen. Push oven completely into the cabinet and centre it. Open microwave door and fasten the appliance to the cabinet using... - Page 39 KÜPPERSBUSCH HAUSGERÄTE AG Postfach 10 01 32, D-45801 Gelsenkirchen, Küppersbuschstraße 16, D-45883 Gelsenkirchen Telefon (02 09) 4 01-0, Telefax (02 09) 4 01-03 03 www.kueppersbusch.de Küppersbusch Ges.m.b.H. Eitnergasse 13, 1231 Wien, Telefon: 01/86680-0, Telefax: 01/8668072 www.kueppersbusch.at – e-Mail: verkauf@kueppersbusch.at...
Need help?
Do you have a question about the EMWK 6550.0 BC and is the answer not in the manual?
Questions and answers