Table of Contents
Advertisement
Quick Links
Advertisement
Table of Contents

Related Manuals for Top R/C Hobby 750MM Series


Summary of Contents for Top R/C Hobby 750MM Series
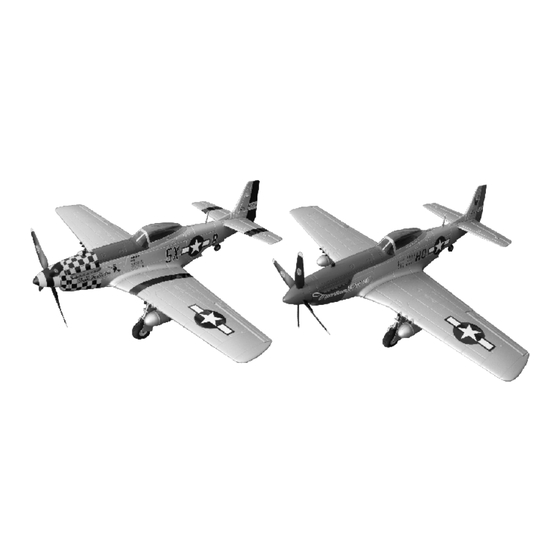
- Page 1 750MM SERIES AIRPLANES P-51D MUSTANG F4U CORSAIR HURRICANE MKⅡ T-34...
-
Page 2: Table Of Contents
CONTENTS B r i e f i n t r o d u c t i o n ....................1 P r o d u c t s c o n s t i t u t i o n . -
Page 3: Main Specifications
Main specifications HURRICANEMK Ⅱ P-51D MUSTANG F4U CORSAIR T-34 ★Wingspan 750mm 750mm 750mm 750mm ★Length 648mm 610mm 622mm 642mm ★Weight 425g 420g 422g 430g ★Thrust ≥ ≥ ≥ ≥ ★Flying time ≥ 5min ≥ 5min ≥ 5min ≥ 5min Main configuration HURRICANEMK Ⅱ... -
Page 4: Assemble Processes(F4U Corsair)
4.Assembly of the vertical wing and 5.Assembly of the auxiliary oil tank package. horizontal wing. Take of the auxiliary oil tank package, tear off the stick surface, then stick Connect the elevator servo arm with it to the mounting groove of auxiliary oil tank on the surface of the wing. rudder servo arm, then locate the clevis arm. - Page 5 4.Add some glue to the slot of the fuselage and assemble the horizontal wing to the fuselage firmly. 5.Please make sure that the tail wheel should be in the neutral position, and add some glue to the rudder surface .Make sure the U plug should be inserted into the U slot of the fuselage, then glue the vertical wing&horizontal wing&fuselage together.
-
Page 6: Assemble Processes( Hurricane Mkⅱ )
8.Take of the auxiliary oil tank and add some glue to its surface, please glue it to the slot of the back part of the main wings. 10.Check the center of gravity and make sure that the CG of the 9. -
Page 7: Assemble Processes( T-34 )
4.Assembly of the vertical wing and 5.Assembly of the auxiliary oil tank package. horizontal wing. Take of the auxiliary oil tank package, tear off the stick surface, then Connect the elevator servo arm with stick it to the mounting groove of auxiliary oil tank on the surface of rudder servo arm, then locate the clevis arm. -
Page 8: Adjustment Steps
4.Assembly of the horizontal wings. 5.Assembly of the vertical wing and Take of the horizontal wing&vertical wing&fixed screw(PA2*10MM) horizontal wing. from the box. Please assemble the horizontal wing and vertical wing as the Connect the elevator servo arm with following pictures. ,then assemble them to the right place of the fuselage by rudder servo arm, then locate the clevis screws(PA2*10MM) .At last, lock the main wings with fuselage. -
Page 9: Safety Precautions
4.Please check the collets to confirm 5.Finished the adjustment for whether it become loose or not, and “ 750MM series airplanes . ” make sure that the control surface is in accordance with the movement of joystick. - Page 10 Operating Then plug cigarette into its socket in car (Adapter should be connected if charge at home: connect the adapter to home power socket, then plug the adapter' DC end to charger). The LED will turn green indicating it is ready for charging. 2.Connect the battery to charger per its interface mark.
-
Page 11: Caution And Notice For Esc
Notification for ESC 1. The function of this ESC was in the best condition after factory setting; please do not change it by yourself. 2. Before connecting the battery, please make sure the throttle and trim were in the lowest position. If the throttle and trim were not in the lowest position by mistake after connecting the battery, you can cut off the battery;... -
Page 12: Spare Par Ts(F4U Corsai)
top01613 top01614 top01615 Spinner (Yellow) Propellor Cabin( Yellow) top01617 top01618 top503 Auxiliary Oil Tank Controlling steel 7.4v,1000mah Lipo Battery top30204 top30205 top201 9g Servo(Wire:150mm) 9g Servo(Wire:150mm) 12A Brushless ESC top401 No: op404 motor(DST-1200) Motor(DST-1300) Spare parts(F4U CORSAIR) top01101 top01102 top01104 Fuselage Blue Main wings... - Page 13 top01103 top01114 top01106 Blue Spinner Blue Auxiliary Oil Tank ( Blue Vertical Wings( top01105 top01107 top01113 Propellor Blue Blue Landing Gear Blue Guided missile( top01108 top01109 top01111 Main wings Horizontal wings Fuselage(Yellow) (Yellow) (Yellow) top01110 top01115 top01116 Spinner Vertical Wings(Yellow) (Yellow) Auxiliary Oil Tank (Yellow) top01117...
-
Page 14: Spare Parts(Hurricanemkⅱ)
top01112 Controlling steel Spare parts(HURRICANE MKⅡ) top 01301 top01302 top01303 Fuselage Main wing Horizontal wing reen) reen) reen) top01304 top01305 top01306 Landing Gear Vertical Wing( reen) reen) Auxiliary oil tank( reen) top01307 top 01308 top01309 Spinner Fuselage Main wing reen) (camo) (camo) top01311... -
Page 15: Spare Parts(T-34)
top01313 top01314 top01315 Spinner Propellor Auxiliary oil tank (camo) (camo) top01316 Controlling steel Spare parts (T-34) top 01501 top01502 top01503 Fuselage Blue Main wing Blue Horizontal wing Blue top01504 top01507 top01508 Blue Blue Landing Gear Blue Vertical Wing( Cabin( top01510 top 01511 top01512 Fuselage... - Page 16 top01513 top01516 top01517 Landing Gear Vertical Wing(Red) (Red) Cabin(Red) top01505 top01506 top01509 Spinner Propellor Bomb top01518 Controlling steel...
Need help?
Do you have a question about the 750MM Series and is the answer not in the manual?
Questions and answers