Table of Contents
Advertisement
Quick Links
Advertisement
Table of Contents
Troubleshooting

Subscribe to Our Youtube Channel
Related Manuals for NI VXIpc-882


Summary of Contents for NI VXIpc-882
- Page 1 Artisan Technology Group is your source for quality new and certified-used/pre-owned equipment SERVICE CENTER REPAIRS WE BUY USED EQUIPMENT • FAST SHIPPING AND DELIVERY Experienced engineers and technicians on staff Sell your excess, underutilized, and idle used equipment at our full-service, in-house repair center We also offer credit for buy-backs and trade-ins •...
- Page 2 NI VXIpc -882 User Manual NI VXIpc-882 User Manual July 2010 372514B-01 Artisan Technology Group - Quality Instrumentation ... Guaranteed | (888) 88-SOURCE | www.artisantg.com...
- Page 3 Support Worldwide Technical Support and Product Information ni.com National Instruments Corporate Headquarters 11500 North Mopac Expressway Austin, Texas 78759-3504 USA Tel: 512 683 0100 Worldwide Offices Australia 1800 300 800, Austria 43 662 457990-0, Belgium 32 (0) 2 757 0020, Brazil 55 11 3262 3599,...
- Page 4 Warranty The NI VXIpc-882 controller is warranted against defects in materials and workmanship for a period of one year from the date of shipment, as evidenced by receipts or other documentation. National Instruments will, at its option, repair or replace equipment that proves to be defective during the warranty period.
- Page 5 Compliance Electromagnetic Compatibility Guidelines This product was tested and complies with the regulatory requirements and limits for electromagnetic compatibility (EMC) as stated in the product specifications. These requirements and limits are designed to provide reasonable protection against harmful interference when the product is operated in its intended operational electromagnetic environment. There is no guarantee that interference will not occur in a particular installation.
-
Page 6: Table Of Contents
Chapter 2 Installation Installing the NI VXIpc-882 ..................2-1 How to Remove the Controller from the VXI Chassis........2-3 Removing the NI VXIpc-882 Component Side Cover ..........2-4 Installing and Upgrading RAM ..................2-4 Installing and Removing the Internal Hard Drive ............2-6 ExpressCard/34 ......................2-7 Installing an ExpressCard/34................2-7... - Page 7 Front Panel SMB ExtClk Setup ..............3-27 Front Panel SMB TRIGIN/TRIGOUT ............3-27 Chapter 4 Developing Your Application NI-VXI, NI-VISA, and Related Terms ................. 4-1 Configuration......................... 4-2 Device Interaction ......................4-3 Programming for VXI ....................4-5 Optimizing Large VXIbus Transfers .............. 4-7 Shared Memory....................
- Page 8 Troubleshooting ......................6-7 Appendix A Specifications Front Panel Layout and Dimensions................A-5 Appendix B Using The Trigger Ports On The NI VXIpc-882 Connecting the Trigger Port Cables................B-1 Software Configuration....................B-2 © National Instruments Corporation NI VXIpc-882 User Manual Artisan Technology Group - Quality Instrumentation ... Guaranteed | (888) 88-SOURCE | www.artisantg.com...
- Page 9 Contents Appendix C VMEbus Capability Codes VMEbus Capability Codes .................... C-1 Appendix D Technical Support and Professional Services Glossary Index NI VXIpc-882 User Manual viii ni.com Artisan Technology Group - Quality Instrumentation ... Guaranteed | (888) 88-SOURCE | www.artisantg.com...
-
Page 10: About This Manual
How to Use the Documentation Set Begin by reading NI VXIpc-882 Installation Guide, a brief quick-start guide that describes how to install and get started with your controller. This manual, the NI VXIpc-882 User Manual, contains more details about changing the installation or configuration from the defaults and using the hardware. -
Page 11: Related Documentation
VXI-6, VXIbus Mainframe Extender Specification, Rev. 2.0, VXIbus Consortium • VXI-8, Cooling Characterization Methodology Specification, Rev. 2.0, VXIbus Consortium • NI-VISA Help NI VXIpc-882 User Manual ni.com Artisan Technology Group - Quality Instrumentation ... Guaranteed | (888) 88-SOURCE | www.artisantg.com... -
Page 12: Introduction
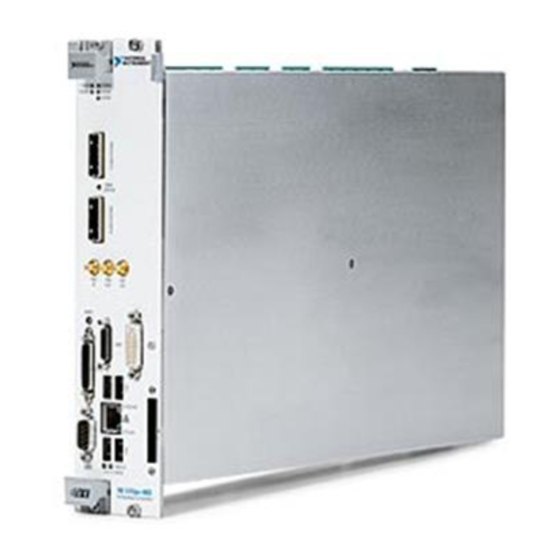
NI VXIpc-882 provides powerful control in a two-slot configuration. Install a NI VXIpc-882 controller in your VXI mainframe, and you can take full advantage of the high-performance VXI backplane and have direct control of VXI registers, memory, interrupts, and triggers. -
Page 13: Ni Vxipc-882 Functional Block Diagram
Chapter 1 Introduction NI VXIpc-882 Functional Block Diagram Figure 1-1 is a functional block diagram of the NI VXIpc-882 controller. Intel Core 2 Duo CPU DVI-I Chip Set 2 SO-DIMMs Connector DUAL CH DDR2 SDRAM Graphics Memory PC2 5300 Controller... -
Page 14: National Instruments Software
VXI triggers to and from the VXI backplane. National Instruments Software National Instruments has developed several software kits you can use with the NI VXIpc-882. NI-VISA and NI-VXI are already installed on your hard drive; LabVIEW is optional. NI-VISA is the National Instruments implementation of the VISA specification. - Page 15 LabVIEW. LabVIEW also comes with hundreds of instrument drivers, which dramatically reduce software development time, because you do not need to spend time programming the low-level control of each instrument. NI VXIpc-882 User Manual ni.com Artisan Technology Group - Quality Instrumentation ... Guaranteed | (888) 88-SOURCE | www.artisantg.com...
-
Page 16: Installation
Installing the NI VXIpc-882 This section contains general installation instructions for the NI VXIpc-882 controller. Consult your VXIbus chassis user manual or technical reference manual for specific instructions and warnings. Plug in your chassis before installing the controller. The power cord grounds the chassis and protects it from electrical damage while you are installing the controller. - Page 17 Replace or close any doors or covers on the chassis. 10. Power on the chassis. 11. The controller should now boot. If the controller does not boot, refer to What if the NI VXIpc-882 does not boot? section of Chapter 6, Common Questions and Troubleshooting.
-
Page 18: How To Remove The Controller From The Vxi Chassis
Chapter 2 Installation Figure 2-1 shows an NI VXIpc-882 installed in the system controller slot of a National Instruments VXI chassis. You can place VXI devices in any other slot. 1 NI VXIpc-882 Controller 2 VXI Chassis Figure 2-1. NI VXIpc-882 Controller Installed in a VXI Chassis How to Remove the Controller from the VXI Chassis The NI VXIpc-882 controller is designed for easy handling. -
Page 19: Removing The Ni Vxipc-882 Component Side Cover
Lift the component-side and rear covers away from the module. Installing and Upgrading RAM The NI VXIpc-882 uses PC2 5300 DDR2 SDRAM and supports up to 2 GB in each of the two RAM sockets. National Instruments recommends the following size SO-DIMMs for use with the NI VXIpc-882 controller (SDRAM): PC2-5300 1 GB, 128 MB ×... - Page 20 Chapter 2 Installation To add or replace RAM for the NI VXIpc-882, complete the following steps: Remove the NI VXIpc-882 from the chassis. Refer to the removal instructions in the How to Remove the Controller from the VXI Chassis section.
-
Page 21: Installing And Removing The Internal Hard Drive
Remove the component side cover. Refer to the removal instructions in the Removing the NI VXIpc-882 Component Side Cover section. Remove the four screws under the solder side cover that hold the hard drive in place. You will need a 2mm hex driver to remove the M3 button head screws. -
Page 22: Expresscard/34
Slide the card out of the slot. Caution To avoid data loss and other potential issues, stop communication with your ExpressCard/34 device before removing it from the NI VXIpc-882. In Windows, use the Safely Remove Hardware tool to safely stop the ExpressCard/34. © National Instruments Corporation NI VXIpc-882 User Manual Artisan Technology Group - Quality Instrumentation ... -
Page 23: Configuration And Default Settings
Hardware Default Settings This chapter summarizes the hardware default settings for the NI VXIpc-882 for easy reference. The module is set at the factory for the most commonly used configuration. Figure 3-1 and Table 3-1 show the factory-default settings of the user-configurable jumpers on the NI VXIpc-882 controller. - Page 24 W8—MITE SELF CONFIG 1-2—DISABLE 2-3—ENABLE (DFLT) J2—SLOT 0 DETECT 1-2—NON-SLOT 0 3-4—AUTO DETECT (DFLT) 5-6—SLOT 0 Figure 3-1. NI VXIpc-882 Shipping Configuration Settings NI VXIpc-882 User Manual ni.com Artisan Technology Group - Quality Instrumentation ... Guaranteed | (888) 88-SOURCE | www.artisantg.com...
-
Page 25: Default Software Settings
Chapter 3 Configuration and Default Settings Table 3-1. NI VXIpc-882 Controller Hardware Default Settings Jumper Description Setting SMB CLK10 DIR 1–2 In (Default) 2–3 Out External CLK10 Source Select 1–2 SMB (Default) 2–3 Trigger Card CLK10 Source Select 1–2 Internal Osc. (Default) 2–3 External Source... - Page 26 Editor Field Default Setting Low-level register access Enabled API support User window size 2 MB DMA setting Enable DMA on this controller NI VXIpc-882 User Manual ni.com Artisan Technology Group - Quality Instrumentation ... Guaranteed | (888) 88-SOURCE | www.artisantg.com...
-
Page 27: Slot 0 Detection
National Instruments support. Slot 0 Detection The NI VXIpc-882 controller is configured at the factory to automatically detect if it is installed in Slot 0 of a VXI mainframe. With automatic System Controller slot detection the NI VXIpc-882 controller can be installed in any VXIbus slot. -
Page 28: Mite Eeprom
Non-System Controller or for automatic detection. Failing to do so may result in damage to the NI VXIpc-882 controller and/or the backplane. When the NI VXIpc-882 controller is installed in Slot 0 of a VXI system it becomes the VXIbus System Controller. As the System Controller, the... -
Page 29: Power-On Self Configuration
Use MAX under Windows to edit the NI VXIpc-882 controller configuration. Some of these settings are stored in files that the NI-VXI software reads, while other settings are stored directly in the NI VXIpc-882 controller EEPROM. Certain EEPROM configurations, including invalid configurations, can lock up your computer while it is booting. -
Page 30: Vxibus Clk10 Routing
If you encounter this situation, you should reduce the size of the NI VXIpc-882 controller user memory window. The EEPROM can become corrupted if the NI VXIpc-882 controller is shut down while it is updating the EEPROM. If one of these situations occurs after you change the configuration, complete the following steps to reconfigure the NI VXIpc-882 controller. -
Page 31: Front Panel Smb Direction Control
Configuration and Default Settings • The front panel TRIG/CLK PORT A(B). CLK10 can be routed into the NI VXIpc-882 from another NI VXIpc-882 through the TRIG/CLK PORT A(B) on the front panel. Onboard jumpers are used to set this configuration. -
Page 32: W4-Clk10 Source Select
Set the W3 jumper to Trigger Card, shown in Figure 3-6b, to select the CLK10 source as the TRIG/CLK PORT A(B) on the NI VXIpc-882 front panel. When selecting the trigger card as the CLK10 input source be sure to set jumper W7 to set the direction of CLK10 through the TRIG/CLK PORT A(B). -
Page 33: Trig/Clk Port A(B) Direction
In Slot 0 operation with jumpers W4 set for an external source and W3 set for the front panel TRIG/CLK PORT A(B) set this jumper to IN, as shown in Figure 3-8a, to route CLK10 in from another NI VXIpc-882 to the VXI backplane. In non-slot 0 operation the IN setting has no effect. -
Page 34: Clk10 Termination
This setting can be found in the hardware configuration panels in MAX, as shown in Figure 3-9. Parallel termination is not necessary when the signal is driven by a 50 Ω source, such Note as an NI VXIpc-882 controller. NI VXIpc-882 User Manual 3-12 ni.com... -
Page 35: Bios Configuration
The BIOS setup program includes menus for configuring settings and enabling NI VXIpc-882 controller features. Most users do not need to use the BIOS setup program, as the NI VXIpc-882 controller ships with default settings that work well for most configurations. Caution Changing BIOS settings may lead to incorrect controller behavior and possibly an unbootable controller. -
Page 36: Main Setup Menu
<Enter> on an item. • System Information—This setting displays a screen containing important system information about the NI VXIpc-882 controller. Advanced Setup Menu This menu contains BIOS settings that normally do not require modification. -
Page 37: Integrated Peripherals Submenu
Integrated Peripherals Submenu Use this submenu to apply nondefault configurations to the front panel peripherals of an NI VXIpc-882 controller. Normally, you do not need to modify these settings, as the factory default settings provide the most compatible and optimal configuration possible. - Page 38 Note that even when set to Disabled, the integrated graphics device still acts as the video display device if it is the only one available in the system. The default setting is Disabled. NI VXIpc-882 User Manual 3-16 ni.com...
-
Page 39: Security Menu
Set Supervisor Password—This setting allows you to specify a password that must be entered to access the BIOS setup options. By default, no password is specified. © National Instruments Corporation 3-17 NI VXIpc-882 User Manual Artisan Technology Group - Quality Instrumentation ... Guaranteed | (888) 88-SOURCE | www.artisantg.com... -
Page 40: Boot Setup Menu
Exit Discarding Changes—Any changes made to BIOS settings during this session of the BIOS setup program are discarded. The setup program then exits and boots the controller without rebooting first. NI VXIpc-882 User Manual 3-18 ni.com Artisan Technology Group - Quality Instrumentation ... Guaranteed | (888) 88-SOURCE | www.artisantg.com... -
Page 41: System Cmos
System CMOS. The setup program remains active, allowing further changes. System CMOS The NI VXIpc-882 contains a backed-up memory used to store BIOS configuration information. Complete the following steps to clear the CMOS contents: Power off the chassis. -
Page 42: Software Configuration
The following sections describe hardware configuration settings available with NI-VXI 3.6. If you are using a later version of NI-VXI, you may find some differences between your settings and those described in this section. NI VXIpc-882 User Manual 3-20 ni.com... -
Page 43: Default Max Settings
You may execute this option by selecting one of the options in the General tab in the MAX hardware configuration. © National Instruments Corporation 3-21 NI VXIpc-882 User Manual Artisan Technology Group - Quality Instrumentation ... Guaranteed | (888) 88-SOURCE | www.artisantg.com... - Page 44 Bus Requester: Release on Request Checked Bus Requester: Request Level Bus Requester: Operate as Fair Requester Checked Bus Arbitration: Prioritized Checked NI VXIpc-882 User Manual 3-22 ni.com Artisan Technology Group - Quality Instrumentation ... Guaranteed | (888) 88-SOURCE | www.artisantg.com...
-
Page 45: Vxi-Mxi-2 Default Settings
Setting Default Value Logical Address Selection Use DIP Switch to Set the Logical Address Shared Memory: Address Space © National Instruments Corporation 3-23 NI VXIpc-882 User Manual Artisan Technology Group - Quality Instrumentation ... Guaranteed | (888) 88-SOURCE | www.artisantg.com... - Page 46 (Recommended) Advanced: Bus Protocols: Transfer Limit Advanced: Bus Arbitration: Checked Arbiter Type: Priority Advanced: Bus Arbitration: Checked Operate as Fair Requester NI VXIpc-882 User Manual 3-24 ni.com Artisan Technology Group - Quality Instrumentation ... Guaranteed | (888) 88-SOURCE | www.artisantg.com...
-
Page 47: Pci-Mxi-2 Default Settings
Share Memory in A32 Space Selected Shared Memory: Shared RAM Size 2 GB Shared Memory: Reserve Physical Memory (KB) © National Instruments Corporation 3-25 NI VXIpc-882 User Manual Artisan Technology Group - Quality Instrumentation ... Guaranteed | (888) 88-SOURCE | www.artisantg.com... - Page 48 Register Access API Support User Window: User Window Size 64 KB Enable PCI Expansion ROM Checked DMA Setting Enable DMA on this Controller NI VXIpc-882 User Manual 3-26 ni.com Artisan Technology Group - Quality Instrumentation ... Guaranteed | (888) 88-SOURCE | www.artisantg.com...
-
Page 49: Front Panel Smb Extclk Setup
Onboard programmable logic can configure the NI VXIpc-882 to drive its 10 MHz VXI CLK10 signal to this connector as an output or to use this connector as an input for the 10 MHz VXI CLK10 signal. -
Page 50: Developing Your Application
NI-VISA is the National Instruments implementation of the VISA I/O standard, which is a common interface to many types of instruments (such as VXI, GPIB, PXI, Serial, TCP/IP, and so on). NI-VXI is optimized for use through NI-VISA, and we recommend using NI-VISA to develop all new VXI/VME applications. -
Page 51: Configuration
VXI system on which to run Resman (refer to Figure 4-1). You can also select Tools»NI-VXI»VXI Resource Manager to run Resman on all VXI systems. From the VXI Options dialog in the Tools»NI-VXI menu, you can also use MAX to NI VXIpc-882 User Manual ni.com... -
Page 52: Device Interaction
Measurement Studio. You can also control your devices in MAX by right-clicking a device name and selecting Open VISA Session. © National Instruments Corporation NI VXIpc-882 User Manual Artisan Technology Group - Quality Instrumentation ... Guaranteed | (888) 88-SOURCE | www.artisantg.com... - Page 53 You can also use VXI Interactive Control Program (VIC) to control your VXI/VME devices and develop and debug VXI application programs. VIC is not included in the default NI-VXI installation; to install it, select NI-VXI API Development from the custom installation screen in the installer.
-
Page 54: Programming For Vxi
NI-VISA and the NI-VXI API are the two National Instruments programming interfaces for accessing your VXI/VME instruments. With NI-VXI 3.0 or later, NI-VISA is the native API for communicating with a VXI or VME system, and we recommend using it for all new applications. - Page 55 NI-VISA, refer to the NI-VISA Help, which you can find at ni.com/ support The NI-VXI API development environment is not installed by default as part of the Note NI-VXI installation. If you must develop an application using the older NI-VXI API, run the NI-VXI installer and select the appropriate option in the custom installation screen.
-
Page 56: Optimizing Large Vxibus Transfers
32-bit aligned, page-locked, Note viMemAlloc() VXImemAlloc() contiguous buffers which work efficiently with the move operations. © National Instruments Corporation NI VXIpc-882 User Manual Artisan Technology Group - Quality Instrumentation ... Guaranteed | (888) 88-SOURCE | www.artisantg.com... -
Page 57: Shared Memory
VXImemAlloc() NI-VXI API Notes The following notes apply only if you are using the NI-VXI API. We recommend that all new VXI/VME applications use the NI-VISA API, but you can still develop with the older NI-VXI API for compatibility with legacy code. -
Page 58: Debugging
NI Spy can log the calls your program makes to these drivers so you can check them for errors at your convenience, or use the NI Spy log as a reference when discussing the problem with National Instruments technical support. - Page 59 VISAIC, discussed in the Device Interaction section of this chapter, is an excellent platform for quickly testing instruments and learning how to communicate with them. Refer to the NI-VISA Help for more information about using VISAIC. Figure 4-5. VISAIC NI VXIpc-882 User Manual 4-10 ni.com...
-
Page 60: Front Panel Connectors
I/O Information Front Panel Connectors Table 5-1 lists various peripherals and their corresponding NI VXIpc-882 external connectors, bus interfaces, and functions. Table 5-1. NI VXIpc-882 Peripherals Overview External Peripheral Connector Function Video 24-pin D-SUB Integrated with Dynamic Video (standard DVI-I) -
Page 61: Dvi-I
I/O Information DVI-I Figure 5-1 shows the location and pinouts for the DVI-I connector on the NI VXIpc-882. Table 5-2 lists and describes the DVI-I connector signals. 9 17 Figure 5-1. DVI-I Connector Location and Pinout Table 5-2. DVI-I Connector Signals Signal Name TMDS Data2–... - Page 62 TMDS Clock+ TMDS Clock– Analog Red Analog Green Analog Blue Analog Horizontal Sync Analog GND Return: (analog R, G, B) © National Instruments Corporation NI VXIpc-882 User Manual Artisan Technology Group - Quality Instrumentation ... Guaranteed | (888) 88-SOURCE | www.artisantg.com...
-
Page 63: Com1
I/O Information COM1 Figure 5-2 shows the location and pinouts for the COM1 connector on the NI VXIpc-882. Table 5-3 lists and describes the COM1 connector signal. COM1 Figure 5-2. COM1 Connector Location and Pinout Table 5-3. COM1 Connector Signals... -
Page 64: Ethernet
Chapter 5 I/O Information Ethernet Figure 5-3 shows the location and pinouts for the Ethernet connector on the NI VXIpc-882. Table 5-4 lists and describes the Ethernet connector signals. Ethernet Figure 5-3. Ethernet Connector Location and Pinout Table 5-4. Ethernet Connector Signals... - Page 65 Unlit 10 Mbit/sec data rate is selected. Bottom Green 100 Mbit/sec data rate is selected. Orange 1000 Mbit/sec data rate is selected. NI VXIpc-882 User Manual ni.com Artisan Technology Group - Quality Instrumentation ... Guaranteed | (888) 88-SOURCE | www.artisantg.com...
-
Page 66: Parallel Port
I/O Information Parallel Port Figure 5-4 shows the location and pinouts for the IEEE 1284 (parallel) connector on the NI VXIpc-882. Table 5-6 lists and describes the IEEE 1284 connector signals. Parallel port adapter cables are available from National Instruments, part number 777169-01. - Page 67 Data Bit 6 Data Bit 7 INIT# Initialize Printer STROBE# Strobe SLCTIN# Select Input AUTOFD# Auto Line Feed +5 V 19–35 Ground Not Connected NI VXIpc-882 User Manual ni.com Artisan Technology Group - Quality Instrumentation ... Guaranteed | (888) 88-SOURCE | www.artisantg.com...
-
Page 68: Universal Serial Bus
I/O Information Universal Serial Bus Figure 5-5 shows the location and pinouts for the Universal Serial Bus (USB) connectors on the NI VXIpc-882. Table 5-7 lists and describes the USB connector signals. Figure 5-5. USB Connector Location and Pinout Table 5-7. USB Connector Signals... -
Page 69: Smb Trigin/Out And Extclk
Front Panel SMB TRIGIN/TRIGOUT section of Chapter 3, Configuration and Default Settings. Figure 5-6 shows the TRIG connector locations on the NI VXIpc-882. Table 5-8 lists and describes the trigger connector signals. TRIG OUT TRIG IN EXT CLK (CLK10) Figure 5-6. -
Page 70: Gpib (Ieee 488.2)
I/O Information GPIB (IEEE 488.2) Figure 5-7 shows the location and pinouts for the GPIB connector on the NI VXIpc-882. Table 5-9 lists and describes the GPIB connector signals. National Instruments provides a GPIB mating connector, part number 183285-0R2. GPIB Figure 5-7. - Page 71 Data Bit 5 DIO6# Data Bit 6 DIO7# Data Bit 7 DIO8# Data Bit 8 REN# Remote Enable 18–25 Logic Ground NI VXIpc-882 User Manual 5-12 ni.com Artisan Technology Group - Quality Instrumentation ... Guaranteed | (888) 88-SOURCE | www.artisantg.com...
-
Page 72: Expresscard/34 Slot
Chapter 5 I/O Information ExpressCard/34 Slot The NI VXIpc-882 controller is equipped with an ExpressCard/34 slot on the front panel, which provides I/O expansion and options for removable storage, Ethernet, and a variety of other I/O. Figure 5-8 shows the location and pinouts for the ExpressCard/34 slot on the NI VXIpc-882. - Page 73 PE Data Receive – PERp PE Data Receive + Ground PETn PE Data Transmit – PETp PE Data Transmit + Ground NI VXIpc-882 User Manual 5-14 ni.com Artisan Technology Group - Quality Instrumentation ... Guaranteed | (888) 88-SOURCE | www.artisantg.com...
-
Page 74: Front Panel Features
DRIVE—Indicates the hard drive is being accessed. Data Storage The NI VXIpc-882 has a SATA hard drive (at least 80 GB). You can add additional data storage capacity with a USB DVD/CD-ROM drive or USB floppy drive. Contact National Instruments to purchase these devices. -
Page 75: Common Questions And Troubleshooting
How do I check the configuration of the memory, hard drive, time/date, and so on? You can view these parameters in the BIOS setup. To enter the BIOS setup, reboot the NI VXIpc-882 and press <Delete> during the memory tests. Refer to the BIOS Configuration... - Page 76 GPIB adapter. How do I install or reinstall the VXI and VISA drivers? The best way to install NI-VXI and NI-VISA is to set up networking on your controller so you can access to download the latest drivers ni.com...
-
Page 77: Boot Options
There are some limitations when booting from a USB device. Windows does not support booting from USB devices. Windows 7, Vista, and XP can be installed from a USB DVD/CD-ROM, but earlier versions of Windows cannot. The NI VXIpc-882 BIOS configures the USB devices so they will work in a DOS environment. -
Page 78: Hard Drive Recovery
Hard drive-based recovery stores a factory backup on a separate portion of your hard drive allowing you to restore your controller without additional media. The NI VXIpc-882 controller also ships with an OS Recovery CD that allows you to reinstall your operating system onto your hard drive through an external DVD/CD-ROM. -
Page 79: Installing An Os
Chapter 6 Common Questions and Troubleshooting Installing an OS The NI VXIpc-882 controller includes a pre-installed OS. In some cases, you may want to install a different OS. When doing so, consider the following guidelines. Installing from a DVD/CD-ROM The NI VXIpc-882 controller supports the installation of Windows 7, Vista, and XP from a USB DVD/CD-ROM. -
Page 80: Removing An Expresscard/34
My NI VXIpc-882 does not have an internal floppy drive. Is there a way to use an external drive? Yes. The NI VXIpc-882 controller supports and can boot from USB floppy drives. -
Page 81: Troubleshooting
Chapter 6 Common Questions and Troubleshooting How do I upgrade system memory? You can change the amount of installed RAM on the NI VXIpc-882 by upgrading the SO-DIMM. Refer to the Installing and Upgrading RAM section of Chapter 2, Installation, or for more ni.com/support... - Page 82 Be sure the video driver is installed. If it is not, refer to the Drivers.txt file on the hard drive or recovery CD-ROM. NI VXIpc-882 User Manual ni.com Artisan Technology Group - Quality Instrumentation ... Guaranteed | (888) 88-SOURCE | www.artisantg.com...
-
Page 83: Appendix A Specifications
Specifications This appendix lists the electrical, mechanical, and environmental specifications of the NI VXIpc-882 embedded computers. Electrical Current (A) Voltage (V) Peak Dynamic 3.1 A ±1.26 A 0.225 A ±0 A 10.6 A ±1.21 A –2 0.251 A ±0.04 A –5.2... - Page 84 VXI-8, Cooling Characterization Methodology Specification Caution Clean the NI VXIpc-882 with a soft nonmetallic brush. Make sure that the device is completely dry and free from contaminants before returning it to service. Storage Environment Ambient temperature range ....–20 to 70 °C...
- Page 85 Caution For EMC compliance, operate this device with shielded cables and accessories. Only valid with an NI VXIpc-882 using a solid-state drive, not with the shipping configuration, which contains a hard drive. © National Instruments Corporation NI VXIpc-882 User Manual...
- Page 86 Certification column. Environmental Management NI is committed to designing and manufacturing products in an environmentally responsible manner. NI recognizes that eliminating certain hazardous substances from our products is beneficial to the environment and to NI customers.
-
Page 87: Front Panel Layout And Dimensions
Front Panel Layout and Dimensions Figure A-1 shows the front panel layout and dimensions for the NI VXIpc-882. Dimensions are in inches (millimeters). © National Instruments Corporation NI VXIpc-882 User Manual Artisan Technology Group - Quality Instrumentation ... Guaranteed | (888) 88-SOURCE | www.artisantg.com... - Page 88 3.063 (77.80) 2.628 (66.75) 1.954 (49.63) 1.748 (44.40) 1.576 (40.03) 1.278 (32.46) 0.000 (0.00) Figure A-1. NI VXIpc-882 Front Panel Layout and Dimensions NI VXIpc-882 User Manual ni.com Artisan Technology Group - Quality Instrumentation ... Guaranteed | (888) 88-SOURCE | www.artisantg.com...
-
Page 89: Using The Trigger Ports On The Ni Vxipc-882
Using The Trigger Ports On The NI VXIpc-882 The NI VXIpc-882 allows you to extend the 8 TTL backplane triggers and CLK10 between chassis through convenient front panel connectors. Each trigger and the CLK are independently configurable as either inputs or outputs of the frame. -
Page 90: Software Configuration
4 NI VXIpc-882 Controller in Slot 0e Figure B-1. NI VXIpc-882 Controller Trigger Cabling Software Configuration Triggers are mapped into and out of your NI VXIpc-882 though software using the following steps. Open MAX. Find your device under Devices and Interfaces. -
Page 91: Vmebus Capability Codes
D32, D16, D08(O) (Interrupt Handler) VMEbus D32, D16, D08(O) interrupt handler D32, D16, D08(O) (Interrupter) VMEbus D32, D16, D08(O) interrupter © National Instruments Corporation NI VXIpc-882 User Manual Artisan Technology Group - Quality Instrumentation ... Guaranteed | (888) 88-SOURCE | www.artisantg.com... - Page 92 Appendix C VMEbus Capability Codes Capability Code Description ROAK, RORA Release on Acknowledge or Register Access interrupter BTO(x) VMEbus bus timer (programmable limit) NI VXIpc-882 User Manual ni.com Artisan Technology Group - Quality Instrumentation ... Guaranteed | (888) 88-SOURCE | www.artisantg.com...
- Page 93 KnowledgeBase, product manuals, step-by-step troubleshooting wizards, thousands of example programs, tutorials, application notes, instrument drivers, and so on. Registered users also receive access to the NI Discussion Forums . NI Applications Engineers make sure every ni.com/forums question submitted online receives an answer.
- Page 94 NI corporate headquarters. Phone numbers for our worldwide offices are listed at the front of this manual. You also can visit the Worldwide Offices section of to access the branch ni.com/niglobal...
- Page 95 An assembly, typically a printed circuit board, with connectors and signal paths that bus the connector pins. © National Instruments Corporation NI VXIpc-882 User Manual Artisan Technology Group - Quality Instrumentation ... Guaranteed | (888) 88-SOURCE | www.artisantg.com...
- Page 96 Video Graphics Array; the minimum video display standard for all PCs Extended Capabilities Parallel Extended Data Out EEPROM Electronically Erasable Programmable Read Only Memory NI VXIpc-882 User Manual ni.com Artisan Technology Group - Quality Instrumentation ... Guaranteed | (888) 88-SOURCE | www.artisantg.com...
- Page 97 Integrated Drive Electronics; hard disk and built-in controller IEEE Institute of Electrical and Electronics Engineers inches © National Instruments Corporation NI VXIpc-882 User Manual Artisan Technology Group - Quality Instrumentation ... Guaranteed | (888) 88-SOURCE | www.artisantg.com...
- Page 98 A transfer can be either a read or a write. megabytes of memory MTBF Mean time between failure MTTR Mean time to repair NI VXIpc-882 User Manual ni.com Artisan Technology Group - Quality Instrumentation ... Guaranteed | (888) 88-SOURCE | www.artisantg.com...
- Page 99 ISA interrupt level, DMA channel, and I/O address © National Instruments Corporation NI VXIpc-882 User Manual Artisan Technology Group - Quality Instrumentation ... Guaranteed | (888) 88-SOURCE | www.artisantg.com...
- Page 100 This slot would be used for a module with ST functionality that can provide individual triggers to all other peripherals. Universal Serial Bus Volts Watts NI VXIpc-882 User Manual ni.com Artisan Technology Group - Quality Instrumentation ... Guaranteed | (888) 88-SOURCE | www.artisantg.com...
- Page 101 Index ACCESS LED, 5-15 cabling triggers between two controllers (figure), B-2 Advanced Setup menu, 3-14 calibration certificate (NI resources), D-2 application development, 4-1 CB LED, 5-15 configuration, 4-2 CE compliance, specifications, A-4 debugging, 4-9 CLK10 routing, VXI bus, 3-8 NI-Spy (figure), 4-10...
- Page 102 4-9 3-26 NI-Spy (figure), 4-10 PCI tab settings (table), 3-26 VISAIC (figure), 4-10 Shared Memory tab settings Declaration of Conformity (NI resources), D-2 (table), 3-25 default settings Shared Memory tab settings (table), 3-22 hardware, 3-1 SMB tab settings (table), 3-23...
- Page 103 1-3 See also configuration location and pinout, 5-10 hard drive, 2-6 NI VXIpc-882 installed in a VXI chassis (figure), 2-3 © National Instruments Corporation NI VXIpc-882 User Manual Artisan Technology Group - Quality Instrumentation ... Guaranteed | (888) 88-SOURCE | www.artisantg.com...
- Page 104 MITE EEPROM LabVIEW, 1-4 See also EEPROM LEDs, front panel LEDs, 5-15 configuration, 3-6 LPT cable, connecting to NI VXIpc-882, 6-6 power on self configuration, 3-7 figure, 3-7 user/factory configuration, 3-6 main power fuse, replacing, 6-7 Main Setup menu, 3-14...
- Page 105 2-6 example programs (table), 4-7 replacing the main power fuse, 6-7 running Resman in MAX (figure), 4-3 © National Instruments Corporation NI VXIpc-882 User Manual Artisan Technology Group - Quality Instrumentation ... Guaranteed | (888) 88-SOURCE | www.artisantg.com...
- Page 106 RAM, 2-4 (figure), A-6 user-configurable settings, 3-5 online product certification, A-4 using the NI VXIpc-882 trigger ports, B-1 NI VXIpc-882 User Manual ni.com Artisan Technology Group - Quality Instrumentation ... Guaranteed | (888) 88-SOURCE | www.artisantg.com...
- Page 107 VXIbus watchdog timer CLK10 routing, 3-8 function, 1-2 front panel SMB direction, 3-9 Web resources, D-1 W2 jumper, 3-9 © National Instruments Corporation NI VXIpc-882 User Manual Artisan Technology Group - Quality Instrumentation ... Guaranteed | (888) 88-SOURCE | www.artisantg.com...
- Page 108 Artisan Technology Group is your source for quality new and certified-used/pre-owned equipment SERVICE CENTER REPAIRS WE BUY USED EQUIPMENT • FAST SHIPPING AND DELIVERY Experienced engineers and technicians on staff Sell your excess, underutilized, and idle used equipment at our full-service, in-house repair center We also offer credit for buy-backs and trade-ins •...
Need help?
Do you have a question about the VXIpc-882 and is the answer not in the manual?
Questions and answers