Advertisement
Quick Links
Light My Bricks
Installation Instructions for Light My Bricks LED Lighting Kits
Jun 21 · 22 min read
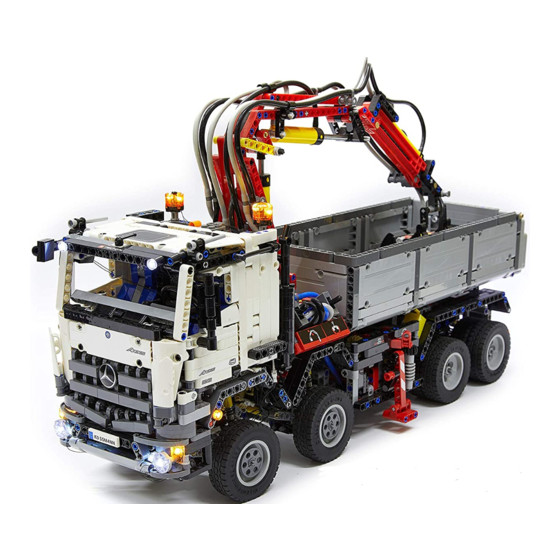
Light My Bricks: LEGO Mercedes Benz
Arocs 42043 Lighting Kit
The following page is the instructions for the Light My Bricks LEGO
Mercedes-Benz Arocs (42043) LED light kit.
To ensure a trouble-free installation of your light kit, please read and
follow each step carefully.
Please note: This page lists instructions for the
LED light kit only.
. . .
Advertisement

Related Manuals for LIGHT MY BRICKS LEGO Mercedes Benz Arocs 42043 Lighting Kit


Summary of Contents for LIGHT MY BRICKS LEGO Mercedes Benz Arocs 42043 Lighting Kit
- Page 1 Light My Bricks: LEGO Mercedes Benz Arocs 42043 Lighting Kit The following page is the instructions for the Light My Bricks LEGO Mercedes-Benz Arocs (42043) LED light kit. To ensure a trouble-free installation of your light kit, please read and follow each step carefully.
-
Page 2: Package Contents
Package Contents: 18x White 15cm Bit Lights • 2x Flashing White 15cm Bit Lights • 2x White 30cm Bit Lights • 2x Rotating 30cm Bit Lights • 4x 8-Port Expansion Boards • 1x 5cm Connecting Cables • 1x 15cm Connecting Cables •... - Page 3 CAUTION: Forcing LEGO® to connect over a cable can result in damaging the cable and light. Connecting cable connectors to Expansion Boards Take extra care when inserting connectors to ports of Expansion Boards. Connectors can be inserted only one way. With the expansion board facing up, look for the soldered “=”...
- Page 4 overheating of the expansion board when connected. Connecting cable connectors to Strip Lights Take extra care when inserting connectors to ports on the Strip Lights. Connectors can be inserted only one way. With the Strip Light facing up, ensure the side of the connector with the wires exposed is facing down. If a plug won’t t easily into a port connector, don’t force it.
- Page 5 . . . K, Let’s Begin! 1.) Start by disconnecting the head light pieces as well as surrounding pieces as per below.
- Page 6 2.) Starting with the left side of the truck, carefully split the section as per below by creating a gap in between sections, then take a White 15cm Bit Light and thread the connector side of the cable through the gap we have created.
- Page 7 3.) Repeat previous step to install another White 15cm Bit Light to the right side Pull both cables out from underneath...
- Page 8 4.) Take the following two pieces and remove the trans clear tiles from each side. Take a White 15cm Bit Light and place it over one of the pieces over the light grey stud. Secure the Bit Light in place by connecting a provided Trans Clear Round Plate 1x1.
- Page 9 Repeat this process to install another White 15cm Bit Light to the other piece using another provided Trans Clear Round Plate 1x1 5.) Take one of the pieces and then recreate the same gap we created in step 2 to allow us to thread the cable through the left side of the truck.
- Page 10 Close up the gap.
- Page 11 Repeat this process to reconnect the other piece to the right side.
- Page 12 6.) Take the two headlight pieces and then disconnect the trans clear 2x2 plates. Take 4x White 15cm Bit Lights and then place each one over each hole of the light grey round 2x2 plate as per below:...
- Page 13 Reconnect the trans clear 2x2 plate over the top to secure the bit lights in place.
- Page 14 Turn the headlight section over and then group the four cables together and then twist them around each other to form one large cable.
- Page 15 Repeat this process to install another 4x White 15cm Bit Lights to the other headlight section. 7.) Take one of the headlight cables and then thread it through thefollowing gap on the right side of the truck. Thread it all the way through and then pull it out from underneath.
- Page 16 Repeat this process to reconnect the headlight on the left side of the truck.
- Page 18 8.) Take 2x 8-Port Expansion Boards and connect them together using a 5cm Connecting Cable. Connect the cable to the end ports.
- Page 19 Connect all six Bit Light cables from the left side of the truck to one of the expansion boards and then connect all six Bit Light cables from the right side of the truck to the other expansion board. 9.) Test the lights we have installed so far are working OK by taking outthe LEGO Power Functions Cable and connecting it to a spare port on the expansion board.
- Page 20 Disconnect the Power Functions Cable from the expansion board and proceed to the next step.
- Page 21 10.) Disconnect the trans orange round tiles from both sides of thetruck. Take a Flashing White 15cm Bit Light and thread the connector side of the cable through the hole where you disconnected the trans orange round tile from. Thread the cable all the way through until the Bit Light is sitting right against the edge of the hole.
- Page 22 Press the Bit Light down so that it sits at against the edge and the secure it in place by connecting a provided Trans Orange Round Plate 1x1 over the top. 11.) Repeat previous step to install another Flashing White 15cm Bit Light to the left side of the truck using another provided Trans Orange Round Plate 1x1...
- Page 24 12.) Turn the truck on it’s side so we can access underneath of it andthen pull down both cables from the two Bit Lights we just installed. Take another 8-Port Expansion Board and connect both lights to the rst two ports.
- Page 25 13.) We will now install lights over the top front of the truck. Firstdisconnect the trans clear round tiles from each side. Starting with the left side, seperate the following sections by pulling the front piece forward.
- Page 26 Take a White 30cm Bit Light and thread the connector side through the following hole and then in between white and black sections as per below: Pull the cable all the way back and then thread it through the second hole of the white piece as per below and then down in between black and grey sections:...
- Page 27 Press the Bit Light at against the edge of the light grey piece and then secure it in place by connecting a provided Trans Clear Round Plate 1x1 over the top.
- Page 28 Close up all the sections we separated. 14.) Pull the cable down the back and then thread down through thefollowing space. Pull it down from underneath (above the wheel) and then connect it to the third port along the 8-port Expansion Board from step 12.
- Page 31 15.) Repeat steps 13 to install another White 30cm Bit Light to the top right front of the truck using another Trans Clear Round Plate 1x1.
- Page 33 16.) Pull the cable back and then pull it down over the back whitesection as per below then thread the cable down through the following space. Pull it down from underneath (above the wheel) and then turn the truck over so that we can bring the 8-port Expansion Board from step 12 across.
- Page 34 17.) Take a 15cm Connecting Cable and connect it to the remaining port on one of the 8-port expansion boards from step 8.
- Page 35 Thread the other end of the 15cm connecting cable through the following space (over the light grey piece) and then connect it to the next port along the 8-port expansion board (from step 12) 18.) Take 4x Adhesive Squares and stick two on each 8-port expansion board at the front.
- Page 36 19.) Neaten up excess cable from the Bit Lights at the front by pullingthem all the way out and then twisting them around each other and then tucking them up the sections closest to each expansion board.
- Page 39 20.) Connect the Power Functions Cable to the Power Functions Batterypack and then pull the cable over the back and then thread it down the space below the cream coloured cog wheel. Pull it down from underneath the truck and then turn the truck on it’s side to allow you to connect the power functions cable to a spare port on the 8-port expansion board.
- Page 40 Turn on the power functions battery pack again to test all the lights are working OK.
- Page 41 21.) We will now install our Rotating Bit Lights inside the two beacons.First disconnect both beacon light sections and then disconnect the black round plates 2x2 from underneath each.
- Page 42 22.) Take 1x Rotating 30cm Bit Light and place the component upside down ( at side up) over the top of the middle of the trans orange round brick 2x2. Reconnect the black round plate 2x2 directly over the top then ip the beacon over to the correct side.
- Page 43 Repeat this process to install another Rotating 30cm Bit Light to the other beacon. 23.) Reconnect both beacons to the top of the truck ensuring the cablesare facing toward the back. Because we have installed Rotating Bit Lights inside trans orange round brick, we will not be able to push this brick all the way down the technic pin.
- Page 44 Ensure that you do NOT forcefully push the Beacon all the way down otherwise this may damage the Rotating Bit Light The base of the Rotating Bit Light should be sitting on top of the technic bar coming up from underneath Take the left beacon cable and thread it down the following space:...
- Page 45 Pull it out from underneath and then thread it through the space below. Pull it out from underneath the truck. Take the right beacon light and thread it down the following space: Pull it down from underneath and then thread it down through the next space below:...
- Page 46 24.) Turn the truck over and pull both beacon light cables out fromunderneath and connect them to the two remaining ports on the 8-port expansion board.
- Page 47 Turn the truck back to its correct side up and then Turn ‘ON’ the Power Functions Battery Pack to test the Rotating Bit Lights are working OK 25.) Turn the Truck back over and then mount the 8-port ExpansionBoard underneath in the following position using 2x Adhesive Squares.
- Page 48 Neaten up excess cable from all the Bit Lights by pulling them all the way out and then twisting them around each other and then tucking them up one of the spaces closest to the expansion board.
- Page 49 26.) Take a 50cm Connecting Cable and connect it to the remaining port on the 8-port Expansion Board at the front of the truck. Follow the below images to thread the other end of the cable through towards the back underneath the truck through the following holes and gaps.
- Page 51 27.) Connect the other end of the 50cm Connecting Cable to the rstport on the remaining 8-Port Expansion Board.
- Page 52 28.) Turn the truck over to the back and then remove the three transcoloured round tiles (orange, red, clear) from each side.
- Page 53 We will installing another 6x White 15cm Bit Lights and replacing the round tiles with the provided trans coloured plates. 29.) Take the rst White 15cm Bit Light and thread it through the rst hole on the left side. Thread it all the way through and then push the Bit Light at down against the edge of the technic pin before securing it in place with one Trans Orange Round Plate 1x1.
- Page 54 Using the same method, install another 2x White 15cm Bit Lights for the left side of the truck using a provided Trans Red Round Plate 1x1 and Trans Clear Round Plate 1x1 to secure them in place.
- Page 55 30.) Take the three cables from the left side and then twist themaround each other to form one large cable.
- Page 56 Thread the cable up through the following space underneath and then pull it all the way out from the back as per below...
- Page 57 31.) Repeat previous steps to install another 3x White 15cm Bit Lights to the right side of the truck using the remaining provided trans coloured round plates 1x1 32.) Thread the cable up through the following space underneath andthen pull it all the way out the left side (same with the left side cable). Then bring all cables together and pull them down behind the wheel.
- Page 58 33.) Turn the truck over and then connect all six lights to the 8- portExpansion Board.
- Page 59 34.) Remove the back left wheel and then disconnect the 50cmconnecting cable from the expansion board and thread the expansion board through the following space. Then pull it over the wheel axle and reconnect the 50cm connecting cable Mount the expansion board to the side frame in the following position using another 2x Adhesive Squares.
- Page 60 Pull the excess cable from the two sides back and them twist them around each other to secure them from dangling down and being seen from the back of the truck. Tuck them in close the expansion board.
- Page 61 35.) Eliminate excess cable from the 50cm connecting cable by pullingit back towards the back expansion board and then twisting any remaining cable around the the six bit light cables as per below...
- Page 63 36.) Reconnect the back wheel and then turn ON the power pack tocon rm the back lights are working OK.
- Page 64 . . . This nally completes installation of the Mercedes Benz Arocs Light Kit. We hope you enjoy your light kit. We Thank YOU for purchasing this Light Kit! . . .
Need help?
Do you have a question about the LEGO Mercedes Benz Arocs 42043 Lighting Kit and is the answer not in the manual?
Questions and answers