Table of Contents
Advertisement
Quick Links
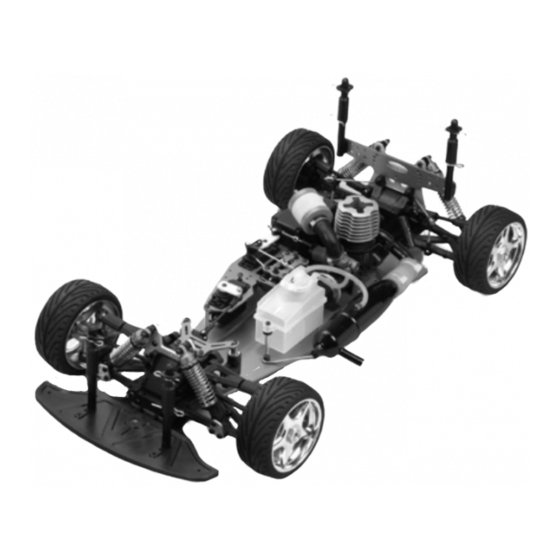
T70
4WD
scale 1/6
Instruction manual • Bouwhandleiding • Bauanleitung • Instructions de montage
2 channel radio not included.
Télécommande 2-voies et accus non inclus.
Exclusief 2 kanaalsradiobesturingsset en batterijen.
2 Kanal Fernsteuerung und batterien nicht in Baukasten enthalten.
version: 07/11/2005
Advertisement
Table of Contents

Subscribe to Our Youtube Channel
Related Manuals for protech ProMAX


Summary of Contents for protech ProMAX
- Page 1 scale 1/6 Instruction manual • Bouwhandleiding • Bauanleitung • Instructions de montage 2 channel radio not included. Télécommande 2-voies et accus non inclus. Exclusief 2 kanaalsradiobesturingsset en batterijen. 2 Kanal Fernsteuerung und batterien nicht in Baukasten enthalten. version: 07/11/2005...
- Page 2 Never use other fuels that are explosive or fi re hazardous. A wrong use of the fuel can cause serious injuries or damages. Only the user is responsible for the use of these products. Protech assumes no liability for the use of this model car.
- Page 3 TOOLS REQUIRED - BENODIGDE GEREEDSCHAPPEN OUTILS RECOMMANDÉS - BENOTIGDE WERKZEUGE CROSS WRENCH NEEDLE NOSE PLIERS KRUISSLEUTEL BEK TANG CLE EN CROIX PINCE À BEC KREUZSCHLUSSEL BEISZANGE PHILIPS SCREW DRIVER WIRE CUTTER PHILIPS SCHROEVENDRAAIER DRAAD STRIPPER PINCE COUPANTE TOURNEVIS PHILIPS KNEIFZANGE SCHRAUBENDREHER SHARP HOBBY KNIFE SCHERP HOBBYMES...
- Page 4 PRECAUTIONS DE SECURITE Afi n de prévenir tout dommage matériel ou corporel, faire évoluer les modèles radiocommandés de façon responsable en suivant au minimum les quelques recom- mandations ci-après. Prendre l’environnement en considération. Ne jamais faire évoluer les modèles R/C près de personne ou animaux, ne pas considérer humains ou animaux comme des obstacles à éviter ! Ne jamais faire évoluer les modèles dans la rue ou sur une route : ils peuvent causer de graves accidents de la circulation.
- Page 5 SICHERHEITSVORSCHRIFTEN Um etwaige Sach- bzw. Personenschäden zu vermeiden, ist es wichtig, daß Sie lhr ferngesteuertes Auto auf verantwortungsbewul3te Art und Weise verwenden und nachstehende Empfehlungen vor der Verwendung des Autos aufmerksam durchlesen. Bei der Fembedienung ist stets auf die Umgebung zu achten. Lassen Sie das Auto niemals in der Nahe von Personen oder Tieren fahren.
- Page 6 Assembly of the front and rear shock absorbers • Please note that when biulding the shock absorber the front Assemblage des amortisseurs avants et arrières shocks are shorter than the Montage van de voorste en achterste schokdempers rear shocks. • Noteer dat de vooste schok- Montierung des Dämpferzylinder vorne und hinten dempers kleiner zijn dan de achterste.
- Page 7 Mounting of the front and rear shock absorbers Montage van de voorste en achterste schokdempers Fixation des amortisseurs AV & AR Montierung des Dämpferzylinder vorne und hinten fi g 1 fi g 2 fi g 3 fi g 4 To mount the front shock ab sorb ers Om de voorste schokdempers te Pour fi...
- Page 8 Installing the servos Installeren van de servo’s Installation des servos Servo einbau Fig 9 Fig 10 Fig 11 Fig 12 Disassemble the radio tray by Demonteer de radioplaat door Démontez la platine radio en re mov ing the six 3mmx10mm middel van het wegnemen van de enlevant les 6 vis 3mmx10mm, screws, locate the servo mount ing...
- Page 9 Mounting of the tank Montage van de tank Montage du réservoir pressure nipple Montieren von Kraftstoffank fuel outlet nipple Fig 23 Fig 24 Fig 25 Fig 26 Before mounting the tank, screw Alvorens de tank te monteren, Avant de monter le réservoir sur the two pressure nipples onto the moet men eerst de 2 nippels le chassis, vissez les nipples en...
- Page 10 Throttle and brake linkage Ref: T54.097 Aansluiting van gas en rem Cut off excess length/ Commande de gas et de frein Op maat afknippen/ Coupez à longuer/ Anschluss von Gaz und Bremse Schneiden Sie überschüssige 2mm threaded rod/ Länge ab 2mm draadstang/ Servo mount M2x25mm screw/...
- Page 11 Tuned pipe assembly Montage van resonantieuitlaat Montage du résonateur Montieren des Resonators Fig 35 Fig 36 Fig 37 Fig 38 Fig 39 Fig 40 Fig 41 Fig 42 Locate the parts for the tuned pipe Zoek alle delen voor de resonan- Prenez toutes les pièces nécces- saires pour le montage du résona- tieuitlaat samen zoals afgebeeld...
- Page 12 Painting the body and wing The body is painted or sprayed on the in side. For this use only spe cial paint that is suitable for polycarbonate (we rec om mend PROTECH RAC ING FINISH). Be fore start ing to paint or spray, the body must be thor ough ly degreased. This can be done by wash ing the inside of the body with wa ter and wash ing up liquid.
- Page 13 Assembly of the front and rear shocks / Montage van de achterste schokdemper / Asssemblage des amortisseurs / Montierung des Dämpferzylinder hinten M 2,6 Nut / Ecrou O-ring (Black) Moer / Mutter Joint torique (Noir) Rubber O-ring (Zwart) 2,6 mm washer / Rondelle O-Ringe (Schwarz) Rondel / Unterlegscheibe Shock piston...
- Page 14 Assembly of the differential (x3) / Montage van het differentieel / Assemblage du différentiel / Montierung des Differential Diff Case (F/R) Carter de différentiel (Av/Ar) Differentieel behuizing (V/A) Differential Gehäuse (V/H) T55.060 Diff Case (Center) Washer (4x) Carter de différentiel (Central) Rondelles O-ring (Black) Differentieel behuizing (Midden)
- Page 15 Assembly of the spur gear / Montage van het hoofdtandwiel / Montage de la couronne principale / Montierung von das Hauptzahnrad Steel spur gear Couronne principale en acier Hoofdtandwiel in staal Hauptzahnrad in Stahl T54.022 Assembly of the brake joint cup / Montage van de aandrijfhuls voor de remschijf / Montage des supports de disque de frein / Montierung des Antriebsgelenk Bremsscheibe Center differential support (Rear) Support de différentiel central (Arr)
- Page 16 Assembly of the center diff and brake unit / Montage van het centrale differentieel en de remmen / Montage des leviers et cames et de frein / Montierung des central Differential und die Bremsen Brake lever Alloy center differential plate Levier de frein Platine de différentiel central en Alu Remarm...
- Page 17 Assembly of the front gearbox and shock stay / Montage van de versnelling en de schokdemper vooraan/ Montage du réducteur et du support d’amortisseurs AV / Montierung des Getriebe Vorne Alu front shock stay Support d’amortisseurs avants Voorste schokdempersteun Stoßdampferplatine vorne T54.020 3 X 20 mm T/P screw Zelftapschroef...
- Page 18 Assembly of the front suspension / Montage van de voorste ophanging / Assemblage de la suspension AV / Montierung von die vordere Querlenker oben Front upper suspension arm Bras supérieur de suspension avant Voorste bovenste ophangingsarm Vorderer Querlenker oben T54.017 M5 X 30mm Set screw Vis allen Stelschroef...
- Page 19 Assembly of the front suspension / Montage van de voorste ophanging / Montage de la suspension AV / Montierung von die vordere Querlenker oben 3 mm E-clip Body post Clips Fixation de carrosserie Clips Carrosseriesteun Sicherungsring Karosseriestutze T54.103 3 X 8mm T/P screw Zelftapschroef Blechschraube 3 mm E-clip...
- Page 20 Assembly of the front stabilizer / Montage van de voorste ophanging / Montage du stabilisateur AV / Montierung des Vordere Stabilisator M3 Flange nut Ecrou avec fl asque Moer met rand Mutter mit rand OPTIONAL PART M3 X 15 Screw Front stabilizer (2.2 mm) Pièces d’option Schroef...
- Page 21 Assembly of the rear gearbox and stabilizer / Montage van de achterste versnelling / Assemblage du réducteur AR / Montierung des Getriebe hinten M3 X 3 Set screw M3 X 3 Set screw Vis allen Vis allen Stelschroef M5 X 5 Set screw Stelschroef Gewindestifte Vis allen...
- Page 22 Assembly of the rear up-right / Montage van de achterste wielophanging / Assemblage d'une fusée AR / Montierung des Achsschenkel hinten 6 X 13 X 5 mm 6 X 13 X 5 mm ball bearing ball bearing Roulement à billes Roulement à...
- Page 23 Assembly of the rear suspension arms / Montage van de achterste ophanging / Montage de la suspension AR / Montierung von die hintere Querlenker unten Adjust this set screw to adjust M4 X 10 Set screw the rear ground clearance Vis allen Stels- Ajustez cette vis pour régler la...
- Page 24 Assembly of the rear suspension arms / Montage van de achterste ophanging / Montage de la suspension AR / Montierung von die hintere Querlenker unten 89 mm T54.043 M4 x 20mm countersunk screw Vis (tête conique) M3x30mm Cap screw Verzinkkop schroef Vis BTR Senkschraube Inbusschroef...
- Page 25 Assembly of the servo saver / Montage van de servo saver Assemblage du sauve-servo / Montierung des Servo Saver Right side Left side Servo saver R + L Droite Gauche T54.047 Rechts Links Top adapter Adaptateur haut Rechts Links Bovenste adapter Obere Adapter Servo saver horn A 6mm E-clip...
- Page 26 Assembly of the servo saver / Montage van de servo saver / Montage du sauve-servo / Montierung des Servo Saver M3x15mm cap screw vis BTR inbusschroef inbusschraube Steering tie rod Barre de direction Stuurstang Steuergestange M3x15mm cap screw vis BTR inbusschroef inbusschraube NOTE: Direction of the balls.
- Page 27 Mounting of the front suspension / Montage van de voorste ophanging / Installation du train AV / Montierung von die vordere Querlenker oben Center drive shaft Cardan centrale moolden cardan Mittlere antriebswelle T70.002 Steering tie rod Tringlerie de direction Stuurstang M3x15mm cap screw Steuergestange vis BTR...
- Page 28 Buiding the clutch / Monteren van de koppeling Assemblage de la cloche d’embrayage / Montierung von die Kupplungsglocke •To mount the fl y wheel carefully hold the fl y wheel with a large pair of pliers and tighten with a cross wrench./ •Pour monter le volant maintenez le volant délicatement dans une pince large et serrez avec un clé...
- Page 29 Installation of the engine / Montage van de motor Installation du moteur / Montierung des motor M3x25mm cap screw/ vis BTR/ inbusschroef/ inbusschraube Manifold adapter/ Joint silicone T54.092 Air-fi lter connector/ Coude du fi ltre T54.095 Manifold spring/ Ressort de coude Manifold set Manifold +Spring+Exhaust connection Coude+ressort+joint...
- Page 30 Throttle and brake linkage / Aansluiting van gas en rem Commande de gas et de frein / Anschluss von Gaz und Bremse M2x4mm screw/ vis/schroef/Schraube Cut off excess length Op maat afknippen Coupez à longueur 2mm threaded rod Schneiden Sie überschüssige Tige fi...
- Page 31 Assembly of the radio plate and throttle linkage / Mon tage van de radioplaat en carburator aansturing / Montage de la platine radio et de la commande de gas / Montieren von die Platine und Vergaser Anlenkung M2x8mm t/p screw zelftapschroef Blechschraube Use servo screw pro-...
- Page 32 Assembling the plastic side guards / Montage van de zijbeschermers / Montage des protections latérales / Montieren von die Seitenschutz 3mm x 10mm self tapper screw (cross head) Vis (Tête conique) Reciever box Zelftapschroef (Verzinkkop) Boîtier récepteur Blechschraube (Senk) Ontvangerbox Empfangerbox T70.006 Antenna Pipe...
- Page 33 Connecting the fuel tubing / Brandstofslang aansluiting / Assembly of the front stiffener / Montage van de voorste verstevingsplaat / Branchement des durites / Kraftstoffschlauch anschluss Montage du raidisseur AV / Zusammenbau von Verstarkungsplatine To fuel inlet nipple Vers carburateur 3 mm X 10mm self tapper screw (cross head) Naar carburator Vis (Tête conique)
- Page 34 Align throttle servo and brake / Uitlijnen van de gas en remservo / Ajustement de la commande de gas et frein /Ajustieren von Gaz und Bremsservo Engine at idle Moteur au ralenti Engine at full throttle Motor in neutraalstand Moteur au régime max. Motor aus neutral Stand Motor volledig open Gas geben...
- Page 35 Mounting the wing / Bevestiging van de vleugel Fixation de l’aileron / Befestigung von Flügel Use the self-tapping screws 2,2x6,5mm to fi x the wing Peugeot 206 onto the rear of the body. Utilisez les vis 2,2x6,5mm pour attacher l’aileron sur l’arrière de la carrosserie.
- Page 36 - 36...
- Page 37 Pro Max 1/6 spare parts / Pro Max 1/6 reserveonderdelen / Pro Max 1/6 pièces de rechange / Pro Max 1/6 Erzatsteilen T54.001 FRONT GEAR CASE T54.063 ANTENNA PIPE Optional parts T54.005 5 MM DIFF DRIVE SHAFT T54.064 BEARING 7X19X6 T54.007 P5 O-RING T54.065...
- Page 38 2-speed gearbox instructions (optional part) / Instructies voor een tweeversnellingsbak (in optie) / Boîte de vitesse à 2 rapports (en option) / 1St Spur Gear Holder 1St Spur Gear 49T T54.511 (One-Way) T54.504 Clutch cam T54.506 Center gear shaft T54.503 Alum.
- Page 39 2-speed gearbox instructions (optional part) / Instructies voor een tweeversnellingsbak (in optie) / Boîte de vitesse à 2 rapports (en option) / Use the parts that come with your car • FOR NORMAL PILOT SHAFT 5x8x0,8mm Washer 5x8x0,3mm Washer Dust Cover 3x8x0,5mm T54.514 Washer...
- Page 40 Pro Max 1/6 Bodies Porsche 911 Body T70.053 Decal T70.063 Subaru WRX Body T70.052 Decal T70.062 Renault Clio V6 ‘Catalunya’ Body T70.051 Decal T70.071 Renault Clio V6 Body T70.051 Decal T70.061 Fuel Tank Front SHOCK SET Réservoir Amortisseurs AV Brandstof Schokdempers tank Kraftoff-...
- Page 41 2-speed gearbox Ref. nr. De scrip tion R e f . n r . D e s c r i p t i o n T54.203 Main gear tefl on T54.518 Spur gear 44T 2nd gear T54.512 Spur gear 45T 2nd gear T54.517 Spur gear...
- Page 42 Fuel fi lter large Ref. Nr. Description Ref. nr. De scrip tion T51.051 Airfi lter 1/8 off-road TUNED PIPE SET FOR 1/8 OFF-ROAD X1403 Airfi lter 1/8 off-road PROMAX•PHASER4•MBX4•INFERNO T54.096 T0154 8 mm T0161 8 mm 9 mm T0156 with glow...
- Page 43 Glowplugs Protech glowplugs, the perfect choice for performance. This range of glowplugs is man u fac tured by a world lead ing Ital ian en gine man u fac tur er. The number in di cates the thick ness of the heat ing wire. The high est number is the coldest plug available.
- Page 44 All you need is inside our 300 pages full colour catalog PROTECH® is a registered trademark Geelseweg 80 • B-2250 OLEN • Belgium Tel. +32 (0)14-25 92 83 • E-mail: info@protech.be www.protech.be...
Need help?
Do you have a question about the ProMAX and is the answer not in the manual?
Questions and answers