Table of Contents
Advertisement
Advertisement
Table of Contents

Related Manuals for Tru-Turf RB48-11A Golf Green Roller


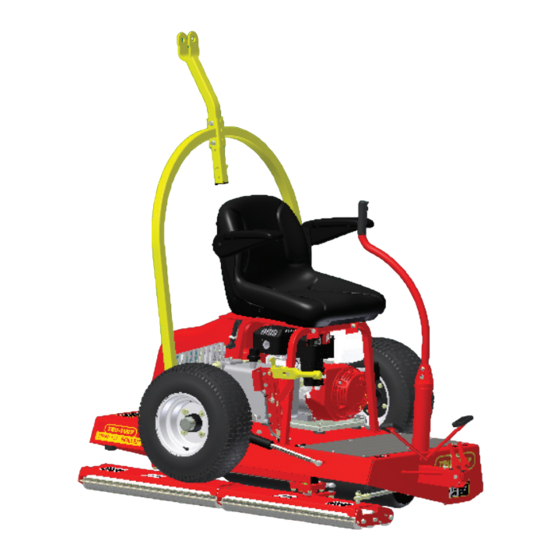
Summary of Contents for Tru-Turf RB48-11A Golf Green Roller
- Page 1 Original Instructions RB48-11A USA GOLF GREENS ROLLER MANUAL...
-
Page 3: Table Of Contents
The products detailed in this manual conform to the following standards: Machinery Directive 2006/EC Annex VIII, Contents EMC Directive 2004/108/EC / Article 10.1 & EN ISO 4254-1:2009 CE Declaration is available on the Tru-turf website. Revised 20/NOV/2013 Important ..............1 Smoothing Roller Parts & Servicing ....39 Drive Roller Sprocket &... -
Page 4: Important
Important Please read and understand before operating machine. 1. Pre-check all nuts, bolts, grub screws for tightness prior to operating machine. 2. Understand the operating procedures and the controls before operating. 3. Use the machine to roll 18-36 greens then check that all nuts, bolts etc. -
Page 5: Machine Information Record
If you have any questions or concerns that this manual does not address, please feel free to contact your distributor. Distributor Information Name: Address: Telephone: Fax: Email: Machine Information Model. RB48-11A Golf Green Roller Serial No. Engine No. Transmission No. Purchase Date No. ... -
Page 6: Safety Information
Safety Information Safety Information release of the catch. If the trailer catch is not correctly engaged while Safety is of the utmost importance when operating turf towing and releases accidentally, the front of the equipment. roller can drop and come in contact with the ground, causing the machine to move dangerously in any To ensure safe operation of the RB48-11A Roll ‘n’... -
Page 7: Warranty
Service calls, overtime-labour rates and freight costs SR72 Sports ground roller. related to the return of the faulty product to Tru-Turf or its MT5000 Series Totes are covered for a period of agents are not included. twelve (12) months. -
Page 8: Assembly
Assembly Initial Assembly When you receive the crate, the machine will be broken down into components ready for assembly. If you run into any problems during assembly, please feel free to call your local distributor or agent. List of Components Description Operation, Maintenance and Parts Manual Machine Frame/Body... - Page 9 Assembly Assembly Procedure • Apply thread lock “Loctite” to the M10 bolt attached to the dampener strut. Screw the M10 bolt into the strut Step 1: Mounting the seat to the seat base. support on the trailer arm. • Fit the armrests to the seat pan using the supplied screws, •...
- Page 10 Assembly Step 7: Correct dampener strut operation • When rolling of the green is completed, move the roller onto the fringe, stop the engine, lock the trailer • When the roller is in the trailing position: into the towing position, connect it to the towing 1.
-
Page 11: Operation
Operation procedures • When approaching the green do not tow the roller Operation procedures onto the green to set up, put the roller on the fringe of the green. Put trailer in the up position, start up the Pre-operation checks roller and drive it onto the green. - Page 12 Operation procedures Points to remember • When rolling of the green is completed, move the roller onto the fringe, stop the engine, lock the trailer into the towing position, connect it to the towing • Make sure the roller is serviceable before rolling. vehicle then move off to the next green to be rolled.
-
Page 13: Maintenance
Maintenance Maintenance It is essential that eff ort is applied to overcome the latch resistance as this is the point at which • Stop engine before performing any maintenance. the latch mechanism pulls the transmission cover • Service the Honda engine according to the down slightly onto the body. - Page 14 Maintenance Transmission (pump, Eaton 11) Lubrication • Initially, change the oil at 50 hours running time, then; • Lubricate drive chain with a chain lube such as Molykote, Innox or ChunkaRocol ITW. Spray on the • Change oil every 500 hours or annually, whichever inside of the chain so that the lubricant is forced into occurs fi rst.
- Page 15 Maintenance Changing engine oil √ √ Check Engine oil Change oil and service as per the manufacturers Servicing √ √ Check Transmission Oil Level Schedule enclosed as a separate insert to this manual. √ √ Beware of contaminants entering the transmission √...
-
Page 16: Fault Finding
Fault Finding Fault Finding Roller will not move one or either way, check: • If the transmission is at fault, repair or replace as • Chain is okay necessary, or seek professional advice from a local Eaton Service Center • Sprockets are not worn or slipping on the shaft •... -
Page 17: Machine Components
Operating Positions Rolling Position Towing Position ... -
Page 18: Park Brake System
Park Brake System ... - Page 19 Park Brake System ...
-
Page 20: Park Brake Lever
Park Brake Lever ... - Page 21 Park Brake Lever & Switch ...
-
Page 22: Seat & Frame
Seat & Frame ... -
Page 23: Seat Frame
Seat Frame ... -
Page 24: Upper Body
Upper Body ... -
Page 25: Transmission Cover Latch Bracket Assembly
Transmission Cover Latch Bracket Assembly ... -
Page 26: Transmission Cover Latch System
Transmission Cover Latch System ... -
Page 27: Transmission Cover & Latch Assembly
Transmission Cover & Latch ... -
Page 28: Latch Assembly
Latch Assembly ... -
Page 29: Drive Train Assembly
Drive Train Assembly ... -
Page 30: Honda Engine Mounting Assembly
Engine ... -
Page 31: Fan & Couplings
Fan & Coupling ... -
Page 32: Drive Chain & Tensioners
Drive Chain & Tensioners ... -
Page 33: Transmission
Transmission ... -
Page 34: Oil Tank & Pipes
Oil Tank & Pipes ... -
Page 35: Oil Tank & Fittings
Oil Tank & Fittings ... -
Page 36: Yoke & Struts
Yoke & Struts Refer to the Maintenance section for instructions regarding the adjustment of the struts ... -
Page 37: Foot Pedal Control
Foot Pedal Control ... -
Page 38: Underbody
Underbody ... -
Page 39: Joystick & Steering Components
Joystick & Steering Components ... -
Page 40: Smoothing Heads
Smoothing Heads ... -
Page 41: Smoothing Heads Exploded
Smoothing Heads Exploded ... -
Page 42: Smoothing Roller Parts & Servicing
Smoothing Roller Bearings & Seals - Replacing REMOVE & REPLACE BEARINGS AND INSERTS AT BOTH ENDS OF THE ROLLER BY CAREFULLY READING THE FOLLOWING INSTRUCTIONS AND PERFORMING THE STEPS SHOWN. 1. Remove Circlip, Plastic Washer and V Seal (Items 6, 1 & 5) to expose Plastic Insert (Item 4). Repeat for other end. *TAKE CARE NOT TO DAMAGE THE CIRCLIPS, SHIELDS &... - Page 43 Smoothing Roller Bearings & Seals - Replacing ROLLER ASSEMBLY INSTRUCTIONS 1. Lightly press one of the supplied new bearings into the end cap of the roller. 2. Slide the shaft into the roller and thru the bearing. Install a circlip against the bearing ensuring it is correctly seated in the circlip groove in the end cap. 3.
-
Page 44: Drive Roller Sprocket & Bearings
Drive Roller Sprocket & Bearings ... -
Page 45: Park Brake
Park Brake ... -
Page 46: Connecting Rods
Connecting Rods ... -
Page 47: Schematic Diagram - Safety Interlock Circuit
Schematic Diagram - Safety Interlock Circuit ... -
Page 48: Parallel Axle Trailer Assembly
Parallel Axle Trailer Assembly - USA ... -
Page 49: Hub Parallel Axle
Hub - Parallel Axle - USA ... -
Page 50: Labels
Labels R8402 R9068 R6057 R6059 R9086 R9088 R9083 R9087 R9066 ... - Page 51 Labels Locations ...
-
Page 52: Sample Inspection Report
Sample Inspection Report ... -
Page 53: Sample Claim Form
Sample Claim Form ... -
Page 54: Options
There are a number of options that can be fi tted to this model. A full set of installation instructions are included with each kit. These optins are available at additional cost from your nearest dealer. Go to the Tru-turf website locate to your nearest dealer. www.truturf.com ... - Page 55 Options For This Model ...
-
Page 56: Notes & Bulletins
Notes & Bulletins ...
Need help?
Do you have a question about the RB48-11A Golf Green Roller and is the answer not in the manual?
Questions and answers