Table of Contents

Related Manuals for Manta SPK5025 NIKE


Summary of Contents for Manta SPK5025 NIKE
- Page 1 16693-KP686 P/N:227-00686M11-02001 Size: 145*210mm 70g paper , 32 pages 16 sheets , black printing GŁOŚNIK POWER AUDIO POWER AUDIO SPEAKER Model: SPK5025 NIKE Instrukcja obsługi User’s Manual...
-
Page 2: Środki Bezpieczeństwa
Instrukcja Obsługi DZIĘKUJEMY ZA ZAKUPIENIE GŁOŚNIKA. PRZED ROZPOCZĘCIEM UŻYWANIA GŁOŚNIKA, NALEŻY DOKŁADNIE ZAPOZNAĆ SIĘ Z NINIEJSZĄ INSTRUKCJĄ OBSŁUGI. ŚRODKI BEZPIECZEŃSTWA 1. Przewód zasilający głośnika należy poprowadzić w miejscu, w którym nie będzie nadeptywany. Na przewodzie zasilającym nie wolno umieszczać ciężkich przedmiotów. Przy przyłączaniu/odłączaniu głośnika do/od źródła zasilania, należy chwytać... - Page 3 Instrukcja Obsługi PROFESJONALNY SYSTEM GŁOŚNIKÓW AKTYWNYCH Przed podłączeniem systemu prosimy o uważne przeczytanie niniejszej instrukcji. Dziękujemy za zakup systemu głośników aktywnych Manta. Przed przystąpieniem do użytkowania montażu prosimy o uważne przeczytanie instrukcji. INSTRUKCJA BEZPIECZEŃSTWA 1) Przeczytaj niniejszą Instrukcję Obsługi przed przystąpieniem do podłączenia bądź...
- Page 4 Instrukcja Obsługi 10) Jeśli wtyczka nie pasuje do twojego gniazda, nie wciskaj jej na siłę. 11) Używaj części zapasowych wskazanych przez producenta. 12) Zamontuj urządzenie zgodnie z instrukcjami producenta. 13) Umieść urządzenie w przewiewnym miejscu. Rozstaw system na płaskiej, twardej i stabilnej powierzchni. Nie narażaj go na działanie temperatur powyżej 40°C.
- Page 5 Instrukcja Obsługi UWAGA: Aby całkowicie odłączyć system, jeśli nie będzie używany przez dłuższy czas, wyjmij wtyczkę z kontaktu. Definicje Symboli NIEBEZPIECZEŃSTWO Oznacza wystąpienie ryzykownej sytuacji, – która może doprowadzić do śmierci lub poważnych obrażeń. Ten symbol pojawia się tylko w skrajnych przypadkach. –...
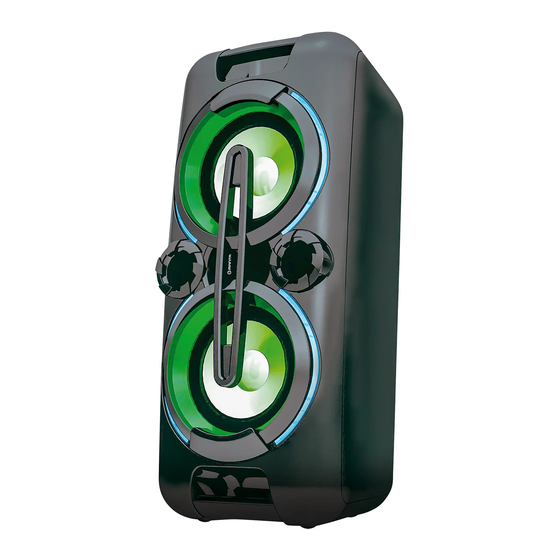
- Page 6 Instrukcja Obsługi Panel sterowania 1. 3,5mm GNIAZDO AUX 2. 6,3mm GNIAZDO MIKROFONU 1 3. 6,3mm GNIAZDO MIKROFONU 2 4. WEJŚCIE USB 1 5. WEJŚCIE USB 2 6. PRZYCISK 10/M./FOLD.+ 7. WŁĄCZNIK ŚWIATŁA 8. PRZYCISK 10/M./FOLD.- 9. PRZYCISK ECHA 10. PRZYCISK KOREKTORA 11.
- Page 7 Instrukcja Obsługi ŹRÓDŁO ZASILANIA Urządzenie jest zasilane akumulatorem kwasowo-ołowiowym (pojemność akumulatora to 4000 mAh) Naładuj urządzenie do pełna (proces trwa ok. 7 godzin) zanim użyjesz go po raz pierwszy. Długość pracy urządzenia po pełnym naładowaniu to ok. 2 godzin. Odłącz kabel zasilający z gniazda, aby używać...
- Page 8 Instrukcja Obsługi USTAWIENIE TRYBU DZIAŁANIA Aby zmienić tryb działania, naciśnij kilkakrotnie przycisk FUNCTION w celu wybrania trybu USB1/USB2/BLUETOOTH/AUX/RADIO. REGULACJA POZIOMU DŹWIĘKU 1. Obracaj pokrętłem GŁOŚNOŚCI, aby zwiększyć lub zmniejszyć poziom dźwięku. 2. Obracaj pokrętłem GŁOŚNOŚCI MIKROFONU, aby zwiększyć lub zmniejszyć poziom dźwięku mikrofonu. REGULACJA BASÓW Naciśnij przycisk SUPER BAS na urządzeniu w celu zwiększenia efektu basu.
-
Page 9: Obsługa Radia
Instrukcja Obsługi Są 3 efekty dekoracyjnego oświetlenia LED wokół głośników. Naciśnij i przytrzymaj przycisk LIGHT, aby wybrać odpowiedni efekt. E-1: Niebieska dioda LED będzie stale świecić. E-2: Czerwona dioda LED będzie stale świecić. E-3: Niebieska i czerwona dioda LED świecące na przemian. OBSŁUGA RADIA Słuchanie audycji radiowych. -
Page 10: Obsługa Usb
Instrukcja Obsługi RĘCZNE ZAPISYWANIE STACJI W PAMIĘCI Wybierz, które stacje chcesz zachować w pamięci, aby nie szukać ich automatycznie. Użyj przycisku /TUN.+ lub /TUN.-, aby dostroić urządzenie do stacji radiowej, którą chcesz zapisać (np. 93.1). Naciśnij przycisk P-MODE/M. Na wyświetlaczu zacznie migotać „P01”, co oznacza, że zapisano stację... - Page 11 Instrukcja Obsługi Aby przejść do konkretnego miejsca utworu podczas odtwarzania, naciśnij i przytrzymaj przycisk lub , aby przewinąć aktualny utwór ze zwiększoną prędkością, aż dotrzesz do poszukiwanego miejsca utworu; puść przycisk, żeby powrócić do normalnego trybu odtwarzania. Aby wybrać utwór o numerze wyższym niż 10, naciśnij przycisk 10/M./FOLD.+ lub 10/M./FOLD.-, żeby przeskoczyć...
-
Page 12: Odtwarzanie Losowe
Instrukcja Obsługi 1. Naciskaj przycisk P-MODE/M. na urządzeniu, aż „ ” będzie stale widoczny na wyświetlaczu; wszystkie utwory z pamięci USB będą powtarzane. 2. Aby anulować powtarzanie, naciskaj przycisk P-MODE/M. na urządzeniu, aż „ ” zniknie z wyświetlacza. Aby powtarzać folder (jedynie w przypadku pamięci USB zawierającej więcej niż... - Page 13 Instrukcja Obsługi 2. Obracaj pokrętło VOLUME na urządzeniu, aby zwiększyć lub zmniejszyć głośność dopasuj głośność urządzeniu zewnętrznym,. 3. Naciśnij i przytrzymaj przycisk PLAY/PAUSE/PAIR/SCAN, aby wyłączyć Bluetooth. Uwaga: Bluetooth działa najlepiej w zasięgu 10 metrów na otwartej przestrzeni. OBSŁUGA WEJŚCIA AUX 1.
- Page 14 Instrukcja Obsługi Specyfikacja Techniczna Wymagane zasilanie AC110-240V~60/50 Hz Pobór energii 33W Moc wyjściowa 30W X 2 Częstotliwość FM 87,5-108 mHz Wejście AUX 3,5 mm Wejście mikrofonu 6,3 mm Temperatura pracy 5°C - +40°C Prawidłowa utylizacja urządzenia. To oznaczenie informuje, że produktu nie należy utylizować wraz z odpadami z gospodarstw domowych w całej Unii Europejskiej.
-
Page 15: Important Safety Measures
User’s Manual Thank you for purchasing the MANTA active speaker system. Please read the manual care- fully before operating. IMPORTANT SAFETY MEASURES Before using this machine, please read all the safety and oper-ating instructions. Please adhere to all the instructions herein, and save this information in a safe place for future use. - Page 16 User’s Manual 4. Should the unit emit any smell or smoke, immediately turn off the power supply. Take the unit to the service center from which you bought it for repairs. Attention: This set applies to AC 220V 50Hz power supply. Please ensure that the power supply of your home or venue you wish to use the unit has the same power supply as that stipulated above.
- Page 17 User’s Manual The exclamation point within an equilateral triangle is intended to alert the user to the presence of important operating and maintenance (servicing) instructions in the literature accompanying the appliance. READ ALL INSTRUCTIONS BEFORE USE Always follow basic safety precautions when using this Bluetooth speaker system with Microphone, especially when children are present.
- Page 18 User’s Manual 9.Do not plug/ unplug the power plug into/from an electrical outlet with wet hands. 10.If the power plug does not fit into your outlet, do not force the plug into an electrical socket if it does not fit. 11.Use replacement parts, which are specified by the manufacturer.
- Page 19 User’s Manual NOTE: To disconnect the system completely if it not to be used for a long time, remove the AC power plug from the wall outlet. Top View . 3.5mm AUX IN JACK 2. 6.3mm MIC JACK 1 3. 6.3mm MIC JACK 2 4.
- Page 20 User’s Manual Front and Back view 23. HANDLE 24. SPEAKERS 25. DISCO LED LIGHT 26. TWEETERS 27. FM ANTENNA 28. VENTILATION HOLES 29. AC SOCKET 30. DECORATION LEDS POWER SOURCE This unit works with rechargeable lead-acid battery (the battery capacity 4000mAh). Fully charge the unit (around 7 hours) before using the product for the first time.
- Page 21 User’s Manual Warning: Do not change the battery, only high-qualified personnel can perform this operation. OPERATION INSTRACTION BASIC FUNCTION TURNING THE UNIT ON/OFF Press the power ON/OFF button to switch the unit on/off. NOTE: In USB/Bluetooth/AUX mode, when the unit is not providing the main function for around 15 minutes, the unit will automatically switch into standby mode.
- Page 22 User’s Manual SETTING THE FUNCTION MODE To change the function modes, press the FUNCTION button repeatedly to choose USB1/USB2/BLUETOOTH/AUX/RADIO function. ADJUSTING THE VOLUME 1. Rotate the VOLUME knob on the unit to increase or decrease the music volume. 2. Rotate the MIC VOL. knob on the unit to increase or decrease the microphone volume.
-
Page 23: Flashing Light
User’s Manual FLASHING LIGHT There are 5 modes for the DISCO LED lighting. Press the LIGHT button to choose the light modes. L-1: Blue LED will be on constantly when it is selected. L-2: Blue LED will be on flashing mode. L-3: Red LED will be on constantly. - Page 24 User’s Manual TUNING TO A RADIO STATION If you know the station frequency that you want to tune to directly: Tune to a station by press the /TUN.+ or /TUN.- button repeatedly. The station frequency is shown on the display. To tune to a preset station: ...
- Page 25 User’s Manual Use the /TUN.+ or /TUN.- button to tune to the station that you want to save as a preset (e.g., 93.1). Press the P-MODE/M. button. “P01” will flash on the display to indicate that you are saving the station as Preset Memory 01.
- Page 26 User’s Manual To select a desired track, press the button respectively during playing until the desired track appears on the display. The unit will start play automatically. To search for a particular passage during playback, press and hold the button to scan the current playing track at high speed until desired point (passage) appears, then release the button for normal playback mode.
-
Page 27: Random Play
User’s Manual REPEAT PLAY You can play one track or all tracks on the USB repeatedly. To Repeat a Single Track Press P-MODE/M. button on unit during play, the display will show “ ” and the current track will be played over an over again. -
Page 28: Aux-In Operation
User’s Manual will start from next track automatically. Press the P- MODE/M. button on unit again until the “RAND” disappears from the display to cancel. BLUETOOTH OPERATION Press the FUNCTION button on unit to switch to BLUETOOTH function, the LCD will display “bt” and the pair indicator will flash at high speed. - Page 29 User’s Manual Connect your audio device to the AUX IN jack on the top panel of the unit with an AUX IN cable. (audio cable is not included) Rotate the VOLUME knob on the unit or adjust the volume on the external device to increase or decrease the music volume to your desired level.
- Page 30 They can take this product for environmental safe recycling. Niniejszym MANTA S.A. oświadcza, że SPK5025 jest zgodne z zasadniczymi wymaganiami oraz innymi stosownymi postanowieniami dyrektywy 1999/5/WE. Deklaracja zgod- ności CE jest dostępna na stronie internetowej producenta...
- Page 31 INFOLINIA SERWISOWA tel: +48 22 332 34 63 lub e-mail: serwis@manta.com.pl od poniedziałku do piątku w godz. 9.00-17.00 Producent zastrzega sobie możliwość wprowadzenia zmian w specyfikację produktu bez uprzedzenia. Strona główna www.manta.com.pl Strona wsparcia technicznego www.manta.info.pl SERVICE INFOLINE tel: +48 22 332 34 63 or e-mail: serwis@manta.com.pl from Monday to Friday.
Need help?
Do you have a question about the SPK5025 NIKE and is the answer not in the manual?
Questions and answers