Buffalo TeraStation 6000 Series User Manual

Buffalo TeraStation 6000 Series User Manual

Network attached storage
Hide thumbs Also See for TeraStation 6000 Series:
Table of Contents

Advertisement

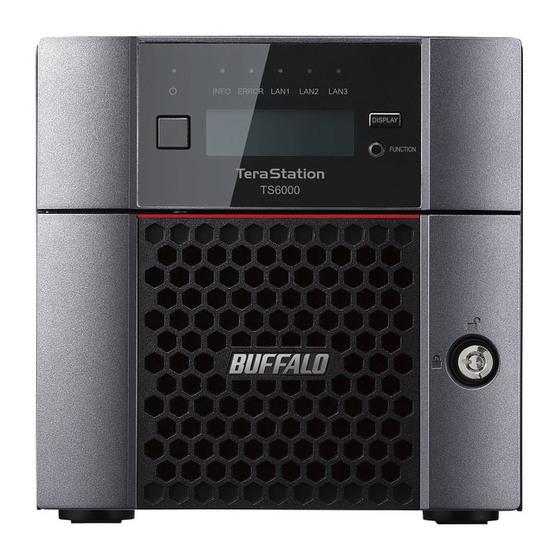
Network Attached Storage
TeraStation 6000
User Manual
TS6200DN Series
TS6400DN Series
TS6400RN Series
Please make sure to read this manual before using and follow the procedures. If you have any inquiries about
the product, contact the number on the warranty statement or the packing box. Do not discard the included
documents, the warranty statement, or the packing box.
Americas: www.buffaloamericas.com
Europe: www.buffalo-technology.com
Asia Pacific: www.buffalo-asia.com
TS6200DN0402
TS6400DN0804
TS6400DN3204
TS6400RN1604
TS6200DN0802
TS6400DN1604
TS6400RN3204
35021637-01
June 2019

Advertisement

Table of Contents
loading

Summary of Contents for Buffalo TeraStation 6000 Series

  • Page 1 Please make sure to read this manual before using and follow the procedures. If you have any inquiries about the product, contact the number on the warranty statement or the packing box. Do not discard the included documents, the warranty statement, or the packing box. Americas: www.buffaloamericas.com Europe: www.buffalo-technology.com Asia Pacific: www.buffalo-asia.com 35021637-01 June 2019...
  • Page 2: Notice

    Notice Notice Regulatory Compliance Information For Customers in the United States This device complies with Part 15 of the FCC Rules. Operation is subject to the following two conditions: (1) this device may not cause harmful interference, and (2) this device must accept any interference received, including interference that may cause undesired operation.
  • Page 3: Warning Symbols And Graphical Icons On The Product

    Notice Warning Symbols and Graphical Icons on the Product Warning symbols are used on the product for safety operation and prevention of injury to you and damage to the unit. The following explains the meanings of symbols used on the product. This symbol indicates important warnings or cautions for operation and maintenance.
  • Page 4 Notice Caution: Do not remove the cover. (10) Caution: Slide/rail mounted equipment is not to be used as a shelf or a work space. (11) Caution: Be careful not to injure fingers when handling. Do not remove the cover. (12) Caution: Do not replace the battery.
  • Page 5: Table Of Contents

    Contents Notice ................1 Regulatory Compliance Information ..........1 Warning Symbols and Graphical Icons on the Product ....2 Safety Precautions ................2 Chapter 1 Getting Started .......... 11 Diagrams ..................11 Turning the TeraStation On and Off..........14 Creating an Initialization Drive ............ 16 Chapter 2 Configuration ..........
  • Page 6 Configuring Users ................. 28 Adding a User ...................28 Importing User Information ..............30 Adding a Group ................30 Configuring Access Restrictions for Shared Folders ....33 Local Users and Groups ................33 Active Directory ..................34 Configuring Access Restrictions for Subfolders ......37 Enabling Subfolders’...
  • Page 7 Checking Drives ................57 S.M.A.R.T..................58 Displaying S.M.A.R.T. Information ............58 Checking Drive Condition ...............59 Formatting Drives ................. 60 Encrypting Drives ................61 Erasing Data on the TeraStation Completely ......61 Using the TeraStation as an iSCSI Device ........62 Introduction .....................62 Creating an iSCSI Volume ................62 Connecting or Disconnecting Volumes ..........65...
  • Page 8 Configuring a Backup Job ...............94 If Backing Up from rsync-Compatible Devices to the TeraStation ..98 Backup Modes ..................99 Backup Logs When Backup Fails ............100 Replication ................... 103 Preparing a Replication Destination ............104 Configuring a Replication Job ..............105 Synchronizing Between Source and Destination TeraStations Periodically .....................108 Failover ..................
  • Page 9 Changing Job Settings ................142 Synchronizing with Microsoft OneDrive ........144 Configuring a New Job ................144 Changing Job Settings ................151 Corrective Actions for in Case of Error ..........154 Chapter 7 Advanced Features ........156 Email Notification ............... 156 Sleep Mode .................. 158 Wake-on-LAN ................
  • Page 10 Initializing with the USB Initialization Drive ........176 Resetting the Administrator Password ........178 Logs ....................178 Displaying TeraStation’s Logs ...............178 Transferring Logs to the Syslog Server ..........179 Creating a Link to the Logs in the Shared Folder ........180 Changing Archive Rules for File Access Logs ........182 Updating the Firmware ...............
  • Page 11 LEDs ......................202 Using a Redundant RAID Mode ............203 Using RAID 0 ...................205 Using JBOD .....................206 Using a Hot Spare ...................207 Replacing a Non-Malfunctioning Drive ........207 Chapter 9 Utilities ............209 NAS Navigator2 for Windows ............. 209 Mounting as a Network Drive ...............211 Changing the IP Address ...............212 NAS Navigator2 for macOS ............
  • Page 12: Chapter 1 Getting Started

    Chapter 1 Getting Started Chapter 1 Getting Started Diagrams Depending on the number or type of drives in the unit, the model name will be different. Check the sticker on the packing box for your unit’s model name. TS6200DN 2 3 4 5 6 7 15 16 17 18 19 TS6400DN 2 3 4 5 6 7...
  • Page 13 Chapter 1 Getting Started TS6400RN 3 4 5 6 7 13 15 23 16 17 18 19 Power Button To power on, connect the power cable and wait for 10 seconds, then press the power button. To power off, press and hold the power button for three seconds. If the TeraStation beeps, pressing this button for a short period will stop the beeping.
  • Page 14 Spins to prevent overheating inside. Do not block the fan. Not in use. USB 3.0 Port Compatible Buffalo USB drives, USB memory devices, and USB UPS connections can be connected. USB hubs are not compatible. LAN Port 1 (1 GbE) Connect an Ethernet cable to use this port for your network.
  • Page 15: Turning The Terastation On And Off

    Chapter 1 Getting Started Link/Act LED Glows blue when the TeraStation is connected to a network at 10 Gbps. It blinks when the connection is active. Turning the TeraStation On and Off Note: Do not disconnect or reconnect the internal drives while turning on or off the TeraStation. Press the power button on the TeraStation to turn it on.
  • Page 16 Chapter 1 Getting Started Enter the username and password, then click OK. Note: The default username and password are “admin” and “password”. Settings will open.
  • Page 17: Creating An Initialization Drive

    Chapter 1 Getting Started Click at the top-right of Settings and choose Shut Down. Click Yes. The “Confirm Operation” screen will open. Enter the confirmation number, then click OK. When the power LED on the front of the TeraStation turns off, the shutdown process is completed. Creating an Initialization Drive We recommend creating an initialization drive as soon as possible.
  • Page 18: Chapter 2 Configuration

    Chapter 2 Configuration Chapter 2 Configuration Configure and manage your TeraStation using the Settings interface, accessible from a browser window. Open the interface using the procedure below or type the TeraStation’s IP address into the URL field of your browser. Note: Microsoft Edge, Firefox, Google Chrome, Internet Explorer 9 or later, and Safari 9 or later are supported.
  • Page 19 Chapter 2 Configuration The password settings page will appear. Enter the desired new administrator password and click Next. If you click Skip, the administrator password will not change from the default value (“password”). The time zone settings page will be displayed. If you need to change the time zone from that which is currently displayed on the page, select it from the drop-down list and click Next.
  • Page 20 Chapter 2 Configuration The proxy server settings page will be displayed. If you place the TeraStation under a proxy network, set your proxy settings. Click Next. The RAID settings page will be displayed. To change the RAID mode from the default mode, select the desired RAID mode and click Next, then click Start on the next page.
  • Page 21: Opening Setup Wizard

    Chapter 2 Configuration If you want to keep the RAID mode as is, select “Keep current RAID mode” and click Next. Note: The RAID settings page will not be displayed if using the TS6200DN series TeraStations. The folder path to access shared folders will be displayed and setup will finish. Opening Setup Wizard You may run the setup wizard even after the initial setup or initialization.
  • Page 22: Opening Settings

    Chapter 2 Configuration Click Execute Wizard. The “Confirm Operation” screen will open. Enter the confirmation number, then click OK. Follow the procedure on the screen and finish the setup wizard. Opening Settings Double-click the NAS Navigator2 icon (   ) to start NAS Navigator2. Right-click your TeraStation’s icon and select Settings.
  • Page 23 Chapter 2 Configuration Enter the username and password, then click OK. Notes: • If the time-out period is set to “10 minutes”, you will be logged out of Settings after 10 minutes of inactivity. • Click Secure Connection to log in using an encrypted connection. Settings will open.
  • Page 24: Checking The Device Information From Dashboard

    Chapter 2 Configuration • Click at the top-right of Settings and choose I’m here to play a tone from the TeraStation for easy location. Checking the Device Information from Dashboard When opening the Settings interface, the Dashboard page will appear first. Dashboard will show the following device information: •...
  • Page 25: Chapter 3 File Sharing

    Chapter 3 File Sharing Chapter 3 File Sharing You can create users and groups to access the shared folders on the TeraStation and configure access restrictions to limit access to key data. Configuring Shared Folders Adding a Shared Folder From Settings, click File Sharing. Click the settings icon ( ...
  • Page 26 Chapter 3 File Sharing Configure the desired settings, then click OK. Notes: • Names may contain up to 27 alphanumeric characters, hyphens (-), and underscores (_). Multibyte characters are supported. The first character should not be a symbol. • When you click the Option 1 tab, you can enter the folder description. Descriptions may contain up to 75 alphanumeric characters, hyphens (-), underscores (_), and spaces.
  • Page 27: Recycle Bin

    Chapter 3 File Sharing ? ] [ / \ = + > < ; : " , | * • Do not use a name already in use as an iSCSI volume name; do not use any of the following words as a shared folder name as these words are reserved for internal use by the TeraStation: authtest, global, homes, info, lost+found, lp, msdfs_root, mt-daapd, printers, ram, spool, usbdisk x (where “x”...
  • Page 28: Hidden Shares

    Chapter 3 File Sharing Read-only shares and HFS Plus-formatted USB drives will have “(Read Only)” added to comments in File Explorer. Note: Configure read-only file attribute in Settings. Configuring them from within Windows is not supported and may cause unexpected behavior. Hidden Shares If hidden shares are enabled, shared SMB folders will not be displayed in Network, and only certain users are allowed to access them.
  • Page 29: Configuring Users

    Chapter 3 File Sharing Enable quotas, choose the alert and the maximum amount of space the user will be allowed to use, and click Configuring Users Adding a User Note: The TeraStation can register a maximum 300 of users, which include the default users “admin” and “guest”. From Settings, click File Sharing.
  • Page 30 Chapter 3 File Sharing Enter the desired settings, then click OK. Notes: • Usernames may contain up to 128 alphanumeric characters, hyphens (-), underscores (_), periods (.), and the symbols ! # & @ $ * ^ %. The first character should not be a symbol. •...
  • Page 31: Importing User Information

    Chapter 3 File Sharing Importing User Information You can import users in File Sharing > Users by clicking Import CSV File. An example format for user data: Username (required), password (required), and user description (optional). Example 1: Importing usernames, passwords, and comments username1,password1,comment1 username2,password2,comment2 username3,password3,comment3...
  • Page 32 Chapter 3 File Sharing Click Add Group.
  • Page 33 Chapter 3 File Sharing Enter the desired settings, then click OK. Notes: • Group names may contain up to 20 alphanumeric characters, hyphens (-), underscores (_), and periods (.). The first character should not be a symbol. • Group descriptions may contain up to 75 alphanumeric characters, hyphens (-), underscores (_), and spaces. Multibyte characters are supported.
  • Page 34: Configuring Access Restrictions For Shared Folders

    Chapter 3 File Sharing Configuring Access Restrictions for Shared Folders You may restrict access to specific shared folders, including external USB drives. Notes: • Shared folders with limited access can still be used as backup destinations. • If you grant both read-only and read and write access to the users or groups, the attribute will become as below: Group with read and Group with read-only Group with no access...
  • Page 35: Active Directory

    Chapter 3 File Sharing Click the Access Restrictions tab. Enable “Access Restrictions for Shared Folders”. Select the level of access for the user or group. : Read and write access allowed : Read access allowed : Access prohibited Click OK. Note: The example above shows access restriction by a user.
  • Page 36 Chapter 3 File Sharing Click Edit. Select “Active Directory”, then click Next. Enter the domain controller information and click Search. The domain controller on the same network will be detected and required settings will be entered into each field automatically. Or, enter the settings manually. If there is a difference of more than five minutes between the TeraStation’s clock and the domain controller’s clock, joining the domain or authenticating domain users and groups may fail.
  • Page 37 Chapter 3 File Sharing Click the shared folder that you want to set access restrictions for. Click the Access Restrictions tab. Enable “Access Restrictions for Shared Folders”. Select the level of access for the user or group. : Read and write access allowed : Read access allowed : Access prohibited Click OK.
  • Page 38: Configuring Access Restrictions For Subfolders

    Chapter 3 File Sharing • Depending on the domain controller’s policy settings, the domain controller may force the TeraStation to leave the Active Directory domain. If this occurs, the TeraStation will lose the domain users and groups so if you have configured access restrictions using domain accounts, these users will no longer be able to access shared folders.
  • Page 39 Chapter 3 File Sharing Click the shared folder that you want to set access restrictions for. Clear all checkboxes for “LAN Protocol Support” other than “SMB (Windows/Mac)”, “Backup”, and “NFS”. Click the Option 2 tab. Enable “Access Restrictions for Subfolders”. Note: If “Hide Non-Access Permitted Files and Folders”...
  • Page 40: Restoring Owner And Permission Settings

    Chapter 3 File Sharing You may also configure access permissions for domain users and groups. You should have the TeraStation join your Active Directory domain before configuring access permissions from File Explorer. Notes: • If enabling subfolders’ access restrictions for a USB drive, the drive should be formatted using Btrfs, XFS, or ext3. •...
  • Page 41 Chapter 3 File Sharing Click the settings icon (   ) to the right of “Folder Setup”. Click Advanced Settings for Subfolders.
  • Page 42 Chapter 3 File Sharing Select a folder to restore permissions from the tree. Note: If you select a root shared folder from the tree, the action will not be run to the recycle bin. To run the action, select the recycle bin instead. Select actions and action range to run, then click OK.
  • Page 43: Chapter 4 Storage Management

    Chapter 4 Storage Management Chapter 4 Storage Management RAID Modes TeraStations support many types of RAID. The type of RAID arrays available for use depends on how many drives are installed in your TeraStation. Notes: • If you change the RAID mode, all data on the array is deleted. This is true for every procedure in this chapter. Always back up any important data before performing actions that affect your RAID array.
  • Page 44: Working With Raid Arrays

    Chapter 4 Storage Management RAID 1 Combines two or more drives into a mirrored array. The available space in the array is the capacity of a single drive. Identical data is written to each drive. If a drive is damaged, data can be recovered by replacing the damaged drive. As long as one drive in the array remains undamaged, all data in the array can be recovered.
  • Page 45: Changing Raid Mode

    Chapter 4 Storage Management Click the array to delete. Click Delete RAID Array. The “Confirm Operation” screen will open. Enter the confirmation number, then click OK. Click OK when completed. Next, create a shared folder by referring to the “Adding a Shared Folder” section in chapter 3.
  • Page 46: Shutting Down The Terastation Automatically If Error Occurs

    Chapter 4 Storage Management Choose a RAID array. Select a RAID mode and the drives to be used, then click Create RAID Array. Click OK. The “Confirm Operation” screen will open. Enter the confirmation number, then click OK. Click OK when completed. Next, create a shared folder by referring to the “Adding a Shared Folder”...
  • Page 47 Chapter 4 Storage Management From Settings, click Storage. Click the settings icon (   ) to the right of “RAID”. Click Options. Click Edit.
  • Page 48: Configuring Actions For If A Drive Used For The Raid Array Has Not Been Discovered

    Chapter 4 Storage Management Change the “Error Behavior” option to “Shut down” and click OK. Configuring Actions for If a Drive Used for the RAID Array Has Not Been Discovered The TeraStation can configure actions for if a drive used for the RAID array cannot be mounted when booting. Displaying or Hiding the Confirmation Screen Configure to display or hide the confirmation screen for selecting actions for if a drive used for the RAID array cannot be mounted when booting.
  • Page 49 Chapter 4 Storage Management Click Options. Click Edit. Change the “Drive Detection Action Settings” option to “Don’t prompt when a drive could not be detected” and click OK.
  • Page 50 Chapter 4 Storage Management When the confirmation screen is hidden, an undetected drive will automatically be dismounted from the TeraStation and the TeraStation will be in degraded mode if a redundant RAID mode is configured. If RAID 0 is configured, the RAID array will be corrupted so that data will be lost.
  • Page 51: Configuring A Hot Spare

    Chapter 4 Storage Management Conditions Corrective Actions RAID 10 has been configured. Refer to the “Selecting the Action on the Confirmation Screen” section above on how to access the confirmation screen. Select “Shut down the TeraStation and reconnect the drives” and click Execute.
  • Page 52: Expanding Raid Capacity Without Deleting Data

    Chapter 4 Storage Management Click Set as a hot spare. Click Yes. The “Confirm Operation” screen will open. Enter the confirmation number, then click OK. Click OK when completed. Note: To turn the hot spare back to a normal drive, choose Set as a normal drive. Expanding RAID Capacity Without Deleting Data You can create or expand a RAID array without erasing data on the drive by using RMM (RAID Mode Manager).
  • Page 53 Chapter 4 Storage Management Choose a RAID array. Set the RAID mode to “RAID 1”. Select the “Add a drive to a RAID array with RMM. Your data will be preserved. ” checkbox. Select the drive whose data will be saved from the drop-down list. Select the drive to add to the RAID array.
  • Page 54 Chapter 4 Storage Management Drives Are Currently in RAID 1 or RAID 5 If the drives are currently in a RAID 1 or a RAID 5 array, you can use RMM to add drives to the RAID array, then change the RAID mode. Note: RMM can be used to expand an array by only one drive per operation.
  • Page 55: Raid Scanning

    Chapter 4 Storage Management Select one drive to add to the RAID array. If changing the RAID mode, choose the desired mode for the array from the drop-down list. If not, keep the current RAID mode as is. Click Change RAID Array. The “Confirm Operation”...
  • Page 56: Adding An External Drive

    Connecting to this TeraStation. Connecting to another Buffalo NAS device. Ext3 Connecting to another Buffalo NAS device that is a TS-X or older model. Connecting to Windows computers. The NTFS-formatted drive can use many NTFS more functions of the operating system than an exFAT drive.
  • Page 57: Dismounting Drives

    Chapter 4 Storage Management Notes: • If your USB 3.0 drive is not reconfigured after rebooting the TeraStation, unplug and reconnect it. • When copying a file that is over 100 MB to a FAT32-formatted USB drive using File Explorer, an error message may appear.
  • Page 58: Checking Drives

    Chapter 4 Storage Management Select the drive to dismount and click Dismount Drive. The “Confirm Operation” screen will open. Enter the confirmation number, then click OK. When the dismounting process is completed, it is safe to unplug the drive. Disconnect the drive from the TeraStation.
  • Page 59: Displaying S.m.a.r.t. Information

    Chapter 4 Storage Management Select the drive or array to test, then click Check Drive. Click Check. You have the option of deleting information files from macOS during the check if desired. S.M.A.R.T. S.M.A.R.T. (Self-Monitoring, Analysis, and Reporting Technology) monitors internal drives to detect and report various indicators of reliability, in the hope of anticipating failures.
  • Page 60: Checking Drive Condition

    Chapter 4 Storage Management Select a drive to check and click S.M.A.R.T. The S.M.A.R.T. information for the drive will be displayed. Different information may be displayed depending on the brand of drives in your TeraStation. Critical attributes are displayed in bold. Checking Drive Condition Attributes with the worst value that is equal to or less than the threshold value may be significant.
  • Page 61: Formatting Drives

    Chapter 4 Storage Management Formatting Drives Notes: • Under some circumstances, data deleted when a drive is formatted can be recovered. To ensure that data is “gone forever”, a format might not be sufficient. Refer to the “Erasing Data on the TeraStation Completely” section below.
  • Page 62: Encrypting Drives

    Chapter 4 Storage Management The “Confirm Operation” screen will open. Enter the confirmation number, then click OK. Depending on the size and the formatted file system of your drive, the format may take several minutes or several hours to complete. “Formatting” will be displayed on the LCD panel until the format is completed. Click OK when completed.
  • Page 63: Using The Terastation As An Iscsi Device

    Chapter 4 Storage Management Click the settings icon (   ) to the right of “Restore/Erase”. Click Erase TeraStation. The “Confirm Operation” screen will open. Enter the confirmation number, then click OK. All data on the TeraStation will be permanently erased. Using the TeraStation as an iSCSI Device Introduction iSCSI is a protocol for carrying SCSI commands over IP networks.
  • Page 64 Chapter 4 Storage Management Notes: • If the volume settings are changed, all data on the volume will be erased. Before changing any settings, back up any important data. • The TeraStation can have up to 255 volumes, but we recommend creating no more than 32. Exceeding this volume amount may cause irreparable damage to the unit.
  • Page 65 Chapter 4 Storage Management Click Create Volume. Enter a volume name, volume description, drive or array where a volume will be created, and volume size. Click OK when completed. If you enabled LVM for the target drive or array, or selected “File I/O” for the “Backstore” option, the volume size that you specify here can be changed later.
  • Page 66: Connecting Or Disconnecting Volumes

    Chapter 4 Storage Management Notes: • If you click Disable Connection for the selected volume in Storage > iSCSI in Settings, the selected iSCSI volume can no longer be accessed. If you click Enable Connection, the volume will become accessible from the iSCSI initiator software.
  • Page 67: Using With Multiple Computers

    Chapter 4 Storage Management Right-click the drive volume that shows the status “Unallocated” and click New Simple Volume from the displayed menu. Follow the screen to finish formatting. When the formatting process is completed, the drive will be visible as an icon in Computer or This PC and can be used as a normal drive on the computer.
  • Page 68 Chapter 4 Storage Management Click the Security tab. Click Edit under “Access Control (Target Discovery)”. Enable authentication, enter the target CHAP name and secret, and click OK. Note: To enable mutual authentication in addition to target CHAP name and secret authentication, select the “Enable mutual authentication”...
  • Page 69 Chapter 4 Storage Management If mutual authentication is enabled, select the “Perform mutual authentication” checkbox. Click OK, then click OK again. The iSCSI volumes on the TeraStation will be listed under “Discovered targets” on the Targets tab. Select the desired volume to connect and click Connect. Click OK.
  • Page 70: Expanding Volume Sizes

    Chapter 4 Storage Management Note: To enable mutual authentication, select the “Enable” checkbox to the right of “Mutual Authentication” and enter the initiator CHAP secret. Click OK when completed. Connecting to Individual Volumes that Are Access-Restricted Open the Microsoft iSCSI Initiator. Register the initiator CHAP secret to your computer first.
  • Page 71: Deleting Volumes

    Chapter 4 Storage Management Enter the desired volume size to add and click OK. Click OK. Deleting Volumes To delete an existing volume, follow the procedure below. Note: Deleting a volume will erase all data on the volume. Back up the data before deleting the volume. From Settings, click Storage.
  • Page 72: Advanced Settings

    Chapter 4 Storage Management Select the volume to delete and click Delete Volume. Confirm that the volume is correctly selected on the screen and click OK. The “Confirm Operation” screen will open. Enter the confirmation number, then click OK. Click OK. Advanced Settings You can configure the following advanced parameters for each iSCSI volume.
  • Page 73: Chapter 5 Backup

    Application for iSCSI Volume Snapshots To create an iSCSI volume snapshot in the environment where the iSCSI volumes on the TeraStation are connected using a virtual machine, we recommend using the Buffalo-offered Windows Server application “Snapshot Agent for TeraStation”, available from the Buffalo website.
  • Page 74 Chapter 5 Backup Click the number under “Snapshot” for the shared folder on the shared folder list. Click Create.
  • Page 75 Chapter 5 Backup Select or clear the “Lock” checkbox to determine whether the created snapshot will be locked or unlocked and enter a short description, then click OK. A locked snapshot cannot be deleted due to auto-archiving. The snapshot will be created on the shared folder. Note: Up to 1024 snapshots can be created for a shared folder.
  • Page 76: Accessing The Snapshots Via Smb

    Chapter 5 Backup Click Create. Select or clear the “Lock” checkbox to determine whether the created snapshot will be locked or unlocked and enter a short description, then click OK. A locked snapshot cannot be deleted due to auto-archiving. The snapshot will be created on the iSCSI volume. Note: Up to 1024 snapshots can be created for an iSCSI volume.
  • Page 77 Chapter 5 Backup From Settings, click File Sharing. Click the settings icon (   ) to the right of “Folder Setup”. Click the shared folder to access snapshots from the computer. Click the Option 2 tab. Enable shadow copy and click OK.
  • Page 78: Restoring Snapshots

    Chapter 5 Backup From the computer, access the TeraStation using File Explorer and right-click the shared folder to view snapshots. Click Restore previous versions. The entire history of created snapshots will appear. Select the snapshot and the action to be taken for the snapshot.
  • Page 79 Chapter 5 Backup From Settings, click File Sharing. Click the settings icon (   ) to the right of “Folder Setup”. Click the number under “Snapshot” for the shared folder on the shared folder list.
  • Page 80 Chapter 5 Backup Select the checkbox for the target snapshot and then click Restore. A new snapshot will be created before restoring the snapshot. Select or clear the “Lock” checkbox to determine whether the created snapshot will be locked or unlocked and enter a short description, then click OK. A locked snapshot cannot be deleted due to auto-archiving.
  • Page 81 Chapter 5 Backup For iSCSI Volumes Note: When restoring snapshots, the iSCSI service will restart so iSCSI volumes will become unable to connect temporarily. If you have saved the virtual machine to the iSCSI volume, shut down the virtual machine before restoring.
  • Page 82 Chapter 5 Backup Select the checkbox for the target snapshot and then click Restore. A new snapshot will be created before restoring the snapshot. Select or clear the “Lock” checkbox to determine whether the created snapshot will be locked or unlocked and enter a short description, then click OK. A locked snapshot cannot be deleted due to auto-archiving.
  • Page 83: Configuring Schedule Snapshot

    Chapter 5 Backup Configuring Schedule Snapshot If you want to create a snapshot for the purpose of regular backups, follow the procedure below. For Shared Folders From Settings, click File Sharing. Click the settings icon (   ) to the right of “Folder Setup”. Click the number under “Snapshot”...
  • Page 84 Chapter 5 Backup Click Advanced Settings at the lower-left corner of the window. Click the Schedule tab. Enable schedule snapshot. Select the day of the week and time for when to automatically create a snapshot. Click OK.
  • Page 85 Chapter 5 Backup For iSCSI Volumes From Settings, click Storage. Click the settings icon (   ) to the right of “iSCSI”. Select the checkbox for the target iSCSI volume and click Show Snapshot List.
  • Page 86 Chapter 5 Backup Click Advanced Settings at the lower-left corner of the window. Click the Schedule tab. Enable schedule snapshot. Select the day of the week and time when to automatically create a snapshot. Click OK.
  • Page 87: Configuring Snapshot Archive Settings

    Chapter 5 Backup Configuring Snapshot Archive Settings If you regularly create snapshots, it will use up capacity on the TeraStation. Snapshot archive settings will allow you to save capacity on created snapshots by automatically deleting older snapshots. You can set either a version-based or a timeline-based rule to delete snapshots.
  • Page 88 Chapter 5 Backup Click Advanced Settings at the lower-left corner of the window. Click the Auto Archive tab.
  • Page 89 Chapter 5 Backup Select the rule to keep the snapshots. For more detailed information on archiving snapshots, refer to the “Archive Rule for Snapshots” section below. Click OK. For iSCSI Volumes From Settings, click Storage. Click the settings icon (   ) to the right of “iSCSI”.
  • Page 90 Chapter 5 Backup Select the checkbox for the target iSCSI volume and click Show Snapshot List. Click Advanced Settings at the lower-left corner of the window.
  • Page 91 Chapter 5 Backup Click the Auto Archive tab. Select the rule to keep the snapshots. For more detailed information on archiving snapshots, refer to the “Archive Rule for Snapshots” section below. Click OK. Archive Rule for Snapshots Version-Based If you enter specific versions, the snapshots created from the latest up to the entered versions will be kept. Snapshots that don’t match the version will not be removed.
  • Page 92 Chapter 5 Backup until a set number of days has passed. If you set this option and the specified days haven’t passed yet, the snapshots will be kept even if they match the target versions to be deleted. Timeline-Based This rule uses a timeline of when the snapshot was created to keep snapshots. Using this rule will keep any snapshots created at closest to 0 minutes on the hour and 12:00 a.m.
  • Page 93: Backing Up Data On The Terastation

    You can back up the TeraStation folders to another shared folder on the same TeraStation, a connected USB drive, or a shared folder on another Buffalo NAS device, either on the same network or on another network. For best results, using a 10GbE port to connect a backup device is recommended.
  • Page 94: Preparing A Backup Destination

    *7 The folders should be created on a Btrfs-formatted area. Preparing a Backup Destination First, configure a shared folder on a Buffalo NAS device or connected USB device as a backup destination. The following procedure explains using another shared folder on a TeraStation as a backup destination. The procedure may vary depending on which Buffalo NAS device is selected as a destination.
  • Page 95: Configuring A Backup Job

    You can configure backup jobs by using another shared folder on the Buffalo NAS device or a USB drive connected to the TeraStation as a destination. You can also back up to a Buffalo NAS device on another network as long as the two networks are connected by a VPN or the route is configured properly.
  • Page 96 Chapter 5 Backup If you had configured a backup device access key for the backup source folder on another Buffalo NAS device or the backup destination folder, click Set. If you hadn’t, skip to step 5. Enter the backup device access key and click OK.
  • Page 97 Chapter 5 Backup Click Add. Select backup settings such as date and time to run. Refer to the differences between the backup modes in the following “Backup Modes” section.
  • Page 98 To use a slower LAN port for backup in this environment, configure the LAN port settings to a different network segment. • If you want to back up to a Buffalo NAS device on another network, follow the procedure below to add the Buffalo NAS device on another network before selecting the backup folders.
  • Page 99: If Backing Up From Rsync-Compatible Devices To The Terastation

    Check it before creating a backup job. • To back up data between Buffalo NAS devices on a network using jumbo frames, make sure that both devices are configured to use identical (or similar) MTU sizes. If MTU sizes are significantly different, the backup job may not be properly performed.
  • Page 100: Backup Modes

    Chapter 5 Backup Enter this TeraStation’s admin password into the “Password” field and click OK. Note: If you want to encrypt the rsync access, enable rsync over SSH. Move the rsync switch to the position to enable rsync. Backup Modes The following types of backup jobs may be selected: Type Files included...
  • Page 101: Backup Logs When Backup Fails

    These folder pairs can be configured. The backup source and backup destination will be paired together: shared folders on this TeraStation and iSCSI volumes, or shared folders on another Buffalo NAS device and iSCSI volumes on this TeraStation.
  • Page 102 Chapter 5 Backup Code Description Corrective Action Log Example Check that the Ethernet cable is rsync error: error The backup destination shared securely connected and that the hub starting client-server folder could not be found. or other devices on the network are protocol (code 5) at turned on.
  • Page 103 Chapter 5 Backup Code Description Corrective Action Log Example Change the filename or folder Invalid characters were used in name using compatible characters. the filename or folder name of Available characters are described in the backup destinations. “Adding a Shared Folder” section in chapter 3.
  • Page 104: Replication

    Chapter 5 Backup Code Description Corrective Action Log Example Check that the backup destination The backup destination folders folders on the backup destination B104 on the backup destination TeraStation exist in the shared folder TeraStation do not exist. list. Check that the drives are recognized properly in Settings.
  • Page 105: Preparing A Replication Destination

    ***If the “Inherit subfolders’ access restrictions” option is selected when creating a backup job, the device should be the Buffalo NAS device whose subfolders’ access restrictions is available. Preparing a Replication Destination First, configure a folder as a replication destination. Follow the procedure below to prepare a replication destination.
  • Page 106: Configuring A Replication Job

    Buffalo NAS device unless it’s entered. You may create multiple folders using different backup device access keys for backup and replication, but only one access key can be used on the TeraStation. Folders that are configured with a different access key cannot be used.
  • Page 107 Chapter 5 Backup If you had configured a backup device access key for the replication destination folder, click Set. If you hadn’t, skip to step 6. Enter the backup device access key and click OK. Click Add. Select the shared folder that will be the replication source and destination, then click OK.
  • Page 108 To use a slower LAN port for replication in this environment, configure the LAN port settings to a different network segment. • If you want to back up to a Buffalo NAS device on another network, follow the procedure below to add the Buffalo NAS device on another network before selecting the backup folders.
  • Page 109: Synchronizing Between Source And Destination Terastations Periodically

    Chapter 5 Backup • If a network problem causes a replication error, unsynced data may be shown as “0” even though replication is incomplete. Click Resync to recover from the replication error. All files from the source folder will be copied to the destination folder.
  • Page 110: Failover

    Chapter 5 Backup When the configuration is completed, click OK. Failover With failover, two TeraStations are connected to the network for redundancy. If an issue renders the main TeraStation inaccessible, operation automatically switches to the backup TeraStation. Data on both TeraStations stays up-to-date. Main Backup Switches automatically if failure occurs.
  • Page 111: Usage Restrictions

    Chapter 5 Backup LAN port 3 (Static IP) Main Network LAN port 3 (Static IP) Backup Using Different LAN Ports Between File Sharing and Failover With this setup, the backup TeraStation and main TeraStation are connected by a second Ethernet cable connecting their LAN port 3.
  • Page 112: Configuring Failover

    To update the firmware while in maintenance mode, the main TeraStation can be updated from Settings, but the backup TeraStation cannot. Download the firmware updater from the Buffalo website for the backup TeraStation and try updating the firmware on it.
  • Page 113 Chapter 5 Backup Select a TeraStation to be the backup destination device and enter its administrator username and password (by default, the username is “admin” and the password is “password”). Select the LAN port to be used for sharing files and enter a virtual IP address and subnet mask. The LAN port you have selected here will also be used for pinging.
  • Page 114: Replacing To The Backup Terastation Manually

    Chapter 5 Backup Press the function button. When you press the function button, the TeraStation will beep once. Press and hold the button until the backup TeraStation beeps again. The I51 message will appear on the LCD panel and NAS Navigator2 for both TeraStations. Wait until initialization finishes.
  • Page 115 Chapter 5 Backup c. Click the settings icon (   ) to the right of “Power Management”. d. Click Edit. e. Select “Sync with UPS connected to this TeraStation” and reconfigure the desired UPS settings. f. Click OK when completed. Click Backup. Click the settings icon ( ...
  • Page 116: Synchronizing Between Main And Backup Terastations Periodically

    Chapter 5 Backup c. Click Edit. d. Select “Sync with UPS connected to another Buffalo NAS device on the same network” and configure the main TeraStation as a sync source. e. Click OK when completed. Reconfigure failover by referring to the “Configuring Failover”...
  • Page 117: Backing Up Your Mac With Time Machine

    Chapter 5 Backup Click Edit. Select “Daily” or “Weekly” from the “Schedule” drop-down list. If “Daily” is selected, configure the sync period. If “Weekly” is selected, specify the weekdays and the sync period. When the configuration is completed, click OK. Backing Up Your Mac with Time Machine Time Machine is a backup program included with macOS.
  • Page 118 Chapter 5 Backup 1. Preparing a Shared Folder for Time Machine From Settings, click File Sharing. Move the AFP switch to the position to enable AFP. Click the settings icon (   ) to the right of “Folder Setup”. Choose a shared folder as your backup destination for Time Machine. Under “LAN Protocol Support”, select the “AFP (Mac)”...
  • Page 119 Chapter 5 Backup Select the shared folder that you enabled AFP for in the previous steps, then click OK. Click OK, then click OK again. Move the Time Machine switch to the position to enable Time Machine. 3. Configuring Time Machine on macOS From the Apple menu, open System Preferences.
  • Page 120 Chapter 5 Backup Click Time Machine.
  • Page 121 Chapter 5 Backup Click Select Backup Disk. Select the TeraStation, then click Use Disk.
  • Page 122 Chapter 5 Backup Click Connect. Enter a username and password to be used for accessing the shared folder and click Connect. Note: If access restrictions are not configured on the destination share, log in with the administrator account. The default username and password for the administrator account are “admin” and “password”. If access restrictions are configured, log in with an account with write privileges.
  • Page 123 Chapter 5 Backup Time Machine will count down from 120 seconds, then backup will begin.
  • Page 124: Chapter 6 Remote Access

    Chapter 6 Remote Access Chapter 6 Remote Access WebAccess WebAccess is a software utility for accessing the files in the shared folder of your TeraStation from your computer or mobile devices through the Internet. Be careful when configuring WebAccess. Certain settings can make the files in the shared folder available to anyone on the Internet, without any access restrictions.
  • Page 125 Chapter 6 Remote Access Configure the desired settings, then click OK. • To use SSL encryption for more secure data transfers, enable “HTTPS/SSL Encryption”. • You may use the BuffaloNAS.com server as a DNS server, or disable it to use a different DNS server. •...
  • Page 126: Ftp

    Allow anonymous: Anyone can access (view) shared folders. (Access restrictions configured for shared folders will not work.) Allow all groups and users: All groups and users registered on the Buffalo NAS device can use WebAccess. (Access restrictions configured for shared folders will not work.) Use inherited folder permissions: Users and groups have the same access permissions with WebAccess that they do locally.
  • Page 127: Synchronizing With Dropbox

    Chapter 6 Remote Access Click the settings icon (   ) to the right of “Folder Setup”. Choose a folder to enable remote FTP access on. Under “LAN Protocol Support”, select the “FTP” checkbox on the Basic tab; select read-only or read and write for the shared folder’s attribute on the Option 2 tab and click OK.
  • Page 128: Configuring A New Job

    Chapter 6 Remote Access Configuring a New Job From Settings, click Cloud Storage. Move the Dropbox Sync switch to the position to enable Dropbox Sync. Click the settings icon (   ) to the right of “Dropbox Sync”. Click Add.
  • Page 129 Chapter 6 Remote Access Click View Dropbox Authentication Page. The authentication site that is offered by Dropbox will be displayed. Log in to the website with your Dropbox account, then click Allow. The authentication code will be displayed. Copy the authentication code and return to Settings. Authentication code reregistration should be finished within three minutes.
  • Page 130: Changing Job Settings

    Chapter 6 Remote Access If you enable encryption, you will need to set an encryption password. The password cannot be changed once you configure it. Please take note of the password and keep it secure. If you forget the password, delete the old job first, then create a new job using the same Dropbox account.
  • Page 131 Chapter 6 Remote Access From the job list, click the job whose settings you want to change. Click the Options tab.
  • Page 132 Chapter 6 Remote Access Click Edit.
  • Page 133 Chapter 6 Remote Access Configure the desired settings and click OK. Notes: • When encryption is enabled, files uploaded to Dropbox not using Dropbox Sync will not be downloaded to the TeraStation even if the sync direction is configured to “Bidirectional” or “Download only”. •...
  • Page 134: Creating A Shared Link (Windows Only)

    ◦ Files whose filename starts with ~ and have the file extension .tmp Creating a Shared Link (Windows Only) Buffalo offers a Windows application, “B-Sync”, that can create shared links for the files stored in the TeraStation folders. You can download the application from the Buffalo website.
  • Page 135 Chapter 6 Remote Access Click the settings icon (   ) to the right of “Microsoft Azure Storage Sync”. Click Add. The job setup wizard will open. Enter your Azure Storage account name and access key, then click Next.
  • Page 136 Chapter 6 Remote Access Enter the desired job name and click Next. Select “Backup” and click Next.
  • Page 137 Chapter 6 Remote Access Select the desired shared folder on the TeraStation as the backup source folder and enter the container name for the backup destination, then click Next. Specify the sync period and click Next.
  • Page 138 Chapter 6 Remote Access Select the desired action to take for files in the container that share the same name as files in the backup source after they are deleted, then click Next. Configure whether to filter the backup target files. The following screen is available to configure file filtering by file size and whether they’re hidden.
  • Page 139: Creating A New Restore Job

    Chapter 6 Remote Access The following screen is available to configure file filtering by extensions. Configure the desired filtering settings and click Next. Confirm that all settings are properly configured and click OK. Notes: • Regardless of whether file filtering was configured, the following files will not be backed up to an Azure Storage container: ◦...
  • Page 140 Chapter 6 Remote Access Move the Microsoft Azure Storage Sync switch to the position to enable Microsoft Azure Storage Sync. Click the settings icon (   ) to the right of “Microsoft Azure Storage Sync”. Click Add.
  • Page 141 Chapter 6 Remote Access The job setup wizard will open. Enter your Azure Storage account name and access key, then click Next. Enter the desired job name and click Next.
  • Page 142 Chapter 6 Remote Access Select “Restore” and click Next. Enter the container name for the restore source and select the desired shared folder on the TeraStation as the restore destination, then click Next. Select either to restore data into the first level folder (root folder) or the second level (subfolder) of the restore destination folder, then click Next.
  • Page 143: Changing Job Settings

    Chapter 6 Remote Access Confirm that all settings are properly configured and click OK. Note: When deleting a completed restored job, it can be converted to a backup job. If that restore job had been configured to restore to the second level on the shared folder, restored data will automatically move to the first level.
  • Page 144 Chapter 6 Remote Access Click the Options tab. Click Edit.
  • Page 145: Synchronizing With Microsoft Onedrive

    Chapter 6 Remote Access Configure the desired settings and click OK. Synchronizing with Microsoft OneDrive The TeraStation supports synchronizing with Microsoft OneDrive, the online cloud storage. Once linked, you can share the TeraStation files via OneDrive (or OneDrive files via the TeraStation). To link your TeraStation with your Microsoft account, follow the procedure below.
  • Page 146 Chapter 6 Remote Access Click to the right of “Microsoft OneDrive Sync”. Click Add. The sign-in window will open. Enter the username and password of your Microsoft account, then sign in.
  • Page 147 Chapter 6 Remote Access Enter the desired job name and click Next. Select the sync action and behavior for when files with the same name are already in the target folder. The behavior for when files with the same name already exist will work when the files that have the same name on both the TeraStation and OneDrive are changed.
  • Page 148 Chapter 6 Remote Access Select the desired TeraStation and OneDrive folders. If you want to create an empty folder first, click Browse under “Folder on TeraStation”, then click Create Folder on the selecting folder window that appears. Click Next after selecting the folders. Note: The 6th level and deeper of shared and OneDrive folders cannot be selected.
  • Page 149 Chapter 6 Remote Access Files will be uploaded during the start and end time of the period configured in step 9 above. If you want to always upload files during the configured sync period, select “Always sync within the sync period” for “Frequency”.
  • Page 150 Chapter 6 Remote Access Select whether to check for file consistency. If an inconsistency occurs with a file between the TeraStation and OneDrive, that file will be updated using the latest file version even if it hasn’t been changed. Click Next after selecting.
  • Page 151 Chapter 6 Remote Access Configure whether to filter the target files. The following screen is available to configure file filtering by file sizes and whether they’re hidden. The file size filtering will work only for the upload process. The available maximum size is up to 15360 MB (15 GB).
  • Page 152: Changing Job Settings

    Chapter 6 Remote Access Confirm that all settings are properly configured and click OK. Notes: • Files whose filename contains the symbols " # % & * / : > < ? \ } { ~ cannot be synchronized. This symbol limitation is based on “Normalization Form Canonical Composition (NFC)”.
  • Page 153 Chapter 6 Remote Access Click the Options tab.
  • Page 154 Chapter 6 Remote Access Click Edit.
  • Page 155: Corrective Actions For In Case Of Error

    Chapter 6 Remote Access Configure the desired settings and click OK. Corrective Actions for in Case of Error You may encounter error messages that contain the following error codes when creating OneDrive Sync jobs, or the error log may contain the following error codes as well. If you encounter one of the following error codes, refer to the table below and try the respective corrective action.
  • Page 156 Chapter 6 Remote Access Code Description Corrective Action Check that the same Microsoft account is used on another TeraStation or Microsoft applications. This error may be resolved by There are too many requests so activityLimitReached reducing the maximum number of threads data could not be synchronized.
  • Page 157: Chapter 7 Advanced Features

    Chapter 7 Advanced Features Chapter 7 Advanced Features Email Notification Your TeraStation can send you email reports daily, or when settings are changed or an error occurs. You can configure the events that will trigger notifications from any of the following functions: quotas, drives (internal, external, or RAID array), fan, backup, replication, failover, system alert.
  • Page 158 Chapter 7 Advanced Features If you select an authentication type other than “Disable” from the drop-down list, you can enter the sender email address and credentials of the email server. To change the events of email reports, click Advanced Report Settings. On the displayed screen, select or clear the category’s checkboxes.
  • Page 159: Sleep Mode

    Chapter 7 Advanced Features The notification emails will be categorized into the following importance levels: Levels Details Daily Report Describes the status of the TeraStation in a daily report email. Sends a notification email if an event occurs. Info reports will contain just Info information such as capacity information, job starts/completes, etc.
  • Page 160 Chapter 7 Advanced Features Specify the timer interval, wake-up time, and time to go into sleep mode, then click OK. Notes: • Up to three timers can be set. • The time to enter sleep mode can be set from 12:00 a.m. to 3:45 a.m. of the next day. The time to wake from sleep mode can be set from 12:00 a.m.
  • Page 161: Wake-On-Lan

    Chapter 7 Advanced Features ◦ Example 3: If running at a current time of 10:00 a.m. Wednesday Timer 1: Daily 9:00–18:00 Timer 2: Wednesday 10:00–1:00 a.m. of the next day Timer 3: Not used On days other than Wednesday, normal operation begins at 9:00 a.m. and the unit goes into sleep mode at 6:00 p.m.
  • Page 162: Ups (Uninterruptible Power Supply)

    • If the TeraStation is connected to a Buffalo wireless router configured for remote access, then it may be turned on from outside the local network (from the WAN side). To use this feature, connect the router to LAN port 1 or 2 on the TeraStation.
  • Page 163 Buffalo NAS device is connected to the UPS, select “Sync with UPS connected to another Buffalo NAS device on the same network”. After making this selection, enter the IP address of the Buffalo NAS device that will be the sync source into “Other Buffalo NAS’s IP Address”.
  • Page 164: Port Trunking

    Chapter 7 Advanced Features Port Trunking Two Ethernet cables can be used to establish two separate communication routes, providing LAN port redundancy and improving communication reliability. The use of two Ethernet cables enables access to the TeraStation even if one of the cables is disconnected. The port trunking modes that can be set in the TeraStation are shown below: Trunking Mode Characteristics...
  • Page 165: Offline Files For Windows

    Chapter 7 Advanced Features Select the port trunking mode and click OK. Connect the hub’s LAN port and TeraStation’s LAN port using the second LAN cable. If you are using an intelligent switch, connect to the LAN port that was previously configured for port trunking. Follow the procedure on the screen to restart the TeraStation.
  • Page 166: Accessing From An Nfs Client

    Accessing from an NFS Client Note: (US customers only) Buffalo’s customer support will help configure the NFS settings on your TeraStation, and will support VMware and Windows clients but will not provide support for configuring your Linux or other UNIX clients.
  • Page 167 Chapter 7 Advanced Features Click the settings icon (   ) to the right of “Folder Setup”. Choose the shared folder that will be accessible from the NFS client. Under “LAN Protocol Support”, select the “NFS” checkbox on the Basic tab and click OK. Note the NFS path.
  • Page 168 Chapter 7 Advanced Features Click Add. Note: To delete a client, select the checkboxes of the clients from the lists and click Delete. Enter the hostname and IP address of the NFS client, then click OK. You should add all NFS clients to access the shared folder.
  • Page 169 Chapter 7 Advanced Features Click the NFS Rules tab. Click Add.
  • Page 170 Chapter 7 Advanced Features Choose the folder to restrict access to, and enter the clients that will have restricted access into the “Hosts” field. Clients may be entered by hostname, IP address, or IP address range. Wildcards are supported. Separate multiple entries with commas.
  • Page 171: Encrypting Data Transmission

    The server certificate included in the TeraStation’s default settings was created by Buffalo, and in some cases, the security certificate warning message may appear in your browser or another security software. Disregard this message and continue.
  • Page 172: Snmp

    Chapter 7 Advanced Features SNMP If SNMP is enabled, you can browse your TeraStation from SNMP-compatible network management software. From Settings, click Network. Click the settings icon (   ) to the right of “SNMP”. Click Edit. Select whether to use SNMP version 2 or version 3. Configure the desired settings, then click OK.
  • Page 173: Saving And Applying Settings

    Chapter 7 Advanced Features SNMP has been configured for the TeraStation. For further use, configure your SNMP-compatible network management software using the Buffalo-specific MIB (management information base) file. The MIB file is available from the Buffalo website. Depending on which SNMP client software you use, the procedure for configuring the software will differ. For more detailed information on configuring the client software, refer to its help or included manual.
  • Page 174: Applying Settings

    Chapter 7 Advanced Features Note: All data on the USB drive will be erased! From Settings, click Management. Click the settings icon (   ) to the right of “Configuration Management”. Select “Save current configuration to a USB drive”. From “Target USB Drive”, select the USB drive that is connected to the USB port on the TeraStation, then click Execute.
  • Page 175: Transferring Another Terastation's Settings

    • Users • Groups Note: This feature currently supports the following TeraStation series as of November 2018. The latest compatibility information will be on the Buffalo website. • TS-X series firmware version 1.58 or later • TS3000 series • TS4000 series •...
  • Page 176: Transferring Settings

    Chapter 7 Advanced Features Procedure for TeraStations Other Than TS-X Series Follow the procedure below to create a config file on a TeraStation that is not a TS-X series. Refer to the user manual of the TeraStation that you want to transfer settings for saving settings to a USB drive. Access the “usbdisk x”...
  • Page 177: Restoring Factory Defaults

    Chapter 7 Advanced Features Notes: • If the migration target TeraStation contains shared folders, users, and groups that share the same name as the transferred settings, the existing settings will be overwritten. If the users and groups meet the following conditions, the settings will not be transferred: users that share the same name with groups already existing on the migration target TeraStation, and groups that share the same name with users on the migration target TeraStation.
  • Page 178 Chapter 7 Advanced Features Creating an Initialization Drive Insert a 1 GB or larger USB drive (not included) into a USB port on the TeraStation. Note: All data on the USB drive will be erased! From Settings, click Management. Click the settings icon (   ) to the right of “Configuration Management”.
  • Page 179: Resetting The Administrator Password

    Chapter 7 Advanced Features Dismount the USB drive before unplugging it. Refer to the “Dismounting Drives” section in chapter 4 for the procedure on dismounting drives. Resetting the Administrator Password If you forget the admin username or password and cannot log in to Settings, or wrong network settings are configured and Settings becomes inaccessible, initialize these settings by holding down the init button (refer to the TeraStation diagram in chapter 1) on the front panel for three seconds.
  • Page 180: Transferring Logs To The Syslog Server

    Chapter 7 Advanced Features Note: All logs are encoded in UTF-8 format. To show them correctly, change the software encoding to “UTF-8”. Transferring Logs to the Syslog Server From Settings, click Management. Click the settings icon (   ) to the right of “Logs”. Click Edit.
  • Page 181: Creating A Link To The Logs In The Shared Folder

    Chapter 7 Advanced Features Enable “Syslog Transfer”. Enter the IP address of the syslog server where you want to transfer the logs to. Select the type of log that you want to transfer from “Logs to Transfer”. Click OK. Creating a Link to the Logs in the Shared Folder From Settings, click Management.
  • Page 182 Chapter 7 Advanced Features Click Edit. Enable “Share Link to Logs”. Click Browse and select the shared folder where the link will be created in “Target Shared Folder”. Click OK. Under the selected shared folder, a folder named “system_log” will now contain the logs.
  • Page 183: Changing Archive Rules For File Access Logs

    Chapter 7 Advanced Features Changing Archive Rules for File Access Logs You can configure how many logs are kept or how long each log will be kept on the TeraStation. From Settings, click Management. Click the settings icon (   ) to the right of “Logs”. Click Edit.
  • Page 184: Updating The Firmware

    Chapter 7 Advanced Features • Unit (Size): 1–100 for file sizes and 1–13 for all versions Click OK. Notes: • To delete the saved logs, click Delete at the window in step 3. • If there is not enough space to save logs, the I70 message will appear on the LCD panel. When it appears, delete unnecessary logs or move them to another device from the TeraStation.
  • Page 185: Updating Automatically

     ) to the right of “Update”. Click Install Update. When updating the firmware is completed, refresh the browser and log in to Settings again. You can also download the latest firmware from the Buffalo website. Updating Automatically From Settings, click Management.
  • Page 186: Configuring Update Notification

    Chapter 7 Advanced Features Select “Update the firmware automatically” and click OK. Alternately, you may choose to schedule updates for a specific time of day. Configuring Update Notification Configure whether or not to receive a notification when new firmware becomes available. From Settings, click Management.
  • Page 187 Select to enable or disable update notification and click OK. For further optimized firmware updates and product usability improvements, Buffalo may ask you to send your usage and environment information, such as a number of shared folders and client computers, and/or S.M.A.R.T.
  • Page 188: Name, Date, Time, And Language

    Chapter 7 Advanced Features If update notification is enabled, it will also automatically enable sending usage feedback to Buffalo. If you don’t want to send this information to us, disable update notification. Note: If a backup job is running and the update time arrives, auto update will be skipped. After backup is completed, auto update will run at the next upcoming update time.
  • Page 189 Chapter 7 Advanced Features Click the Time tab. Enable the NTP server and select the “Use default NTP server” checkbox. If you disable the NTP function, click Use Local Date/Time to use your computer’s time settings for the TeraStation. By default, the TeraStation adjusts its clock automatically by using a default NTP server. This NTP server belongs to Internet Multi Feed Inc.
  • Page 190: Beep Alerts

    Chapter 7 Advanced Features Click the Management Information tab. Enter the desired location and administrator information. When all settings are completed, click OK. Beep Alerts You can set the TeraStation to beep if certain errors occur. From Settings, click Management. Click the settings icon ( ...
  • Page 191: Lcd And Leds

    Chapter 7 Advanced Features LCD and LEDs You may configure options for the LCD panel and adjust the brightness of the LCD panel and LEDs on the TeraStation. From Settings, click Management. Click the settings icon (   ) to the right of “Notifications”. Click Edit.
  • Page 192: Jumbo Frames

    Chapter 7 Advanced Features From Settings, click Network. Click the settings icon (   ) to the right of “Proxy Server”. Enable “Proxy Server”. Enter the proxy server IP address or hostname, port number, username and password, then click OK. Once you configure the proxy server settings, you may use the settings for other cloud storage services such as Dropbox by selecting the “Configured settings”...
  • Page 193 Chapter 7 Advanced Features Click Edit. Select or enter the desired MTU size and click OK.
  • Page 194: Changing The Ip Address

    Chapter 7 Advanced Features Connection Transmission Transfer data using jumbo frames. Jumbo Frame Jumbo Frame Jumbo Frame Compatible Switch Compatible PC Transfer data without using jumbo frames. Jumbo Frame Jumbo Frame Jumbo Frame Incompatible PC Compatible Switch Transfer data without using jumbo frames.
  • Page 195 Chapter 7 Advanced Features Click Edit. Clear the “DHCP” checkbox and enter the desired IP address and its subnet mask. Select “User (static)” for both “Gateway Owner” and “DNS Owner” options from the drop-down list, then enter the desired default gateway address and DNS server addresses. Click OK.
  • Page 196: Mapping Ip Address And Hostname

    Chapter 7 Advanced Features Notes: • Only one default gateway and DNS address can be configured for all LAN ports. Different network addresses cannot be assigned to the LAN ports. • Do not set the IP address of the same segment for all LAN ports. This may cause unstable network communication.
  • Page 197: Boot Authentication

    Chapter 7 Advanced Features Click Add. Enter the hostname (FQDN) and the IP address that you want to map, then click OK. Click OK again to apply settings. Boot Authentication Boot authentication allows you to authenticate the TeraStation while it’s booting, and also prevents the TeraStation from being used in an unauthorized or unexpected manner, such as in cases of theft.
  • Page 198: Notes Before Use

    Chapter 7 Advanced Features Notes Before Use • To use boot authentication, a Windows PC is necessary to serve as the authentication server. • When activating boot authentication, the drives on the TeraStation will be formatted and all data on the drives will be erased.
  • Page 199: Configuring Boot Authentication On The Terastation

    Chapter 7 Advanced Features Download the application for the authentication server, “Boot Authentication Tool”, from the Buffalo website and install it onto the Windows PC. Register the specific port number that is used on the application as a firewall exception rule. Navigate to Control Panel >...
  • Page 200: If The Terastation Cannot Be Accessed

    Chapter 7 Advanced Features The drive formatting process will start. Click Yes. The “Confirm Operation” screen will open. Enter the confirmation number, then click OK. The format will begin. Wait until it finishes. When formatting finishes and the TeraStation is added to Boot Authentication Tool, boot authentication setting is completed.
  • Page 201 Chapter 7 Advanced Features When the user tries to access the TeraStation’s Settings and the TeraStation is not available, the screen below will be displayed. Have the user forward the decryption key to the authentication server administrator. Open Boot Authentication Tool on the authentication server. From Boot Authentication Tool, right-click the target TeraStation from the list and click Decrypt Passcode.
  • Page 202 Chapter 7 Advanced Features The decrypted 20-digit passcode will be displayed. Send the passcode to the user. The user can then enter the 20-digit passcode into Settings and click OK. If the passcode is authenticated, the TeraStation will become available. The user can click OK to log in to Settings.
  • Page 203: Chapter 8 Drive Replacement

    TeraStation may malfunction. • For the replacement drive of other series TeraStations, use a Buffalo OP-HDN series drive. The replacement drive should be the same size or larger as the original drive. If a larger drive is used, the extra space will not be usable in a RAID array.
  • Page 204: Using A Redundant Raid Mode

    Chapter 8 Drive Replacement Using a Redundant RAID Mode Back up the saved data to another location before replacing the failed drive. If one or more drives fail during the drive replacement, data can no longer be retrieved from the TeraStation. Open the front cover with the included key.
  • Page 205 Chapter 8 Drive Replacement Drives without red status LEDs lit are still on. Do not unplug or remove them. Pull out the drive cartridge and remove it from the TeraStation. Insert the new drive into the empty slot. Slide the drive in with the locking mechanism open. Push here to insert.
  • Page 206: Using Raid 0

    Chapter 8 Drive Replacement Swing the lock back down until it clicks into place. When the replaced drive is recognized, the status LED will flash red and the I31 message will appear on the LCD panel. Close the front cover. Press the function button on the front of the TeraStation.
  • Page 207: Using Jbod

    Chapter 8 Drive Replacement Note: If a drive malfunctions in RAID 0, all data on the RAID array will be lost. All of the settings for the shared folders (such as access restrictions) are erased after replacing a drive from a RAID 0 array. Turn off the TeraStation.
  • Page 208: Using A Hot Spare

    Chapter 8 Drive Replacement Insert the new drive into the empty slot. Slide the drive in with the locking mechanism open. Swing the lock back down until it clicks into place. Close the front cover. Press the power button on the TeraStation. When the replaced drive is recognized, the status LED will flash red and the I32 message will appear on the LCD panel.
  • Page 209 Chapter 8 Drive Replacement If you must change a drive that is not malfunctioning, either first dismount it in Settings, referring to the “Dismounting Drives” section in chapter 4, or shut down the TeraStation before replacing the drive. If you need to replace more than one drive at the same time, replace the drives one at a time to preserve your data.
  • Page 210: Chapter 9 Utilities

    Chapter 9 Utilities NAS Navigator2 for Windows NAS Navigator2 is a utility program that makes it easy to display Settings, change the Buffalo NAS device’s IP address, or check its drive. To install NAS Navigator2, download the installer from http://d.buffalo.jp/TS6000/.
  • Page 211 I’m here Causes your Buffalo NAS device to beep. *Click on the Buffalo NAS device’s icon to display these options. When NAS Navigator2 is closed, right-click the NAS Navigator2 icon in the system tray for the following options.
  • Page 212: Mounting As A Network Drive

    Searches for the Buffalo NAS devices on the network again. Open NAS Navigator2 Opens the NAS Navigator2 window. Exit Exits NAS Navigator2. The following menus may be accessed from the Buffalo NAS device’s properties page. Name Description Configuration Click Settings to open the configuration interface.
  • Page 213: Changing The Ip Address

    NAS Navigator2 for macOS NAS Navigator2 is a utility program that makes it easy to display Settings, change the Buffalo NAS device’s IP address, or check its drive. To install NAS Navigator2, download the installer from http://d.buffalo.jp/TS6000/.
  • Page 214 Causes your Buffalo NAS device to beep. icon. Label Color Selects the color of the name displayed below the icon. The following menus may be accessed from the Buffalo NAS device’s properties page. Name Description Configuration Click Settings to open the configuration interface.
  • Page 215: Mounting As A Network Drive

     ) in the Dock to start NAS Navigator2. Click the Buffalo NAS device’s icon while holding down the control key, then select Configure > IP Address. Clear the “Use DHCP” checkbox; enter the desired settings and the administrator password, then click Apply.
  • Page 216: Chapter 10 Appendix

    Chapter 10 Appendix Chapter 10 Appendix TeraStation Does Not Work Properly If an error occurs that prevents the TeraStation from booting up properly, one or more of the following symptoms may occur: • The power LED keeps blinking instead of turning into a solid glow; follow the procedure at the “Power LED Keeps Blinking”...
  • Page 217: Booting The Terastation In Emergency Mode

    Chapter 10 Appendix Make sure that “Recover firmware” is selected from the drop-down list under “Action”, then click OK. Note: There are two more options for “Action” other than “Recover firmware”. The details for all options are below: • Use the drive’s firmware: The TeraStation will boot using the firmware on the drive. •...
  • Page 218: Cleaning The Dustproof Filter

    Chapter 10 Appendix To recover from emergency mode, follow the procedure below. Download the firmware updater from the Buffalo website. Extract the downloaded file by double-clicking it and launch the updater. Update the firmware for the TeraStation unit that is currently in emergency mode.
  • Page 219 Chapter 10 Appendix Remove the front cover while holding the hook downward. Remove the dustproof filter from the front cover and clear any dust, such as by using a vacuum cleaner. When cleaning is completed, return the filter and the front cover.
  • Page 220: Lcd Panel

    Chapter 10 Appendix Close the front cover. LCD Panel The LCD panel can be cycled through different modes by pressing the display button on the front of the TeraStation. Modes LCD Message Description Corrective Action Connect an Ethernet LANx Not connected to a network. cable to the LAN Not Connected port.
  • Page 221: Errors

    An error occurred in the fan speed. air duster, or other tools to remove them. If the error is displayed again, contact Buffalo technical support for assistance. Do not place objects in the area around A rise in the system temperature may have E12 Cooling Failure the TeraStation.
  • Page 222: Status

    An error occurred, so the drive was Replace the drive by referring to the drive E30 Replace Drive x removed from the RAID array. replacement sections in chapter 8. Contact Buffalo technical support for E41 NVRAM Failure The NVRAM inside the TeraStation failed. assistance. Status After you change settings, one of the following messages will appear on the LCD panel and the info LED will glow amber.
  • Page 223 TeraStation and the backup TeraStation replication or failover destinations, disable failed during failover configuration. them or change the destinations. If the error is displayed again, contact Buffalo technical support for assistance. I37 Recovering Settings initialization in progress. System... I38 Recovery Settings initialization is completed.
  • Page 224: Default Settings

    Chapter 10 Appendix LCD Message Description Corrective Action I49 Lost Failover The main TeraStation in the failover Make sure that the main TeraStation is on, Main configuration cannot be found. working, and connected to the network. Failover maintenance is in progress. I50 Failover in Note: Do not turn off the TeraStation’s Maintenance Mode...
  • Page 225: Specifications

    Disabled TS6200DN: RAID 1 RAID Mode TS6400DN, TS6400RN: RAID 5 Specifications Check the Buffalo website for the latest product information and specifications. IEEE 802.3ab (1000BASE-T), IEEE 802.3u (100BASE- Standards Compliance TX), IEEE 802.3 (10BASE-T) 1GbE LAN Interface Data Transfer Rates...
  • Page 226 Supported RAID TS6400DN, TS6400RN: 0, 1, 5, 6, 10, JBOD (individual Internal Hard Drives drives) Buffalo OP-HDN series drive Note: The replacement drive should be the same Replacement Drive size or larger as the original drive. The drives listed above are available from the Buffalo website.

Table of Contents