Table of Contents
Advertisement
Quick Links
Network Attached Storage
TeraStation 5020
User Manual
Please make sure to read this manual before using and follow the procedures. If you have any inquiries about
the product, contact the number on the warranty statement or the packing box. Do not discard the included
documents, the warranty statement, or the packing box.
www.buffaloamericas.com
35022387-02
November 2022
Advertisement
Table of Contents

Related Manuals for Buffalo TeraStation TS5420DN0


Summary of Contents for Buffalo TeraStation TS5420DN0
- Page 1 Network Attached Storage TeraStation 5020 User Manual Please make sure to read this manual before using and follow the procedures. If you have any inquiries about the product, contact the number on the warranty statement or the packing box. Do not discard the included documents, the warranty statement, or the packing box.
-
Page 2: Table Of Contents
Table of Contents Chapter 1 Notice .............9 Regulatory Compliance Information ..........9 Warning Symbols and Graphical Icons on the Product ....9 Safety Precautions ................9 Chapter 2 Getting Started .......... 11 Diagrams ..................11 4-Bay and 8-Bay Desktop Models, 4-Bay Rackmount Model ....11 12-Bay Rackmount Model ...............14 Turning the TeraStation On and Off.......... - Page 3 Importing User Information ..............28 Adding a Group ................28 Configuring Access Restrictions ..........31 Restricting Local User Access to Shared Folders ........31 Restricting AD Domain User Access to Shared Folders ......33 Restricting Access to Subfolders ............36 Accessing from a macOS Device ..........38 Accessing from an NFS Client ............
- Page 4 S.M.A.R.T..................67 Displaying S.M.A.R.T. Information ............67 Checking the Drive Condition ..............68 Formatting Drives ................. 68 Encrypting Drives ................70 Erasing Data on the TeraStation Completely ......70 Quotas .................... 71 Limits for Shared Folders ................71 Limits for LVM Volumes ................72 Using the TeraStation as an iSCSI Device ........
- Page 5 Configuring Snapshot Archive Settings ..........101 Backing Up Data on the TeraStation .......... 106 Backup Modes ..................107 Preparing a Backup Destination ............110 Configuring a Backup Job ..............112 If Backing Up from rsync-Compatible Devices to the TeraStation ..117 Restoring Backup Data ................117 Backup Logs for If Backup Fails ............121 Replication ...................
- Page 6 Synchronizing with Dropbox ............. 156 Creating a Dropbox Sync Job ..............157 Changing Job Settings ................159 Creating a Shared Link (Windows Only) ..........162 Using Microsoft Azure for Data Preservation ......162 Creating an Azure Storage Sync Backup Job ........162 Creating an Azure Storage Sync Restore Job ........170 Changing Job Settings ................175 Synchronizing with Microsoft OneDrive ........
- Page 7 Chapter 8 Settings Backup/Restoration ....213 Saving and Applying Settings ............ 213 Saving Settings ..................214 Applying Settings ..................214 Transferring Another Buffalo NAS Device’s Settings ....215 Creating a Config File (.nas_config) ............216 Transferring Settings ................216 Restoring Factory Defaults ............217 Initializing from Settings ..............217...
- Page 8 Two PSU Devices Are Installed ..............238 Automatic Shutdown If Power Supply Fails ......240 Logs ....................241 Displaying TeraStation’s Logs ...............241 Transferring Logs to the Syslog Server ..........242 Creating a Shortcut to the Logs in the Shared Folder ......243 Changing Archive Rules for File Access Logs ........244 Updating the Firmware ...............
- Page 9 Drive Replacement for a RAID 0 Array ..........262 Drive Replacement for a Hot Spare ............263 Replacing a Non-Malfunctioning Drive ........264 Re-Inserting Drives ..............264 TeraStation Does Not Work Properly ......... 265 Power LED Keeps Blinking ..............265 Booting the TeraStation in Emergency Mode ........267 Unable to Access Shared Folders ..........
-
Page 10: Chapter 1 Notice
Chapter 1 Notice Chapter 1 Notice Regulatory Compliance Information For Customers in the United States This device complies with Part 15 of the FCC Rules. Operation is subject to the following two conditions: (1) this device may not cause harmful interference, and (2) this device must accept any interference received, including interference that may cause undesired operation. - Page 11 Chapter 1 Notice (4) The device can only be used in a fixed location, such as a telecommunication center or a dedicated computer room. When you install the device, ensure that the protective earthing connection of the socket-outlet is verified by a technician.
-
Page 12: Chapter 2 Getting Started
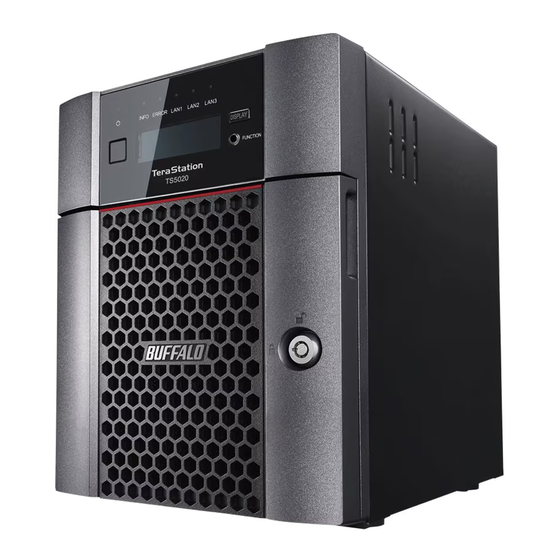
Chapter 2 Getting Started Chapter 2 Getting Started Diagrams Depending on the number or type of drives in the unit, the model name will be different. Check the sticker on the packing box for your unit’s model name. 4-Bay and 8-Bay Desktop Models, 4-Bay Rackmount Model TS5420DN TS5420RN 3 4 5 6 7 13... - Page 13 Chapter 2 Getting Started TS5820DN 2 3 4 5 6 7 Power Button Press this button to power on the TeraStation. To power off the TeraStation, press and hold down the power button for five seconds. If the TeraStation beeps, pressing and holding this button for a short period will stop the beeping. Power LED When the TeraStation is on, the LED glows green.
- Page 14 Chapter 2 Getting Started Drive Lock Open the front panel with the key to replace drives or access the init button. Reset Button Press and hold down this button with something pointed to initialize the TeraStation’s admin username and password, two-factor authentication settings, IP settings, SSL, and service port restriction settings to their factory default values.
-
Page 15: 12-Bay Rackmount Model
Chapter 2 Getting Started Link/Act LED Glows blue when the TeraStation is connected to a network at 10 Gbps. It blinks when the connection is experiencing activity. 12-Bay Rackmount Model TS51220RH 16 17 18 19 Power Button Press this button to power on and off the TeraStation. If the TeraStation beeps, pressing and holding this button for a short period will stop the beeping. - Page 16 Chapter 2 Getting Started Reset Button Press and hold down this button with something pointed to initialize the TeraStation’s admin username and password, two-factor authentication settings, IP settings, SSL, and service port restriction settings to their factory default values. The effects of this button can be changed in Settings. During initialization, the TeraStation will beep and the message will appear as a notification.
-
Page 17: Turning The Terastation On And Off
Chapter 2 Getting Started Note: To communicate at up to 10 Gbps, all network devices must be compatible with 10GbE. LAN Port 4 (10GbE) Connect an Ethernet cable to use this port for your network. It is available for communicating at max. 10 Gbps if using the included Ethernet or category 6A cable. -
Page 18: Opening Settings
Chapter 2 Getting Started Opening Settings Double-click the NAS Navigator2 icon ( ) to start NAS Navigator2. Right-click your TeraStation’s icon and select Open Settings. For macOS, select the TeraStation’s icon while holding down the control key, then select Open Settings. Enter the username and password, then click OK. - Page 19 Chapter 2 Getting Started • Click Secure Connection to log in using an encrypted connection. For detailed information about encrypted connections, refer to the “Encrypting Data Transmission” section in chapter 7. If you did not enable two-factor authentication, skip to step 5. Otherwise, refer to the authenticator app on your mobile device for the verification code.
-
Page 20: Configuring Settings Via Setup Wizard
Chapter 2 Getting Started Username Password Settings Available If a user is assigned as an administrator, all settings are available. If assigned to a power users group, creating Your username Your password or editing shared folders, users, and groups is available. If assigned to a general users group, only changing the password of logged-in users is available. -
Page 21: Checking The Device Information From Dashboard
Chapter 2 Getting Started Click Execute Wizard. The “Confirm Operation” screen will open. Enter the confirmation number, then click OK. Follow the procedure on the screen and finish the setup wizard. Checking the Device Information from Dashboard When opening the Settings interface, the Dashboard page will appear first. Dashboard will show the following device information: •... - Page 22 Chapter 2 Getting Started Log in to Settings using NAS Navigator2. Click at the top-right of Settings and choose Shut Down or Restart. Click Yes. The “Confirm Operation” screen will open. Enter the confirmation number, then click OK.
-
Page 23: Chapter 3 File Sharing
Chapter 3 File Sharing Chapter 3 File Sharing You can create users and groups to access the shared folders on the TeraStation and configure access restrictions to limit access to key data. Configuring Shared Folders Adding a Shared Folder From Settings, click File Sharing. Click the settings icon ( ... - Page 24 Chapter 3 File Sharing Configure the desired settings, then click OK to finish. Notes: • Names may contain up to 27 alphanumeric characters, hyphens (-), and underscores (_). Multibyte characters are supported. The first character should not be a symbol. •...
-
Page 25: Recycle Bin
Chapter 3 File Sharing ⅰⅱⅲⅳⅴⅵⅶⅷⅸⅹ㎜㎝㎞㎎㎏㏄㎡№㏍℡㊤㊥㊦㊧㊨㈱㈲㈹㍾㍽㍼㍻㍉㌔㌢㍍㌘㌧㌃㌶㍑㍗㌍㌦㌣㌫㍊ ㌻¦'"〝〟∮Σ∟⊿ 纊褜鍈銈蓜俉炻昱棈鋹曻彅丨仡仼伀伃伹佖侒侊侚侔俍偀倢俿倞偆偰偂傔僴僘兊兤冝冾凬刕劜劦勀勛匀匇匤 卲厓厲叝﨎咜咊咩哿喆坙坥垬埈埇﨏塚增墲夋奓奛奝奣妤妺孖寀甯寘寬尞岦岺峵崧嵓﨑嵂嵭嶸嶹巐弡弴彧德 忞恝悅悊惞惕愠惲愑愷愰憘戓抦揵摠撝擎敎昀昕昻昉昮昞昤晥晗晙晴晳暙暠暲暿曺朎朗杦枻桒柀栁桄棏﨓楨 﨔榘槢樰橫橆橳橾櫢櫤毖氿汜沆汯泚洄涇浯涖涬淏淸淲淼渹湜渧渼溿澈澵濵瀅瀇瀨炅炫焏焄煜煆煇凞燁燾犱 犾猤猪獷玽珉珖珣珒琇珵琦琪琩琮瑢璉璟甁畯皂皜皞皛皦益睆劯砡硎硤硺礰礼神祥禔福禛竑竧靖竫箞精絈絜 綷綠緖繒罇羡羽茁荢荿菇菶葈蒴蕓蕙蕫﨟薰蘒﨡蠇裵訒訷詹誧誾諟諸諶譓譿賰賴贒赶﨣軏﨤逸遧郞都鄕鄧釚 釗釞釭釮釤釥鈆鈐鈊鈺鉀鈼鉎鉙鉑鈹鉧銧鉷鉸鋧鋗鋙鋐﨧鋕鋠鋓錥錡鋻﨨錞鋿錝錂鍰鍗鎤鏆鏞鏸鐱鑅鑈閒隆 﨩隝隯霳霻靃靍靏靑靕顗顥飯飼餧館馞驎髙髜魵魲鮏鮱鮻鰀鵰鵫鶴鸙黑畩秕緇臂蘊訃躱鐓饐鷯 • File and folder names may contain up to 255 single-byte characters. • Folder and workgroup names whose names contain multibyte characters may not be displayed correctly. •... -
Page 26: Hidden Shares
Chapter 3 File Sharing Hidden Shares If a shared folder becomes hidden, it will not be displayed under Network, and only certain users will be allowed to access it. To hide a shared SMB folder, follow the procedure below. From Settings, navigate to File Sharing > Folder Setup and choose a shared folder to make hidden. Click the Option 2 tab and select the “Hidden share (SMB only)”... - Page 27 Chapter 3 File Sharing Click Create.
- Page 28 Chapter 3 File Sharing Enter the desired settings, then click OK to finish. Notes: • Usernames may contain up to 128 alphanumeric characters, hyphens (-), underscores (_), periods (.), and the symbols ! # & @ $ * ^ %. The first character should not be a symbol. •...
-
Page 29: Importing User Information
Chapter 3 File Sharing Importing User Information You can import users in File Sharing > Users by clicking Import CSV File. An example format for user data: Username (required), password (required), and user description (optional). Example 1: Importing usernames, passwords, and comments username1,password1,comment1 username2,password2,comment2 username3,password3,comment3... - Page 30 Chapter 3 File Sharing Click Create.
- Page 31 Chapter 3 File Sharing Enter the desired settings, then click OK to finish. Notes: • Group names may contain up to 20 alphanumeric characters, hyphens (-), underscores (_), and periods (.). The first character should not be a symbol. • Group descriptions may contain up to 75 alphanumeric characters, hyphens (-), underscores (_), and spaces. Multibyte characters are supported.
-
Page 32: Configuring Access Restrictions
Chapter 3 File Sharing Configuring Access Restrictions You may restrict access for specific shared folders, including external USB drives. Notes: • Configure access restrictions only through Settings. Configuring access restrictions through Windows is not supported and may cause unexpected behavior. •... - Page 33 Chapter 3 File Sharing Click the shared folder that you want to set access restrictions for. Click the Access Restrictions tab. Enable “Access Restrictions for Shared Folders”.
-
Page 34: Restricting Ad Domain User Access To Shared Folders
Chapter 3 File Sharing Select the level of access for the user or group. : Read and write : Read-only : No access Note: The example above shows access restrictions by users. To restrict access by group, click the Local Groups tab and select group permissions. - Page 35 Chapter 3 File Sharing From Settings, click Network. Click the settings icon ( ) to the right of “Workgroup/Domain”. Click Edit. Select “Active Directory”, then click Next. Enter the domain controller information and click Search. The domain controller on the same network will be detected and required settings will be populated into each field automatically.
- Page 36 Chapter 3 File Sharing If there is a difference of more than five minutes between the TeraStation’s clock and the domain controller’s clock, joining the domain or authenticating domain users and groups may fail. For best results, select “Configure domain controller as an NTP server” if the domain controller can function as the NTP server. Click OK.
-
Page 37: Restricting Access To Subfolders
Chapter 3 File Sharing • After building an Active Directory domain, the administrator password for joining the domain must be changed at least once, or joining the Active Directory domain will fail. • The DNS name and NetBIOS name of Active Directory domains should be identical. •... - Page 38 Chapter 3 File Sharing Click the shared folder that you want to set access restrictions for. If either or both of the “FTP” and “SFTP” checkboxes for “LAN Protocol Support” are selected, clear them all. Click the Option 2 tab. Enable “Access Restrictions for Subfolders”.
-
Page 39: Accessing From A Macos Device
Chapter 3 File Sharing You may also configure access permissions for domain users and groups. You should have the TeraStation join your Active Directory domain before configuring access permissions from File Explorer. Notes: • If enabling subfolders’ access restrictions for a USB drive, the drive should be formatted using Btrfs, XFS, or ext3. •... -
Page 40: Accessing From An Nfs Client
Accessing from an NFS Client Note: Buffalo’s customer support will help configure the NFS settings on your TeraStation, and will support VMware and Windows clients but will not provide support for configuring your Linux or other UNIX clients. There are various types of UNIX and the procedures for configuring NFS with them will vary considerably. - Page 41 Chapter 3 File Sharing Choose the shared folder that will be accessible from the NFS client. Under “LAN Protocol Support”, select the “NFS” checkbox on the Basic tab and click OK. Note the NFS path. It will be used later for accessing data from an NFS client. Click Close.
- Page 42 Chapter 3 File Sharing Click the Clients tab. Click Add.
- Page 43 Chapter 3 File Sharing Enter the hostname and IP address of the NFS client, then click OK. You should add all NFS clients to access the shared folder. Click the Rules tab.
- Page 44 Chapter 3 File Sharing Click Create. Choose the folder to restrict access to, and enter the clients that will have restricted access into the “Hosts” field. Clients may be entered by hostname, IP address, or IP address range. Wildcards are supported. Separate multiple entries with commas.
-
Page 45: Offline Files For Windows
Chapter 3 File Sharing Notes: • To restrict NFS access to a specific network or client, navigate to File Sharing > NFS > Services and click Edit. Enter the address of the network. For example, if your local network subnet has a router at 192.168.1.1 and clients with IP addresses in the range from 192.168.1.2 through 192.168.1.48 with subnet mask 255.255.255.0, then the “Public Network Address”... - Page 46 Chapter 3 File Sharing Click the shared folder for offline files. Choose either “Manual caching of documents”, “Automatic caching of documents”, or “Automatic caching of programs and documents” on the Option 1 tab, then click OK. Manual caching of documents: User selects files that are cached. Automatic caching of documents: Opened files can be cached locally for offline use.
- Page 47 Chapter 3 File Sharing From File Explorer, right-click the icon of the shared folder on the TeraStation for which you have set the offline feature, then click Always available offline. When the offline settings and synchronization settings are finished, the shared folder icon will be changed to and synchronization will begin.
-
Page 48: Chapter 4 Raid Modes And Drive Management
Chapter 4 RAID Modes and Drive Management Chapter 4 RAID Modes and Drive Management Available RAID Modes The TeraStation supports multiple types of RAID. The type of RAID arrays available for use depends on how many drives are installed on your TeraStation. Notes: •... -
Page 49: Working With Raid Arrays
Chapter 4 RAID Modes and Drive Management RAID 0 A RAID 0 array combines two or more drives into a single array. The usable space is equal to the total capacity of all drives in the array. This simple RAID mode offers faster performance than RAID modes that include parity. If a single drive in the array fails, then all data in the array will be lost. -
Page 50: Creating A Raid Array
Chapter 4 RAID Modes and Drive Management Click Delete RAID Array. The “Confirm Operation” screen will open. Enter the confirmation number, then click OK. Click OK when finished. Next, create a shared folder by referring to the “Adding a Shared Folder” section in chapter 3. -
Page 51: Shutting Down The Terastation Automatically If An Error Occurs
Chapter 4 RAID Modes and Drive Management Choose a RAID array. Select a RAID mode and the drives to be used, then click Create RAID Array. Depending on the RAID configuration, the message will appear. Read the message carefully and click Yes to proceed. - Page 52 Chapter 4 RAID Modes and Drive Management a case, you can confirm the failed drive number in the notification email. To configure email notifications, refer to the “Email Notification” section in chapter 10. To configure auto shutdown, follow the procedure below. From Settings, click Storage.
-
Page 53: Rebuilding The Raid Array Automatically For The Ts51220Rh
Chapter 4 RAID Modes and Drive Management Change the “Error Behavior” option to “Shut down” and click OK to finish. Rebuilding the RAID Array Automatically for the TS51220RH If auto RAID rebuild is enabled, RAID arrays will rebuild automatically after a failed drive is replaced. You may enable or disable auto RAID rebuild by following the procedure below. -
Page 54: Configuring Actions For If A Drive Used For The Raid Array Has Not Been Detected
Chapter 4 RAID Modes and Drive Management Click Options. Click Edit. Change the “Automatically Rebuild if New Drive Is Detected” option to “Yes” and click OK to finish. Configuring Actions for If a Drive Used for the RAID Array Has Not Been Detected You can configure actions to be taken by the TeraStation if a drive used for the RAID array cannot be mounted when booting. - Page 55 Chapter 4 RAID Modes and Drive Management From Settings, click Storage. Click the settings icon ( ) to the right of “RAID”. Click Options. Click Edit. Change the “Drive Detection Window” option to “Don't prompt when a drive could not be detected” and click OK to finish.
- Page 56 Chapter 4 RAID Modes and Drive Management If the confirmation screen is not set to appear, an undetected drive will automatically be dismounted from the TeraStation. Subsequently, the TeraStation will enter degraded mode if a redundant RAID mode has been configured and the RAID array will be corrupted if RAID 0 has been configured, resulting in data loss.
-
Page 57: Configuring A Hot Spare
Chapter 4 RAID Modes and Drive Management Configuring a Hot Spare If you have a hot spare configured and an array fails, the TeraStation immediately switches over to the hot spare. To use a hot spare, you need a RAID 1 or RAID 5 array and an extra drive that’s not part of an array. Notes: •... -
Page 58: Expanding Raid Capacity Without Deleting Data
Chapter 4 RAID Modes and Drive Management Click Set as a hot spare. Read the message carefully and select the checkbox, then click OK. The “Confirm Operation” screen will open. Enter the confirmation number, then click OK to finish. Note: To turn the hot spare back to a normal drive, choose Set as a normal drive. Expanding RAID Capacity Without Deleting Data You can create or expand a RAID array without erasing data on the drive by using RMM (RAID Mode Manager). - Page 59 Chapter 4 RAID Modes and Drive Management Insert the new drive (sold separately) into the empty slot with the lock mechanism remaining open and swing the lock back down until it clicks into place. Close the front cover. When the drive is recognized, the status LED will flash red and the message will appear as a notification.
- Page 60 Chapter 4 RAID Modes and Drive Management The “Confirm Operation” screen will open. Enter the confirmation number, then click OK to finish. Drives Are Currently in JBOD If the drives are currently in JBOD (not in a RAID array), you may change it to a RAID 1 array. To create the RAID 1 array using RMM, you must have at least two drives available in JBOD.
- Page 61 Chapter 4 RAID Modes and Drive Management Set the RAID mode to “RAID 1”. Select the “Add a drive to a RAID array with RMM. Your data will be preserved. ” checkbox. Select the drive whose data will be saved from the drop-down list. Select the drive to add to the RAID array.
-
Page 62: Raid Scanning
Chapter 4 RAID Modes and Drive Management Choose a RAID array. Select one drive to add to the RAID array. If changing the RAID mode, choose the desired mode for the array from the drop-down list. Otherwise, keep the current RAID mode as is. Click Change RAID Array. -
Page 63: Configuring Low Drive Space Alerts
Chapter 4 RAID Modes and Drive Management Move the RAID scanning switch ( ) to the position to enable RAID scanning. Click the settings icon ( ) to the right of “RAID Scanning”. Click Edit. Select when to run the scan and click OK. Notes: •... -
Page 64: Adding An External Drive
After a USB drive is recognized, the TeraStation adds “usbdisk x” to the shared folder list, where “x” is the USB port to which the drive is connected. Compatibility Supported file systems for external USB drives are below: File Systems Recommended Situation Btrfs Connecting to this TeraStation. Connecting to another Buffalo NAS device. -
Page 65: Dismounting Drives
Chapter 4 RAID Modes and Drive Management File Systems Recommended Situation Connecting to another Buffalo NAS device. XFS is recommended because the Ext3 more files stored in one folder, the slower the performance. The available capacity will be less than the area formatted to XFS. -
Page 66: Using Settings
Chapter 4 RAID Modes and Drive Management Using Settings From Settings, click Storage. Click the settings icon ( ) to the right of “Drives” to dismount an internal drive or “USB Drives” to dismount an external drive. Select the drive to dismount and click Dismount Drive. The “Confirm Operation”... - Page 67 Chapter 4 RAID Modes and Drive Management From Settings, click Storage. Click the settings icon ( ) to the right of “Drives” to check an internal drive or “USB Drives” to check an external drive. Select the drive or array to test, then click Check Drive. Click Check.
-
Page 68: Displaying S.m.a.r.t. Information
Chapter 4 RAID Modes and Drive Management S.M.A.R.T. S.M.A.R.T. (Self-Monitoring, Analysis, and Reporting Technology) monitors internal drives to detect and report various indicators of reliability, in the hope of anticipating failures. If S.M.A.R.T. informs you of impending drive failure, you may choose to replace the drive to avoid outages and possible data loss. Follow the procedure below to check S.M.A.R.T. -
Page 69: Checking The Drive Condition
Chapter 4 RAID Modes and Drive Management The S.M.A.R.T. information for the drive will be displayed. Different information may be displayed depending on the brand of drives on your TeraStation. Critical attributes are displayed in bold. Checking the Drive Condition Attributes with the worst value that is equal to or less than the threshold value may be significant. - Page 70 Chapter 4 RAID Modes and Drive Management Click the settings icon ( ) to the right of “Drives” to format an internal drive or “USB Drives” to format an external drive. Select the drive or array to format, then click Format Drive. Select a format type, then click Format.
-
Page 71: Encrypting Drives
Chapter 4 RAID Modes and Drive Management • For drives that are 2.2 TB or larger, make sure that the “GPT partition” checkbox is selected. Encrypting Drives Internal drives (and arrays) can be encrypted with 256-bit AES during formatting. Encrypted drives and arrays are then readable only from that specific TeraStation. -
Page 72: Quotas
Chapter 4 RAID Modes and Drive Management Click Erase TeraStation. The “Confirm Operation” screen will open. Enter the confirmation number, then click OK. The complete format process will begin. After the complete format is finished, the TeraStation will shut down automatically. -
Page 73: Limits For Lvm Volumes
Chapter 4 RAID Modes and Drive Management Enable quotas, choose the alert and the maximum amount of space the user will be allowed to use, and click Limits for LVM Volumes If LVM is enabled, volumes can be created with maximum size limits. Notes: •... - Page 74 Chapter 4 RAID Modes and Drive Management Read the message carefully and click Yes. The “Confirm Operation” screen will open. Enter the confirmation number, then click OK. Click OK. Click Edit under “NAS Volume”. Click Create Volume.
-
Page 75: Using The Terastation As An Iscsi Device
Chapter 4 RAID Modes and Drive Management Configure the desired settings, then click OK to finish. The usable capacity can now be limited by selecting the volume that you created for “Drive/Array” on the Basic tab when creating a shared folder. Notes: •... -
Page 76: Creating An Iscsi Volume
Chapter 4 RAID Modes and Drive Management Creating an iSCSI Volume To use the TeraStation as an iSCSI drive, create a volume first. Configure the TeraStation as described below. Notes: • If the volume settings are changed, all data on the volume will be erased. Before changing any settings, back up any important data. - Page 77 Chapter 4 RAID Modes and Drive Management Click Create Volume. Enter a volume name, volume description, drive or array where a volume will be created, and volume size, then click OK to finish. If you enabled LVM for the target drive or array, or selected “File I/O” for the “Backstore” option, the volume size that you specify here can be changed later.
-
Page 78: Connecting Or Disconnecting Volumes
Chapter 4 RAID Modes and Drive Management Notes: • Do not use the TeraStation’s whole capacity for iSCSI volumes. Some features need free space in order to function. If there is no available free space, it may cause unexpected behavior. •... -
Page 79: Using With Multiple Computers
Chapter 4 RAID Modes and Drive Management When the formatting process is finished, the drive will be visible as an icon in Computer or This PC and can be used as a normal drive on the computer. Disconnecting a Volume From Windows, navigate to Control Panel >... - Page 80 Chapter 4 RAID Modes and Drive Management Click the Security tab. Click Edit. Enable authentication, enter the target CHAP name and secret, and click OK. Note: To enable mutual authentication in addition to target CHAP name and secret authentication, select the “Enable mutual authentication”...
- Page 81 Chapter 4 RAID Modes and Drive Management Register the initiator CHAP secret to your computer first. If you didn’t enable mutual authentication, skip this step. Click CHAP on the Configuration tab. Enter the configured initiator CHAP secret into the “Initiator CHAP secret” field and click OK.
- Page 82 Chapter 4 RAID Modes and Drive Management Click the volume to enable access restrictions. Enable authentication, enter the target CHAP name and secret, and click OK. Note: To enable mutual authentication, select the “Enable” checkbox to the right of “Mutual Authentication” and enter the initiator CHAP secret.
-
Page 83: Expanding Volume Sizes
Chapter 4 RAID Modes and Drive Management Connecting to Individual Volumes That Are Access-Restricted Open the Microsoft iSCSI Initiator. Register the initiator CHAP secret to your computer first. If you didn’t enable mutual authentication, skip this step. Click CHAP on the Configuration tab. Enter the configured initiator CHAP secret into the “Initiator CHAP secret” field and click OK. -
Page 84: Deleting Volumes
Chapter 4 RAID Modes and Drive Management Select the volume to expand. Enter the desired volume size to add and click OK. Click OK to finish. Deleting Volumes To delete an existing volume, follow the procedure below. Note: Deleting a volume will erase all data on the volume. Back up the data before deleting the volume. -
Page 85: Enabling The Isns Protocol
Chapter 4 RAID Modes and Drive Management From Settings, click Storage. Click the settings icon ( ) to the right of “iSCSI”. Select the volume to delete and click Delete Volume. Confirm that the volume is correctly selected on the screen and click OK. The “Confirm Operation”... -
Page 86: Advanced Iscsi Volume Settings
Chapter 4 RAID Modes and Drive Management From Settings, click Storage. Click the settings icon ( ) to the right of “iSCSI”. Click the Internet Storage Name Service (iSNS) tab. Click Edit. Enable “iSNS” and enter the IP address or hostname of the iSNS server, then click OK to finish. Advanced iSCSI Volume Settings You can configure the following advanced parameters for each iSCSI volume. - Page 87 Chapter 4 RAID Modes and Drive Management Advanced Parameter Description HeaderDigest Controls the HeaderDigest usage by the iSCSI target portal group endpoint. DataDigest Controls the DataDigest usage by the iSCSI target portal group (TPG) endpoint. Controls the usage of Multiple Connections per Session (MC/S). Initiator and MaxConnections target negotiate the maximum number of connections requested and/or acceptable.
-
Page 88: Chapter 5 Backup
Application for iSCSI Volume Snapshots To create an iSCSI volume snapshot in the environment where the iSCSI volumes on the TeraStation are connected using a virtual machine, we recommend using the Buffalo-offered Windows Server application “Snapshot Agent for TeraStation”, available from the Buffalo website. - Page 89 Chapter 5 Backup Click the number under “Snapshot” for the shared folder on the shared folder list. Click Create.
- Page 90 Chapter 5 Backup Select or clear the “Lock” checkbox to determine whether the created snapshot will be locked or unlocked and enter a short description, then click OK to finish. A locked snapshot cannot be deleted due to auto-archiving. Notes: •...
- Page 91 Chapter 5 Backup Select the checkbox for the target iSCSI volume and click Show Snapshot List. Click Create.
-
Page 92: Accessing The Snapshots Via Smb
Chapter 5 Backup Select or clear the “Lock” checkbox to determine whether the created snapshot will be locked or unlocked and enter a short description, then click OK. A locked snapshot cannot be deleted due to auto-archiving. Read the message carefully and click OK to finish. Notes: •... - Page 93 Chapter 5 Backup Click the shared folder to access snapshots from the computer. Click the Option 2 tab. Enable shadow copy and click OK. From the computer, access the TeraStation using File Explorer and right-click the shared folder to view snapshots.
-
Page 94: Restoring Snapshots
Chapter 5 Backup The entire history of created snapshots will appear. Select the snapshot and the action to be taken for the snapshot. Restoring Snapshots To restore the created snapshots to the shared folder or the iSCSI volume, follow the procedure below. For Shared Folders Note: When restoring snapshots, the file sharing service will restart so shared folders will become inaccessible temporarily. - Page 95 Chapter 5 Backup Click the number under “Snapshot” for the shared folder on the shared folder list. Select the checkbox for the target snapshot and then click Restore.
- Page 96 Chapter 5 Backup A new snapshot will be created before restoring the snapshot. Select or clear the “Lock” checkbox to determine whether the created snapshot will be locked or unlocked and enter a short description, then click OK to finish. A locked snapshot cannot be deleted due to auto-archiving.
- Page 97 Chapter 5 Backup Select the checkbox for the target iSCSI volume and click Show Snapshot List. Select the checkbox for the target snapshot and then click Restore.
-
Page 98: Configuring Schedule Snapshot
Chapter 5 Backup A new snapshot will be created before restoring the snapshot. Select or clear the “Lock” checkbox to determine whether the created snapshot will be locked or unlocked and enter a short description, then click OK to finish. A locked snapshot cannot be deleted due to auto-archiving. - Page 99 Chapter 5 Backup Click the number under “Snapshot” for the shared folder on the shared folder list. Click Advanced Settings at the lower-left corner of the window.
- Page 100 Chapter 5 Backup Click the Schedule tab. Enable schedule snapshot. Select the day of the week and time for when to have a snapshot automatically created, then click OK to finish. For iSCSI Volumes From Settings, click Storage. Click the settings icon ( ) to the right of “iSCSI”.
- Page 101 Chapter 5 Backup Select the checkbox for the target iSCSI volume and click Show Snapshot List. Click Advanced Settings at the lower-left corner of the window.
-
Page 102: Configuring Snapshot Archive Settings
Chapter 5 Backup Click the Schedule tab. Enable schedule snapshot. Select the day of the week and time when to automatically create a snapshot, then click OK to finish. Configuring Snapshot Archive Settings If you regularly create snapshots, it will use up capacity on the TeraStation. Snapshot archive settings will allow you to save capacity on created snapshots by automatically deleting older snapshots. - Page 103 Chapter 5 Backup Click the number under “Snapshot” for the shared folder on the shared folder list. Click Advanced Settings at the lower-left corner of the window.
- Page 104 Chapter 5 Backup Click the Auto Archive tab. Select the rule to keep the snapshots and click OK to finish. For more detailed information on archiving snapshots, refer to the “Archive Rules for Snapshots” section below. For iSCSI Volumes From Settings, click Storage.
- Page 105 Chapter 5 Backup Click the settings icon ( ) to the right of “iSCSI”. Select the checkbox for the target iSCSI volume and click Show Snapshot List. Click Advanced Settings at the lower-left corner of the window.
- Page 106 Chapter 5 Backup Click the Auto Archive tab. Select the rule to keep the snapshots and click OK to finish. For more detailed information on archiving snapshots, refer to the “Archive Rules for Snapshots” section below. Archive Rules for Snapshots Version-Based If you enter specific versions, the snapshots created from the latest up to the entered versions will be kept.
-
Page 107: Backing Up Data On The Terastation
You can back up the TeraStation folders to another shared folder on the same TeraStation, a connected USB drive, or a shared folder on another Buffalo NAS device, either on the same network or on another network. For best results,... -
Page 108: Backup Modes
*4 If the “Inherit subfolders' access restrictions” option is selected when creating a backup job, the device should be a Buffalo NAS device whose subfolders’ access restrictions is available. Overwrite (Incremental) The first backup job runs like a full backup. As each subsequent backup job runs, only files that have been changed since the last full backup will be backed up, but any files deleted from the backup source folder will also remain in the backup destination folder. - Page 109 *4 If the “Inherit subfolders' access restrictions” option is selected when creating a backup job, the device should be a Buffalo NAS device whose subfolders’ access restrictions is available. Overwrite (Differential) The first backup job runs like a full backup. As each subsequent backup job runs, only files that have been changed since the last full backup will be backed up, and any files deleted from the backup source folder will also be deleted from the backup destination folder.
- Page 110 *4 If the “Inherit subfolders' access restrictions” option is selected when creating a backup job, the device should be a Buffalo NAS device whose subfolders’ access restrictions is available. iSCSI Backup Imaged iSCSI volume data will be backed up. Each backup job will create a snapshot before the job runs. The backup source and backup destination can be paired and configured together.
-
Page 111: Preparing A Backup Destination
TeraStation as a backup destination. The procedure may vary depending on which Buffalo NAS device is selected as a destination. If using a USB drive as a backup destination, make sure its attribute is set to read and write. To change a read-only USB drive’s attribute to read and write, refer to “Read-Only Shares”... - Page 112 Chapter 5 Backup Choose the folder to be set as a backup destination. Under “LAN Protocol Support”, select the “Backup” checkbox on the Basic tab. Click OK and proceed to the next step to create a backup device access key.
-
Page 113: Configuring A Backup Job
You can configure backup jobs by using another shared folder on the Buffalo NAS device or a USB drive connected to the TeraStation as a destination. You can also back up to a Buffalo NAS device on another network as long as the two networks are connected by a VPN or the route is configured properly. - Page 114 Chapter 5 Backup If you had configured a backup device access key for the backup source folder on another Buffalo NAS device or the backup destination folder, click Set. If you hadn’t, skip to step 5. Enter the backup device access key and click OK.
- Page 115 Chapter 5 Backup Click Create.
- Page 116 Chapter 5 Backup Select backup settings such as date and time to run, then select a backup mode for the “Operation Mode” drop-down list. Refer to the differences between the backup modes from the “Backup Modes” section above. Click Add.
- Page 117 Check it before creating a backup job. • To back up data between Buffalo NAS devices on a network using jumbo frames, make sure that both devices are configured to use identical (or similar) MTU sizes. If MTU sizes are significantly different, the backup job may not be properly performed.
-
Page 118: If Backing Up From Rsync-Compatible Devices To The Terastation
Chapter 5 Backup If Backing Up from rsync-Compatible Devices to the TeraStation If you want to set an rsync-compatible device as the backup source and back up data on the rsync-compatible device to the TeraStation, you will need to enable rsync access on the TeraStation. From Settings, click File Sharing. - Page 119 Click the settings icon ( ) to the right of “Backup”. If you had configured a backup device access key for the backup source folder on another Buffalo NAS device or the backup destination folder, click Set. If you hadn’t, skip to step 5.
- Page 120 Chapter 5 Backup Enter the backup device access key and click OK. Click Create.
- Page 121 Chapter 5 Backup Select backup settings such as date and time to run, then select “iSCSI backup” for the “Operation Mode” drop- down list. Read the message carefully and click OK. Click Add.
-
Page 122: Backup Logs For If Backup Fails
Chapter 5 Backup Select the original backup destination as the backup source, then select an iSCSI file I/O volume as the backup destination. Click OK, then click OK again. The backup job will be added to the backup jobs list. The backup data will be restored on the backup destination after the backup job has run. - Page 123 Chapter 5 Backup Code Description Corrective Action Log Example The Ethernet cable was disconnected from the backup Reconnect the Ethernet cable. rsync error: error in source TeraStation when the socket IO (code 10) backup job started. Code 10 at clientserver.c(128) A backup destination doesn’t Select another backup destination [sender=3.1.0pre1]...
- Page 124 Chapter 5 Backup Code Description Corrective Action Log Example Change the filename or folder Invalid characters were used in name using compatible characters. the filename or folder name of Available characters are described in the backup destinations. “Adding a Shared Folder” section in chapter 3.
-
Page 125: Replication
Chapter 5 Backup Code Description Corrective Action Log Example The backup source folders on Check that the backup source folders B103 the backup source TeraStation on the backup source TeraStation are do not exist. on the shared folder list. Check that the backup destination The backup destination folders folders on the backup destination B104... -
Page 126: Preparing A Replication Destination
Buffalo NAS device whose subfolders’ access restrictions is available. Preparing a Replication Destination Configure a folder as a replication destination. Follow the procedure below to prepare a Buffalo NAS device as a replication destination. Note: You cannot use the same replication destination folder for multiple replication source folders. - Page 127 Chapter 5 Backup Choose the folder to be set as a replication destination. Under “LAN Protocol Support”, select the “Backup” checkbox on the Basic tab. Click OK and proceed to the next step to create a backup device access key.
-
Page 128: Configuring A Replication Job
Note: If you want to replicate to a Buffalo NAS device on another network, follow the procedure below to add the Buffalo NAS device so it can be used as a replication destination. - Page 129 Chapter 5 Backup If you had configured a backup device access key for the replication destination folder, click Set. If you hadn’t, skip to step 7. Enter the backup device access key and click OK. Click Create.
- Page 130 Chapter 5 Backup Select the shared folder that will be the replication source and destination, then click OK. Read the message carefully and click Yes to finish. Notes: • During setup, you may choose to encrypt and/or compress replication data. Encrypted data will be transferred securely on the network.
-
Page 131: Synchronizing Between Source And Destination Terastations Periodically
Chapter 5 Backup Synchronizing Between Source and Destination TeraStations Periodically To copy files that are saved via other file sharing protocols such as FTP to the replication destination regularly, configure “Periodic Sync” in Settings. Follow the procedure below. From Settings, click Backup. Click the settings icon ( ... -
Page 132: Failover
Chapter 5 Backup Failover With failover, two TeraStations are connected to the network for redundancy, with one being the main TeraStation and the other being the backup TeraStation. If an issue renders the main TeraStation inaccessible, operation automatically switches to the backup TeraStation. Data on both TeraStations stays up-to-date. -
Page 133: Usage Restrictions
Chapter 5 Backup Using Different LAN Ports Between File Sharing and Failover With this setup, the backup TeraStation and main TeraStation are connected by a second Ethernet cable connecting their LAN port 3. Updating is done over this dedicated network path, so updates are quicker and don’t interfere with normal network traffic. -
Page 134: Configuring Failover
Chapter 5 Backup Configuring Failover From Settings for the main TeraStation, click Backup. Click the settings icon ( ) to the right of “Failover”. Click Configure Failover. - Page 135 Chapter 5 Backup Select a TeraStation to be the failover backup device and enter its administrator username and password (by default, the username is “admin” and the password is “password”). Select the LAN port to be used for sharing files and enter a virtual IP address. The LAN port you have selected here will also be used for pinging.
-
Page 136: Changing Settings While Failover Is Configured
Chapter 5 Backup Press the function button. When you press the function button, the TeraStation will beep once. Press and hold down the button until the backup TeraStation beeps again. Initialization on the main and backup TeraStations will begin. Wait until it finishes. When initialization finishes, message will disappear. - Page 137 Chapter 5 Backup From Settings for the main TeraStation, click Backup. Click the settings icon ( ) to the right of “Failover”. Click Configure Failover.
- Page 138 Chapter 5 Backup Click Maintenance Mode. Read the message carefully and click Yes. The TeraStation will enter maintenance mode. Once you are finished with changing settings in maintenance mode, make sure the TeraStation leaves maintenance mode. You can make the TeraStation leave maintenance mode by either pressing and holding the function button, or follow the procedure below to exit maintenance mode from the main TeraStation’s Settings.
-
Page 139: Synchronizing Between Main And Backup Terastations Periodically
Note: To update the firmware while in maintenance mode, the main TeraStation can be updated from Settings, but the backup TeraStation cannot. Download the firmware updater from the Buffalo website for the backup TeraStation and try updating the firmware on it. -
Page 140: Switching To The Backup Terastation Manually
Chapter 5 Backup Click the Periodic Sync tab. Click Edit. Select “Daily” or “Weekly” from the “Schedule” drop-down list. If “Daily” is selected, configure the sync period. If “Weekly” is selected, specify the weekdays and the sync period. Click OK to finish. Switching to the Backup TeraStation Manually If “Switch to backup unit manually”... -
Page 141: Reconfiguring After Failover Occurs
Chapter 5 Backup • Log in to Settings for the backup TeraStation and click Set as Main Unit. • Press the function button on the backup TeraStation. The TeraStation will beep once. Press and hold down the function button until the backup TeraStation beeps again. Note: If the main TeraStation fails but all LAN port connections on the backup TeraStation remain active, you cannot replace the main TeraStation with the backup TeraStation from Settings. - Page 142 Chapter 5 Backup Click Configure Failover. Click Force Failover to Stop to cancel the failover settings. Shut down this main TeraStation.
-
Page 143: Stopping Failover
Click the settings icon ( ) to the right of “Power Management”. c. Click Edit. d. Select “Sync with UPS connected to another Buffalo NAS device on the same network” and configure the main TeraStation as a sync source. e. Click OK when finished. - Page 144 Chapter 5 Backup Click Configure Failover. Click Stop Failover.
-
Page 145: Backing Up Your Mac With Time Machine
Chapter 5 Backup Stopping from the Backup TeraStation Log in to Settings for the backup TeraStation and click Force Failover to Stop. Stopping Failover Forcibly If failover hasn’t been stopped by taking actions from both the main and backup TeraStations, navigate to Backup >... - Page 146 Chapter 5 Backup Select the shared folder and click OK. Click OK, then click OK again. Move the Time Machine switch ( ) to the position to enable Time Machine and finish configuration. Note: We recommend adding a quota to limit the backup shared folder space that can be used for Time Machine. If you don’t add a quota, Time Machine will continue to use all available space.
- Page 147 Chapter 5 Backup Click Time Machine.
- Page 148 Chapter 5 Backup Click Select Backup Disk. Select the shared folder, then click Use Disk.
- Page 149 Chapter 5 Backup Click Connect. Enter a username and password to be used for accessing the shared folder and click Connect. Note: If access restrictions are not configured on the destination share, log in using the administrator account. The default username and password for the administrator account are “admin” and “password”. If access restrictions are configured, log in using an account with write privileges.
- Page 150 Chapter 5 Backup Time Machine will count down from 120 seconds, then backup will begin.
-
Page 151: Chapter 6 Cloud Services And Remote Access
Chapter 6 Cloud Services and Remote Access Chapter 6 Cloud Services and Remote Access Synchronizing with Amazon S3 The TeraStation supports Amazon S3, a fee-based online storage service provided by Amazon, and other cloud storage services that share the Amazon S3 API. Follow the procedure below to configure your TeraStation for use with Amazon S3. - Page 152 Chapter 6 Cloud Services and Remote Access Click Create. Select the service name and region name that you have selected when creating the bucket from the drop- down list. Enter the bucket name, access key ID, and secret access key; select the storage class and the connection protocol, then click OK.
- Page 153 Chapter 6 Cloud Services and Remote Access Enter a remote folder name to use with Amazon S3 and click OK. Under “LAN Protocol Support”, select the “Backup” checkbox on the Basic tab. Click OK. Enter the desired characters into the backup device access key field and click OK to finish. Notes: •...
-
Page 154: Uploading Files To Amazon S3
Chapter 6 Cloud Services and Remote Access Uploading Files to Amazon S3 To upload files to Amazon S3 buckets, using a backup job is recommended. From Settings, click Backup. Click the settings icon ( ) to the right of “Backup”. If you had configured a backup device access key to the remote folder that was created through the “Creating an Amazon S3 Job”... - Page 155 Chapter 6 Cloud Services and Remote Access Click Create. Select backup settings such as date and time to run, select a backup mode for the “Operation Mode” drop- down list. It is recommended to configure a job to run periodically. Refer to the differences between the backup modes in the “Backup Modes”...
- Page 156 Chapter 6 Cloud Services and Remote Access Note: If you create a differential backup job and there are files that only exist in the destination folder, these files will be deleted when the job runs. Make sure that files are not saved when creating a backup job. Click Add.
-
Page 157: Synchronizing With Dropbox
Chapter 6 Cloud Services and Remote Access Select the shared folder that files will be saved to as a source, and the remote folder created through the “Creating an Amazon S3 Job” section above as a destination. Click OK. The backup job will be added to the backup job list. Notes: •... -
Page 158: Creating A Dropbox Sync Job
Chapter 6 Cloud Services and Remote Access Notes: • To use Dropbox Sync, you will need a Dropbox account and an available empty Dropbox folder. If you don’t have a Dropbox account, or if you need to create a new empty Dropbox folder, refer to the Dropbox website. •... - Page 159 Chapter 6 Cloud Services and Remote Access Click View Dropbox Authentication Page. The authentication site that is offered by Dropbox will be displayed. Log in to the website with your Dropbox account, then click Allow. The authentication code will be displayed. Copy the authentication code and return to Settings. Authentication code reregistration should be finished within three minutes.
-
Page 160: Changing Job Settings
Chapter 6 Cloud Services and Remote Access Note: Make sure to select the TeraStation folder that doesn’t contain multibyte characters on its name. If the folder name contains mutlibyte characters, the job will fail. Click OK to finish. Notes: • Refer to the following website for synchronization restrictions between the TeraStation and Dropbox: https:// www.dropbox.com/help/145 •... - Page 161 Chapter 6 Cloud Services and Remote Access From the job list, click the job whose settings you want to change. Click the Options tab. Click Edit.
- Page 162 Chapter 6 Cloud Services and Remote Access Configure the desired settings and click OK. Notes: • When encryption is enabled, files uploaded to Dropbox not using Dropbox Sync will not be downloaded to the TeraStation even if the sync direction is configured to “Bidirectional” or “Download only”. •...
-
Page 163: Creating A Shared Link (Windows Only)
Chapter 6 Cloud Services and Remote Access Creating a Shared Link (Windows Only) Buffalo offers a Windows application, “B-Sync”, that can create shared links for the files stored in the TeraStation folders. You can download the application from the Buffalo website. - Page 164 Chapter 6 Cloud Services and Remote Access Click Create. The job setup wizard will open. Enter your Azure Storage account name and access key, then click Next.
- Page 165 Chapter 6 Cloud Services and Remote Access Enter the desired job name and click Next.
- Page 166 Chapter 6 Cloud Services and Remote Access Select “Backup” and click Next.
- Page 167 Chapter 6 Cloud Services and Remote Access Select the desired shared folder on the TeraStation as the backup source folder. A TeraStation shared folder that is currently being used by certain TeraStation functions, including an existing Azure Storage sync job, cannot be selected.
- Page 168 Chapter 6 Cloud Services and Remote Access Specify the sync period and click Next.
- Page 169 Chapter 6 Cloud Services and Remote Access Select the desired action to take for files in the container that share the same name as files in the backup source after they are deleted, then click Next.
- Page 170 Chapter 6 Cloud Services and Remote Access Configure whether to filter the backup target files. The following screen is available to configure file filtering by file size and whether they’re hidden. “Hidden files” refer to files whose filename starts with a period. Configure the desired filtering settings and click Next.
-
Page 171: Creating An Azure Storage Sync Restore Job
Chapter 6 Cloud Services and Remote Access The following screen is available to configure file filtering by extensions. Configure the desired filtering settings and click Next. Confirm that all settings are properly configured and click OK to finish. Notes: • Regardless of whether file filtering was configured, the following files will not be backed up to an Azure Storage container: ◦... - Page 172 Chapter 6 Cloud Services and Remote Access From Settings, click Cloud Storage. Move the Microsoft Azure Storage Sync switch ( ) to the position to enable Microsoft Azure Storage Sync. Click the settings icon ( ) to the right of “Microsoft Azure Storage Sync”. Click Create.
- Page 173 Chapter 6 Cloud Services and Remote Access The job setup wizard will open. Enter your Azure Storage account name and access key, then click Next.
- Page 174 Chapter 6 Cloud Services and Remote Access Enter the desired job name and click Next.
- Page 175 Chapter 6 Cloud Services and Remote Access Select “Restore” and click Next.
-
Page 176: Changing Job Settings
Chapter 6 Cloud Services and Remote Access Enter the container name for the restore source and select the desired shared folder on the TeraStation as the restore destination, then click Next. Select either to restore data into the first level folder (root folder) or the second level (subfolder) of the restore destination folder, then click Next. - Page 177 Chapter 6 Cloud Services and Remote Access From the job list, click the job whose settings you want to change. Click the Options tab. Click Edit.
-
Page 178: Synchronizing With Microsoft Onedrive
Chapter 6 Cloud Services and Remote Access Configure the desired settings and click OK to finish. Synchronizing with Microsoft OneDrive The TeraStation supports synchronizing with Microsoft OneDrive, the online cloud storage. Once linked, you can share the TeraStation files via OneDrive (or OneDrive files via the TeraStation). To link your TeraStation with your Microsoft account, follow the procedure below. - Page 179 Chapter 6 Cloud Services and Remote Access From Settings, click Cloud Storage. Move the OneDrive Sync switch ( ) to the position to enable OneDrive Sync. Click the settings icon ( ) to the right of “Microsoft OneDrive Sync”. Click Create. The sign-in window will open.
- Page 180 Chapter 6 Cloud Services and Remote Access Enter the desired job name and click Next. Select the sync action and behavior for when files with the same name are already in the target folder, then click Next. There are three types of sync actions; bidirectional, uploading, and downloading. If bidirectional is selected as the sync action, files on both OneDrive and the TeraStation will be updated.
- Page 181 Chapter 6 Cloud Services and Remote Access action, only files on OneDrive will be updated. If downloading is selected as the sync action, only files on the TeraStation will be updated. The behavior for when files with the same name already exist will occur when the files that have the same name on both the TeraStation and OneDrive are changed.
- Page 182 Chapter 6 Cloud Services and Remote Access Select the desired TeraStation and OneDrive folders. A TeraStation shared folder that is currently being used by certain TeraStation functions, including an existing OneDrive Sync job, cannot be selected. If you want to create an empty folder first, click Browse under “Folder on TeraStation”, then click Create Folder on the selecting folder window that appears.
- Page 183 Chapter 6 Cloud Services and Remote Access Specify the sync period and click Next.
- Page 184 Chapter 6 Cloud Services and Remote Access Files will be uploaded during the start and end time of the period configured in step 9 above. If you want to always upload files during the configured sync period, select “Always sync within the sync period” for “Frequency”.
- Page 185 Chapter 6 Cloud Services and Remote Access Select whether to encrypt the files using a password. When encryption is enabled, uploaded files will be archived in zip format and encrypted using the entered encryption password. Click Next after selections are finished.
- Page 186 Chapter 6 Cloud Services and Remote Access Configure file options. Select whether to check for file consistency and delete older files with the same name from OneDrive. Click Next after selections are finished.
- Page 187 Chapter 6 Cloud Services and Remote Access Configure whether to filter the target files. The following screen is available to configure file filtering by file sizes and whether they’re hidden. The file size filtering will work only for the upload process. The available maximum size is up to 15,360 MB (15 GB).
- Page 188 Chapter 6 Cloud Services and Remote Access The following screen is available to configure file filtering by extensions. Configure the desired filtering settings and click Next. Confirm that all settings are properly configured and click OK to finish. Notes: • Files whose filename contains the symbols " # % & * / : > < ? \ } { ~ may fail to be synchronized. This symbol limitation is based on “Normalization Form Canonical Composition (NFC)”.
-
Page 189: Changing Job Settings
Chapter 6 Cloud Services and Remote Access Changing Job Settings Follow the procedure below to change any job settings you have already configured. From Settings, click Cloud Storage. Click the settings icon ( ) to the right of “Microsoft OneDrive Sync”. From the job list, click the job whose settings you want to change. - Page 190 Chapter 6 Cloud Services and Remote Access Click the Options tab. Click Edit.
-
Page 191: Corrective Actions For In Case Of Error
Chapter 6 Cloud Services and Remote Access Configure the desired settings and click OK to finish. Corrective Actions for in Case of Error Error Appears in the “Status” Field of Job List If a token error is displayed on the “Status” field of the OneDrive Sync job list, follow the procedure below to refresh the token. - Page 192 Chapter 6 Cloud Services and Remote Access From the job list, click the job whose the token error occurs.
- Page 193 Chapter 6 Cloud Services and Remote Access Click Update Token at the bottom-left of the window. Wait until the process of refreshing the token is finished. Error Appears While Creating a Job or Error Code Appears on the Error Log You may encounter error messages that contain the following error codes when creating OneDrive Sync jobs;...
-
Page 194: Webaccess
Check that the same Microsoft account is used on another Buffalo NAS device or Microsoft software. This error may be There are too many requests so activityLimitReached resolved by reducing the maximum number data could not be synchronized. - Page 195 Chapter 6 Cloud Services and Remote Access Configure the desired settings, then click OK. • To use SSL encryption for more secure data transfers, enable “HTTPS/SSL Encryption”. • You may use the BuffaloNAS.com server as a DNS server, or disable it to use a different DNS server. •...
- Page 196 Chapter 6 Cloud Services and Remote Access Click Create. For best results, create a new dedicated share for WebAccess to prevent opening files accidentally. Under “LAN Protocol Support”, select the “WebAccess” checkbox on the Basic tab. Click the Option 2 tab.
-
Page 197: Accessing Via Webaccess
Allow everyone: Anyone can access (view) shared folders. (Access restrictions configured for shared folders will not work.) Allow only registered groups and users: All groups and users registered on the Buffalo NAS device can use WebAccess. (Access restrictions configured for shared folders will not work.) Use folder permissions: Users and groups have the same access permissions with WebAccess that they do locally. -
Page 198: Unable To Create A Buffalonas.com Name
Chapter 6 Cloud Services and Remote Access For Computers Use a web browser on a computer; supported browsers include Microsoft Edge, Firefox, Google Chrome, Internet Explorer 9 or later, Safari 9 or later. Refer to the help guide at the BuffaloNAS.com website after connecting with your BuffaloNAS.com name for more detailed information. -
Page 199: Ftp
) to the position to enable WebAccess. After configuring the required settings on the Buffalo NAS device is finished, next configure the router using the port number set at step 5 above. By default, the TeraStation’s shares are only accessible by users connected to the same network or router as the TeraStation. - Page 200 Chapter 6 Cloud Services and Remote Access Choose a folder to enable remote FTP access on. Under “LAN Protocol Support”, select the “FTP” checkbox on the Basic tab; select read-only or read and write for the shared folder’s attribute on the Option 2 tab and click OK to finish. Accessing the TeraStation with an FTP Client To access the TeraStation via FTP, configure your FTP client software with the following settings: •...
- Page 201 Chapter 6 Cloud Services and Remote Access Notes: • If the TeraStation joins a domain, domain and anonymous users cannot remote access via FTP. Domain users will be able to access remotely using SFTP. • Shared folders connected by FTP are available from the “/mnt” folder. The examples of default locations are: /mnt/array1/share /mnt/disk1/share /mnt/usbdisk1...
-
Page 202: Chapter 7 Security Enhancement
Chapter 7 Security Enhancement Chapter 7 Security Enhancement Two-Factor Authentication Two-factor authentication is a security feature that strengthens login security by requiring a verification code in addition to username and password to log in to Settings. Two-factor authentication can better protect both your login credentials and data on the TeraStation. - Page 203 Chapter 7 Security Enhancement Select the logged-in user for whom two-factor authentication will be enabled. Click Two-Factor Authentication.
- Page 204 Chapter 7 Security Enhancement Click Next.
- Page 205 Chapter 7 Security Enhancement Enter an email address as an alternative method to receive the verification code and click Next. Click Send Test Email to have a test email sent to the entered address to confirm that the address is correct. Note: The entered email address will be assigned to a user.
- Page 206 Chapter 7 Security Enhancement Use the authenticator app to scan the QR code displayed in Settings. Alternatively, enter the setup key into the app. Click Next after the app establishes the connection with the TeraStation.
- Page 207 Chapter 7 Security Enhancement Enter the 6-digit verification code displayed on the authenticator app and click Next. Click Close when finished.
-
Page 208: Restricting Logins For Non-Admin Users
Chapter 7 Security Enhancement Two-factor authentication will become active after logging out from Settings. A verification code will be required the next time you log in to Settings using the same username. Note: If authentication fails even if the verification code is vaild, make sure the time settings on both the TeraStation and the mobile device are the same. -
Page 209: Disabling Two-Factor Authentication
Chapter 7 Security Enhancement Click Two-Factor Authentication. Change the “Settings Interface Access” option to “Deny login by non-administrator users”, then click OK. Click OK when finished. Disabling Two-Factor Authentication From Settings, click File Sharing. - Page 210 Chapter 7 Security Enhancement Click the settings icon ( ) to the right of “Users”. Select the logged-in user for whom two-factor authentication will be disabled.
-
Page 211: Encrypting Data Transmission
Chapter 7 Security Enhancement Click Two-Factor Authentication. Click Disable. Click OK when finished. Encrypting Data Transmission Encrypting Settings Data All communication with Settings can use SSL encryption if you access the Settings page by changing “http://” to “https://” in the browser address bar or click Secure Connection from the login window. Once you are logged in using the HTTPS connection and wish to disable SSL encryption, click Normal Connection from the login window. -
Page 212: Encrypting Ftp Transfer Data
The server certificate included in the TeraStation’s default settings was created by Buffalo, and in some cases, the security certificate warning message may appear in your browser or another security software. If this occurs, disregard the message and continue. - Page 213 Chapter 7 Security Enhancement Register “server.key” for “Secret Key” and “server.crt” for “Server Certificate (.crt)”, then click Import to finish. Notes: • Place the SSL key files (server.key, server.crt) directly below the C root drive. The SSL key files may be unable to be updated if they are placed in folders or paths that contain multibyte characters.
-
Page 214: Chapter 8 Settings Backup/Restoration
Saving and Applying Settings The TeraStation’s settings can be saved to a USB drive and applied to another Buffalo NAS device of the same series. Use this feature to back up or copy settings to a new Buffalo NAS device. -
Page 215: Saving Settings
Applying Settings The saved settings can be applied to a different Buffalo NAS device of the same series. If applying settings to another Buffalo NAS device, the unit’s current firmware version will be changed to the version used to save the settings. -
Page 216: Transferring Another Buffalo Nas Device's Settings
The settings will be applied. When applying settings is finished, click OK. Transferring Another Buffalo NAS Device’s Settings You can transfer saved settings from another series Buffalo NAS device to your TeraStation. The following settings can be transferred: • Shared folders which are created from “File Sharing” > “Folder Setup”... -
Page 217: Creating A Config File (.Nas_Config)
Procedure for Buffalo NAS Devices Other Than TS-X Series Models Follow the procedure below to create a config file on a Buffalo NAS device that is not part of TS-X series TeraStations. Refer to the user manual of the Buffalo NAS device whose settings will be saved to a USB drive. -
Page 218: Restoring Factory Defaults
The settings will be transferred. When transferring settings is finished, click OK. Notes: • If the migration target Buffalo NAS device contains shared folders, users, and groups that share the same name as the transferred settings, the existing settings will be overwritten. If the users and groups meet the following conditions, the settings will not be transferred: users share the same name with groups that already exist on the migration target Buffalo NAS device;... -
Page 219: Initializing Using The Usb Initialization Drive
Chapter 8 Settings Backup/Restoration Click Initialize TeraStation. The “Confirm Operation” screen will open. Enter the confirmation number, then click OK. The settings will be restored to its factory default settings. The message will appear as a notification while settings are being restored. When it disappears, the initialization is finished. Initializing Using the USB Initialization Drive A USB initialization drive will restore the settings on your TeraStation to their factory defaults. -
Page 220: Resetting The Administrator Password
Chapter 8 Settings Backup/Restoration From “Target USB Drive”, select the USB drive that is connected to the USB port on the TeraStation, then click Execute. The “Confirm Operation” screen will open. Enter the confirmation number, then click OK. The TeraStation will create the USB initialization drive. This will take about one minute. When creating the USB initialization drive is finished, refresh the browser and log in to Settings again. -
Page 221: Chapter 9 Network Settings
Chapter 9 Network Settings Chapter 9 Network Settings Wake-on-LAN The TeraStation supports Wake-on-LAN, which allows it to be turned on remotely. The TeraStation will be turned on automatically in the following situations: receiving a Wake-on-LAN packet, recovering from a power outage, disconnecting and reconnecting the power cable. - Page 222 Chapter 9 Network Settings Trunking Mode Characteristics Only one NIC slave in the bond is active. A different slave becomes Active-backup active if and only if the active slave fails. Creates aggregation groups that share the network speed and duplex settings.
- Page 223 Chapter 9 Network Settings Select the LAN port that will be used from the drop-down list. Click a port trunking bond.
- Page 224 Chapter 9 Network Settings Select the port trunking mode and click OK. Click Save. Read the message carefully and click Yes. Connect the hub’s LAN port and TeraStation’s LAN port using the second Ethernet cable. If you are using an intelligent switch, connect to the LAN port that was previously configured for port trunking.
-
Page 225: Snmp
Chapter 9 Network Settings SNMP If SNMP is enabled, you can browse your TeraStation from SNMP-compatible network management software. Examples of frequently-notified traps are described in the “Relevant Trap List” subsection below. From Settings, click Network. Move the SNMP switch ( ) to the position to enable SNMP. - Page 226 Configure the desired settings, then click OK to finish. SNMP has been configured for the TeraStation. For further use, configure your SNMP-compatible network management software using the Buffalo-specific MIB (management information base) file. The MIB file is available from the Buffalo website.
-
Page 227: Proxy Server
Chapter 9 Network Settings Private MIB Traps If any traps are not listed in the following chart, refer to the web page for downloading the private MIB file on the Buffalo website for more detailed information. Conditions Trap Name Backup fails. -
Page 228: Jumbo Frames
Chapter 9 Network Settings Jumbo Frames If your other network devices support jumbo frames, you may be able to improve network performance. Note: If the TeraStation is being used as an iSCSI drive, to change the settings, navigate to Storage > iSCSI in Settings and move the iSCSI switch to the off position temporarily before changing settings. -
Page 229: Changing The Ip Address
Chapter 9 Network Settings Connection Transmission Transfer data using jumbo frames. Jumbo Frame Jumbo Frame Jumbo Frame Compatible Switch Compatible PC Transfer data without using jumbo frames. Jumbo Frame Jumbo Frame Jumbo Frame Incompatible PC Compatible Switch Transfer data without using jumbo frames. -
Page 230: Mapping Ip Address And Hostname
Chapter 9 Network Settings Click the settings icon ( ) to the right of “IP Address”. Click Edit. Clear the “DHCP” checkbox and enter the desired IP address and its subnet mask. Select “User (static)” from the drop-down list for both the “Gateway Owner” and “DNS Owner” options, then enter the desired default gateway address and DNS server addresses. - Page 231 Chapter 9 Network Settings can be accessed using the configured pair when name resolution is needed. Follow the procedure below to configure FQDN mapping. From Settings, click Network. Click the settings icon ( ) to the right of “IP Address”. Click FQDN Mapping.
- Page 232 Chapter 9 Network Settings Click Add. Enter the hostname (FQDN) and the IP address that you want to map, then click OK. Click OK again to apply settings.
-
Page 233: Chapter 10 Advanced Features
Chapter 10 Advanced Features Chapter 10 Advanced Features Email Notification Your TeraStation can send you email reports daily, or whenever settings are changed or an error occurs. You can configure the events that will trigger notifications from any of the following functions: quotas, drives (internal, external, or RAID array), fan, backup, replication, failover, system alert. - Page 234 Chapter 10 Advanced Features Enter your email server settings and the notification email’s default subject, then configure recipients and the time when email reports will be sent. Click OK to save the configured settings and have a test email sent. If you select an authentication type other than “Disable”...
-
Page 235: Sleep Mode
Chapter 10 Advanced Features To change the events of email reports, click Advanced Report Settings. On the displayed screen, select or clear the category’s checkboxes. Email notification will be enabled. Email Notification Categories Notification emails will be categorized into the following importance levels. You can configure them from the “Report Settings”... - Page 236 Chapter 10 Advanced Features From Settings, click Management. Click the settings icon ( ) to the right of “Sleep Timer”. Click Edit. Specify the timer interval, wake-up time, and time to enter sleep mode, then click OK to finish. Notes: •...
-
Page 237: Ups (Uninterruptible Power Supply)
Buffalo NAS device is connected to the UPS, select “Sync with UPS connected to another Buffalo NAS device on the same network”. After making this selection, enter the IP address of the Buffalo NAS device that will be the sync source into “Other Buffalo NAS's IP Address”. -
Page 238: One Psu Device Is Installed
Chapter 10 Advanced Features • If the power supply from the UPS to the TeraStation stops and restarts when UPS recovery is enabled, the TeraStation will automatically restart. One PSU Device Is Installed Plug the power cable of the UPS to a wall socket. Connect the power cable of the TeraStation to the UPS. -
Page 239: Two Psu Devices Are Installed
Chapter 10 Advanced Features Configure the desired settings, then click OK to finish. Two PSU Devices Are Installed The TS51220RH TeraStation model supports multiple PSU device connections. Refer to the setups below for connection configurations. A. To Boot the TeraStation After the Power Supply Recovers (Recommended) Connect both power cables of the TeraStation to a single UPS device. - Page 240 Chapter 10 Advanced Features Wall Socket 1 TS51220RH Wall Socket 2 Note: With this connection setup, the option “Wake Up TeraStation After Power Supply Recovers” will not work if it’s configured. C. To Use Two UPS Devices Connect a power cable to each of the UPS devices. Use separate power supply systems to increase redundancy. With this connection setup, the UPS devices of the same connection type cannot be used.
-
Page 241: Automatic Shutdown If Power Supply Fails
Chapter 10 Advanced Features Configure the desired settings, then click OK to finish. Automatic Shutdown If Power Supply Fails You may configure the TeraStation to shut down automatically if a power supply fails. Note: This function is only for the TS51220RH TeraStation model. Other models will not display this function on Settings. -
Page 242: Logs
Chapter 10 Advanced Features Select “Shut down TeraStation” and enter the number of minutes that will elapse after the power supply fails before the unit shuts down. Click OK to finish. Logs Displaying TeraStation’s Logs Follow the procedure to check the TeraStation’s logs. From Settings, click Management. -
Page 243: Transferring Logs To The Syslog Server
Chapter 10 Advanced Features Select a log to view. The file access log stores file access events that occurred on the internal drives. File access on USB drives are not logged. Note: All logs are encoded in UTF-8 format. To make sure they display correctly, change the software encoding to “UTF-8”. -
Page 244: Creating A Shortcut To The Logs In The Shared Folder
Chapter 10 Advanced Features Enable “Syslog Transfer”. Enter the IP address of the syslog server where you want to transfer the logs to. Select the type of log that you want to transfer from “Logs to Transfer” and click OK to finish. Creating a Shortcut to the Logs in the Shared Folder From Settings, click Management. -
Page 245: Changing Archive Rules For File Access Logs
Chapter 10 Advanced Features Enable “Create Shortcut to Logs”. Click Browse under “Target Folder” and select the shared folder where the created shortcut will lead, then click OK to finish. In the selected shared folder, a folder named “system_log” will now contain the logs. Changing Archive Rules for File Access Logs You can configure how many logs are kept or how long each log will be kept on the TeraStation. - Page 246 Chapter 10 Advanced Features Specify the location and select the unit and version to save logs to the right of “Archive Rule for File Access Logs”. For example, if you select “Month” for the unit and enter “7” for the version, the file access logs for the next 7 months will be saved on the TeraStation.
-
Page 247: Updating The Firmware
Chapter 10 Advanced Features • You cannot delete a RAID array, format a drive, or change a folder name while file access logs are being saved to the shared folder. Updating the Firmware If a new firmware version is available, a message is displayed when you access Settings. To either manually or automatically update the firmware, follow the appropriate procedure below. -
Page 248: Enabling Automatic Update
The “Confirm Operation” screen will open. Enter the confirmation number, then click OK. When updating the firmware is finished, refresh the browser and log in to Settings again. You can also download the latest firmware from the Buffalo website. Enabling Automatic Update From Settings, click Management. -
Page 249: Configuring Update Notification
Chapter 10 Advanced Features Select either “Update the firmware automatically” or “Update the firmware on schedule”, then click OK. If you select to update on schedule, choose a specific time of day for the update to occur. Configuring Update Notification Configure whether or not to receive a notification when a new firmware version becomes available. -
Page 250: Name, Date, Time, And Language
For more details such as the information sent and how it will be handled by us, click Privacy Policy for Usage Feedback. If update notification is enabled, it will also automatically enable sending usage feedback to Buffalo. If you don’t want to send this information to us, disable update notification. - Page 251 Chapter 10 Advanced Features hyphens (-). The first and last characters should not be a hyphen; do not use the following word as a hostname: localhost. Click the Time tab. Enable the NTP server and select the “Use default NTP server” checkbox. If you disable the NTP function, click Use Local Date/Time to use your computer’s time settings for the TeraStation.
-
Page 252: Beep Alerts
Chapter 10 Advanced Features Click the Language tab and select the language to be used. Note: This tab changes the language used by the TeraStation for email notifications and other functions. To change the language displayed in Settings, go to Settings and click Language from the menu bar. Choose your desired language from the drop-down list. -
Page 253: Lcd And Leds
Chapter 10 Advanced Features Select the triggers to make the alert beep, then click OK to finish. LCD and LEDs You may configure options for the LCD panel and adjust the brightness of the LCD panel and LEDs on the TeraStation. - Page 254 Chapter 10 Advanced Features From the Front Panel tab, configure your desired settings and click OK to finish.
-
Page 255: Chapter 11 Drive Replacement And Troubleshooting
Notes • Use a Buffalo OP-HDH2U series drive as the replacement drive. The replacement drive should be the same capacity or larger as the original drive. If a larger drive is used, the extra space will not be usable in a RAID array. - Page 256 Chapter 11 Drive Replacement and Troubleshooting The failed drive’s error LED will be glowing red. Push its unlock button and swing the lock mechanism out. While the TeraStation’s power is turned off, refer to the notification email sent by email notifications to determine which drive has failed.
-
Page 257: Drive Replacement For A Raid 0 Array
Chapter 11 Drive Replacement and Troubleshooting Swing the lock back down until it clicks into place. If the TeraStation’s power is off, press the power button. When the replaced drive is recognized, the error LED will blink and the message will appear as a notification. -
Page 258: Drive Replacement For A Jbod
Chapter 11 Drive Replacement and Troubleshooting Drive Replacement for a JBOD If a drive used as JBOD fails, you need to format the replaced drive after replacing the defective drive to a new drive. The failed drive’s error LED will be glowing red. Push its unlock button and swing the lock mechanism out. Pull out the drive cartridge and remove it from the TeraStation. -
Page 259: Drive Replacement For A Redundant Raid Array Or Jbod (Terastation Is On)
TeraStation may malfunction. • Use a Buffalo OP-HDN series drive as the replacement drive. The replacement drive should be the same capacity or larger as the original drive. If a larger drive is used, the extra space will not be usable in a RAID array. - Page 260 Chapter 11 Drive Replacement and Troubleshooting Open the front cover with the included key. The failed drive’s status LED will be glowing red. Push its unlock button and swing the lock mechanism out.
- Page 261 Chapter 11 Drive Replacement and Troubleshooting Drives without red status LEDs lit are still on. Do not unplug or remove them. Pull out the drive cartridge and remove it from the TeraStation. Insert the new drive into the empty slot with the lock mechanism remaining open. Push here to insert.
- Page 262 Chapter 11 Drive Replacement and Troubleshooting Swing the lock back down until it clicks into place. When the replaced drive is recognized, the status LED will flash red and the message will appear as a notification. Close the front cover. Press the function button.
-
Page 263: Drive Replacement For A Redundant Raid Array Or Jbod (Terastation Is Off)
Chapter 11 Drive Replacement and Troubleshooting If set up as a JBOD: Format the replaced drive by referring to the “Formatting Drives” section in chapter 4. Next, create a shared folder by referring to the “Adding a Shared Folder” section in chapter 3. Drive Replacement for a Redundant RAID Array or JBOD (TeraStation Is Off) If a drive used on a redundant RAID array fails, you need to recover the RAID array after replacing the defective drive... -
Page 264: Drive Replacement For A Hot Spare
Chapter 11 Drive Replacement and Troubleshooting The failed drive’s status LED will be blinking red. Push its unlock button and swing the lock mechanism out. Pull out the drive cartridge and remove it from the TeraStation. Insert the new drive into the empty slot with the lock mechanism remaining open. Swing the lock back down until it clicks into place. -
Page 265: Replacing A Non-Malfunctioning Drive
Chapter 11 Drive Replacement and Troubleshooting Replacing a Non-Malfunctioning Drive If you must change a drive that is not malfunctioning, shut down the TeraStation, then disconnect the drive. A new drive should be inserted after turning on the TeraStation. Make sure that the startup process is successful by checking that the power LED changes to a steady green. -
Page 266: Terastation Does Not Work Properly
In such a case, try the corresponding corrective action to recover from the error, described in each section below. If the error is still not resolved, contact Buffalo technical support for assistance. • The power LED keeps blinking instead of turning into a solid glow; follow the procedure at the “Power LED Keeps... - Page 267 Chapter 11 Drive Replacement and Troubleshooting When the power LED changes from blinking to glowing, let go of the function button and open Settings from NAS Navigator2. Make sure that “Recover firmware” is selected from the drop-down list under “Action”, then click Start Setup. Note: There are two more options for “Action”...
-
Page 268: Booting The Terastation In Emergency Mode
To recover from emergency mode, follow the procedure below. Download the firmware updater from the Buffalo website. Extract the downloaded file by double-clicking it and launch the updater. Update the firmware for the TeraStation unit that is currently in emergency mode. -
Page 269: Restoring Owner And Permission Settings
Chapter 11 Drive Replacement and Troubleshooting Click the settings icon ( ) to the right of “SMB”. Click Edit. Change the “Network Credentials” option to “Show network credentials window”, then click OK. The settings will be changed. A window to enter a username and password will appear the next time you access a shared folder but fails. - Page 270 Chapter 11 Drive Replacement and Troubleshooting Click Advanced Settings for Subfolders. Select a folder to restore permissions from the tree. Note: If you select a root shared folder from the tree, the action will not apply to the recycle bin. To apply the action to the recycle bin, select it instead.
-
Page 271: Configuring Compatible Smb Protocols
Chapter 11 Drive Replacement and Troubleshooting Select the actions and action range to run, then click OK. The “Confirm Operation” screen will open. Enter the confirmation number, then click OK. Configuring Compatible SMB Protocols You can change the SMB protocols that the TeraStation supports depending on the environment of your SMB clients. - Page 272 Chapter 11 Drive Replacement and Troubleshooting Open the front cover with the included key. Remove the front cover while holding the hook downward. Remove the dustproof filter from the front cover and clear any dust, such as by using a vacuum cleaner.
- Page 273 Chapter 11 Drive Replacement and Troubleshooting When cleaning is finished, return the filter and the front cover. Close the front cover.
-
Page 274: Chapter 12 Utilities
Chapter 12 Utilities NAS Navigator2 NAS Navigator2 is a utility program that makes it easy to display Settings, change the Buffalo NAS device’s IP address, or check its drives. To install NAS Navigator2, refer to the appropriate procedure below for your computer. -
Page 275: Chapter 13 Appendix
Chapter 13 Appendix Chapter 13 Appendix LCD Panel Modes The LCD panel can be cycled through different modes by pressing the display button. LCD Message Description Corrective Action Connect an Ethernet LANx Not connected to a network. cable to the LAN Not Connected port. -
Page 276: Errors
If there is a corresponding corrective action described below for the code, try it first. If the code is still displayed after trying the corrective action, contact Buffalo technical support for assistance. You can also confirm the current status from the Dashboard in Settings or by using NAS Navigator2. If NAS Navigator2 displays the error as an unknown error, check the Dashboard in Settings for the error details. -
Page 277: Notices
If there is a corresponding corrective action described below for the code, try it first. If the code is still displayed after trying the corrective action, contact Buffalo technical support for assistance. You can also confirm the current status from the Dashboard in Settings or by using NAS Navigator2. If NAS Navigator2 displays the error as an unknown error, check the Dashboard in Settings for the error details. -
Page 278: Information Events
If there is a corresponding corrective action described below for the code, try it first. If the code is still displayed after trying the corrective action, contact Buffalo technical support for assistance. You can also confirm the current status from the Dashboard in Settings or by using NAS Navigator2. If NAS Navigator2 displays the status as an unknown error, check the Dashboard in Settings for the status details. - Page 279 Chapter 13 Appendix LCD Message Description Corrective Action Recovering the RAID array. Rebuilding Note: Transfer speeds are slower during Array x... the rebuilding process. I19 Rewriting Rewriting drives in the TeraStation with 0s. Array x... Formatting Formatting the drive. Drive x... I21 Checking Checking the drive.
-
Page 280: Default Settings
Chapter 13 Appendix LCD Message Description Corrective Action I41 Push Func Press the function button to start the to Start settings initialization process. Recovery I42 Preparing Preparing to start the settings initialization Recovery process. The TeraStation was started from the USB initialization drive, but the settings cannot Unsupported be initialized from this USB initialization... -
Page 281: Specifications
TS5420DN (partially-populated model): RAID 1 RAID Mode TS5420DN, TS5420RN: RAID 5 TS5820DN, TS51220RH: RAID 6 Specifications Check the Buffalo website for the latest product information and specifications. IEEE 802.3ab (1000BASE-T), IEEE 802.3u (100BASE-TX), IEEE Standards Compliance 802.3 (10BASE-T) 1GbE LAN Interface... - Page 282 0, 1, 5, 6, 10, JBOD (individual drives) Internal Drive TS51220RH: Buffalo OP-HDH2U series drive Other models than TS51220RH: Buffalo OP-HDN series drive Note: The replacement drive should be the same capacity Replacement Drive or larger as the original drive. The drives listed above are...
- Page 283 Chapter 13 Appendix TS5420DN, TS5420RN: AC 100–240 V, max. 2.5 A, 50/60 Hz Power Supply TS5820DN: AC 100–240 V, max. 3.0 A, 50/60 Hz TS51220RH: AC 100–240 V, 7.0–3.5 A, 50/60 Hz TS5420DN: 170 × 215 × 230 mm (6.7 × 8.5 × 9.1 in.) Dimensions (W ×...
Need help?
Do you have a question about the TeraStation TS5420DN0 and is the answer not in the manual?
Questions and answers
no menu Appications