Table of Contents
Advertisement
Operating instructions
Installation instructions
for the radio remote control systems
of different transmitter versions
HETRONIC
from
Please enter the system number here!
Please retain for reference!
Date of publication:
HETRONIC
Adalbert – Stifter – Strasse 2
D – 84085 Langquaid
Tel.: +49 (0) 9452/189-0
Fax: +49 (0) 9452/189-201
Advertisement
Table of Contents

Related Manuals for HETRONIC CS 434


Summary of Contents for HETRONIC CS 434
- Page 1 Operating instructions Installation instructions for the radio remote control systems of different transmitter versions HETRONIC from Please enter the system number here! Please retain for reference! Date of publication: HETRONIC Adalbert – Stifter – Strasse 2 D – 84085 Langquaid Tel.: +49 (0) 9452/189-0...
- Page 2 Congratulations on purchasing this high quality safety radio remote control system from HETRONIC. You have selected a quality product from one of the leading manufacturers of safety radio remote control systems and therefore can be fully confident that it reflects state-of-the-art technology.
-
Page 3: Table Of Contents
Table of contents Safety 1.1. Safety of this radio remote control system 1.2. Safety information and tips 1.3. Sources of risk 1.4. Qualified operators 1.5. Safety precautions in the working area 1.6. Protection devices 1.7. What to do in an emergency Operation 2.1. - Page 4 Maintenance Disposal Technical data 6.1. General 6.2. Rechargeable batteries and battery charger 6.3. Transmitter 6.4. Receiver 6.5. Standard options Appendix A...
-
Page 5: Safety
Operating instructions 1. Safety 1.1. Safety of this radio remote control system This radio remote control system is equipped with both electronic and mechanical protection devices. When allocated, coding applies to one transmitter only, meaning that control commands cannot be received from other transmitters. This concerns your safety In the event of incorrect operation or misuse, there is a risk of harm to the health of the operator or other persons, and... -
Page 6: Sources Of Risk
1.3. Sources of risk The system is designed for permitting machines to be controlled by radio remote control. However, since the control commands also are transmitted beyond your range of vision, and through or around obstacles in the vicinity, you should always: Put the transmitter down only in a safe and dry location, switch the transmitter off and pull the key from the key switch (or if your transmitter does not have a key switch, remove the rechargeable... -
Page 7: Protection Devices
1.6. Protection devices The machine will be stopped: If you actuate the red EMERGENCY STOP button or the Stop button on the control panel of the transmitter If the range is exceeded If there is receiver or transmitter interference or when the radio signal is interrupted If the rechargeable battery or the battery compartment is removed If the rechargeable battery or non-rechargeable batteries is/are run... -
Page 8: Operation
You may not use the device until you have done so! 2.1. Handling non-rechargeable/rechargeable batteries Depending on the version, HETRONIC radio remote control systems either come with a battery compartment for two or three 1.5 V alkaline mignon batteries with a HETRONIC rechargeable battery/battery charger set (12/24 VDC or... - Page 9 Replace the run down rechargeable battery with a fully charged one. Press the end of the rechargeable battery until it fully locks into place (see Fig. 5). HETRONIC rechargeable batteries: Remove the run down rechargeable battery by pressing the edge lip or battery cover forward, then pull up and out.
-
Page 10: Battery Charger And Charging The Battery
Please make sure that you read the operating instructions provided by the manufacturer for the battery charger prior to use and that you follow all safety instructions contained therein. HETRONIC will not accept liability for improper or negligent use. Only use genuine HETRONIC parts or parts approved by HETRONIC. -
Page 11: Battery Chargers
If no LED is shining after inserting battery on power at charger the yellow LED is flashing continuously, the battery is bad. Version 1, VersaPak (Fig. 9) Version 2, HETRONIC MINI (Fig. 10) Version 3, HETRONIC GL (Fig. 11) - Page 12 Your HETRONIC radio remote control system is delivered with charged rechargeable batteries (optional) or with non-rechargeable batteries, i.e. the radio remote control system is ready for immediate use. Battery compartment: Rechargeable battery: Version 1 Version 1, VersaPak rechargeable battery (Fig. 4) (Fig.
-
Page 13: Control Elements
The diagram forms an integral part of these operating instructions. The following is a description of those control elements that are standard on HETRONIC radio remote control systems. 2.3. Operation Before you use the system, you must carry out the safety checks described in sections 2.3.1. -
Page 14: Visual Checks
2.3.1. Visual checks Always check the transmitter for damage each time before use! Are all protection devices present and intact? Are there any broken parts? Are the rubber sleeves and pushbutton caps free of cracks? Never work with a transmitter that is damaged in any of these ways! Ensure that such damage is dealt with immediately! 2.3.2. - Page 15 Check the EMERGENCY STOP function as described in the manufacturer's manual, however, instead of pressing the EMERGENCY STOP button on the machine, press the Emergency Stop button or the yellow STOP button on the control panel of the transmitter. Now press the EMERGENCY STOP button or the yellow STOP button on the transmitter.
-
Page 16: Fault Troubleshooting Table
Incorrect or run down rechargeable connection is faulty or loose. Operating time is too short. batteries/non-rechargeable batteries Only use rechargeable batteries approved by HETRONIC. were inserted. Only use alkaline batteries. Check that a yellow and red LED flash on the receiver. If not, No radio link. -
Page 17: Frequencies And Addressing
2.5. Frequencies and addressing Radio remote control systems from HETRONIC include a CS434, CS447 or CS458 RF module synthesizer (not subject to registration), which incorporates an RF transmitter module and an RF receiver module. 2.5.1. Frequency allocation for CS434 FREQUENCY ALLOCATION FOR CS434TXN... -
Page 18: Frequency Allocation For Cs458
458.5000 458.5250 458.5500 UK Channels Use of the CS 434 RF module is not subject to registration or payment of a fee! The transmitter must never be used without an aerial, as this could destroy the RF module! The frequency is preset by HETRONIC in the factory. If you should experience difficulties with the radio link in your system, please contact your dealer or HETRONIC’s aftersales service team. -
Page 19: Installation Instructions
German UVV (accident prevention) safety regulations must all be fulfilled. HETRONIC will not accept liability or provide a guarantee in the event of personal injury, damage to property and consequential damage resulting from improper or negligent handling of this... -
Page 20: Receiver Dimensions
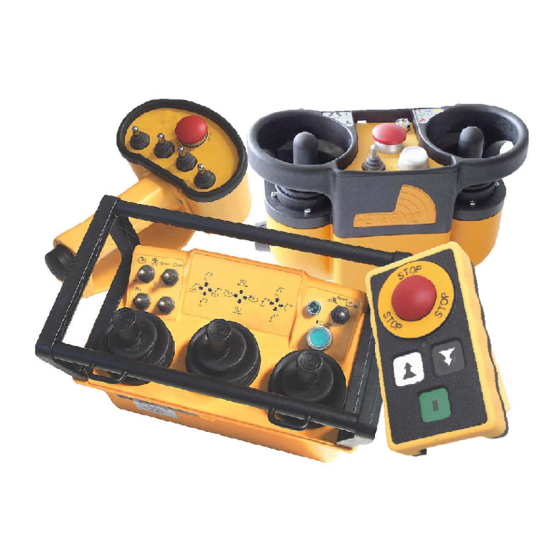
These can be obtained from your dealer or direct from the replacement parts sales division at HETRONIC. The rubber buffers will prevent heavy vibrations being transferred from the machine to the receiver. A diagram of your transmitter and receiver version is included with these operating instructions. -
Page 21: Rx-Cp Housing
3.2.1. RX-CP housing 11-pin socket 11-poliger Sockel / 11-pole socket View „A“ „A“ view... -
Page 22: Housing
3.2.2. HS-1 housing 76.0 19.0 Massstab 1:1 Scale 1:1 Unit: mm Einheit: mm t=63 General tolerance: DIN 7168-m Allgemeintoleranz: DIN 7168-m Material: PA6+30% glass fiber/RAL 1033 Werkstoff: PA6+30% Glasfaser/RAL1033... - Page 23 3.2.3. HS-2 housing 115.8 22.1 M 1:2 Scale 1:2 Unit: mm Einheit: mm General tolerance: DIN 7168-m Allgemeintoleranz: DIN 7168-m Material: PA6+30% glass fiber/RAL 1033 Werkstoff: PA6+30% Glasfaser/RAL1033 Protection type: IP 65 Schutzart: IP65...
- Page 24 3.2.4. Receiver housing, 250 x 255 Attachment points 236 mm 200,5 mm – Ø 6,5 mm Scale 1:2 Scale 1:2 Unit: mm Unit: mm General tolerance: DIN 7168-m General tolerance: DIN 7168-m...
- Page 25 3.2.5. Receiver housing, 400 x 250 Scale 1:2 Unit: mm General tolerance: DIN 7168-m...
- Page 26 3.2.6. Receiver housing, 400 x 400 Atachment dimensions 380x355 – Ø 6,5 Maße für Befestigung 380x355- / 6,5 STEUERSYSTEME M 1 :2,5 Unit : mm M 1:2,5 Einheit: mm...
-
Page 27: Maintenance
Do not pollute the environment! Electronic devices and their components are hazardous waste! This applies particularly to rechargeable battery packs! Use a specialist disposal company for recycling and disposal! Defective rechargeable battery packs also can be disposed of directly through HETRONIC! -
Page 28: Technical Data
6. Technical data 6.1. General: Frequency range: 400 - 470 MHz Other frequency ranges available on request RF synthesizer: Microprocessor-controlled PLL synthesizer with 32 selectable frequencies RF output: <10 mW standard Higher transmitter outputs available on request RF certifications: Certified for frequency ranges subject to approval and freely assignable frequency ranges in over 40 states Modulation:... -
Page 29: Receiver
Operating time: 14 - 20 hours (continuous operation), according to the system Pushbuttons: One or two-stage Master switch/joystick: All master switches have an automatic reset function, multiple-steps and proportional, are moisture resistant and ergonomically designed 6.4. Receiver: Housing material: Fiberglass-based polyamid with 30% glass fibre rate, according to the system Other materials available upon request Connection:... - Page 32 This form must be completed and signed by the person responsible for undertaking installation of the system. HETRONIC will not accept liability for the correctness of the installation of the radio remote control system. As the operator, you have responsibility for ensuring that the radio remote control system and the machine have been properly coordinated with each other and tested, and that all relevant safety provisions are maintained (see section 2).
Need help?
Do you have a question about the CS 434 and is the answer not in the manual?
Questions and answers