
Subscribe to Our Youtube Channel
Related Manuals for Westinghouse WVE915SC


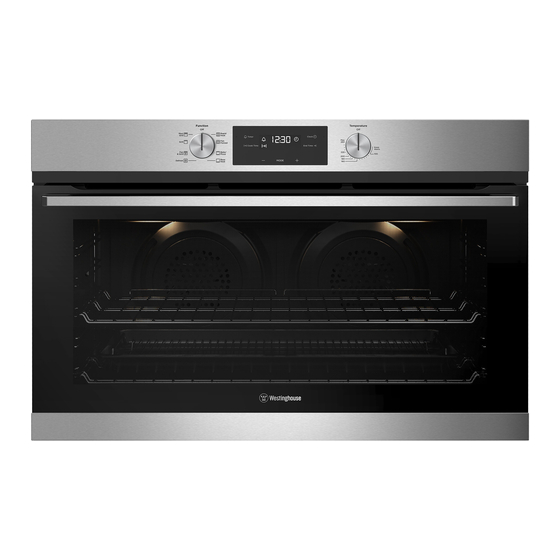
Summary of Contents for Westinghouse WVE915SC
- Page 1 USER MANUAL 90cm ELECTRIC BUILT-IN OVENS WVE915SC, WVE915SCA, WVEP916SC, WVEP917DSC IMPORTANT SAFETY INSTRUCTIONS...
-
Page 2: Table Of Contents
Failure to of the appliance. strictly adhere to the requirements in this manual may result in personal injury, property damage and affect your ability to make a claim under the Westinghouse ENVIRONMENTAL TIPS ENVIRONMENT manufacturer’s warranty provided with your product. -
Page 3: Important Safety Instructions
IMPORTANT SAFETY INSTRUCTIONS Installation, cleaning and servicing warnings Please read this user manual carefully and store in a handy place for later reference. Pass the user manual • An authorised person must install this appliance. on to possible new owners of the appliance. (Certificate of Compliance to be retained). - Page 4 IMPORTANT SAFETY INSTRUCTIONS (continued) WARNING WARNING WARNING WARNING Oven Child safety • During use the appliance becomes hot. Care should • This appliance is not intended for use by persons be taken to avoid touching the hot surfaces inside (including children) with reduced physical, sensory the oven.
-
Page 5: Description Of Your Appliance
DESCRIPTION OF YOUR APPLIANCE WVE915SC Knob control electric oven Control Panel WVE915SCA Programmable electric oven Control Panel DESCRIPTION OF YOUR APPLIANCE... -
Page 6: Wvep916Sc, Wvep917Dsc
DESCRIPTION OF YOUR APPLIANCE (continued) WVEP916SC Pyro clean knob control electric oven Control Panel WVEP917DSC Pyro clean programmable electric oven Control Panel DESCRIPTION OF YOUR APPLIANCE... -
Page 7: Installation Of The Appliance
INSTALLATION OF THE APPLIANCE Cabinet requirement IMPORTANT TIPS & INFORMATION Models are designed to be built into cabinetry either To minimise the weight of the oven for easier below a benchtop or into a vertical cabinet. installation, remove the oven door and oven internal accessory pack. - Page 8 INSTALLATION (continued) Underbench installation Vertical cabinet installation Your underbench oven looks best when the control The oven can be built into a vertical cabinet in the panel is directly under the benchtop. An upper infill same manner as an underbench. The required cavity panel may be added if the cooktop placed above the dimensions are the same and the product is secured benchtop is too deep.
- Page 9 INSTALLATION (continued) Cabinet construction for built in oven For the best integration within a kitchen, install this appliance in a cupboard that gives a flush fit with the surrounding cupboard fronts. A recess of 20mm is ideal. NOTE: Your appliance must be mounted on a horizontal surface for the full width and depth of the product.
-
Page 10: Wiring Requirements
Plastic clip cooking range. Securing points Supply cord size required: WVE915SC/WVE915SCA - 2.5mm WVEP916SC/WVEP917DSC - 4.0mm The Data plate gives information about rating and is located behind the bottom of the oven door. Hard wiring detail •... -
Page 11: Before Operating Your Appliance For The First Time
Setting the time After electrically connecting the appliance, you must set the time of the day before you can operate your oven. Touch control electronic clock model WVE915SC WVE915SCA, WVEP917DSC electronic controller After the appliance has been electrically connected “12.00” will be displayed and the “clock” indicator will flash. -
Page 12: Installing Your Oven Accessories
INSTALLING YOUR OVEN ACCESSORIES Slides (telescopic runners) (on selected models) Installing the side racks The selected models are supplied with a set of slides Insert the rear peg into the rear access hole and instructions on how to assemble. Ensure the provided, ensuring peg is fully inserted. - Page 13 INSTALLING YOUR OVEN ACCESSORIES (continued) Fitting grill dish and insert Your oven comes with a full width grill dish and a grill insert. The grill dish insert is designed with flexibility to adjust distance between the food and the grill element. Maximum grill power Grill dish insert brings the food closer to the grill element.
-
Page 14: Using Your Oven
USING YOUR OVEN Understanding your oven functions Bake/Pizza Rapid Heat/AirFry Heat comes from two elements, one above and one below the food. The bottom element is a clean heat element and is below the floor of the oven. Both This function can be either used for a quicker pre-heat elements are controlled by the thermostat and will turn of your oven or used to turn your oven into an AirFry on and off to maintain the set temperature. - Page 15 USING YOUR OVEN (continued) Pizza Grill “Pizza” is a combination of “Base Heat” and “Fan Forced” The “Grill” directs radiant heat from the powerful upper and offers you the combined benefits of both functions. element onto the food. You can use the “Grill” function Heat comes from the elements surrounding the fans as for tender cuts of meat, steak, chops, sausages, fish, well as the clean heat element below the oven floor.
- Page 16 USING YOUR OVEN (continued) Pyro Clean Cooling/Venting fan (WVEP916SC & WVEP917DSC models only) Your built-in appliance is fitted with a cooling fan. This prevents your kitchen cabinet from overheating and reduces the condensation inside the oven. It will operate whenever you are using your oven or grill and will blow warm air across the top of the oven door.
-
Page 17: Operating Wve915Sc
USING YOUR OVEN (continued) Operating the touch control clock model Cooking with timer WVE915SC Select the cooking function Turn the function selector in any direction to the desired cooking function. The oven cavity light will come on. On when timer is set... - Page 18 USING YOUR OVEN (continued) Setting the cooking duration To check or cancel settings Check the clock displays the correct time of day. To check settings, touch the symbol until the desired setting is displayed. The relevant icon Select the desired oven function and temperature. will flash.
-
Page 19: Operating Wvep916Sc
USING YOUR OVEN (continued) Operating WVEP916SC Cooking with the timer Setting the time Before the appliance, can be used, the time must be set. When power is supplied to the oven the clock icon will be displayed. Along with the clock symbol the ‘12’ will be flashing. - Page 20 USING YOUR OVEN (continued) Setting the end time Additional Functionality Use the knobs to select the desired oven function and cooking temperature. Setting the countdown timer Touch the button as often as necessary, until Use this for timing any activity, for example baking the ‘end time’...
- Page 21 USING YOUR OVEN (continued) Activating the child-proof lock Safety Cut-out feature When the child lock is engaged, the oven cannot be The oven automatically switches itself off if the operated and the door cannot be opened. temperature is not adjusted or the appliance is left operating after a period of time.
-
Page 22: Operating Wve915Sca And Wvep917Dsc
USING YOUR OVEN (continued) Operating WVE915SCA & WVEP917DSC FUNCTION TEMP SET TIME Hold 3s ON/OFF BACK FAVOURITE ALARM Use the sensor fields to operate the oven. FUNCTION DESCRIPTION ON/OFF To turn the oven on and off Press the sensor field once to choose a heating function. Heating functions or Assisted Cooking To turn the light on or off, press the sensor field for 3 seconds To go back one level in the menu. - Page 23 USING YOUR OVEN (continued) Display Heating function 16:30 Time of day Heat-up indicator 00:15 140°C Function duration/end time Temperature Other indicators of the display: SYMBOL FUNCTION DESCRIPTION Minute minder The function is currently working Time of day The display shows the current time Duration The display shows the necessary time for cooking End time...
- Page 24 USING YOUR OVEN (continued) Submenu for “Basic Settings” SYMBOL FUNCTION DESCRIPTION Set time of day Sets the current time on the clock. When ON, the display shows the current time when you deactivate Time indication the appliance. When on, fast heat up will be activated automatically in heating Fast heat up function.
- Page 25 USING YOUR OVEN (continued) Navigating the menus Clock functions Turn on the oven Clock functions table Press to select the menu option Symbol Clock function Application Press OK to move to the submenu or accept To set a countdown (max. the setting 2 h 30 min).
- Page 26 USING YOUR OVEN (continued) Additional Functions Function Lock This function prevents an accidental change of the Favourites heating function. You can turn it on only when the oven works. You can save your favourite settings, such as duration, Turn on the oven. temperature or heating function.
- Page 27 EASY BAKE STEAM Your WVEP917DSC has the ability to add steam while baking. Cooking with steam is a great addition to straight ‘hot air’ cooking. Steam brings out all the natural flavours and goodness in the food, cooks evenly from surface to centre and retains more nutrients and vitamins.
-
Page 28: Cooking Test
COOKING TEST COOKING GUIDE Get to know your new oven with this • For best baking results preheat oven for 30 minutes. ‘Simple Test Cake’ • Select the correct shelf location for food being cooked. Although we strive for a perfect performing oven, it’s •... - Page 29 COOKING GUIDE (continued) Choosing the best oven settings The following table is intended as a guide and experience may show some variation in cooking times necessary to meet individual requirements. We recommend that you preheat your oven for 30 minutes. Modes without oven fan FOOD TEMPERATURE •C...
- Page 30 COOKING GUIDE (continued) Easy Bake Steam function WATER IN CAVITY TEMPERATURE OVEN SHELF FOOD TIME IN MINUTES WELL (ML) POSITION* Yeast goods Bread loaves 180 - 200 2 or 3 35 - 45 Bread rolls 190 - 210 2 or 3 20 - 25 Gluten free bread 180 - 200...
- Page 31 COOKING GUIDE (continued) Roasting Meat As a method of cooking, grilling can be used to: • Enhance the flavours of vegetables, fish, poultry Place the meat in the oven and set the temperature and meat. between 180°C and 200°C. (It is recommended •...
-
Page 32: Dealing With Cooking Problems
DEALING WITH COOKING PROBLEMS (see also TROUBLESHOOTING) PROBLEM CAUSES REMEDIES Uneven cooking: • Incorrect shelf position. – Select shelf that puts food in the centre of the oven. • Trays not centralised. – Centre trays. • Air flow in oven uneven. –... -
Page 33: Cleaning Your Oven
CLEANING YOUR OVEN Oven WARNING WARNING • Always keep your appliance clean. Ensure that fats • Always switch off power to the oven before and oils do not accumulate around elements or fans. cleaning. • Always keep the oven shelves, baking tray, grill dish •... - Page 34 CLEANING YOUR OVEN (continued) Cleaning your oven door Cleaning your oven door The oven door has been designed to allow the two inner door glasses to be removed for cleaning without WARNING WARNING removing the door from the product. • DO NOT use the oven without the inner and Removing the inner door glass for cleaning: middle door glass fitted.
-
Page 35: Cleaning Your Pyrolytic Oven
CLEANING YOUR PYROLYTIC OVEN WVEP916SC & WVEP917DSC TIPS & INFORMATION IMPORTANT During the pyrolytic cleaning function, it is advisable Pyrolytic cleaning of the oven cavity not to use a cooktop if it is fitted above the oven. The oven has the Pyrolytic self-cleaning function, it This could cause overheating and damage to both appliances. - Page 36 CLEANING YOUR PYROLYTIC OVEN (continued) After Pyrolytic cleaning The door will only unlock when the oven has cooled to a safe temperature. Turning the function off will not unlock the door. After cool-down, wipe the ash out of the oven with a soft damp cloth and warm water.
-
Page 37: Troubleshooting
TROUBLESHOOTING Faults If there is a problem with the oven and/or grill, please: • Check the points listed below before calling for service. It may be possible to avoid a call by fixing the problem yourself – and so continue cooking. NOTE: We may charge for service even in the guarantee period if your problem is due to the causes listed below. -
Page 38: Notes
NOTES NOTES... -
Page 39: Warranty
(c) ‘ASC’ means Electrolux’s authorised serviced centres; the Appliance; (d) ‘Westinghouse’ is the brand controlled by Electrolux Home Products In addition, Electrolux is not liable under this warranty if: Pty Ltd of 163 O’Riordan Street, Mascot NSW 2020, ABN 51 004... - Page 40 0800 10 66 10 email: customercare@electrolux.co.nz web: westinghouse.co.nz and WESTINGHOUSE are trademarks of Westinghouse Electric Corporation. Used under license by Electrolux Home Products Pty Ltd. All Rights Reserved. Part Number: A18644401 REV 002 © 2019 Electrolux Home Products Pty Ltd...
Need help?
Do you have a question about the WVE915SC and is the answer not in the manual?
Questions and answers
Made a mistake in setting the clock how to return to the start
To reset the clock on a Westinghouse WVE915SC:
1. After the appliance is electrically connected, “12.00” will display and the “clock” indicator will flash.
2. Press the up or down arrow buttons to set the correct time.
3. Wait 5 seconds after the last change. The “clock” indicator will disappear, confirming the time is set.
Note: The clock uses a 24-hour display.
This answer is automatically generated