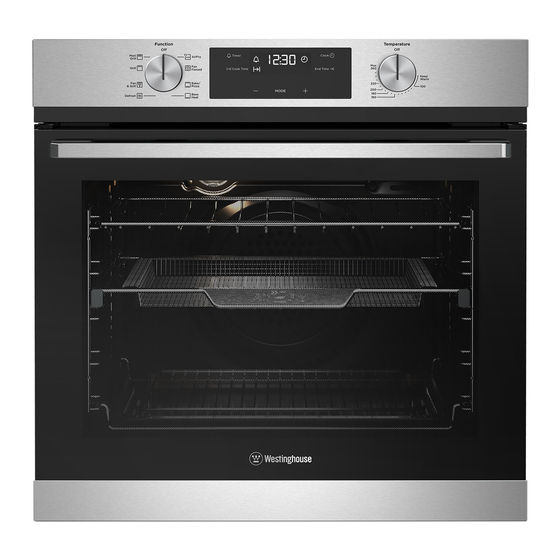
Westinghouse WVES613 User Manual

Westinghouse WVES613 User Manual

Electric built-in ovens
Hide thumbs Also See for WVES613:

Advertisement

USER MANUAL
Timer
Cook Time
MODE
ELECTRIC BUILT-IN OVENS
WVE613, WVES613, WVE614, WVE615, WVEP615,
WVE616, WVE617, WVEP617, WVEP618, WVE625,
WVEP627, WVE636, WVE645, WVE655, WVE665
Clock
End Time

Advertisement

Table of Contents
loading
Need help?

Need help?

Do you have a question about the WVES613 and is the answer not in the manual?

Questions and answers

Summary of Contents for Westinghouse WVES613

  • Page 1 USER MANUAL Timer Clock Cook Time End Time MODE ELECTRIC BUILT-IN OVENS WVE613, WVES613, WVE614, WVE615, WVEP615, WVE616, WVE617, WVEP617, WVEP618, WVE625, WVEP627, WVE636, WVE645, WVE655, WVE665...
  • Page 2: Table Of Contents

    This can be done by switching off you cook. Run the oven(s) at 180°C for 30 minutes and under the Westinghouse manufacturer’s warranty the appliance via the powerpoint or isolating switch ensure the room is well ventilated.
  • Page 3: Important Safety Instructions

    Do not put water directly into the hot appliance. WVE613 597 x 596 x 569 2.3kW 9.6A • Always clean the appliance immediately after any WVES613 597 x 596 x 569 2.3kW 9.6A food spills. WVE614 597 x 596 x 569 2.3kW...
  • Page 4 INSTALLING YOUR APPLIANCE (CONTINUED) • If a powerpoint is fitted it must be accessible with the Cabinet construction for your appliance Non-pyrolytic underbench ovens and side open door oven appliance installed, as the plug must be accessible For the best integration within a kitchen, install the Your underbench oven looks best when the control panel is directly under the benchtop.
  • Page 5 INSTALLING YOUR APPLIANCE (CONTINUED) Separate grill underbench oven Double oven GAS TYPE Your underbench oven looks best when the control panel is directly under the benchtop. An upper infill panel may have to be added if the cooktop placed over the oven is too deep. Refer to cooktop installation instructions for required Flush fit 1086 581min...
  • Page 6: Product Description

    613SC PRODUCT DESCRIPTION WVE613/WVES613/WVES614 WVE616 613SC 613SC WVE615 WVE617 613SC P615 WVEP615 P615 WVEP617 P615 P617 P617 FUNCTION TEMP SET TIME P617 Hold 3s WVEP618 P618 ON/OFF BACK FAVOURITE ALARM FUNCTION TEMP SET TIME Hold 3s P618 ON/OFF BACK FAVOURITE...
  • Page 7 PRODUCT DESCRIPTION (CONTINUED) WVE615SCA/DSCA WVE645 613SC P615 WVE625 WVE655 P617 FUNCTION TEMP SET TIME Hold 3s P618 ON/OFF BACK FAVOURITE ALARM WVEP627 WVE665 P627 P615 P615 WVE636 P615 P617 P617 FUNCTION TEMP SET TIME Hold 3s P617 P618 ON/OFF BACK FAVOURITE ALARM Upper function selector...
  • Page 8: Before First Use

    BEFORE FIRST USE INSTALLING YOUR OVEN ACCESSORIES Preparing your appliance for the first time Slides (Telescopic runners) Left hand side rack (For applicable models only) • Please remove all internal boxes and bags from the oven before operation. Obtain left hand side rack and left hand slide – see image to identify.
  • Page 9: Using Your Oven

    INSTALLING YOUR OVEN ACCESSORIES (CONTINUED) USING YOUR OVEN To fit a shelf or tray to telescopic slides Air Fry (For applicable models only) Understanding your oven functions Bake (For applicable models only): Heat comes from two elements, one above and one below The Air Fryer can be placed onto slides or into side racks Your oven will have a selection of the following functions.
  • Page 10 USING YOUR OVEN (CONTINUED) Fan Assist & Grill” it is not necessary to turn the food over during the Maxi Grill (grill-in-oven models only) Grill (small oven only) cooking cycle. Set temperature to 180°C. Heat comes from two elements, one above and one “Maxi grill”...
  • Page 11 USING YOUR OVEN (CONTINUED) oven temperature falls below the set temperature, the Cooking with your timer (selected models only) To set the time of day in hours and minutes, touch the element switches on and the oven indicator light comes symbols.
  • Page 12 USING YOUR OVEN (CONTINUED) Enter the time of day to finish cooking by pressing Operating the Electronic Clock Selecting the oven temperature The minutes will flash and can be set in the same manner. symbols while the indicator symbol (WVEP615, WVEP627, WVEP617) 5 seconds after the last change, the clock display will stop Toggle the temperature selector (left or right...
  • Page 13 USING YOUR OVEN (CONTINUED) light turns off. Also the light can be turned on from the Repeat step 2 until display shows 24:68. 3 beeps Normal clean Touch the button as often as necessary, until the sound and DEMO will be shown. standby state by touching and holding the button ‘end time’...
  • Page 14 USING YOUR OVEN (CONTINUED) Operating the Programmable Controller (WVEP618) Display Heating function 16:30 FUNCTION TEMP SET TIME Time of day Hold 3s Heat-up indicator 00:15 140°C ON/OFF BACK FAVOURITE ALARM Function duration/end time Temperature Other indicators of the display: Use the sensor fields to operate the oven. SYMBOL FUNCTION DESCRIPTION...
  • Page 15 USING YOUR OVEN (CONTINUED) Submenu for “Basic Settings” Before first use SYMBOL FUNCTION DESCRIPTION Initial cleaning Set time of day Sets the current time on the clock. Remove all accessories and removable shelf supports from the oven. When ON, the display shows the current time when you deactivate the Time indication appliance.
  • Page 16 USING YOUR OVEN (CONTINUED) Setting a heating function Setting the clock functions shows the first free memory position, press or and press Brightness of the display to overwrite an existing program. Before you use the functions: Duration, End Time, 1. Turn on the oven. There are two modes of display brightness: You can change the name of a program in the menu: Edit you must set a heating function and temperature...
  • Page 17: Cooking Guide

    USING YOUR OVEN (CONTINUED) COOKING GUIDE Oven shelves Choosing the best oven settings RECOMMENDED MINUTES MEAT RESULT TEMPERATURE PER KG The following table is intended as a guide and experience may show some variation in cooking times necessary TIPS & INFORMATION IMPORTANT Rare 35 - 40...
  • Page 18: Grilling Guide

    GRILLING GUIDE STEAM ASSISTED COOKING Grilling hints Guide to better grilling Cooking with steam is a great addition to straight ‘hot air’ cooking. Steam brings out all the natural flavours and WARNING CAUTION goodness in the food, cooks evenly from surface to centre Do not refill the cavity well with water during cooking or and retains more nutrients and vitamins.
  • Page 19: Dealing With Cooking Problems

    STEAM ASSISTED COOKING (CONTINUED) DEALING WITH COOKING PROBLEMS Remove the drain pipe only when the water PROBLEM CAUSES REMEDY stops flowing. Uneven cooking • Incorrect shelf position • Select shelf suitable for cooking function. See Soak up any leakages with a sponge or cloth cooking function tables in cooking guide •...
  • Page 20: Getting To Know The Oven

    GETTING TO KNOW THE OVEN CARE AND CLEANING Get to know the oven with this ‘Simple Test Cake’ WARNING WARNING WARNING WARNING Although we strive for a perfect performing oven, it’s Ensure the oven is electrically isolated before cleaning. The door glass on this appliance is made from a tough, possible that there will be some variation in colour This can be done by switching off the appliance via durable material that withstands heating and cooling...
  • Page 21 CARE AND CLEANING (CONTINUED) cover back into position. • A special high temperature resistant globe should be used. This can be purchased from Electrolux Customer Care Centre. NOTE: :Light globes are not covered by warranty WARNING WARNING Make sure the appliance is turned off before you remove or replace parts, to avoid the possibility of electric shock.
  • Page 22 CARE AND CLEANING (CONTINUED) Removing the door glass panels • Repeat for the black bordered glass panel ensuring Fitting the oven door the painted surface is facing to the downside. • Take hold of the oven door with a hand on each side and with the door at an angle of 45 , position the WARNING...
  • Page 23 CARE AND CLEANING (CONTINUED) Cleaning the quad glazed oven door Cleaning the door glass panels • Insert the black bordered glass panel into the upper (on selected models) position, ensuring the painted surface is facing the downside as per the image below. WARNING CAUTION WARNING...
  • Page 24 CARE AND CLEANING (CONTINUED) Cleaning the door glass panels Replacing top door trim WARNING CAUTION • Take hold of the top door trim at each side and Do not lift the door by the handle. Rough handling will position it to the inside edge of the glass. WARNING CAUTION cause glass to break.
  • Page 25 CARE AND CLEANING (CONTINUED) during the pyrolytic cleaning process. It is strongly • Switch on the appliance by pressing advised to remove any pets (especially birds) from TIPS & INFORMATION IMPORTANT • Select the pyrolytic cleaning function and press the vicinity of the appliance during and after each During the cleaning procedure, some water can drip pyrolytic cleaning process.
  • Page 26: Using Your Cooktop

    USING YOUR COOKTOP TROUBLESHOOTING Cleaning your ceramic hotplate Cooktop Faults WARNING CAUTION Remove all spilt food and fat with a razor blade If there is a problem with the oven and/or grill, please: PROBLEM POSSIBLE CAUSE SOLUTION The ceramic cooktop is made from ceramic glass,a tough scraper (supplied with the unit) while the ceramic •...
  • Page 27: Notes

    TROUBLESHOOTING (CONTINUED) NOTES Oven PROBLEM POSSIBLE CAUSE Oven or grill • Time of day not set. not working • Power not turned on. • Controls are incorrectly set. • Oven is in ‘Demo’ mode, refer to Using your oven section. •...
  • Page 28: Warranty

    (c) ‘ASC’ means Electrolux’s authorised serviced centres; the Appliance; (d) ‘Westinghouse’ is the brand controlled by Electrolux Home Products In addition, Electrolux is not liable under this warranty if: Pty Ltd of 163 O’Riordan Street, Mascot NSW 2020, ABN 51 004...
  • Page 29 0800 225 088 westinghouse.co.nz email: customercare@electrolux.co.nz web: westinghouse.co.nz and WESTINGHOUSE are trademarks of Westinghouse Electric Corporation. Used under license by Electrolux Home Products Pty Ltd. All Rights Reserved. P/No: A18857101 © 2020 Electrolux Home Products Pty Ltd. ABN 51 004 762 341...

Table of Contents