
Related Manuals for Audio Service STILINE BT


Summary of Contents for Audio Service STILINE BT
- Page 1 USER MANUAL SLIM-RIC HEARING INSTRUMENTS ❒ STILINE ❒ STILINE BT ❒ CONNEXX SLIM-RIC (BT) CHARGING CASE...
-
Page 2: Table Of Contents
Content Inserting and removing the hearing instruments Adjusting the volume Changing the hearing program Welcome Charging the internal battery of your charger Intended use Checking the battery capacity of your charger Your hearing instruments Special listening situations Instrument type On the phone Getting to know your hearing instruments Audio streaming with iPhone, iPad or iPod touch ... - Page 3 Charger Important information Professional maintenance Conformance information for charger Service and warranty Important safety information for hearing instruments and charger Safety information on lithium-ion rechargeable batteries Safety information for hearing instruments Safety information for charger Further information Accessories Operating, transport and storage conditions for hearing instruments and charger Disposal information ...
-
Page 4: Welcome
Welcome CAUTION It is important to read this user guide and the safety manual Thank you for choosing our hearing instruments to accompany you thoroughly and completely. Follow the safety information to through everyday life. Like anything new, it may take you a little time avoid damage or injury. -
Page 5: Intended Use
Your hearing instruments Intended use Hearing instruments are intended to improve the hearing of hearing impaired persons. Diagnosis and prescription of a hearing This user guide describes optional features that your hearing instrument must be performed by hearing health specialists, e.g. instruments may or may not have. acousticians, audiologists or ENT doctors. -
Page 6: Getting To Know Your Hearing Instruments
The wireless functionality enables advanced audiological features and synchronization between your two hearing instruments. Your hearing instruments have no controls. Only for Stiline BT: If you want to adjust the volume or switch hearing programs Your hearing instruments feature Bluetooth low energy* ®... -
Page 7: Components And Names
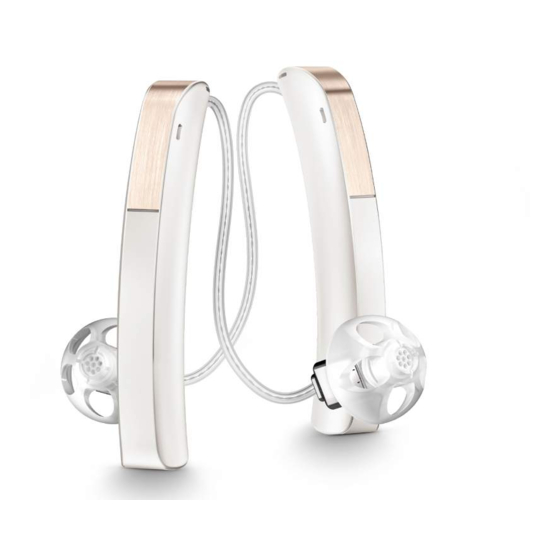
Components and names ➊ ➊ ➏ ➋ Stiline Stiline BT ➋ ➊ ➍ ➍ ➌ ➌ ➋ ➌ ➌ ➏ ➏ ➌ ➊ ➊ ➌ ➍ ➍ ➋ ➋ ➎ ➎ ➎ ➍ ➎ ➊ ➍ Button ➊ ➍ Ear piece Microphone openings ➋... -
Page 8: Hearing Programs
Hearing programs You can use the following standard ear pieces: Standard ear pieces Size Click Sleeve, Open or Closed Click Dome, Open or Closed Click Dome Semi‑open Read more in section “Changing the hearing program”. Click Dome Double Features The tinnitus therapy feature generates a sound to distract You can easily exchange the standard ear pieces. -
Page 9: Daily Use
Daily use Stiline Stiline BT The middle status LED The front status LED permanently shows the permanently shows the Charging charging status of the charger. charging status of the charger. The hearing instruments’ The hearing instruments’ How you can use the charger charging status is shown by charging status is shown when You can use your charger in three different ways. - Page 10 Mobile charging Stiline Stiline BT When you are mobile with no electrical outlet available, you can still The charging status of charger The charging status of charger charge your hearing instruments. Energy is fed from the charger’s and hearing instruments is and hearing instruments is integrated battery into your hearing instruments.The charger must...
- Page 11 ● When the charger turns on, the status of the hearing instruments and the status of the charger’s internal battery are displayed for Stiline Stiline BT 5 ‑ 7 seconds. Stiline Stiline BT ●...
- Page 12 If the status LEDs do not light up when you insert the hearing Charging hearing instruments instruments, check the following: Place the right hearing ● The hearing instruments are not correctly placed. Push them instrument in the charging slot slightly into their charging slots or close the charger’s lid. marked with an “R”, and the ●...
- Page 13 Charging status of hearing instruments Status description Status description Stiline Stiline BT Flashing green Breathing green Hearing instrument Hearing instrument The outer LEDs indicate The LED next to the hearing is being charged. is being charged. the charging status of the instrument indicates the hearing instruments.
-
Page 14: Turning On And Off Hearing Instruments
Low power indication of the hearing instruments LED is off LED is off You will hear an alert signal to indicate the power cell is running No hearing No hearing low. The signal will be repeated every 15 ‑ 20 minutes. Depending instrument is in the instrument is in the charger, hearing... -
Page 15: Switching To Standby Mode
Switching to standby mode instruments. This may take several seconds. Note that the default volume and hearing program are set. Via remote control, you can switch your hearing instruments to standby mode. This mutes the hearing instruments. When you leave standby mode, the previously used volume and hearing program are set. -
Page 16: Inserting And Removing The Hearing Instruments
Inserting and removing the hearing instruments Correct: Your hearing instruments have been fine-tuned for your right and left ear. Letters indicate the side: ● R = right ear ● L = left ear Inserting a hearing instrument: Incorrect: For Click Sleeves, take care that the bend of the Click Sleeve is in line with the bend of the receiver cable. - Page 17 Carefully push the ear piece in the ear ● It may be helpful to insert the right hearing instrument ➊ canal ➋ with the right hand and the left hearing instrument with Twist it slightly until it sits well. the left hand. ●...
- Page 18 The optional retention strand helps to securely retain the ear piece Removing a hearing instrument: ➊ in your ear. To position the retention strand: Lift the hearing instrument and slide ➊ Bend the retention strand and position it it over the top of your ear carefully into the bottom of the bowl of your ear (refer to the picture).
-
Page 19: Adjusting The Volume
Adjusting the volume CAUTION Your hearing instruments automatically adjust the volume to the Risk of injury! listening situation. In very rare cases the ear piece could remain in your ear If you prefer manual volume adjustment, use a remote control when removing the hearing instrument. If this happens, option. -
Page 20: Changing The Hearing Program
Changing the hearing program Charging the internal battery of your charger Depending on the listening situation, your hearing instruments NOTICE automatically adjust their sound. Use of incompatible parts poses a risk of malfunction. Your hearing instruments may also have several hearing programs Use only the USB power cable that is provided with the which allow you to change the sound, if needed. - Page 21 Charging status of your charger Stiline Stiline BT The middle LED indicates the The front LED indicates the charging status of the charger charging status of the charger ➋ and its internal battery. and its internal battery. ➊ While the internal battery is While the internal battery is...
-
Page 22: Checking The Battery Capacity Of Your Charger
Disconnect the charger from the electrical outlet. cooled down. cooled down. Briefly press the button. Stiline Stiline BT The middle LED indicates The front LED indicates the the status of the charger’s status of the charger’s internal internal battery for 5 seconds. - Page 23 LED Status description LED Status description Orange Orange Internal battery does Internal battery does not Flashing green Green not have enough have enough capacity to Internal battery has Internal battery has capacity to fully fully charge two hearing enough capacity enough capacity to fully charge two hearing instruments.
-
Page 24: Special Listening Situations
Special listening situations On the phone When you are on the phone, hold the telephone receiver slightly above your ear. The hearing instrument and telephone receiver have to be aligned. Turn the receiver slightly so that the ear If the status LED does not light up when you press the button, is not completely covered. -
Page 25: Audio Streaming With Iphone, Ipad Or Ipod Touch
Bluetooth, however direct audio streaming will not be possible and other functions will not be available. Only for Stiline BT To activate or deactivate the airplane mode, use the smartphone Audio streaming with iPhone, iPad or iPod touch app. -
Page 26: Frequently Asked Questions
Frequently asked questions How can I turn off my hearing instruments without You may have some questions on how to best charge your hearing charging them? instruments. Read the questions and answers below. If you have Place the hearing instruments in the charger. Ensure that more questions, your Hearing Care Professional will help you. they are inserted correctly (status LEDs light up). - Page 27 Stiline Stiline BT What should I pay attention to when charging? Charging resumes The front LED will stop flashing The hearing instruments and charger must be clean and dry. automatically after the device orange during the cooling Observe the operation conditions in section “Operating, transport, has cooled down. Do not phase.
-
Page 28: Maintenance And Care
Maintenance and care Never use running water or immerse the devices in water. Never apply pressure while cleaning. To prevent damage it is important that you take care of your hearing instruments and follow a few basic rules, which will soon become a part of your daily routine. -
Page 29: Ear Pieces
At 6 month intervals you will have to charge the hearing Storage instruments to avoid an unrecoverable deep‑discharge of the ● Short‑term storage (up to several days): Turn off your hearing power cell. Deep‑discharged power cells cannot be charged instruments by placing them in the charger. anymore and they have to be replaced. - Page 30 For all types of ear pieces: For Click Domes or Click Sleeves: Squeeze the tip of the ear piece. Clean the ear piece right after removal with a soft and dry tissue. This prevents that cerumen becomes dry and hard. Exchanging Exchange standard ear pieces approximately every three months.
- Page 31 Take particular care that the new Exchanging Click Domes Click Dome clicks noticeable in To remove the old Click Dome, use the removal tool or follow the place. instructions on the packaging of the Click Domes. Be careful not Check the firm fit of the new to pull the receiver cable.
-
Page 32: Charger
Charger Exchanging Click Sleeves Turn the Click Sleeve inside out. Cleaning Grasp the Click Sleeve and the receiver NOTICE (not the receiver cable) with your fingers Risk of injuries caused by electric shock! and pull the Click Sleeve off. If cleaning is required, disconnect the charger from the power supply. -
Page 33: Professional Maintenance
Important safety information for Professional maintenance hearing instruments and charger Your Hearing Care Professional can perform a thorough professional cleaning and maintenance. Ask your Hearing Care Professional for your individual Safety information on lithium-ion rechargeable recommendation of maintenance intervals and for support. batteries WARNING A lithium‑ion rechargeable battery is permanently built into your device. - Page 34 ● Observe the operating conditions. Refer to the section Replacement and repair have to be performed by a professional. “Operating, transport, and storage conditions”. Therefore: ● ● Pay special attention to protect your device from extreme heat Do not repair or replace the lithium‑ion rechargeable battery (e.g.
-
Page 35: Safety Information For Hearing Instruments
Safety information for hearing instruments WARNING For more safety information, refer to the safety manual supplied Risk of injury! with the device. Do not use obviously damaged devices and return them to point of sale. Safety information for charger WARNING Note that any unauthorized changes to the product may Personal safety for charger cause damage to the product or cause injury. - Page 36 WARNING WARNING Risk of burns! Charging systems may interfere with measuring devices and electronic equipment. Do not place anything other than your hearing instruments in the charger. In hospitals: The charger complies with CISPR 35 and CISPR 32. Therefore the use of the charger in hospitals should be permissible.
- Page 37 Product safety for charger WARNING Interference with implantable devices NOTICE The device can be used with all electronic implants Protect your device from extreme heat. Do not store it in that comply with the ANSI/AAMI/ISO 14117:2012 direct sunlight. Electromagnetic compatibility standard for human implants.
-
Page 38: Further Information
Further information Requirements for the electrical plug Use an electrical plug with an output voltage of 5 V and a maximum Accessories output current of 500 mA. The type of available accessories depends on the instrument type. WARNING Examples are: a remote control, an audio streaming device, or a Risk of electric shock! smartphone app for remote control. -
Page 39: Operating, Transport And Storage Conditions For Hearing Instruments And Charger
Operating, transport and storage conditions for Storage Transport hearing instruments and charger Temperature 10 to 25 °C ‑20 to 60 °C (recommended) Operating conditions Discharging Charging Temperature 10 to 40 °C ‑20 to 60 °C Temperature 0 to 50 °C 10 to 35 °C (maximum range) Relative humidity 5 to 93 % 20 to 75 % Relative humidity 20 to 80 %... -
Page 40: Disposal Information
Symbols WARNING Risk of injury, fire or explosion during shipment. Symbols used in this document Ship power cells, hearing instruments and/or charger Points out a situation that could lead to serious, moderate, or according to local regulations. minor injuries. Indicates possible property damage. Disposal information To avoid environmental pollution, do not throw power cells, Advice and tips on how to handle your device better. -
Page 41: Troubleshooting
Troubleshooting Symbols on the device or packaging CE compliance label, confirms compliance with certain Problem and possible solutions European Directives, refer to section Sound is weak. “Conformance information”. ● Increase the volume. Indicates the legal manufacturer of the device. ● Charge the hearing instrument. ● Do not dispose of the device with general domestic Clean or exchange the ear piece. -
Page 42: Important Information
Important information Problem and possible solutions Sound is distorted. Conformance information for charger ● Decrease the volume. The CE mark indicates conformity with the following European ● Charge the hearing instrument. directives: ● Clean or exchange the ear piece. ● 2014/30/EU concerning electromagnetic compatibility Hearing instrument emits signal tones. ●... -
Page 43: Service And Warranty
Service and warranty Operation is subject to the following two conditions: ● This device may not cause harmful interference, and ● Serial numbers this device must accept any interference received, including interference that may cause undesired operation. Left hearing instrument: Right hearing instrument: For conformance information for hearing instruments, refer to the Charger: safety manual supplied with the device. - Page 44 Warranty Date of purchase: Warranty period in months: Your Hearing Care Professional...
- Page 45 Only for Stiline BT: Hearing instrument: Charger: AS AUDIO-SERVICE GmbH Sivantos GmbH Alter Postweg 190 Henri-Dunant-Straße 100 32584 Löhne 91058 Erlangen Germany Germany 0123...
Need help?
Do you have a question about the STILINE BT and is the answer not in the manual?
Questions and answers