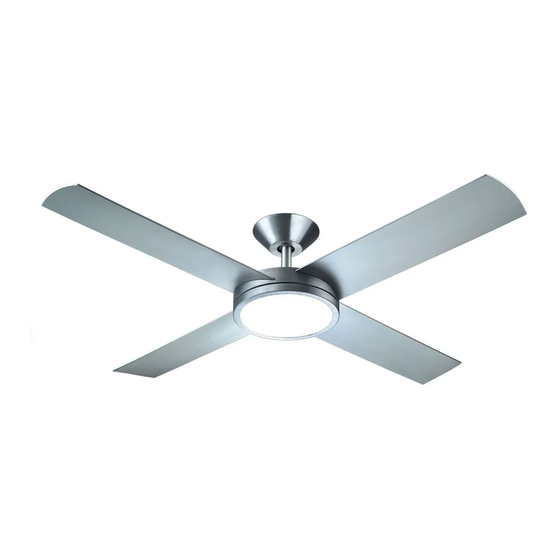
Summary of Contents for LUCCI Air AERO Series
- Page 1 AERO SERIES CEILING FAN INSTALLATION OPERATION MAINTENANCE WARRANTY INFORMATION CAUTION READ INSTRUCTIONS CAREFULLY FOR SAFE INSTALLATION AND FAN OPERATION. V 1.0 published on 12. 2016...
-
Page 2: Safety Precautions
AERO Fan Installation Instructions THANK YOU FOR PURCHASING Thank you for purchasing this quality Lucci product. To ensure correct function and safety, please read all instructions before using the product and keep all instructions for future reference SAFETY PRECAUTIONS In Europe: This appliance can be used by children aged from 8 years and above and persons with reduced physical, sensory or mental capabilities or lack of experience and knowledge if they have been given supervision or instruction concerning the use of the appliance in a safe way and understand the hazards involved. - Page 3 AERO Fan Installation Instructions all-pole safety switch at the switchboard, then this is considered to be an all-pole disconnection to the ceiling fan electrical circuit, meeting the requirements of clause 7.12.2 of AS/NZS 60335.1. A single-pole switch on the active of the receiver input of remote control must also be included in the wiring, and located the same room as the ceiling fan.
-
Page 4: Before Installation
AERO Fan Installation Instructions BEFORE INSTALLATION Unpack your ceiling fan carefully. Remove all parts and hardware. Examine all parts, you should have the following: Aero fan without light Ceiling Canopy Screw Fig 1 Hanger Bracket Ball Joint Pin (hidden) Ball Joint Screw Ceiling Canopy Ball Joint Down Rod... - Page 5 AERO Fan Installation Instructions Aero fan with LED light Ceiling Canopy Screw Hanger Bracket Fig 2 Ball Joint Pin (hidden) Ceiling Canopy Ball Joint Down Rod Ball Joint Screw Down Rod Knuckle Screw Wall Control Assembly Down Rod Pin Down Rod Screw Down Rod Knuckle Blade Screw Blade Cover...
-
Page 6: Installing The Mounting Bracket
AERO Fan Installation Instructions INSTALLING THE MOUNTING BRACKET • The ceiling fan must be installed in a location so that the blades are a minimum 300mm spacing from the tip of the blade to the nearest objects or walls, including angle ceiling panels. •... -
Page 7: Blade Installation
AERO Fan Installation Instructions BLADE INSTALLATION Note: Never use power tools when assembling the fan Fit the blades before suspending the fan motor from the ceiling. Remove the blade cover screws and lift up the blade cover (Fig 5) ... -
Page 8: Hanging The Fan
AERO Fan Installation Instructions HANGING THE FAN Lift the fan assembly onto the mounting bracket. Ensure the registration slot (A) of the hanger ball is positioned on the stopper (B) of the mounting bracket (C) to prevent the fan from rotating when in operation. -
Page 9: Completing The Installation
AERO Fan Installation Instructions COMPLETING THE INSTALLATION After completing the electrical connection at the mounting bracket terminal block, connect the ceiling fan wiring by the quick connector plug. Loosen the screws in the bottom of the bracket then cover the mounting bracket with the canopy (1). Ensure all electrical wiring is tucked inside the canopy and that the wires are not damaged during this step. - Page 10 AERO Fan Installation Instructions Fig 12 Reverse Switch to the left Fig. 15 Direction fan will spin in FWD (Summer) mode when viewed from underneath Fig 13 Reverse Switch to the right Direction fan will spin in REVERSE (Winter) mode when viewed from underneath 10 | P a g e...
- Page 11 AERO Fan Installation Instructions INSTALLING AN EXTENSION ROD When using extension rods the lower edge of the fan blades must be more than 2.1m above floor level in Australia and more than 2.3m in Europe. 2.1m Minimum Loose the ball joint screw (1) Lower the ball joint slightly and remove pin (2) Remove ball joint from down rod (3) Remove ceiling canopy from down rod (4)
- Page 12 AERO Fan Installation Instructions Remove the 3 down rod knuckle screws (1) Lift the knucke assembly from the motor (2) Loosen the 2 down rod screws (3) Remove the down rod pin (4) Withdraw the down rod from the knuckle (5) Fig.
-
Page 13: After Installation
AERO Fan Installation Instructions AFTER INSTALLATION WOBBLE: NOTE: Ceiling fans tend to move during operation due to the fact that they are mounted on a ball joint. If the fan was mounted rigidly to the ceiling it would cause excessive vibration and damage to the fan or ceiling. -
Page 14: Notes And Information
AERO Fan Installation Instructions NOTES AND INFORMATION Please use this page to record information about your fan and its installation that may not be covered elsewhere. Examples are: - The circuit breaker or safety switch number supplying power to this fan - An inspection schedule (if mounted outdoors we recommend fans should be checked for damage every 12 months or after severe weather) ________________________________________________________________... - Page 15 AERO Fan Installation Instructions LUCCI CEILING FAN WARRANTY DETAIL LUCCI WARRANTY HOTLINE- 1800 602 243 THIS WARRANTY IS VALID IN AUSTRALIA ONLY In the event of service being required, please call the Lucci Fan Warranty Hotline on 1800 602 243 between 9am &...
- Page 16 AERO Fan Installation Instructions CEILING FAN WARRANTY INFORMATION LUCCI WARRANTY HOTLINE- 1800 602 243 Complete and retain this form for your personal records and warranty purposes. NAME………………………………………………………………………………… ADDRESS…………………………………………………………………………… ……………………………………………………POSTCODE…………………… MODEL NUMBER…………………………………………………………………… (PO# + DATECODE Sticker here) PO NUMBER or DATECODE ……………………………………………………… DATE OF PURCHASE………………………………………………………………...


Need help?
Do you have a question about the AERO Series and is the answer not in the manual?
Questions and answers