Advertisement
Quick Links
16555 East Gale Avenue
City of Industry, CA 91745-1788
626/968-5666 • FAX 626/968-5716
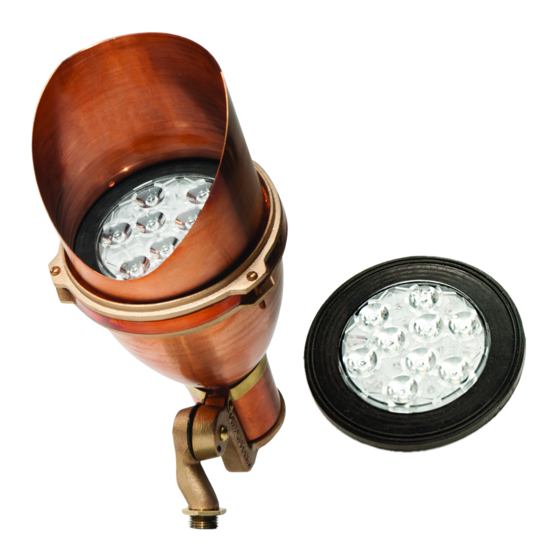
C24/C54 LED Upgrade Kit Installation Instructions
INSTRUCTIONS PERTAINING TO A RISK OF FIRE, OR INJURY TO PERSONS
WARNING: Fixtures must be grounded in accordance with local codes or the
!
National Electrical Code. Portable spear or tree mounts using a cord and plug must be plugged into a
receptacle protected by a Ground Fault Circuit Interrupter (GFCI) in accordance with the National Electrical
Code. Failure to take these steps may result in serious personal injury. Lighted lamp is HOT!
AVERTISSEMENT: Les luminaires doivent être mis à la terre conformément aux codes locaux ou
!
au National Electrical Code. Lance ou arbres supports portables utilisant un cordon et la prise doivent
être branchés dans une prise protégée par un disjoncteur différentiel (GFCI) conformément au Code national
de l'électricité. Le défaut de prendre ces mesures peut entraîner des blessures graves. La lampe allumée
est CHAUD!
NOTE: All wiring must be done by a qualified electrician.
!
REMARQUE: Tout le câblage doit être fait par un électricien certifié.
!
See additional warnings and cautions on p. 4.
KEEP THIS SHEET FOR FUTURE REFERENCE.
Tools Required:
q Flat-Blade Screwdriver
INSTALLATION INSTRUCTIONS:
Make certain the electrical supply is OFF
!
before starting LED upgrade.
With flat-blade screwdriver, remove
1.
back-up ring holding shield and
glass lens in place. Lift shield and
glass lens from body. Discard lens
and lens gasket
*Consult Kim Landscape Lighting Collection Catalog for mounting device options.
10/06/14
EC 141009004
C24
IMPORTANT SAFETY INSTRUCTIONS!
q Phillips Screwdriver
5. Remove screw on swivel arm and
set aside.
Status A
C54
Parts List:
q LED Upgrade Kit
AVERTISSEMENTS D'INSTALLATION:
Assurez-vous que l'alimentation électrique est éteinte
!
avant LED départ de mise à niveau.
q Miscellaneous hardware
3. Remove swivel stem and swivel
gasket and set aside.
Part No. 93054368
Advertisement

Subscribe to Our Youtube Channel
Related Manuals for Hubbell KIM LIGHTINING C24


Summary of Contents for Hubbell KIM LIGHTINING C24
- Page 1 16555 East Gale Avenue City of Industry, CA 91745-1788 626/968-5666 • FAX 626/968-5716 C24/C54 LED Upgrade Kit Installation Instructions INSTRUCTIONS PERTAINING TO A RISK OF FIRE, OR INJURY TO PERSONS IMPORTANT SAFETY INSTRUCTIONS! WARNING: Fixtures must be grounded in accordance with local codes or the National Electrical Code.
- Page 2 C24/C54 LED Upgrade Kit Installation Instructions 4. Loosen screw connecting body Remove screws holding socket 5. Remove screws connecting swivel spinning strap to swivel arm. Do not arm to socket mounting plate and set to socket mounting plate and remove. aside discard.
- Page 3 C24/C54 LED Upgrade Kit Installation Instructions 14. Push electronic driver bracket upwards 15. Run wire leads through swivel stem. 16. Turn fixture over while holding swivel in body spinning and reattach screws Insert swivel arm screw, place sleeve arm/swivel stem assembly together connecting swivel arm to socket over screw and seal gasket and .
- Page 4 C24/C54 LED Upgrade Kit Installation Instructions Installation warnings and cautions for upgrade kits Avertissements et précautions pour l’installation de kits de mise à niveau. WARNING: Make certain all electrical supply is OFF a risque d’endommagement du câblage, du bloc d’alimentation before staring installation or beginning maintenance ou d’autres parties lors du perçage pour installer la quincaillerie procedures.
Need help?
Do you have a question about the KIM LIGHTINING C24 and is the answer not in the manual?
Questions and answers