
Related Manuals for Vidos duo M1021


Summary of Contents for Vidos duo M1021
- Page 1 USER’S MANUAL 2 wire system video door intercom M1021 7" VIDEO HANDS-FREE COLOR TFT MONITOR W.20170627...
- Page 2 CHRACTESISTICS OF THE SYSTEM VIDOS is a state-of-the-art solution characterised by its exceptional ease of configuration and installation. The system operation is based on the simplicity of connection through 2 non-polarity wires only.
-
Page 3: Table Of Contents
CONTENTS PARTS AND FUNCTIONS ..................... 4 Front panel ..........................4 Mounting ..........................5 Screen ............................ 6 BASIC OPERATIONS ......................7 Answering a call ........................7 Pan-tilt & Zoom ........................9 Adjusting screen&volume ...................... 10 Door release .......... -
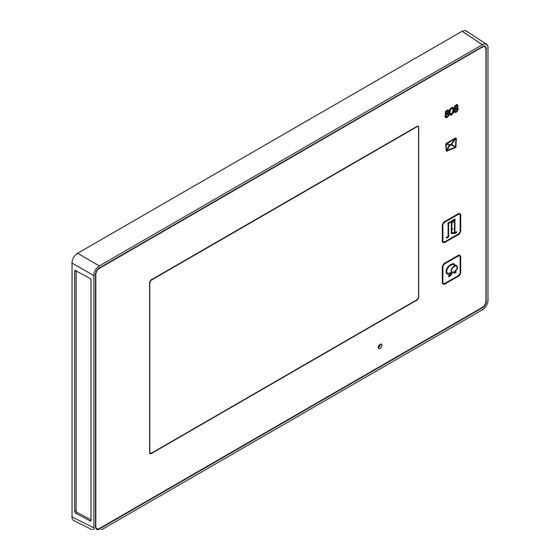
Page 4: Parts And Functions
PARTS AND FUNCTIONS Front panel SD card [10] 1 2 3 4 5 6 Key functions Item Description • See the next page for details Digital LCD touch screen • Display the visitors' image Press it & hold for 3s to send SOS message to mobile Emergency button phone,the function is supported by GSM unit. -
Page 5: Mounting
PARTS AND FUNCTIONS Mounting Mounting box (size:86x86mm) The unit Mounting screw x 2(included) 2 wire cable Mounting bracket The installation height is suggested to 145~160cm. 1. Use screws to fasten the mounting bracket to the wall with mounting box. 2. Connect the 2 wire cables to the unit. 3. -
Page 6: Screen
PARTS AND FUNCTIONS Screen Main Menu The Main menu is your starting point for using all the applications on your monitor. You can cus- tomize your Main menu to display your logo. Touch anywhere of the screen on monitor in standby mode, the Main menu will appear as follow: MONITOR Touch it to write messages or Touch it to view outdoor condition. -
Page 7: Basic Operations
BASIC OPERATIONS Answering a call • When there is a call from a video door station e .T c h all tone sounds, an image will be dis- played on the screen. • Touch icon on screen or press TALK/MON button on the panel, begin communicat- ing hands free with the visitor for 90 seconds. - Page 8 BASIC OPERATIONS Adjusting image scale while being called/talking It’s available to adjust image scale while being called. Total 3 image modes can be selected. Follow the steps: 00:10 DS-1 00:10 DS-1 00:10 DS-1 Normal Compare the difference of these 3 image modes: To complete communication •...
-
Page 9: Pan-Tilt & Zoom
BASIC OPERATIONS Pan-tilt & Zoom It is available to adjust the display mode for viewing images at a fi sh-eye door station by using the 5 direction pad button. When an image at a door station is displayed,move to the desired position b y to u ch in g on th e screen to view the image in zoom mode. -
Page 10: Adjusting Screen&Volume
BASIC OPERATIONS Adjusting screen&volume While receiving a call from door station, or monitoring /communicating with h e t visitor,you can adjust the screen and speaker volume. Follow the steps: 00:10 DS-1 00:10 DS-1 Normal Brightly Soft User Adjusting images Total 4 scene modes can be selected in sequence:Normal, Brightly, Soft and User.Whichever mode you choose, there will be a corresponding value for contrast,brightness and color. -
Page 11: Door Release
BASIC OPERATIONS Door release It is available to release the door during a call i n , communication,or while monitoring a door station. 00:10 DS-1 Touch either icon on the screen or press UNLOCK button on panel to release door. The door lock is released for the set door release time. -
Page 12: Monitoring
BASIC OPERATIONS - You can install up to 13 indoor units at one house (only 1- and 2-user systems). When addressing them in the range of 00-12 (single-user system) and 16-28 (double-user system), you can make connections in-between the selected monitors. You can also make an external connection to any other place if you know the address of its monitor installed there. -
Page 13: Recording
BASIC OPERATIONS Video Quard Monitoring: If the system installs multi cameras via QSW. Video quad monitoring is available. • On Monitor select page, touch “ > “ icon to scroll next page. • Select “QUAD-1” item to activate video quad monitoring, see the following steps: 00:10 00:10 00:10... -
Page 14: Viewing Images/Videos
BASIC OPERATIONS The recorded images are stored in the built-in memory fi rst. ∗ Max.118 pictures can be stored in inner memory ∗ If a micro-SD card is installed, images can be copied to SD card. ∗ Max. 32G Micro SD card is supported. Note: ∗... -
Page 15: Formating Sd Card
BASIC OPERATIONS Formating a SD card Micro-SD cards need to be formatted when using them in this monitor for the fi rst time. ∗ When formatting a micro-SD card, all existing data on card is erased. ∗ To EXPORT RECORDED IMAGES, refer to following item on this page. ∗... -
Page 16: Leaving Messages
BASIC OPERATIONS Leaving messages This function is very useful when you are away home. Must insert a micro SD card to support this function. To activate the function, please follow the steps: 00:10 00:10 DS-1 DS-1 Call Scenario Normal Do Not Disturb Leave a Message,Immediately Leave a Message,If No Answer Divert, Simultaneously... -
Page 17: Mute Function
BASIC OPERATIONS You can review who is visiting at some time. 1. Touch one of the visiting list. 2. Touch icon to show the caller's image. Current page Total page Visitor Message 01/N Playback visitor's video&audio When touch the 06-23 15:22 DS-1 item,"... -
Page 18: Transferring Call
BASIC OPERATIONS Transferring call The calling from door station can be diverted tou r y o phone. please note that this function should be supported by the unit of TPC/GSM/TPS. Follow the steps to activate this function: 00:10 00:10 DS-1 DS-1 Call Scenario Normal... -
Page 19: Setting Divert Number
BASIC OPERATIONS Setting divert number On main menu page,touch [Phone]->[Divert]. Total 3 telephone numbers can be set,touch the telephone number frame,then input the number by touching the digital keypad. Divert Numbers Tel 1: Tel 2: Tel 3: Inform Divert Phone * Touch icon on the screen to save the setting. -
Page 20: Sms Function
BASIC OPERATIONS You can review who is calling at some time. 1. Touch one of the calling list. 2. Touch icon to show the caller's image. Call Record Call Record Call Record 01/05 01/05 01/05 Playback caller's image When touch the 06-23 15:22 Calo... -
Page 21: Openning Staircase Light
BASIC OPERATIONS 3.Writing a message: • On main menu page,touch [SMS]->[Write a SMS] icon, and then select the sending address. • Write a message by touching the on-screen keypad.Up to 78 charc a ters can be entered for a message. •... -
Page 22: Motion Detect Function
BASIC OPERATIONS Motion detect function This function is available only if the setting of Motion Detect Enable is selected. This function should make effective by door station with motion detection. Follow the steps: 00:10 DS-1 • Detection off: close all motion detections of door station. •... -
Page 23: Setup Instructions
SETUP INSTRUCTIONS Setting date and time You can correct the current date and time at any time by following the procedure below. 1.On main menu page, touch settings icon ->[Date&Time]. Or directly touch current date and time area in shortcut to enter Date&Time setting page. 2.Touch the setting target of month, date, year, hour,minute and second individually, then to uch icon to change the value. -
Page 24: Setting Ring Volume
SETUP INSTRUCTIONS Setting ring volume The day/night ring volume can be set individually.The setting range is 0~9. • On main menu page, touch settings icon ->[Sounds]. • Select the Volume setting item,touch icon to adjust the levels. Settings will perform immediately. -
Page 25: Setting Monitor Time
SETUP INSTRUCTIONS 3.Rename the door station by touching the on-screen keypad. * Up to 12 characters can be entered for a name. Current name is displayed here. Current renamed door station Keypad type abc- Alphabet keypad DOOR1 RENAME 123-Number keypad DS1_ Edit box Delete the last character... -
Page 26: Enabling/Disabling Motion Detect Function
SETUP INSTRUCTIONS Enabling/Disabling motion detect function You can make it possible (ENABLE) or not (DISABLE) to activate motion d e tect function from this monitor. 1.On main menu page, touch settings icon ->[More...]. 2.Click Motion Detect Enable setting item,when “ “... -
Page 27: Changing The Display Language
SETUP INSTRUCTIONS Changing the language The default language can be customized.But you cac n h ange it to the language you need at any time. Follow the steps: • On main menu page, touch settings icon ->[Language]. • Touch desired language and select to save the setting. -
Page 28: System Configurations
SYSTEM CONFIGURATIONS Entering installer setup • On main menu page, touch [Logo] icon to enter About page. • When the screen stay in About page,press UNLOCK button on front panel and hold for 2 seconds. • A keypad is shown. Refer to the followings: 00:10 00:10... - Page 29 SYSTEM CONFIGURATIONS Entering Address setting page Input the key “@ and ok” to open Address Setting menu. Refer to the followings: INSTALLER SETUP ? + OK: Help Menu @ + OK: Address Setting Menu Setting master/slave monitor Maximum 4 monitors can be connected in one apartment, one master mon o ir t together with 3 slave monitors, so you should set the address correctly.(Note:must have one monitor to be set as a master monitor) •...
- Page 30 SYSTEM CONFIGURATIONS Setting user code In the building system, you can configure up to 32 apartamens in the basic version Each apartment must have a individual address from 00-31 and this address should be set on monitors or uniphones. If there is more than one monitor in one apartment, all monitors or uniphones have the same address.
- Page 31 SYSTEM CONFIGURATIONS Manual Input Address It’s available to input the address manually for this monitor. • Total 32 numbers to be set, from 00~31. • When multi monitors need to be installed in one a partment, these monitors should use the same user code, and the master/slave mode should be set on the monitor.
-
Page 32: Specyfications
SPECIFICATIONS Power supply: DC 20~28V Power consumption: Standby 0.29W; Working 7W Communication: Hands-free Screen: 7 Inch digital color TFT Display Resolutions: 800∗3(R, G, B) x 480 pixels Video signal: 1Vp-p, 75Ω, CCIR standard Mounting: Surface wall-mount Color: White,Black Wiring: 2 wires, non-polarity Dimension: 132(H)×226(W)×18(D)mm Memory card:... -
Page 33: Warranty Card
8. The condition to perform repair works is to deliver the Product with the Warranty Card and the proof of purchase. 9. Service Centre: Firma Handlowa Wena Al. Jerozolimskie 311 , 05 - 816 Reguły / near Warsaw Poland tel. +48 228 370 286; +48 228 174 003 e-mail: biuro@vidos.pl www.vidos.pl... - Page 34 Firma Handlowa Wena l. Jerozolimskie 311 05-816 Reguły/ near Warsaw Poland tel. +48 228 370 286; +48 228 174 008 e-mail: biuro@vidos.pl www.vidos.pl...
Need help?
Do you have a question about the duo M1021 and is the answer not in the manual?
Questions and answers