Table of Contents
Advertisement
Advertisement
Table of Contents

Related Manuals for Humminbird AS GR50


Summary of Contents for Humminbird AS GR50
- Page 1 GPS Receiver and Heading Sensor Installation Guide 531478-5_A...
- Page 2 Always operate the boat at very slow speeds if you suspect shallow water or submerged objects. WARNING! The electronic chart in your Humminbird® unit is an aid to navigation designed to facilitate the use of authorized government charts, not to replace them.
- Page 3 European Parliament and of the Council of 27 January 2003 on the restriction of the use of certain hazardous substances in electrical and electronic equipment. EU DECLARATION OF CONFORMITY: Hereby, Humminbird declares that this device is in compliance with the essential requirements and other relevant provisions of Directive 2014/53/EU.
- Page 4 ATTENTION INTERNATIONAL CUSTOMERS: Products sold in the U.S. are not intended for use in the international market. Humminbird® international units provide international features and are designed to meet country and regional regulations. Languages, maps, time zones, units of measurement, and warranty are examples of features that are customized for Humminbird®...
-
Page 5: Table Of Contents
Edit, Delete, or Hide Saved Tracks ........44 Contact Humminbird... -
Page 6: Overview
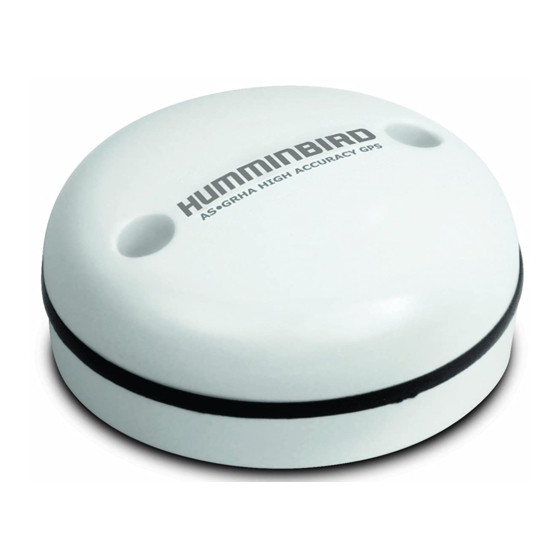
Installation Guide NOTE: The stem mount is not included. To purchase extension cables and other accessories, see our Web site at humminbird.com or call Humminbird Technical Support at 1-800-633-1468. The following functionality will be supported by your trackplotter when it is connected to the Sensor: •... -
Page 7: How Gps And Trackplotting Work
How GPS and Trackplotting Work Your Humminbird® uses GPS to determine your position and display it on a grid. GPS uses a constellation of satellites that continually send radio signals to the earth. The GPS receiver on your boat receives signals from satellites that are visible to it. -
Page 8: How The Heading Sensor Works
Magnetic North matches True North. If you have trailered the boat to a new location, the compass’ operation may also be affected by a different magnetic zone. The Humminbird® control head compensates for magnetic declination and also allows you to make additional adjustments from the menu system. -
Page 9: Installation Overview
• Cables: Test run the Sensor Cable from the chosen mounting location to the Control Head. 10 ft (3m) extension cables may be purchased from Humminbird® if your planned cable route exceeds 20 ft (6 m). Maximum cable length, including extension cables, should not exceed 50 ft (16 m). -
Page 10: Install The Sensor
2. Install the Sensor There are three different options to mount the sensor. Proceed to the section that matches the type of mounting location you will be using, as follows: Stem Mount with 1" - 14 Thread The sensor will be mounted on a stem or antenna pole. -
Page 11: Stem Mount With 1"-14 Thread
A. Stem Mount with 1"-14 Thread Use the following instructions to stem mount the Sensor: WARNING! If your Sensor includes a compass (AS GPS HS), do NOT mount it to a stem mount or antenna pole that contains ferrous metals. NOTE: It is important to review the mounting considerations and test run the cable route as indicated in Section 1 before proceeding with the installation. - Page 12 4. Route the Sensor cable through the stem Positioning the Arrow on the Compass and through the planned cable route. To use extension cables, see the details in Section 1: Choose the Mounting Location. 5. If the Sensor includes a compass (AS GPS HS), position the sensor so the arrow on the cover is pointed straight toward the front of the boat in the direction of travel.
-
Page 13: Access Under Mounting Location
B. Access Under Mounting Location Use the following instructions to deck mount the Sensor and route the cable down through the mounting surface: NOTE: It is important to review the mounting considerations and test run the cable route as indicated in Section 1 before proceeding with the installation. - Page 14 NOTE: Apply marine-grade silicone caulk or sealant to both screw and drilled holes as needed to protect your boat from water damage. 7. Align the Sensor’s screw holes over the pilot screw holes and attach with the #8 - 1 1/4" (32 mm) Phillips head screws. Hand tighten only. NOTE: If the mounting surface is thin or made of a light-weight material, you may need to add reinforcing material below the mounting surface in order to support the Sensor.
-
Page 15: No Access Under Mounting Location
C. No Access Under Mounting Location Use the following instructions to deck mount the Sensor and route the cable to the side if there is not space for a cable underneath the mounting location. NOTE: It is important to review the mounting considerations and test run the cable route as indicated in Section 1 before proceeding with the installation. - Page 16 3. With the cable routed, position the Sensor in Positioning the Arrow on the Compass the planned mounting location. If the Sensor includes a compass (AS GPS HS), position the sensor so the arrow on the cover is pointed straight toward the front of the boat in the direction of travel.
-
Page 17: Connect To The Control Head
3. Connect to the Control Head Use the following instructions to connect the Sensor cable to the control head. 1. Proceed to the instructions that correspond with your control head model. HELIX: Insert the Sensor’s NMEA-COM connector into the control head’s COM port. - Page 18 SOLIX: Connect a separately purchased SOLIX GPS/NMEA 0183 Splitter Data Cable to the Sensor’s NMEA-COM connector. See your cable installation guide for more details. Connect the Data Cable to the NMEA 0183 port on the control head or cable tray (if applicable). See your control head installation guide for details.
-
Page 19: Power On And Confirm Gps Reception
WARNING! It is important to finish all installation connections before powering on the control head. 4. Power on and Confirm GPS Reception Follow the instructions below to power on your Humminbird® control head. HELIX Series GPS Diagnostic View 1. Press the POWER/LIGHT key. - Page 20 4. Press the VIEW key repeatedly until the GPS Diagnostic View is displayed on the screen. Confirm that External GPS is displayed and the Fix Type indicates Enhanced or 3D. • If the GPS Diagnostic View is not displayed in the rotation, press the MENU key twice to open the Main Menu.
-
Page 21: Turn On Nmea Output And Confirm The Baud Rate (For Devices Connected To The Pigtail Only)
Sensor’s pigtail, it also needs to operate at 38400. See your device’s installation guide to set the baud rate to 38400. • If a GPS Receiver (AS GR16, AS GR50, AS GRP) is connected to the control head, and NMEA Output is turned on, the control head will operate exclusively at a baud rate of 4800. -
Page 22: Confirm The Heading Sensor Operation
Turn On/Off NMEA Output HELIX Series 1. Press the MENU key twice. 2. Select Setup tab > NMEA Output. 3. Press the RIGHT or LEFT Cursor keys to select On or Off. (Default = Off) NOTE: The menu option in your Fishing System will be called NMEA 0183 Output or NMEA Output. - Page 23 5. Select a Readout position and use the RIGHT or LEFT Cursor keys to select Heading. Select another Readout position and select Course. 6. Press the EXIT key until the Main Menu is closed. 7. Press the VIEW key until the Sonar View is displayed on the screen. 8.
- Page 24 Confirming the Heading Digital Readout (Sonar View) course (GPS required) heading (heading sensor required) SOLIX Series 1. Press the HOME key. 2. Select Settings > General > Units > Compass > Magnetic North. 3. With a Sonar View displayed on-screen, navigate the boat in a straight line, in calm, open water at 4.5 mph.
- Page 25 Confirming the Heading Digital Readout (Chart View) course (GPS required) heading (heading sensor required) Confirming the Heading Digital Readout (Sonar View) course (GPS required) heading (heading sensor required) Installation...
-
Page 26: Views
Waypoint Management Guide. The manuals are included on the CD that was included with your control head, or you can download these manuals from our Web site at humminbird.com. Views... -
Page 27: Bird's Eye View
Bird’s Eye View (HELIX Series only) Bird’s Eye View shows a 3-D, perspective view of the track from a point above and behind the boat (the eye point). As the boat turns, the eye point moves to follow the boat. •... -
Page 28: Chart View
Chart View Chart View shows the current track (also known as the position history or breadcrumb trail) showing where the boat has been, along with saved tracks, waypoints, and the current route (when navigating). Panning: Use the 4-WAY Cursor Control key (HELIX) or the Joystick (SOLIX) to move the grid around on the display in the direction of the key being pressed. - Page 29 Chart View with Active Cursor (SOLIX) depth course over ground bearing distance to active cursor latitude and longitude track scale to cursor go to cursor position of cursor Views...
-
Page 30: Combo View
Combo View Combo View is displayed as a split screen, with Chart View on one side and Sonar View on the other side of the screen. Combo View (HELIX) water surface tempetature depth course over ground speed of boat sonar window track scale chart window Combo View (SOLIX) -
Page 31: View Orientation
View Orientation The Chart View and Combo View allow you to choose the orientation of the view. • North-Up: The chart is oriented with North up on the display, and the vessel rotates according to its heading or COG (Course Over Ground). •... - Page 32 Chart Orientation set to Course Up chart north up orientation indicator When the boat is stationary, it is drawn as a circle. When the boat is in motion, it changes to a boat shape, pointed in the direction of motion. NOTE: If a Heading Sensor (AS GPS HS) is attached, the boat icon will always be displayed as a boat shape.
- Page 33 QUICK TIP! You can also select the Chart Orientation Menu on the status bar. See the illustration below. preview window menu selection Views...
-
Page 34: Introduction To Navigation
Introduction to Navigation Your Humminbird control head allows you to mark waypoints, create a route, and start navigating. Waypoints, routes, and tracks can be managed on-screen so you can save your favorites, edit names, and easily return to your favorite destinations. - Page 35 You can clear the Current Track or save it at any time. The current track represents your actual path so far. NOTE: The maximum number of waypoints, routes, and tracks may vary due to your Humminbird® control head model. See your control head operations manual for details. Introduction to Navigation...
-
Page 36: Save, Edit, Or Delete A Waypoint
Save, Edit, or Delete a Waypoint Save your current position as a waypoint HELIX Series 1. On the Track or Combo view, press the MENU key to display the X-Press™ Menu. 2. Select Mark, and press the RIGHT Cursor key to save the boat position as a waypoint. - Page 37 NOTE: When you save a waypoint by any of these methods, a numerical waypoint name is automatically assigned. You can edit the waypoint information later to give it a different name and select an icon to represent it (see Program or Edit the Waypoint Fields). Display the Waypoints submenu HELIX Series 1.
- Page 38 Program or Edit the waypoint fields HELIX Series Use the 4-WAY Cursor Control key to move from field to field, and use the UP or DOWN Cursor keys to change the character in the field. In the Waypoint Name, Latitude, and Longitude fields, press the UP or DOWN Cursor keys to change the letter or number.
-
Page 39: Navigate To A Waypoint Or Position
SOLIX Series 1. Press the HOME key. 2. Select the NAV Data tool. 3. Under Lists, select Waypoints. 4. Tap a waypoint or use the joystick to select it. 5. Press the ENTER key. 6. Select Full Info. 7. Select Delete. Navigate to a Waypoint or Position Navigate to the cursor position HELIX Series... - Page 40 Navigate to a specified waypoint HELIX Series 1. Press the MENU key once to display the Navigation X-Press™ Menu. 2. Select Go To, and press the RIGHT Cursor key. 3. Press the DOWN Cursor key to select a waypoint from the saved waypoints list, and press the RIGHT Cursor key to start navigation.
- Page 41 NOTE FOR HELIX USERS: When two or more waypoints overlap, or are displayed close together on a chart view, the screen will automatically declutter—waypoint names will shorten and the waypoint icons will change into small blue icons. To view a Decluttered Waypoint at full size, use the 4-WAY Cursor Control key to move the cursor onto a decluttered waypoint icon.
-
Page 42: Add A Waypoint Target Or Trolling Grid
1. Press the GO TO key. 2. Select Cancel Navigation. 3. Select Save Route or Discard Route. Add a Waypoint Target or Trolling Grid (HELIX models only) The Waypoint Target shows a target consisting of concentric circles in various distance ranges centered on the waypoint you choose. The Trolling Grid shows various distance ranges in grid format from the waypoint you choose. -
Page 43: Save Or Clear A Current Track
Chart View with Grid trolling grid Remove the Target or Trolling Grid: Press the MENU key once, choose Remove Target or Remove Grid from the Navigation X-Press™ Menu, and press the RIGHT Cursor key. NOTE: Only one waypoint can have a target or a grid applied to it at one time. If you apply a target or a grid to a new waypoint, the original waypoint will lose its target or grid. -
Page 44: Edit, Delete, Or Hide Saved Tracks
NOTE: When you save a track, a name is automatically assigned to it, but it can be re-named later. Clear the current track HELIX Series 1. From the Navigation X-Press™ Menu, select Clear Current Track, and press the RIGHT Cursor key. The track will be removed from the display and permanently deleted. - Page 45 2. Select the track you want to edit, and press the RIGHT Cursor key. When the Edit Track dialog box appears, use the 4-WAY Cursor Control key to move between fields. In the Name field, press the UP or DOWN Cursor keys to change the letter or number.
- Page 46 Hide or display a saved track HELIX Series 1. From the Saved Tracks submenu, select Edit, and press the RIGHT Cursor key to display the saved tracks list. 2. Select a track, and press the RIGHT Cursor key. 3. Select the Visibility field, and press the UP or DOWN Cursor keys to select Hidden or Visible.
- Page 47 Notes Notes...
-
Page 48: Contact Humminbird
Contact Humminbird Contact Humminbird Technical Support in any of the following ways: Web site: humminbird.com E-mail: service@humminbird.com Telephone: 1-800-633-1468 Direct Shipping: Humminbird Service Department 678 Humminbird Lane Eufaula, AL 36027 USA Hours of Operation: Monday - Friday 8:00 a.m. to 4:30 p.m. (Central Standard Time) Social Media Resources: Facebook.com/HumminbirdElectronics...
Need help?
Do you have a question about the AS GR50 and is the answer not in the manual?
Questions and answers