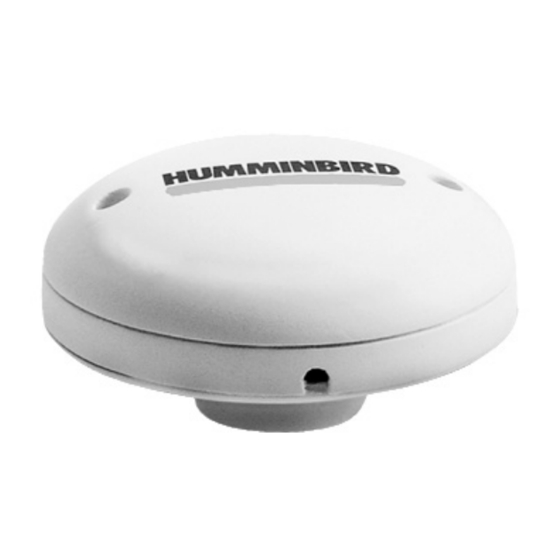
Humminbird GR16 Accessories Manual
Humminbird gps receiver owner's manual
Hide thumbs
Also See for GR16:
- Accessories manual (66 pages) ,
- Installation manual (48 pages) ,
- Operation manual (32 pages)
Table of Contents
Advertisement
Advertisement
Table of Contents

Related Manuals for Humminbird GR16


Summary of Contents for Humminbird GR16
- Page 1 GR16 GPS Receiver GR16 GPS Receiver Accessory Manual Accessory Manual 531478-1_B...
-
Page 2: Thank You
Thank you for choosing Humminbird®, America's #1 name in fishfinders. Humminbird® has built its reputation by designing and manufacturing top-quality, thoroughly reliable marine equipment. Your Humminbird® accessory is designed for trouble-free use in even the harshest marine environment. In the unlikely event that your Humminbird® accessory does require repairs, we offer an exclusive Service Policy - free of charge during the first year after purchase, and available at a reasonable rate after the one-year period. -
Page 3: Table Of Contents
Table of Contents GR16 GPS Connection Kit How GPS and Trackplotting Work ... 1 Connecting a GR16 GPS Receiver to the Fishfinder ... 2 GPS Receiver Installation ... 4 Stem Mount with 1” - 14 Thread ... 4 Access Under Mounting Location... 5 No Access Under Mounting Location ... - Page 4 Navigation X-Press™ Menu (Navigation Views only) Mark... 24 Zoom ... 24 Go To ... 24 Waypoint [Name] (only with an active cursor on a waypoint)... 25 Cursor to Waypoint (Chart or Combo View only)... 26 Save Current Track ... 26 Clear Current Track...
- Page 5 NOTE: Entries in this Table of Contents which list (with PC Connect Cable Only) require the purchase of a separate accessory. You can visit our website at www.humminbird.com to order these accessories online or contact our Customer Resource Center at 1-800-633-1468.
-
Page 6: Gr16 Gps Connection Kit
GR16 Antenna Cable length up to 50 feet. How GPS and Trackplotting Work Your Humminbird® uses GPS and sonar to determine your position, display it on a grid, and provide detailed underwater information. The Global Positioning System (GPS) is a satellite navigation system designed and maintained by the U.S. -
Page 7: Connecting A Gr16 Gps Receiver To The Fishfinder
2. If you are already using other Fishfinder accessories plugged into the COM connector, you will also need to use the AS-YC ("Y") cable included in your GR16 GPS Hardware Kit so that you can use both the accessories and your GPS Receiver at the same time. - Page 8 CAUTION! Please use caution before connecting the red +12V wire to any other NMEA device. This is an output voltage provided by the Fishfinder unit and GR16 receiver and should only be connected to those NMEA devices that need a 12 volt input.
-
Page 9: Gps Receiver Installation
GPS receiver, follow the instructions included with that hardware to attach the stem to the boat. NOTE: 10’ extension cables may be purchased from Humminbird® if your planned cable route exceeds 20’ (6 m). Maximum cable length, including extension cables, should not exceed 50’ (16 m). Visit our website at www.humminbird.com, or call our Customer Resource... -
Page 10: Access Under Mounting Location
Fishfinder control head to the planned mounting location of the GPS Receiver. NOTE: 10’ extension cables may be purchased from Humminbird® if your planned cable route exceeds 20’ (6 m). Maximum cable length, including extension cables, should not exceed 50’ (16 m). Visit our website at www.humminbird.com, or call our Customer Resource... -
Page 11: No Access Under Mounting Location
Fishfinder control head to the planned mounting location of the GPS Receiver. NOTE: 10’ extension cables may be purchased from Humminbird® if your planned cable route exceeds 20’ (6 m). Maximum cable length, including extension cables, should not exceed 50’ (16 m). Visit our website at www.humminbird.com, or call our Customer Resource... -
Page 12: Views
Sonar Views Combo Bird's View View Track View Bird’s Eye View Bird's Eye View - This view shows a 3-D, perspective view of the track from a point above and behind the boat (the eye point). As the boat turns, the eye point moves to follow the boat. When you press the 4-WAY Cursor key in the Bird’s Eye View, the position of the eye point will shift. -
Page 13: Track View
Track View Track View - This view shows the current track (also known as the position history or breadcrumb trail) showing where the boat has been, along with saved tracks, waypoints, and the current route (when navigating). Depth Track Scale Latitude and Longitude Position of... -
Page 14: Combo View
Combo View Combo View - This view is displayed as a split screen, with Track View on the left and Sonar View on the right side of the screen. The width of the sonar window can be changed. Depth Track Scale Water Surface Temperature View Orientation... -
Page 15: Introduction To Navigation
Introduction to Navigation Use your Fishfinder to establish waypoints at areas of interest and to navigate to those waypoints via a route (representing the shortest intended distance between waypoints). You can also view and save tracks, which represent the actual path of the boat. Waypoints, Routes and Tracks Waypoints are stored positions that allow you to mark areas of interest or navigation points. -
Page 16: Save, Edit Or Delete A Waypoint
Save, Edit, or Delete a Waypoint Save your current position as a waypoint: On any view, press the MENU key to display the X-Press™ menu. Select Mark and press the RIGHT Cursor key to save the current position of the boat as a waypoint. -
Page 17: Navigate To A Waypoint Or Position
To make it easier to select a waypoint, select Sort By and press the RIGHT or LEFT Cursor keys to select a sort order: • Name shows the waypoints alphabetically • Time shows the most recently-created waypoint first • Distance shows the closest waypoint first. Delete a waypoint: From the Waypoints submenu, select Delete and press the RIGHT Cursor key to display a list of waypoints. -
Page 18: Add A Waypoint Target Or Trolling Grid
Add a Waypoint Target or Trolling Grid Waypoint Target Track Scale Track View with Target Track Scale Waypoint Trolling Grid Track View with Grid NOTE: Only one waypoint can have either a target or a grid at one time. If you apply a target or a grid to a new waypoint, the original waypoint will lose its target or grid. -
Page 19: Save Or Clear A Current Track
Save or Clear a Current Track Save the current track: From the Navigation X-Press™ menu, select Save Current Track and press the RIGHT Cursor key. The track will remain on the display, but will change from black to gray. To remove the track completely from the display, see Edit, Delete or Hide Saved Tracks. NOTE: When you save a track, a name is automatically assigned. -
Page 20: The Menu System
The Menu System The menu system is divided into easy-to-use menu modules. The main components of the menu system are: Start-Up Options Menu - Press the MENU key during the power up sequence to view the Start- Up Options menu. X-Press™... - Page 21 User Mode (Normal or Advanced) - An Advanced Mode is provided for users who desire the highest level of control over the Fishing System and Normal Mode for users who desire greater simplicity and fewer menu choices. Additional Advanced menu choices will be displayed throughout the menu system when you navigate to specific menus while in Advanced Mode.
-
Page 22: Start-Up Options Menu
Start-Up Options Menu See the following paragraphs for more information about each of these choices. Normal Operation Use Normal operation for on the water operation with a transducer connected. In addition, your Fishing System uses advanced transducer detection methods to determine if a transducer is connected. -
Page 23: Simulator
NOTE: To get the full benefit of the Simulator, it is important to select Simulator manually from the Start-Up Options menu as opposed to letting the Fishing System enter Simulator automatically (as it will if a transducer is not connected and you do nothing during power up). -
Page 24: Accessory Test
Accessory Test lists the accessories connected to the system. NOTE: The speed accessory will be detected only if the paddlewheel has moved since your Fishing System was powered up. NOTE: GPS will be shown as Connected when your Fishing System detects your GR16 GPS Receiver. -
Page 25: Pc Connect (With Pc Connect Cable Only)
Connect Cable accessory. NOTE: The PC Connect Cable requires a separate purchase. For more information visit our website at www.humminbird.com or contact our Customer Resource Center at 1-800-633-1468. Exit PC Connect mode by powering the Fishing System off. (With PC Connect Cable only) -
Page 26: Sonar X-Press™ Menu (Sonar Views Only)
Sonar X-Press™ Menu (Sonar Views only) The Sonar X-Press™ menu provides access to the settings most frequently-used. Press the MENU key once while in any of the Sonar Views to access the Sonar X-Press™ menu. NOTE: Menu choices will vary depending on system settings such as whether the unit is set for Advanced User mode. -
Page 27: Mark
To Mark a Waypoint: 1. Highlight Mark on the Sonar X-Press™ menu. 2. Use the RIGHT 4-Way Cursor Control key to mark the location of a Waypoint. Cancel Navigation discards the current route and exits Navigation Mode. This menu choice will only appear when you are currently navigating a route. -
Page 28: Navigation X-Press™ Menu (Navigation Views Only)
Navigation X-Press Menu Navigation X-Press™ Menu (Navigation Views only) The Navigation X-Press™ menu provides access to the settings most frequently used. Press the MENU key once while in the Bird's Eye View, the Track or the Combo View to access the Navigation X-Press™... -
Page 29: Mark
at the current boat location, or, if the Cursor is active, at the current Cursor location. To Mark a Waypoint: 1. Highlight Mark on the Navigation X-Press™ menu. 2. Use the RIGHT 4-Way Cursor Control key to mark the location of a Waypoint. To Zoom: 1. -
Page 30: Waypoint [Name] (Only With An Active Cursor On A Waypoint)
Waypoint [Name] allows you to view the Waypoints submenu for the waypoint under your cursor. To view the Waypoint [Name] Submenu: 1. Move the cursor onto an existing waypoint and press the MENU key once, or use Cursor to Waypoint to select a waypoint from a list of saved waypoints. 2. -
Page 31: Cursor To Waypoint (Chart Or Combo View Only)
Cursor to Waypoint allows you to quickly move the cursor to any saved waypoint, so that you can locate it or edit it. NOTE: This X-Press™ menu item appears only if you have saved waypoints. To move cursor to a saved waypoint: 1. -
Page 32: Skip Next Waypoint (Only When Navigating)
Skip Next Waypoint removes the next waypoint from the current route. This menu choice will only appear when you are currently navigating a route. To Skip Next Waypoint: 1. Highlight Skip Next Waypoint on the Navigation X-Press™ menu. 2. Use the RIGHT 4-WAY Cursor Control key to initiate skipping the next waypoint. 3. -
Page 33: Remove Grid (Only If Grid Is Active)
Remove Grid removes the waypoint grid from the display. This menu choice will only appear when a grid has already been applied to a waypoint. To Remove a Grid: 1. Highlight Remove Grid on the Navigation X-Press™ menu. 2. Use the RIGHT 4-WAY Cursor Control key to remove the grid. Sonar Window sets the size of the Sonar Window in the Combo View. - Page 34 Waypoint [Name] Submenu The Waypoint Submenu contains the following menu choices: Edit allows you to edit the Name, Position (Latitude and Longitude) and select the Icon that will be used to represent the waypoint in the Chart and Combo Views. Delete allows you to delete a waypoint from the list of saved waypoints.
-
Page 35: Navigation Menu Tab
NOTE: Menu choices will vary depending on system settings. The Navigation Menu Tab will be added to the menu system when the GR16 is connected to your Fishing System, and the following menu choices will appear in the menu tab: •... -
Page 36: Current Track
To view the Current Track Submenu: 1. Highlight Current Track on the Navigation main menu. 2. Use the RIGHT 4-WAY Cursor Control keys to view the Current Track submenu. The Current Track Submenu contains the following menu choices: Save Current Track allows you to save the current track. Clear Current Track allows you to clear the current track. -
Page 37: Waypoints
To view the Waypoints Submenu: 1. Highlight Waypoints on the Navigation main menu. 2. Use the RIGHT 4-WAY Cursor Control keys to view the Waypoints submenu. The Waypoints Submenu contains the following menu choices: Create allows you to create a new waypoint and edit it immediately. The current boat position will be used as the default, but you can set the coordinates to any valid position. -
Page 38: View Orientation
and Combo Views should be drawn North-Up or Course-Up. To change the View Orientation setting: 1. Highlight View Orientation on the Navigation main menu. 2. Use the LEFT or RIGHT 4-WAY Cursor Control keys to change the View Orientation setting. (North-Up, Course-Up, Default = North-Up) NOTE: The View Orientation setting does not apply to the Bird's Eye View. -
Page 39: Trackpoint Interval
between trackpoints. The current track can only contain up to 2000 trackpoints, so longer time periods cause the track to extend back further in time, but will be less detailed. NOTE: Trackpoint Interval works in conjunction with Track Min Distance. Both conditions must be met before a trackpoint is added to the current track. -
Page 40: Map Datum (Advanced)
Map Datum allows you to change the map coordinate system used by the Fishing System to match those of a paper map. The Map Datum menu choice is only available when User Mode is set to Advanced (see Setup Menu Tab: User Mode). NOTE: See Setup Menu Tab: User Mode in your Fishing System Operations manual. -
Page 41: Alarms Menu Tab
Alarms Menu See your Fishing System Operations Manual for information on the standard Alarm Menu choices. Alarms Menu Tab From any view, press the MENU key twice to access the Main Menu System. The Alarms tab will be the default selection. NOTE: When an alarm is triggered, you can silence it by pressing any key. -
Page 42: 7Off Course Alarm
off course based on the menu setting when navigating. Off Course Alarm allows you to set how far the boat is allowed to move off course before the Off Course Alarm will sound. To change the Off Course Alarm setting: 1. -
Page 43: Drift Alarm
distance from the boat’s anchored position, based on the menu setting. Drift Alarm allows you to set the size of a perimeter around the boat’s anchored position; if the anchored boat drifts outside of that perimeter, the Drift Alarm will sound. To change the Drift Alarm setting: 1. -
Page 44: Setup Menu Tab
Setup Menu Tab From any view, press the MENU key twice to access the tabbed Main Menu System, then press the RIGHT cursor key until the Setup tab is selected. NOTE: Menu choices will vary depending on system settings such as whether the unit is set for Advanced User mode and what accessories are attached to the unit. -
Page 45: Units - Distance
To change the Units - Distance setting: 1. Highlight Units - Distance on the Setup menu. 2. Use the LEFT or RIGHT 4-WAY Cursor Control keys to change the Units - Distance setting. (Domestic Models: Statute Miles, Nautical Miles; Default = Statute Miles; International Models: Meters/Kilometers, Meters/Nautical Miles, Feet/Statute Miles, Feet/Nautical Miles;... -
Page 46: Local Time Zone (Advanced)
Local Time Zone selects your time zone in reference to the time reported by the GPS receiver when Time+Date is selected as a Digital Readout on the Sonar View (see Select Readouts). This menu choice is available only when in Advanced User Mode (see Setup Menu Tab: User Mode.) NOTE: See Setup Menu Tab: Select Readouts and User Mode in your Fishing System Operations manual. -
Page 47: Position Format (Advanced)
Position Format selects the format of the latitude and longitude position display. This menu choice is available only when in Advanced User Mode (see Setup Menu Tab: User Mode.) NOTE: See Setup Menu Tab: User Mode in your Fishing System Operations manual. To change the Position Format setting: 1. -
Page 48: Date Format (Advanced, International Only)
Date Format changes the date format used by the unit. This menu choice is available only when in Advanced User Mode (see Setup Menu Tab: User Mode.) International Models only. Date Format selects the format for the date display when Time + Date is selected as a Digital Readout on the Sonar View. - Page 49 To turn NMEA Output on or off: 1. Make sure you are in Advanced User Mode, then highlight NMEA Output on the Setup menu. 2. Use the LEFT or RIGHT 4-WAY Cursor Control keys to change the NMEA Output to On or Off (Off, On, Default = Off)
-
Page 50: Troubleshooting
Troubleshooting Before contacting the Humminbird® Customer Resource Center, please read the following section. Taking the time to review these troubleshooting guidelines may allow you to solve a performance problem yourself, and therefore avoid sending your unit back for repair. Fishing System Doesn’t Power Up If your Fishing System doesn’t power up, use the Installation Guide that also comes with it for... -
Page 51: Display Problems
Display Problems There are several main conditions or sources of possible interference that may cause problems with the quality of the information displayed on the control head. Look in the following table for some symptoms of display problems and possible solutions: Problem The control head loses power at high speeds. -
Page 52: Finding The Cause Of Noise
Finding the Cause of Noise Electrical noise usually affects the display with many black dots at high speeds, and high sensitivity readings. One or more of the following sources can cause noise or interference: Possible Source of Noise Other electronic devices The boat’s engine Cavitation from the boat’s propeller... -
Page 53: Humminbird® Accessories
This accessory requires the MSWindows-compatible HumminbirdPC™ software downloaded from our website to your PC in order to communicate with the Fishing System. Be sure to check out our website www.humminbird.com for additional new and exciting accessories to grow your Fishing System! NOTE: Each accessory requires a separate purchase. -
Page 54: Gps & Navigation Glossary
Acquisition Time: The length of time that a GPS receiver typically takes to determine a position from at least three satellites. Humminbird® GPS receivers provide very fast acquisition times (under one minute), permitting users to get out on the water faster. - Page 55 A GPS receiver, such as that included with many Humminbird® products, receives the signals from these satellites and is able to determine position based on very slight differences in the time each signal is received and the receiver’s knowledge of the location of each of the satellites.
- Page 56 MMC is a very rugged format suitable for the marine environment, but it is not waterproof. The MMC is removable from Humminbird® products, and can be used in a PC that is equipped with an appropriate card reader. MMC is the same format that many digital cameras use. See SD.
- Page 57 Greenwich England. (UTC is equivalent to Greenwich Mean Time (GMT)). To display the correct Local Time in a Humminbird® GPS unit, the user must use the Local Time Zone menu and select the time zone (i.e. EST, CST).
- Page 58 GPS receiver’s memory. This can include a marker buoy, dock, fishing hole or anywhere else the user may want to return to. Humminbird® products offer the ability to name and assign a symbol to the saved location. Depth, Date and Time of Day when the waypoint was created is also saved.
-
Page 59: Notes
Notes:... -
Page 60: Contact Humminbird
Contact Humminbird® Contact the Humminbird® Customer Resource Center in any of the following ways: By Telephone: (Monday - Friday 8:00 a.m. to 4:30 p.m. Central Standard Time): 1-800-633-1468 By e-mail: (typically we respond to your e-mail within three business days): custserv@johnsonoutdoors.com...
Need help?
Do you have a question about the GR16 and is the answer not in the manual?
Questions and answers