Table of Contents
Advertisement
Advertisement
Table of Contents

Subscribe to Our Youtube Channel
Summary of Contents for Ryobi RED1850Li40
- Page 1 ORIGINAL INSTRUCTIONS Cordless Edger RED1850Li40 RED1850Li20 RED1850Li15 OED1850...
- Page 2 Important! It is essential that you read the instructions in this manual before assembling, operating and maintaining the product. Subject to technical modification.
-
Page 3: Intended Use
Safety, performance, and dependability have been given PERSONAL SAFETY top priority in the design of your cordless edger. ■ Stay alert, watch what you are doing and use common sense when operating a power tool. Do INTENDED USE not use a power tool while you are tired or under the influence of drugs, alcohol or medication. - Page 4 ■ Use the power tool, accessories and tool bits etc. there is a risk of lightning. in accordance with these instructions, taking into ■ Use the product in daylight or with good artificial light. account the working conditions and the work to ■...
-
Page 5: Transportation And Storage
OVERLOAD PROTECTION RYOBI 18 V lithium-ion batteries are designed with features ■ Turn off and remove the battery pack before conducting that protect the lithium-ion cells and maximise battery life. -
Page 6: Risk Reduction
RISK REDUCTION Keep feet away from the rotating blade. It has been reported that vibrations from handheld tools may contribute to a condition called Raynaud’s Syndrome. Symptoms may include tingling, numbness, and blanching Avoid using in wet or damp conditions. of the fingers, usually apparent upon exposure to cold. - Page 7 WHAT’S IN THE BOX RED1850Li40 RED1850Li20 RED1850Li15...
- Page 8 WHAT’S IN THE BOX OED1850...
-
Page 9: Know Your Product
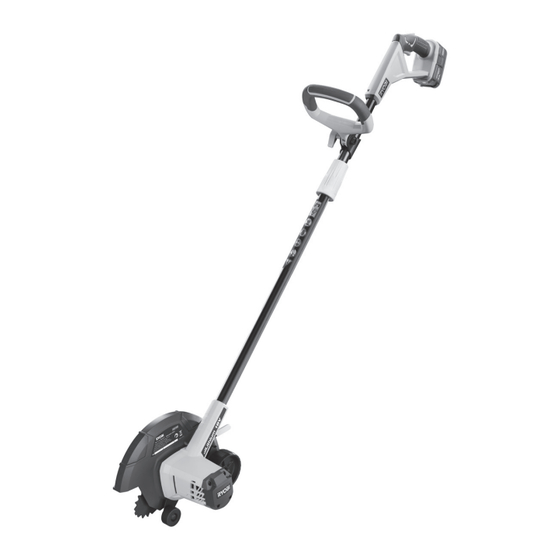
Know your product KNOW YOUR PRODUCT 1. Variable speed trigger 9. Blade 2. Lock-out trigger 10. Motor 3. Rear handle 11. Blade guard 4. Battery pack 12. Lower shaft 5. Coupler 13. Front handle 6. Battery charger 7. Depth adjustment lever 8. -
Page 10: Getting Started
GETTING STARTED Install the lower shaft to the upper shaft. Tighten the coupler to Always wear safety goggles or safety glasses with side shields secure. when operating the product. Wear non-slip, heavy-duty protective gloves. Wear non-skid, protective footwear that will protect your feet and improve your footing on slippery surfaces. - Page 11 GETTING STARTED Install the front handle. Re-insert and tighten the upper-shaft knob Loosen and remove the upper-shaft knob. to secure. NOTE: The angle of the front handle can be adjusted 180°.
- Page 12 OVERVIEW Operating the edger Adjusting the depth of cut p.11 p.13 Replacing the blade Cleaning the edger Storing the edger p.14 p.16 p.17...
-
Page 13: Operation
OPERATION OPERATING THE EDGER WARNING: Always use two hands to operate the product. Hold the rear handle with the right hand and the front handle with the left hand. WARNING: Best appearance is obtained when the grass is dry. Avoid using the edger in wet soil or wet grass areas. - Page 14 OPERATION WARNING: Keep hands and feet away from the blade at all times and especially when switching on the motor. 3. Use the edger along sidewalks, driveways, flower beds, curbs, and similar areas. NOTE: Cut at a steady pace. If the blade begins to bog down, you are edging too fast;...
- Page 15 OPERATION ADJUSTING THE DEPTH OF CUT 1. Remove the battery pack. 2. Move the depth adjustment lever up to increase the depth of cut, or down to decrease the depth of cut. NOTE: The depth adjustment lever locks into one of four positions. NOTE: Adjust the blade depth from 15 mm (0.59 in.) to 45 mm (1.77 in.) deep initially.
- Page 16 MAINTENANCE REPLACING THE BLADE 1. Remove the battery pack. 2. Place the product on a level surface on the ground. Position the product with the motor side down and the blade guard side up. 3. Align the slot in the inner flange with the slot in the motor ring.
- Page 17 MAINTENANCE 5. Center the new blade on the inner flange, making sure that the blade sits flat. NOTE: Install the outer flange properly. Only the outer ring of the outer flange, not the inner ring with the hole, must touch the blade. 6.
- Page 18 MAINTENANCE CLEANING THE EDGER 1. Remove the battery pack. 2. Clean all foreign material from the product with a soft, dry brush. WARNING: Avoid using solvents when cleaning plastic parts. Most plastics are susceptible to damage from various types of commercial solvents and may be damaged by their use.
- Page 19 STORAGE STORING THE EDGER NOTE: Clean the product before storing. 1. Remove the battery pack. 2. Loosen the coupler. Remove the lower shaft from the upper shaft. 3. Store the product in a cool, dry, and well- ventilated place that is inaccessible to children and away from sources of ignition.
-
Page 20: Product Specifications
The declared vibration value has been measured with a Cordless Edger standard test method and may be used to compare one tool with another. Model RED1850Li40 / RED1850Li20 / The declared vibration value may be used in a preliminary RED1850Li15 / assessment of exposure. - Page 24 Techtronic Industries Australia Pty Ltd 31 Gilby Road, Mount Waverley, VIC 3149, Melbourne, Australia Techtronic Industries N.Z. Limited Unit C, 70 Business Parade South, RYOBI is a trademark of Ryobi Limited, Highbrook, Auckland 2013, New Zealand and is used under license. 961481060-01...


Need help?
Do you have a question about the RED1850Li40 and is the answer not in the manual?
Questions and answers