Table of Contents
Advertisement
Quick Links
Advertisement
Table of Contents

Related Manuals for BenQ DC T700


Summary of Contents for BenQ DC T700
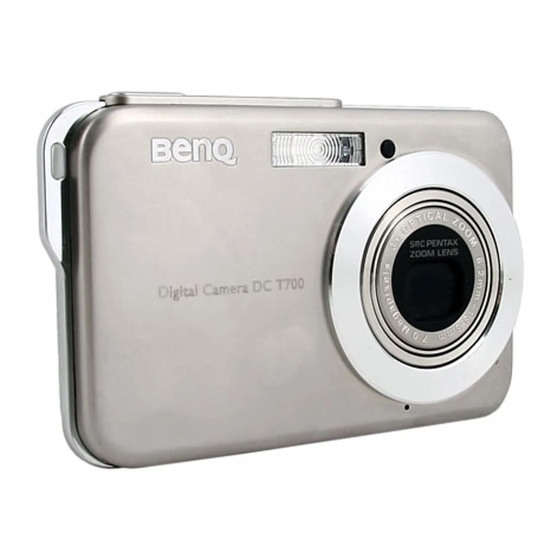
- Page 1 DC T700 Digital Camera User Manual Welcome...
- Page 2 Copyright Copyright 2007 by BenQ Corporation. All rights reserved. No part of this publication may be reproduced, transmitted, transcribed, stored in a retrieval system or translated into any language or computer language, in any form or by any means, electronic, mechanical, magnetic, optical, chemical, manual or otherwise, without the prior written permission of this company.
- Page 3 A “Declaration of Conformity” in accordance with the above Directives has been made and is available from BenQ Corp. upon request. FCC Statement This equipment has been tested and found to comply with the limits for a Class B digital device, pursuant to Part 15 of the FCC Rules.
-
Page 4: Table Of Contents
Table of Contents Table of Contents Touring the camera ......1 Playback mode ......16 Checking the package contents ..1 Options for playback and editing 17 Camera components ..... 1 Playback palette ......17 Front view ........1 Slideshow ........17 Rear view ..........2 Resize .......... -
Page 5: Touring The Camera
Touring the camera 1 Touring the camera Checking the package contents Carefully unpack your kit box and ensure that you have the following items. 1. User Manual 2. Digital camera 3. USB cable 4. Battery 5. Stylus (touch pen) 6. Hand strap 7. -
Page 6: Rear View
2 Preparing the camera for use Rear view 1. Touch screen (LCD display) 2. T (Tele): Zoom-in 3. W (Wide): Zoom-out or thumbnail view (playback) 4. Strap eyelet 5. MENU button or return to the previous menu 6. Play button (toggling between capture and playback modes) -
Page 7: Charging The Battery
Preparing the camera for use 3 To remove the battery: 1. Open the battery/SD card cover. 2. Release the battery lock lever. 3. When the battery has come out a little, gently pull it out the rest of the way. 4. -
Page 8: Using An Sd Card
4 Preparing the camera for use Using an SD card The camera comes with internal memory for storing captured images, video clips, or audio files. You can also add an SD (Secure Digital) card to store more files. To install an SD card: 1. -
Page 9: Operating The Camera
Operating the camera 5 Operating the camera The procedure below is a general guideline for basic operation. It is particularly useful if you are new to the camera. 1. Press 2. Tap the touch screen or press for desired options. 3. -
Page 10: Capture Mode
6 Capture mode Capture mode Item Description Page reference A scene mode selected from the Capture palette Flash mode Drive mode Focus mode Memory card type (SD or internal) Number of shots available Battery status Image size Image quality White balance AE metering ISO sensitivity Date and time (or Histogram) -
Page 11: Capture Options
Capture mode 7 Capture options By default, five options show when you tap the touch screen in the capture mode: Icon Mode Description Page reference Capture palette Displays a number of scene modes to choose from. Flash Offers various flash options. Drive Sets self-timer and continuous shooting. -
Page 12: Flash Mode
8 Capture mode S.S.F. Reduces blur caused by camera vibration, and thus (Super Shake-Free) improves image quality and clearness. ISO value is also automatically adjusted based on the ambient brightness. Food Captures food by enhancing color brightness and giving more vivid colors. Frame Composite Adds a photo frame of your choice when capturing an image. -
Page 13: Drive Mode
Capture mode 9 Soft flash Opens the shutter for a longer period and fires the flash just before it closes. Select this mode for illuminating a foreground subject while retaining a darker background. It is useful when capturing a night scene with people in the foreground. -
Page 14: Battery Status
10 Capture mode Battery status Icon Description Battery power remains adequate. Battery power is low. Battery power is very low. You should replace the battery ASAP. Image size Icon Description Icon Description 7 megapixels (3072 x 2304) 3 megapixels (2048 x 1536) 5 megapixels (2592 x 1944) 2 megapixels (1600 x 1200) 4 megapixels (2304 x 1728) -
Page 15: White Balance
Capture mode 11 White balance White balance compensates for color temperatures in different lighting conditions, so white and other colors can display properly when you capture images. Icon Mode Description Auto Adjusts white balance automatically. Daylight Used in bright daylight conditions. Shade Used in cloudy, twilight, or shady conditions. -
Page 16: Ae Metering
12 Capture mode AE metering Icon Mode Description Automatic Exposure: Multiple Detects the exposure based on multiple points in the subject area. Automatic Exposure: Center Detects the exposure of the entire shooting screen, but gives more importance to the values near center. -
Page 17: Setting Ev
Capture mode 13 Setting EV EV (exposure value) lightens or darkens the entire image. Adjust EV when the brightness between the subject and the background is not balanced, or when the subject occupies only a small part of the picture. To select an EV: 1. -
Page 18: Common Settings
14 Capture mode Common settings Here you can decide whether to enable digital zoom, choose the stored settings for the camera to remember (useful when you turn it on next time), or select the hot keys to be displayed when you tap the touch screen (by default, there are 4 icons). To select a common option: 1. -
Page 19: Other Settings
Other settings 15 Other settings Icon Mode Description Format Formats the internal memory or the SD card. Date Adjust Adjusts date, time, and displayed format. World Time Sets date and time of another place different from your home town. Language Sets the displayed language on the touch screen. -
Page 20: Playback Mode
16 Playback mode Playback mode Press to enter the playback mode. • When the camera is off, pressing while holding will enter the playback mode. • In the capture mode, press to enter the playback mode. • In the playback mode, press or the Shutter to switch to the capture mode. -
Page 21: Options For Playback And Editing
Playback mode 17 Options for playback and editing By default, seven options show when you tap the touch screen in the playback mode: Icon Mode Description Page reference Playback palette Offers a number of playback options such as slideshow and resizing. Enlargement Magnifies images. -
Page 22: Resize
18 Playback mode 3. Select time interval, screen effect, and sound effect as needed. 4. Tap Start. 5. The slideshow will automatically play and stop. If you want to stop it at any time, tap the touch screen or press the Shutter, zoom-in/out buttons (T/W), , or Resize Changes an image to a smaller size. -
Page 23: Voice Memo
Playback mode 19 Voice memo Inserts a voice annotation to an image file. To add a voice memo: 1. Press and select an image. Then tap the touch screen. 2. Tap > > OK. 3. Start recording your voice. Tap to stop. -
Page 24: Viewing Multiple Files At A Time
20 Playback mode 3. Press T to zoom-in or W to zoom-out. Alternatively, tap the touch screen > . You can also tap + or - to change the zoom ratio. 4. Move and drag the blue frame on the upper-left corner to move quickly to a particular part of the image. -
Page 25: Adding Drawings And Stamps To An Image
Playback mode 21 Adding drawings and stamps to an image Adds preset or customized drawings (including handwriting) and stamps to an image. • Drawings and stamps cannot be added to an image of 640 x 480 or an audio/video file. •... -
Page 26: Adding A Photo Frame
22 Playback mode My Stamps Selects a custom-made stamp. To select a custom-made stamp: 1. Tap , and then tap a stamp you made. If you want to rotate a stamp, tap and select an orientation. 2. Tap OK. 3. On the touch screen, tap the location where you want to add a stamp. -
Page 27: Bundled Software
Bundled software 23 Bundled software The camera offers the following programs on a CD. ArcSoft Combines photo editing with creative enhancement and sharing tools PhotoImpression 5 that maximize your digital media experience. ArcSoft Creates multimedia presentations by combining photos and video VideoImpression 2 clips with audio, text and scene transitions. -
Page 28: Printing With Pictbridge
24 Printing images Printing with PictBridge You can directly print images by connecting your camera to a PictBridge-compatible printer without using a computer. To print images from a PictBridge-compatible printer: 1. Make sure the USB connection is set to PictBridge. (Press , and then tap >... -
Page 29: Troubleshooting And Service Information
Troubleshooting and service information 25 Troubleshooting and service information If your camera cannot operate normally, see the frequently encountered problems and solutions listed below. If the problem persists, contact your nearest service center or technical support. Problem Cause Solution I cannot play back The MPEG-4 video compression Make sure you are using Windows video clips by... -
Page 30: Technical Support
Turn on the camera, select images with printer when the camera is PictBridge, and then connect to the PictBridge- powered off. printer. compliant printers. Technical support For technical assistance, free driver updates, product information, and news releases, visit the following web site: http://www.BenQ.com... -
Page 31: Specifications
Specifications 27 Specifications Image sensor 7.2-megapixel CCD; size: 1/2.5-inch LCD display 3-inch LTPS LCD; 230K dots Zoom Optical: 3X Digital: 4X (preview) / 12X (playback) Lens F2.7 ~ F5.2 Wide: 6.2 mm (135 camera: 37.5 mm) Tele: 18.6 mm (135 camera: 112.5 mm) Focus TTL Auto Focus Focus range... - Page 32 28 Specifications System requirements • Pentium III 600 Mhz or higher compatible CPU • 64 MB RAM • Optical disc drive • Windows Vista/XP/2000/Me • 128 MB free hard disk space • Available USB port...
Need help?
Do you have a question about the DC T700 and is the answer not in the manual?
Questions and answers