Table of Contents
Advertisement
Quick Links
Advertisement
Table of Contents

Subscribe to Our Youtube Channel
Related Manuals for Multitech Dragonfly Nano MTQN-MNG3-B02


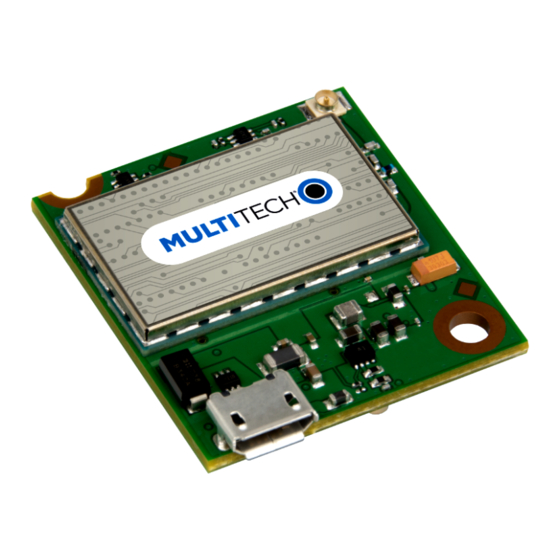
Summary of Contents for Multitech Dragonfly Nano MTQN-MNG3-B02
- Page 1 ™ Dragonfly Nano MTQN-MNG3-B02 Device Guide...
- Page 2 Legal Notices The MultiTech products are not designed, manufactured or intended for use, and should not be used, or sold or re-sold for use, in connection with applications requiring fail-safe performance or in applications where the failure of the products would reasonably be expected to result in personal injury or death, significant property damage, or serious physical or environmental damage.
-
Page 3: Table Of Contents
CONTENTS Contents Chapter 1 – Product Overview ..........................5 Overview ..................................5 Documentation ................................5 Product Build Options ..............................5 Chapter 2 – Mechanical Drawings..........................6 MTQN-MNG3-B02................................. 6 Chapter 3 – Hardware and Specifications......................... 7 Specifications ................................7 Mounting Hardware..............................8 Recommended Parts.............................. - Page 4 CONTENTS Configuring Low Power Options ..........................20 Powering Down the Device............................20 Configuring u-blox Cellular Radio..........................20 USB Driver Installation .............................. 22 Chapter 7 – Labels..............................23 Approvals and Certifications ............................23 Example Labels................................23 Chapter 8 – Regulatory Information........................24 EMC, Safety, and Radio Equipment Directive (RED) Compliance ................
-
Page 5: Chapter 1 - Product Overview
The Dragonfly Nano functions similarly to the Dragonfly and maintains interoperability with legacy systems that use a 40-pin connector and forward mounting hole. Documentation The following documentation is available on the product page at https://www.multitech.com/brands/multiconnect-dragonfly-nano. Document Description Part Number MTQN-MNG3-B02 Device... -
Page 6: Chapter 2 - Mechanical Drawings
MECHANICAL DRAWINGS Chapter 2 – Mechanical Drawings MTQN-MNG3-B02 ™ Dragonfly Nano MTQN-MNG3-B02 Device Guide... -
Page 7: Chapter 3 - Hardware And Specifications
HARDWARE AND SPECIFICATIONS Chapter 3 – Hardware and Specifications Specifications Category Description Performance 3GPP Release 13 LTE Cat M1, 3GPP Release 13 LTE Cat NB1, Coverage Enhancement Mode A, Release 12 LTE Power Save Mode, PSM, Rel 13 e- DRX, Cat M1 Half Duplex (Up to 375 kbps downlink and uplink), Cat NB1 Half Duplex (Up to 27.2K kbps downlink and 62.5K kbps uplink), Cat NB1 Non-IP Data Delivery, and 2G GPRS/EGPRS Frequency Band (MHz) -
Page 8: Mounting Hardware
HARDWARE AND SPECIFICATIONS The following table defines the remaining specifications for the MTQN-MNG3. Category Description Certifications and Compliance EMC Compliance CE Mark, RED (EU) Radio Compliance CE Mark, RED (EU) Safety Compliance IEC 60950-1 2nd ED +Am.2 Network Carrier EU Carriers Mounting Hardware The board has two mounting holes at the corners. -
Page 9: Pin Definitions
HARDWARE AND SPECIFICATIONS Pin Definitions Signal Name I/O Level In/Out Description Power Ground Connection USB-DATA+ USB Data+ connection to cellular module USB-DATA- USB Data- connection to cellular module VCC-IN Power Power Input RADIO_RX Cellular Radio UART Data Output RADIO_DCD Cellular Radio UART DCD Output RADIO_RI Cellular Radio UART RI Output RADIO_CTS... - Page 10 HARDWARE AND SPECIFICATIONS Signal Name I/O Level In/Out Description Power Ground Connection VUSB-SELECT 5 Apply 5V to use USB Interface to cellular modem 1V8_MON 3.318 Power Ground Connection. RADIO_RTS Cellular Radio UART RTS Input RADIO_DSR Cellular Radio UART DSR Output RADIO_DTR Cellular Radio UART DTR Input RADIO_TX...
-
Page 11: 40-Pin Connector
HARDWARE AND SPECIFICATIONS 40-Pin Connector Manufacturer: Hirose Electric Co LTD Description: Plug Model Number: DF17(2.0)-40DP-0.5V(57) Electrical Characteristics Operating Conditions Parameter Minimum Volts Maximum Volts Supply Range - Vcc 5.25 Absolute Maximum Rating Symbol Description Conditions Min. Max. Unit Module supply voltage Input DC voltage at VCC pin -0.5 Generic digital interfaces Input DC voltage at Generic... -
Page 12: Input/Output Current Ratings
HARDWARE AND SPECIFICATIONS (2) Guaranteed by design, not tested in production. Input/Output Current Ratings Output current draw all other output pins 1 mA ™ Dragonfly Nano MTQN-MNG3-B02 Device Guide... -
Page 13: Power Draw
HARDWARE AND SPECIFICATIONS Power Draw Voltage Radio Power Saving Live (AVG) TX Pulse (AVG) Total Inrush Protocol Mode and Connection Measured Amplitude Current for Charge in Power Down Idle-No data Current at Peak Current (mA) MilliCoulombs (μA) (mA) Max Power (mC) (mA) 5 Volts with... -
Page 14: Chapter 4 - Antennas
Chapter 4 – Antennas Antenna Devices were approved with the following antenna or for alternate antennas meeting the given specifications: Manufacturer: Wieson Description: LTE Antenna with SMA-Male Connector Model Number GY115IE002-001 MultiTech ordering information: Model Quantity ANLTE4-1HRA ANLTE4-2HRA ANLTE4-10HRA ANLTE4-50HRA Antenna Specifications Category... -
Page 15: Chapter 5 - Safety Information
SAFETY INFORMATION Chapter 5 – Safety Information Handling Precautions To avoid damage due to the accumulation of static charge, use proper precautions when handling any cellular device. Although input protection circuitry has been incorporated into the devices to minimize the effect of static build-up, use proper precautions to avoid exposure to electronic discharge during handling and mounting the device. -
Page 16: General Safety
SAFETY INFORMATION General Safety The device is designed for and intended to be used in fixed and mobile applications. Fixed means the device is physically secured at one location and cannot be easily moved to another location. Mobile means the device is used in other than fixed locations. -
Page 17: Device Maintenance
Do not place the device alongside computer discs, credit or travel cards, or other magnetic media. The information contained on discs or cards may be affected by the device. Using accessories, such as antennas, that MultiTech has not authorized or that are not compliant with MultiTech's accessory specifications may invalidate the warranty. -
Page 18: Chapter 6 - Getting Started
USB connector on the MTQN. There is no connection to pins 6, 7 and 24 on the MTUDK-ST-Cell. VUSB_SELECT is isolated from VUSB of the micro USB connector. Establish serial communication using Multitech developer board MTUDK2-ST-Cell. See the Universal Developer Kit 2.0 Developer Guide (PN S000610) for more information. -
Page 19: Usb Driver Installation
For the Windows USB driver, refer to the SARA-R4 USB Driver Installation Guide on the product page of the MultiTech website. The driver is located under the Downloads section of the product page. For the Linux USB driver, if your Linux OS does not automatically detect your device, you may need to execute a script. -
Page 20: Configuring Low Power Options
GETTING STARTED Configuring Low Power Options NOTE for MNG3: eDRX and PSM modes are not supported in 2G (all modes are supported using Cat M1). Refer to Powering Down the Device for lowest power consumption. To configure PSM: AT+CPSMS To configure eDRX: AT+CEDRXS To set device functionality: AT+CFUN... - Page 21 GETTING STARTED Note 1: +CPSMS Note 2: +CEDRXS Note 3: +URAT Note 4: +UBANDMASK If your carrier network is not on the supported list of MNOs, you must set to Cat M1 mode and follow the instructions per that scenario below. The MNG3 model has regulatory approval to operate in the EU/UK.
-
Page 22: Usb Driver Installation
For the Windows USB driver, refer to the SARA-R4 USB Driver Installation Guide on the product page of the Multitech website. The driver is located under the Downloads section of the product page. For the Linux USB driver, if your Linux OS does not automatically detect your device, you may need to execute a script. -
Page 23: Chapter 7 - Labels
This device is an industry and/or carrier approved modem. In most cases, when integrated and used with an antenna system that was part of the MultiTech modem certification, additional approvals or certifications are not required for the device that you develop as long as the following requirements are met: PTCRB Requirements: The antenna system cannot be altered. -
Page 24: Chapter 8 - Regulatory Information
Council Directive 2014/53/EU on radio equipment and telecommunications terminal equipment and the mutual recognition of their conformity. MultiTech declares that this device is in compliance with the essential requirements and other relevant provisions of Directive 2014/53/EU. The declaration of conformity may be requested at https://support.multitech.com. -
Page 25: Chapter 9 - Environmental Notices
Substances) complements the WEEE Directive by banning the presence of specific hazardous substances in the products at the design phase. The WEEE Directive covers all MultiTech products imported into the EU as of August 13, 2005. EU-based manufacturers, distributors, retailers and importers are obliged to finance the costs of recovery from municipal collection points, reuse, and recycling of specified percentages per the WEEE requirements. -
Page 26: Reach Statement
ENVIRONMENTAL NOTICES Polybrominated Diphenyl Ethers, [PBDE] < 1000 PPM Bis(2-Ethylhexyl) phthalate (DEHP): < 1000 ppm Benzyl butyl phthalate (BBP): < 1000 ppm Dibutyl phthalate (DBP): < 1000 ppm Diisobutyl phthalate (DIBP): < 1000 ppm Environmental considerations: Moisture Sensitivity Level (MSL) =1 Maximum Soldering temperature = 260C (in SMT reflow oven) Lead usage in some components is exempted by the following RoHS annex, therefore higher lead concentration would be found in some modules (>1000 PPM);... -
Page 27: Information On Hs/Ts Substances According To Chinese Standards (In Chinese)
ENVIRONMENTAL NOTICES Information on HS/TS Substances According to Chinese Standards (in Chinese) 依 依 照 照 中 中 国 国 标 标 准 准 的 的 有 有 毒 毒 有 有 害 害 物 物 质 质 信 信 息 息 根据中华人民共和国信息产业部... -
Page 28: Information On Hs/Ts Substances According To Chinese Standards
ENVIRONMENTAL NOTICES Information on HS/TS Substances According to Chinese Standards In accordance with China's Administrative Measures on the Control of Pollution Caused by Electronic Information Products (EIP) # 39, also known as China RoHS, the following information is provided regarding the names and concentration levels of Toxic Substances (TS) or Hazardous Substances (HS) which may be contained in Multi-Tech Systems Inc. -
Page 29: Chapter 10 - Using Connection Manager
Click Connection Manager. Open or unzip the Connection Manager file and run the installer (.msi file). In the MultiTech Connection Manager Setup Wizard, read the end-user license agreement and check I accept the terms in the License Agreement. Click Next to have the installer automatically disable the native WWAN AutoConfig service in Windows. -
Page 30: Setting Up A Serial Device In Windows Device Manager
To specify a folder for Connection Manager, use the default folder or click Change to browse to the folder you want to use. Click Install. A separate wizard opens for installing Telit drivers. Some MultiTech devices use embedded modules from Telit Wireless Solutions to provide cellular connectivity; these devices require Telit drivers. Select Complete setup type. - Page 31 USING CONNECTION MANAGER In the Add Hardware Wizard: Click Next. Select Install the hardware that I manually select from a list, then click Next. Select Modems, then click Next. Check Don't detect my modem; I will select it from a list, then click Next. Select Standard Modem Types, then select Standard 33600 bps Modem on the right.
-
Page 32: Connecting A Device
USING CONNECTION MANAGER Connecting a Device Before You Begin Make sure that your device is connected to the computer where Connection Manager is installed. Set up the device in Device Manager. Refer to Setting Up a Serial Device in Windows Device Manager. -
Page 33: Uninstalling Connection Manager
The steps above describe how to uninstall Connection Manager using Control Panel. You can also uninstall the application by using the installer file (.msi). Double-click the file, in the MultiTech Connection Manager Setup Wizard, click Next, and then select Remove on the next two pages. -
Page 34: Main Tab
USING CONNECTION MANAGER Connection Details Terminal Charts Main tab The Main tab displays the following: Status of device connection: Searching, Connecting, Connected, Disconnecting, or Disconnected The action button, which changes according to the current device connection status: Detect, Connect, or Disconnect Signal strength bars and percentage indicator (only when connection to the carrier's network is established) Note:... -
Page 35: Settings Tab
USING CONNECTION MANAGER Settings tab Use the Settings tab to specify the type of device: USB Modem or Serial Modem. If USB Modem is selected, the tab displays USB settings. These settings cannot be edited. If Serial Modem is selected, the tab displays the serial settings that match the serial-port settings for the device. -
Page 36: Multiconnect Cell Usb Modem Is Not Detected
USING CONNECTION MANAGER Try the following steps: Click the Settings tab and make sure that the appropriate modem type is selected: USB or Serial. If you are connecting a serial device, make sure that all serial modem settings correspond to the serial modem and serial port configuration. -
Page 37: Index
INDEX Index absolute maximum rating ..........11 hazardous substances ...........25 activation...............29 antenna .................14 install SIM card..............18 build options ..............5 labels ................23 Chinese hazardous substances Chinese version............27 English version ............28 mounting hardware ............8 Connection Manager Charts tab..............33 connecting device to carrier's network ....32 Connection tab............33 operating conditions .............11 Details tab ..............33...
Need help?
Do you have a question about the Dragonfly Nano MTQN-MNG3-B02 and is the answer not in the manual?
Questions and answers