Table of Contents
Advertisement
Advertisement
Table of Contents

Related Manuals for Vatech EZSensor

Summary of Contents for Vatech EZSensor
- Page 3 This manual covers the installation and operating procedures of the EzSensor. Unless otherwise specified, all the information contained in this manual is applicable equally to all EzSensor types. Notice to users For the improvement of product performance, supplementation, and the follow-up of information, the contents of this manual are subject to change without prior notice.
- Page 4 Before each usage, check the outer surface of the EzSensor for any signs of physical damage or defect. The surface of the EzSensor should have a smooth finish, with no evidence of chipping or damage.
- Page 5 Symbol Description Type B applied part Indicates to the user to check the accompanying documents (this User Guide) for more information about EzSensor Conforms to CE MDD 93/42/EEC (European Communities) concerning medical devices Waste Electrical and Electronic Equipment Handle with care...
- Page 6 Who disposes any Electric and Electronic Equipment, reporting the above symbol, as unsorted municipal waste, instead of collecting it separately, incurs the administrative sanctions in accordance with law. Label Location The VATECH logo and the following label can be found on the EzSensor device.
-
Page 7: Table Of Contents
Installation of the EzSensor Holder ............... 18 CHAPTER 3 INSTALLING THE SOFTWARE ........... 19 Installation of EasyDent .................. 19 Preparing for Image Acquisition with the EzSensor ........24 Running the EasyDent ..................25 3.3.1 Patient Registration and Device Selection ................25 3.3.2 Single Shot .......................... -
Page 8: Chapter 1 Introduction
EzSensor is connected by a „USB A-A‟ cable (supplied separately) to a compatible Windows XP or Windows Vista or Windows 7 PC. EzSensor is provided the power from PC. Support for the EzSensor is provided by compatible software programs such as EasyDent. - Page 9 <Table 1. Specifications > Parameter Description Detector Structure Low Noise Hybrid CMOS Size 1.0: 1.03 x 1.45 x 0.19 inch (26.1 x 36.8 x 4.95 mm) Dimensions (W x L x T) Size 1.5: 1.14 x 1.52 x 0.19 inch (29.2 x 38.7 x 4.95 mm) Size 2.0: 1.24 x 1.69 x 0.19 inch (31.5 x 42.8 x 4.95 mm) Pixel Pitch 0.035 mm...
-
Page 10: System Components
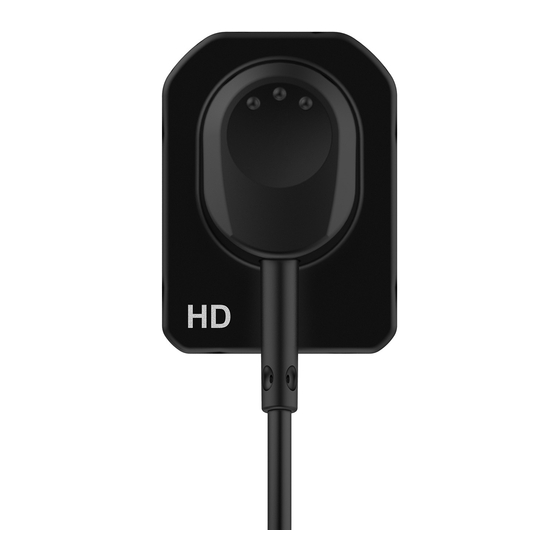
System Components The EzSensor device installer should check the following items listed in the table below before system installation. If the serial numbers of the individual parts do not match, do not install the system. Contact your local distributor or agent for support. - Page 11 2. Control Board Box: Provides power to the sensor, timing and synchronization of sensor signals, signal pre- amplification, analogue/digital signal conversion, USB port interface and optical insulation of all connections. 3. USB PC Interface Cable: Used to transmit the output signal from the control board box to the computer. 4.
- Page 12 disposed. These wrap are conform to the ISO 10993-1. 7. S/W Installation CD...
-
Page 13: Sensor Positioning Aid Accessories (Optional)
Sensor positioning aid accessories (optional) The positioning system is an intraoral positioning device specifically designed to support and align the sensor with the X-ray source when positioned along the upper or lower jaw. Please refer to the Appendix for more information (pages 49~51). -
Page 14: Chapter 2 Hardware Installation
Chapter 2 Hardware Installation What you should do before use To operate the intraoral sensor, you need to install the EzSensor driver. This device should be connected with the product which is complied with IEC 60601-1. Specifications We cannot guarantee that EasyDent will work properly with an unregistered copy of Microsoft Windows. -
Page 15: Ezsensor Driver Setup
EzSensor Driver Setup This step is necessary for the installation of EzSensor. Capturing software and Calibration data for the EzSensor will be installed along with the Windows device driver. A Twain driver is also installed during this step. Step 1 Insert the S/W Installation CD in the CD-ROM. - Page 16 Step 3 Check the EzSensor installation directory and then click the „Next‟ button. Step 4 The Installshield Wizard will start configuring the installation parameters. Step 5 The InstallShield wizard will copy the EzSensor calibration files to your workstation(PC).
-
Page 17: Cable Connection & Driver Installation
Cable Connection & Driver Installation Do not connect the EzSensor and USB PC Interface cable to your computer until you have successfully installed the setup program. Be sure to connect the EzSensor module to the control board box before connecting the USB PC Interface cable to your computer. - Page 18 Windows 7 : Control Panel System and Security System Device Manager Windows XP : Settings Control Panel System Hardware Device manager Select „VH EzSensor-N x.x‟, located under Imaging Devices. You should see the message, “This device is working properly”.
- Page 19 EzSensor is supplied the power and transported data via USB port of PC. Do not disconnect during usage.
-
Page 20: Installation Of The Ezsensor Holder
Installation of the EzSensor Holder The EzSensor holder is used for mounting the EzSensor to the wall when not in use. When choosing where to install the EzSensor, locate an area that offers easy access and visibility during patient examinations. -
Page 21: Chapter 3 Installing The Software
Chapter 3 Installing the software Installation of EasyDent In this step, EasyDent(viewer) will be installed. Alternatively, software which supports the Twain interface can be used instead of EasyDent. Step 1 Insert the S/W installation CD in the CD-ROM drive. D:\EasyDentV4\setup.exe. Press „Enter‟. - Page 22 Step 3 The „EasyDentV4 InstallShield Wizard‟ will appear. Click the „Next‟ button. Step 4 Select the setup type that best suits your needs. Click the „Next‟ button. Basic : Installs the basic version of EasyDent V4 CD-Publishing : Installs the basic version of EasyDent V4 along with CD-Publishing capabilities (optional)
- Page 23 Select the features that you want to install. Click the „Next‟ button. EasyDent Viewer is the minimum requirement for EzSensor use. Step 6 Now you are ready to install. If you would like to review any of your installation settings, click „Back‟.
- Page 24 Step 7 Installing EasyDentV4 Step 8 The program compatibility and Windows Firewall alarm messages are shown. Click 'Run program' button on the program compatibility message. And click 'Allow access' button on the windows security message.
- Page 25 Step 9 MSDE(Microsoft SQL server Desktop Engine) is installed automatically. Close the SQL Server Service Manager. Step 10 Select „No, I will restart my computer later‟, and then click „Finish‟.
-
Page 26: Preparing For Image Acquisition With The Ezsensor
④ Put a new wrap on the EzSensor and connect this to the sensor positioning system. ⑤ Position the EzSensor at the appropriate area in the mouth. The flat receptor side of the sensor must face the X-ray source. Note that the receptor side is marked with a label for ease of recognition. -
Page 27: Running The Easydent
Running the EasyDent Shot functions are available after patient registration and device selection. Single shot, multi shot, sequence shot are used frequently. You must be fully aware of the explanations before capturing image. 3.3.1 Patient Registration and Device Selection Step 1 Turn on the PC. - Page 28 Step 2 The new patient registration window will appear. You are asked to register the new patient and click “Add”. Step 3 Click „Help > Intra-Oral Sensor Setting > Select Device‟ on the menu bar. Select your capture device. At this time, you are asked to select the device and image quality.
-
Page 29: Single Shot
3.3.2 Single Shot Capture a single image. Step 1 Start EasyDent by clicking the EasyDent V4 Viewer on the desktop. Search and enter the appropriate patient information. - Page 30 Step 2 Click the „Layouts‟ tab. Select your favorite layout from the Layout template list. The Layout Template can be customized. Please refer to the EasyDent manual. Step 3 Select the „Single‟ from the Shoot Type list.
- Page 31 Step 4 Select the tooth position to capture. The tooth box is selected in blue. Step 5 Click the „SENSOR ( )‟ button or „Capture ( )‟ button. Step 6 Position the sensor correctly.
- Page 32 Step 7 After checking the sensor is in the correct position, expose the X-ray after the “Please expose X-ray” message appears. The message, “Optimizing Image… Please wait” appears while the image is being optimized. The image will appear after optimization is complete.
-
Page 33: Multi Shot
3.3.3 Multi Shot You can capture multiple images continuously until you click stop. Click and drag the image to its appropriate position after stopping capture. Step 1 Select the „Multiple‟ from the Shoot Type list. - Page 34 Step 2 Select the tooth position to capture. A blue rectangle will be drawn on the tooth box. Step 3 Click the „SENSOR ( )‟ button or „Capture ( )‟ button. Step 4 Position the sensor correctly.
- Page 35 Step 5 Expose the X-ray after the “Please expose X-ray” message appears. The message, “Optimizing Image… Please wait” appears while the image is being optimized.
- Page 36 Step 6 If you want to acquire more images, continue to expose the x-ray when the „Press the X-ray (shot) button‟ message appears. To finish, double click on the „Press the X-ray (shot) button‟ message box. And then the image will appear after optimization is complete. Step 7 Click and drag the image to its appropriate position.
-
Page 37: Sequence Shot
3.3.4 Sequence Shot You can capture multiple images according to a pre-saved order. Capturing according to the order will ensure the images appear automatically in the correct positions. Step 1 Select your favorite sequence from the Shoot Type list. Red numbers are represented the capture order. - Page 38 Step 4 Capturing according to the order, the images appear automatically in the correct positions. Expose the X-ray after the “Please expose X-ray” message appears. The message, “Optimizing Image… Please wait” appears while the image is being optimized.
- Page 39 Step 5 If you want to finish, double click the „Press the X-ray (shot) button‟ message box. And then according to the capturing order, the images appear automatically in the correct positions. All images are saved in the Database server automatically. With double click on the image, the image is shown as large size at any function’s table.
-
Page 40: Chapter 4 Maintenance
Check that all cables connected to the EzSensor are undamaged. ● Check for external damage to the EzSensor that may compromise its ability to be safely operated. If EzSensor is defective, the sensor will be returned to the manufacturer for repair. -
Page 41: Precautions
Make sure that liquid does not penetrate the system through the USB cable or the sensor cable connectors. After cleaning the surface of the EzSensor, use a clean lint-free cloth to dry the system, as required, until the surface is clean. - Page 42 If the device may have caused or contributed to a serious injury of a patient, your distributor should be notify immediately by telephone, fax, or written correspondence to the manufacturer. And then the manufacturer shall report them to the government of each country according to their reporting process.
-
Page 43: Chapter 5 Warranty
VATECH shall have no obligation for any defects to the extent that such defect arises out of (i) normal and fair wear and tear or Product which has been modified without VATECH's... - Page 44 If the Buyer fails to pay any amounts due to the Seller, whether related to the Products or otherwise, VATECH shall have the right to refuse to provide any services to the Buyer under this Warranty until such payment has been received by the Seller.
-
Page 45: Appendix
Appendix LED Indicators The EzSensor Hardware Controller has two LED indicators that show its functional status. The location of the LED lights is as shown in the following illustration and described in Table 3. LED 1 LED 2 <Table 3. Description of LED Indicators>... -
Page 46: X-Ray Exposure Guide
X-ray Exposure Guide The required X-ray dose for the best image is dependent on the following: X-ray source (tube assembly, manufacturer, AC/DC, etc.) Distance between beam focus and sensor Tooth (object) to be X-rayed Bone density and age of patient Miscellaneous circumstances, etc. - Page 47 < Table 4. Recommendation on Exposure Time > Exposure 60kvp 60kVp 65kVp Dose condition (μGy) Patient Adult Adult Adult 28cm 18cm 28cm Intra Oral X-ray Unit VX 70 AnyRay (Model name) Filter Approximate Exposure Time (sec) Incisor & 300 ~ 500 0.12 ~ 0.2 0.1 ~ 0.2 0.18 ~ 0.28...
-
Page 48: Error Message
●This means that the user canceled image capture. Please try again. 8. Cannot find dark frame. ● Solution: Restore the EzSensor‟s calibration data from the S/W installation CD or re- calibrate the sensor. If the same message is displayed again, contact Customer Service. 9. Cannot find bright frames for calibration. - Page 49 12. Cannot load 'EzSensor.dll'. ● Solution: Please re-install the acquisition software. 13. Require 'EzSensor.dll' was damaged. ● Solution: Please re-install the acquisition software.
-
Page 50: Troubleshooting
Troubleshooting If you experience any problems regarding the EzSensor system during operation, please refer to the troubleshooting table below for corrective measures. If the problem persists, please contact your local VATECH product distributor. <Table 5. Troubleshooting Table> Item Description Corrective Measure... -
Page 51: How To Use The Sensor Positioning System
How to use the sensor positioning system ● Sensor position aids: ① Sensor positioning system for molars ② Sensor positioning system for anterior... - Page 52 ● Usage Method: ① Insert the sensor into the wrap provided. At this time, it is normally recommended to cover the sensor with the silicon cover. ② Pass the sensor through the cone ring and into the sensor holder. ③ Fix the sensor firmly to the sensor holder. ④...
- Page 53 ⑤ Fasten the sensor cable on the cone ring with the cable hook. ⑥ Put the cushion cap on the top of the bottom block.
-
Page 54: Electromagnetic Field Information According To Iec601-1-2
Guidance and manufacturer’s declaration – electromagnetic emissions The Model EzSensor is intended for use in an electromagnetic environment as specified below. The customer or the user of the Model EzSensor should ensure that it is used in such an environment. Emissions test... - Page 55 Guidance and manufacturer’s declaration – electromagnetic immunity The model EzSensor is intended for use in an electromagnetic environment as specified below. The customer or the user of model EzSensor should ensure that it is used in such an environment. Electromagnetic environment –...
- Page 56 CE symbol grants the product compliance to the European Directive for Medical Devices 93/42/EEC as a class IIB device. Authorized by SGS United Kingdom Ltd EC Representative; VATECH Dental Manufacturing Ltd. Axiom House, The Centre Feltham, Middlesex, TW13 4AU, United Kingdom...
- Page 58 Document No. R-USM-701 Release Version 4.4 Dated Aug. 8th. 2013 Rayence Co., Ltd. 1F, 2F, 3F, #402, 14, Samsung 1-ro 1-gil, Hwaseong-si, Gyeonggi-do, Korea...
Need help?
Do you have a question about the EZSensor and is the answer not in the manual?
Questions and answers