Table of Contents
Advertisement
Advertisement
Table of Contents

Subscribe to Our Youtube Channel
Related Manuals for Audio Technica AT-LPW50PB


Summary of Contents for Audio Technica AT-LPW50PB
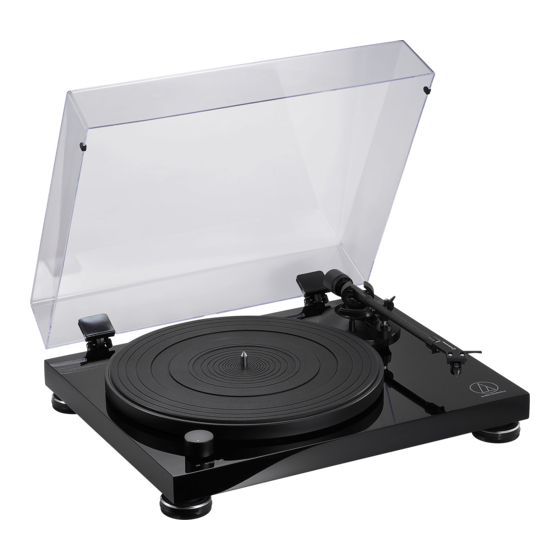
- Page 1 AT-LPW50PB User Manual Belt-Drive Turntable...
-
Page 2: Package Contents
Package contents Make sure that you have all the included items listed below before using this product. If some items are missing or damaged, contact your local Audio-Technica dealer. • Turntable body • Dust cover •... -
Page 3: Safety Precautions
– Connect the equipment into an outlet on a circuit different from that to which the receiver is connected. – Consult the dealer or an experienced radio/TV technician for help. Contact: Responsible Company: Audio-Technica U.S., Inc. Address: 1221 Commerce Drive, Stow, Ohio 44224, USA Tel: 330-686-2600 For customers in Canada... -
Page 4: Notes On Use
Notes on use Turntable body • Do not set and use the product in locations that are considerably hot or humid, dirty, or subject to extreme vibrations. • The product should be positioned on a flat, level surface. • When closing the dust cover, close it completely. Cartridge •... -
Page 5: Part Names And Functions
Part names and functions Overall diagram Platter Ground (earth) terminal Connect the amplifier's ground (earth) terminal to this terminal Drive belt using the RCA audio cable's ground conductor. Motor pulley (brass-colored) Stereo output terminals Connect the RCA audio cable. Connect it to either the amplifier's Spindle PHONO input jack or its LINE input jack. - Page 6 Part names and functions Tonearm Counterweight Balances the tonearm and adjusts to provide the proper tracking force. Tracking force gauge ring Use to adjust and set the tracking force. Tonearm lift Moves the tonearm vertically to and from the face of the record. Tonearm rest with clamp Use the clamp to secure the tonearm so that it does not move.
-
Page 7: Preparation For Use
Preparation for use Placing the platter Setting up the turntable This product requires some assembly before using it for the first time. • Position the product on a level surface. Do not connect the AC adapter until assembly is complete. •... -
Page 8: Assembling The Tonearm
Preparation for use 2. Unlock the tonearm and lift the tonearm lift control lever. Assembling the tonearm • The tonearm is tilted because the balance has yet to be adjusted. 1. Remove the cable tie used to secure the tonearm at the time of delivery. -
Page 9: Setting Output Selector Switch
Preparation for use Setting tracking force Installing/removing the dust cover 1. While supporting the counterweight so that it does not move, The dust cover is designed to protect the product's sensitive turn the tracking force gauge ring so that its “0” position lines up components when the product is not in use. -
Page 10: Connecting To Connectable Equipment (Active Speakers, Amplifiers, Etc.)
Preparation for use Connecting to connectable equipment (active Connecting the AC adapter speakers, amplifiers, etc.) 1. Connect the AC adapter's cord to the power input jack. Align the settings for the output selector switch and connect the RCA 2. Plug the AC adapter into an outlet. audio cable to a compatible input jack on the connectable equipment •... -
Page 11: Playing A Record
Playing a record Before playing a record Playing a record 1. Remove the cartridge’s protector. Lower the volume of the amplifier, speakers, etc. sufficiently. • If the tonearm is fixed to the tonearm rest, remove the clamp. 1. Turn the power switch on. 2. -
Page 12: Pausing The Record
Playing a record Care Pausing the record Turntable body 1. After lowering the volume of the amplifier, speakers, etc. • When the turntable body is dirty or dusty, first disconnect the AC sufficiently, lift the tonearm with the tonearm lift control lever. adapter from the outlet and then wipe off the dirt and dust with a soft, dry cloth. -
Page 13: Replacing The Stylus
Replacing the stylus Replacing a cartridge Refer to the user manual for the cartridge that you will be using if you Removing the stylus are replacing the cartridge included with this product with another, commercially available cartridge. After you replace the old cartridge •... -
Page 14: Replacing The Belt
Replacing the belt • The belt is a consumable part. Replace the belt if the speed of 4. Attach the platter. playback slows down or irregular rotation occurs. As a rule of thumb, • Align one of the openings with the position of the motor pulley (brass- we suggest replacing the belt once a year. -
Page 15: Adjusting The Overhang
Adjusting the overhang When the turntable is moved The position of the cartridge must be accurately determined (adjusting Using the product's original packing materials, wrap the turntable in the overhang) when mounting a cartridge or headshell other than the the reverse order from when you unwrapped it. If you do not have the one provided. -
Page 16: Troubleshooting
Troubleshooting Problem Solution The platter does not spin. • Is the AC adapter connected to the outlet? Connect AC adapter to the outlet. • Has the belt slipped from the platter? Correctly place the belt on the platter. • Is the belt placed on the motor pulley? Check that the belt is placed on the motor pulley (brass-colored) correctly. - Page 17 Dimensions (Unit: mm)
-
Page 18: Specifications
Replacement headshell AT-HS4 BK Type Static balanced straight carbon (sold separately) tonearm Replacement belt AT-LPW50PB exclusive belt Effective length 223.6 mm (sold separately) Overhang 18.6 mm Maximum tracking error angle Less than 2.0° Specifications are subject to change without notice due to improvements.
Need help?
Do you have a question about the AT-LPW50PB and is the answer not in the manual?
Questions and answers