Table of Contents
Advertisement
Advertisement
Table of Contents

Related Manuals for Mamiya RZ67 AE


Summary of Contents for Mamiya RZ67 AE
- Page 1 AE Prism Finder RZ English Instructions...
- Page 2 Special Features The finder uses a roof prism to produce an unreversed, laterally correct and bright image, with quartz-controlled, aperture-priority automation to calculate exposures. The viewfinder’s LEDs display the metering mode and shutter speed. In AE Mode, perfect exposures are now possible after merely focusing the camera and releasing the shutter.
- Page 3 and in one-stop intervals in Manual Mode. AE Mode: 4 sec. to 1/400 sec. in 1/6 EV steps, ½ Shutter Speed Range stop intervals. Manual Mode: 8 sec. to 1/400 sec. in ½ stop intervals. Metering Modes are indicated by ‘A’ (Averaged) or ‘S’...
- Page 4 Removing the Finder from the Camera Body While pushing the finder’s two Attaching Latches (8) down and toward the back of the finder, lift the front of the finder up. Pull the finder’s two Attaching Pins out of the camera body’s finder mounting holes, and then remove the finder from the camera body, Fig.
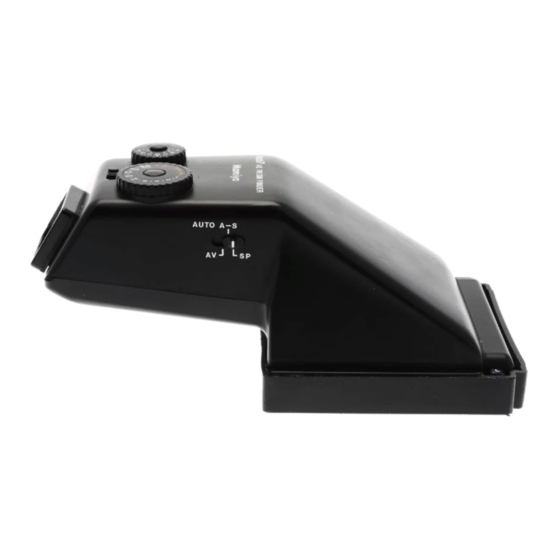
- Page 5 The Averaged ‘A’ Metering Mode uses information from the entire frame to determine exposures. The Spot ‘S’ Metering Mode only uses information from the central area of the frame to determine exposures. The Auto-Shift Mode will automatically switch between Averaged and Spot Metering Modes depending on the lighting conditions.
- Page 6 Although it can be used with any Metering Mode, it is most effective when used with the ‘SP’ (Spot) Metering Mode. AE Lock Photography Set the finder’s Shutter Speed Dial to its ‘AEL’ position. Fig. 5. While looking through the finder, center the most important area of the subject in the center circle of the frame, and then press the camera’s Shutter Release Button down halfway and keep it in this position.
- Page 7 The Prism’s Viewfinder Metered Manual Exposure Set the camera’s Shutter Speed Dial to its AE position, Fig. 3. Turn the finder’s Shutter Speed Dial to any shutter speed. Use the Metering Mode Selector, Fig. 4, and select a Metering Mode. Press the camera’s Shutter Speed dial down halfway.
- Page 8 Removing a Diopter Corrective Lens from the Finder Remove the finder’s rubber Eyecup. Insert your fingernail between the bottom of the Corrective Lens and the bottom of the finder’s Eyecup Frame. Pull the Corrective Lens out of the frame. Reinstall the Eyecup.
Need help?
Do you have a question about the RZ67 AE and is the answer not in the manual?
Questions and answers