Advertisement
Quick Links
Advertisement

Related Manuals for Mamiya PD Prism Finder S


Summary of Contents for Mamiya PD Prism Finder S
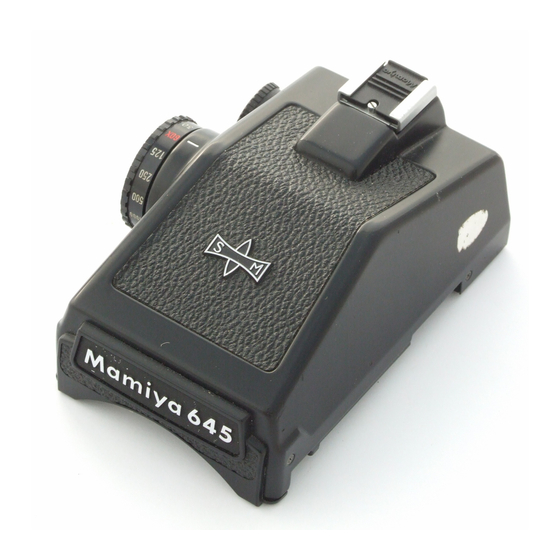
- Page 1 PD Prism Finder S English Instructions...
-
Page 2: Specifications
Special Features The Mamiya PD Prism Finder S is an eye-level finder with a build-in silicon diode and an electronic shutter-control circuit. The finder enables complete coupling with the lens, the ISO speed and the shutter. The finder’s viewing system uses seven LEDs to interpret exposure: A yellow-green LED indicates a correct exposure, the red LEDs indicate over, under and compensated exposures. - Page 3 1/500 sec., do not set the finder’s shutter speed to 1/1000 as this speed is not applicable to the camera. ASA Range 25 – 6400 Camera battery. The finder uses a shut-off timer to Power Source prevent unnecessary battery drain. Attaching the Finder to the Camera Body Before attaching the finder to the camera body, confirm that the White Dot on the Finder Release Button is pointing upward.
- Page 4 Removing the Finder from the Camera Body While pushing the Finder Release Button with your thumb, lift the finder off the camera body, and then release the Finder Release Button. Using the Finder Set the lens’ A-M Lever to its ‘A’ setting. Turn the Aperture Ring so that the camera’s Coupling Pin (A) engages the lens’...
-
Page 5: Viewfinder Display
Always set the shutter speed on the finder’s Shutter Speed Dial and not the camera’s Shutter Speed Dial. The camera’s Shutter Speed Dial must remain at its Concentric Circle setting, Fig. 5. The shutter speed is usually set to either 1/125 or 1/250 when photographing outdoors, and 1/60 when photographing indoors. - Page 6 To correct the exposure, decrease the shutter speed on the finder’s Shutter Speed Dial or use a larger aperture. Exposure Compensation Since the finder measures light though the lens (TTL), exposure compensation when using filters, extension rings, a bellows, etc. is unnecessary. Exposure Compensation for Special Photographic Situations When photographing under the following conditions, it may be necessary to adjust the indicated exposure, as follows:...
- Page 7 If you are farsighted, correction lenses are available in: +3, +1 and +1 diopters; if you are nearsighted, correction lenses are available in: -0.5, -1, -2, -3 and -4 diopters, Fig. 8. Installing a Diopter Corrective Lens on the Finder Remove the finder’s Eyecup.
Need help?
Do you have a question about the PD Prism Finder S and is the answer not in the manual?
Questions and answers