Table of Contents
Advertisement
Quick Links
Advertisement
Table of Contents

Related Manuals for Martin PIT VIPER

Summary of Contents for Martin PIT VIPER
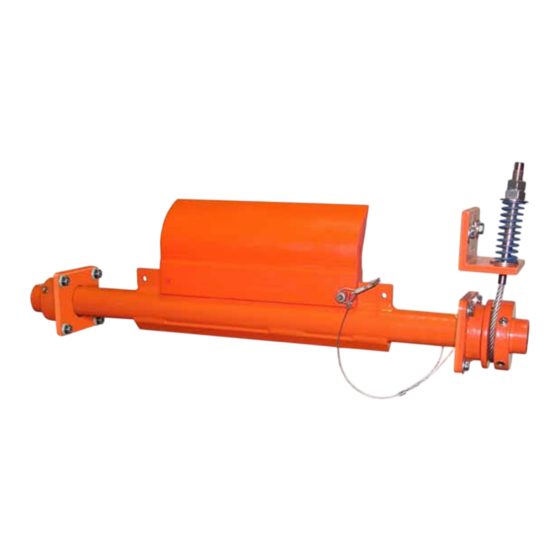
- Page 1 ® MARTIN PIT VIPER™ Pre-Cleaner Installation instructions M3735UK...
- Page 2 © Martin Engineering GmbH M3735UK-09/15...
-
Page 3: Table Of Contents
Placement of the warning labels and warning trailers . 23 Maintenance ............... 24 Safety information............24 Weekly maintenance ........... 24 Replacing the blades ........... 27 Troubleshooting ............30 Safety information............30 Troubleshooting............30 Storage, de-installation, disposal ......32 Packing and transportation.......... 32 © Martin Engineering GmbH M3735UK-09/15... - Page 4 Explanation of part numbers ........33 Inline-Reversing tensioner ........... 34 Martin ® Inspection Doors..........34 Installation manuals ............. 34 Accessories..............34 Warning labels / Warning trailers ......... 34 ® MARTIN PIT VIPER™ Pre-Cleaner ......35 Declaration of incorporation ........38 © Martin Engineering GmbH M3735UK-09/15...
-
Page 5: Introduction
The product and documentation are subject to technical changes without prior notification. Earlier documents then lose their validity. Martin Engineering's General Terms of Sales and Delivery shall apply. 2.1.3... -
Page 6: Reference To Additional Documents
The Martin Engineering products are designed for a long service life. They conform to the state of the art in science and technology and were thoroughly inspected before shipment. In addition to this, Martin Engineering constantly performs product and market research for continuous product development. -
Page 7: Classification Of The Hazards
NOTE Contains comments about the installation and/or the product's usage to point out situations which cause neither personal injury nor property damage but include important information. © Martin Engineering GmbH M3735UK-09/15... -
Page 8: Intended Usage
5 m/s. Every other usage of this product is deemed misuse. Please contact Martin Engineering customer service if you would like to use this product for a different purpose. We will be happy to assist you with the product configuration. -
Page 9: Occupational Safety
The installation must be carried out to completion before the system is started up. The flawless execution of all operating steps must be tested before the conveyor system can be started up again. Please observe all information on the installation and start-up of the product. © Martin Engineering GmbH M3735UK-09/15... -
Page 10: Duties Of The Owner-Operator
Operating, maintenance and installation personnel Personnel are considered authorised when they have been trained on using the product and have read and understood these operating instructions in their entirety. © Martin Engineering GmbH M3735UK-09/15... -
Page 11: Description Of The Product
The owner-operator is responsible for taking the required counter- measures. In the case of applications with contaminants, Martin Engineering or one of its representatives can assist with the positioning or with special solutions. Tensioners... -
Page 12: Type Clarification
Type clarification Blades for the MARTIN ® PIT VIPER™ Pre-Cleaner are available in various material designs. The required material can be selected in accordance with the material conditions. The selection of the various blades is listed in section 9 - “Part numbers”. -
Page 13: Preparing For The Installation
• Is the delivery complete? Does the number of pallets/ crates/containers delivered match the number on the delivery note? • Do all of the transport packages appear to be undamaged? Does damage to the packaging exist which indicates damage to the product contained inside? © Martin Engineering GmbH M3735UK-09/15... - Page 14 PIT VIPER™ Pre-Cleaner, • possible accessories as contained in the order, • two Conveyor Products Warning Labels Part No. 23395. 4. Report any missing or damaged parts to Martin Engineering or one of its authorised dealers. © Martin Engineering GmbH...
-
Page 15: Installation
The pre-cleaner is heavy and can cause serious injuries if it is dropped during lifting or moving. Always use a suitable lifting device or engage the help of several persons when lifting the pre-cleaner. Do not stand under hanging loads. © Martin Engineering GmbH M3735UK-09/15... -
Page 16: Installation Process
• Follow the instructions given in Section 5.2.3. Installation on an open transfer system Use the equipment provided at the site to comply with the dimensions for correct installation. © Martin Engineering GmbH M3735UK-09/15... -
Page 17: Determination Of The Installation Position
(70-76 mm). This value is freely selectable. The selected value must also be used for the far side. 4. Draw the arc of a circle (4, Fig. 1) with radius R. © Martin Engineering GmbH M3735UK-09/15... -
Page 18: Installing The Tensioner
8. Repeat steps 1 to 7 on the far side of the chute wall. 5.2.2 Installing the tensioner See the installation manual accompanying your Inline Reversing tensioner for specific instructions on how to install it (Section 2.1.4). © Martin Engineering GmbH M3735UK-09/15... -
Page 19: Installing The Pre-Cleaner
Fig. 3 3. Open the retaining clip. 4. Remove the pin hitch (5, Fig. 3). 5. Remove the blade from the mainframe. 6. Follow the corresponding instructions for your specific tensioner for installing the mainframe. © Martin Engineering GmbH M3735UK-09/15... - Page 20 NOTE Position the blade in a way that its tip points in the opposite direction of the conveyor belt. 8. Insert the pin hitch (5, Fig. 4). 9. Tighten the retaining clip. © Martin Engineering GmbH M3735UK-09/15...
-
Page 21: Centring The Blade
Aligning the mainframe in parallel to the head pulley A = B Fig. 6 Pos. Description Top view of the blades Head pulley Head pulley frame Chute wall Tab. 3: Aligning the mainframe in parallel to the head pulley © Martin Engineering GmbH M3735UK-09/15... -
Page 22: Aligning The Mainframe In Parallel To The Head Pulley Frame
Always tighten the belt cleaners in accordance with the specification and also ensure uniform tightening whenever dual Inline-Reversing tensioners are used. See the installation manual accompanying your Inline Reversing tensioner for specific instructions on how to configure it (Section 2.1.4). © Martin Engineering GmbH M3735UK-09/15... -
Page 23: Operation With Loading
3. Shut off the conveyor belt system after the one-hour operation under load, shut off the power supply and secure it against unauthorised reactivation. 4. Check whether all of the fastening points are securely tightened. Tighten any loose connections. © Martin Engineering GmbH M3735UK-09/15... - Page 24 • Bulk material accumulation: No bulk materials must accumulate between the blades and return side. 6. Note the corresponding information in Section 7 “Troubleshooting” in cases of excess wear, bulk material accumulation or other problems. © Martin Engineering GmbH M3735UK-09/15...
-
Page 25: Placement Of The Warning Labels And Warning Trailers
Before any installation or maintenance work is carried out, ensure that all power sources to the conveyor belt system and its accessories are switched off and secured against inadvertent reactivation. Use warning signs! Fig. 8 © Martin Engineering GmbH M3735UK-09/15... -
Page 26: Maintenance
3. Inspect whether all of the fastening points are securely tightened. Tighten any loose connections. 4. Check the cleaner tension and re-tighten if necessary. 5. Check the blades for wear, damage and missing parts. © Martin Engineering GmbH M3735UK-09/15... - Page 27 NOTE Take the corresponding parts out of service if any indications of functional disturbances are noticed. Contact Martin Engineering or one of its representatives for support. Do NOT start up the conveyor system until the cause of the problems has been recognised and eliminated.
- Page 28 A risk of damage due to overheating exists for the belt cleaner and/or the conveyor belt. Never operate the belt cleaner unless the conveyor belt is running. 10. Observe the cleaner and check its cleaning performance. © Martin Engineering GmbH M3735UK-09/15...
-
Page 29: Replacing The Blades
1. Slacken the Inline-Reversing tensioners as specified in the corresponding installation instructions. Fig. 9 2. Fold the cleaner down from the head pulley 3. Open the retaining clip. 4. Remove the pin hitch (5, Fig. 9). © Martin Engineering GmbH M3735UK-09/15... - Page 30 6. Remove the blade from the mainframe (2, Fig. 10). Fig. 11 7. Place a new blade onto the mainframe (1, Fig. 11) 8. Slide the blade onto the hollow clamping pin (2, Fig. 11). © Martin Engineering GmbH M3735UK-09/15...
- Page 31 13. Remove all tools from the working area. 14. Switch the conveyor back on. 15. Observe the cleaner and check its cleaning performance. See Section 7 "Troubleshooting" if the cleaning power is insufficient. © Martin Engineering GmbH M3735UK-09/15...
-
Page 32: Troubleshooting
Malfunctions other than those listed below can therefore occur. In this case, either Martin Engineering or one of its representatives can assist with the positioning or with special solutions. Do not start up the conveyor system again until the fault has been recog- nised and cleared. - Page 33 Cleaner on the conveyor Correct the tension if necessary. belt too loose of too tightly tensed. The blade's urethane is Contact Martin Engineering or one possibly not suitable for the of its representatives. application. Corrosion or chemical The blade's urethane is Contact Martin Engineering or one decomposition.
-
Page 34: Storage, De-Installation, Disposal
Storage, de-installation, disposal Packing and transportation The products described here are packed and shipped by Martin Engineering. The products may be transported solely in the Martin Engineering packaging. The logistics company in charge of the shipment shall be responsible for any damage and/or loss. -
Page 35: Part Numbers
Part numbers This section lists the product designations with their associated part numbers for the MARTIN ® PIT VIPER™ Pre-Cleaner and its acces- sories. Please always indicate the part numbers in every order. Explanation of part numbers ® MARTIN PIT VIPER™ Pre-Cleaner... -
Page 36: Inline-Reversing Tensioner
Part No. 27382+E. For the installation of the Cable Tensioner or TWIST™ Tensioner on the conveyor belt frame instead of a chute wall. Warning labels / Warning trailers • Conveyor Products Warning Label: Part no. 23395 © Martin Engineering GmbH M3735UK-09/15... -
Page 37: Martin ® Pit Viper™ Pre-Cleaner
® MARTIN PIT VIPER™ Pre-Cleaner ML = Mainframe Length / Hauptachsenlänge CW = Cleaning Width / Reinigungsbreite 48,3 RL = Reinforcement Length / Verstärkungslänge Fig. 13 © Martin Engineering GmbH M3735UK-09/15... - Page 38 Description / Beschreibung P/N / Teile-Nr. Pos. Anz. Pit Viper mainframe / s.C. / s.T. Pit Viper blade / Abstreiferblatt s.C. / s.T. Wire lock pin 1/4" x 2-1/2" / Sicherungsbolzen 32772 Spring pin 8 x 50 mm / Hohlspannstift 32774+E Cable Ø1mm / Kabel...
- Page 39 Clear / Klar Anwendung bei trockenen Schüttgütern Used for temperatures above PV1S-XXXXXXGRXX-XX+E PV-XXXXXXGR Green / Grün 120°C / Anwendung bei Temperaturen >120°C Used for sticky materials / Navy blue / PV1S-XXXXXXNBXX-XX+E PV-XXXXXXNB Anwendung bei klebrigen Marineblau Schüttgütern © Martin Engineering GmbH M3735UK-09/15...
-
Page 40: Declaration Of Incorporation
Product designation: Belt cleaner of make / type: ® MARTIN PIT VIPER™ Pre-Cleaner with serial number: not required meets the following requirements: EC - Machinery Directive 2006/42/EC DIN EN 618 - Equipment and systems for bulk materials... - Page 41 USA (Headquarters) Germany (Main European branch) Martin Engineering Martin Engineering GmbH One Martin Place, 61345 Neponset (Illinois), USA In der Rehbach 14, 65396 Walluf, Germany Tel. +1 (800) 544-2947; Fax +1 (800) 814-1553 Tel. +49 6123 97820; Fax +49 6123 75533 info@martin-eng.com;...
Need help?
Do you have a question about the PIT VIPER and is the answer not in the manual?
Questions and answers