Table of Contents
Advertisement
Available languages
Available languages
Quick Links
Istruzioni per installazione, uso e manutenzione
Montage und Bedienungsanleitung
Installation, use and maintenance instructions
Bruciatori di gas ad aria soffiata
I
Gas-Gebläsebrenner
D
Forced draught gas burners
GB
Funzionamento monostadio
Einstufiger Betrieb
One stage operation
CODICE
CODE
3761171
3761271
3761371
3761471
MODELLO - MODELL
MODEL
BS1F
BS2F
BS3F
BS4F
TIPO - TYP
TYPE
911 T1
912 T1
913 T1
914 T1
2903150 (1) - 10/2008
Advertisement
Chapters
Table of Contents

Related Manuals for Riello Burners Gulliver Series


Summary of Contents for Riello Burners Gulliver Series
- Page 1 Istruzioni per installazione, uso e manutenzione Montage und Bedienungsanleitung Installation, use and maintenance instructions Bruciatori di gas ad aria soffiata Gas-Gebläsebrenner Forced draught gas burners Funzionamento monostadio Einstufiger Betrieb One stage operation CODICE MODELLO - MODELL TIPO - TYP CODE MODEL TYPE 3761171...
- Page 2 DICHIARAZIONE DI CONFORMITA’ RIELLO S.p.A. dichiara sotto la propria responsabilità che i sotto elencati bruciatori di gas ad aria soffiata sono conformi alle seguenti Direttive Europee: - Direttiva del Consiglio 73/23/CEE - 2006/95/CE – relativa al Materiale Elettrico - Direttiva del Consiglio 89/336/CEE - 2004/108/CE – relativa alla Compatibilità Elettromagnetica - Direttiva del Consiglio 90/396/CEE –...
-
Page 3: Table Of Contents
INDICE DESCRIZIONE DEL BRUCIATORE ..........1.1 Materiale a corredo . -
Page 4: Descrizione Del Bruciatore
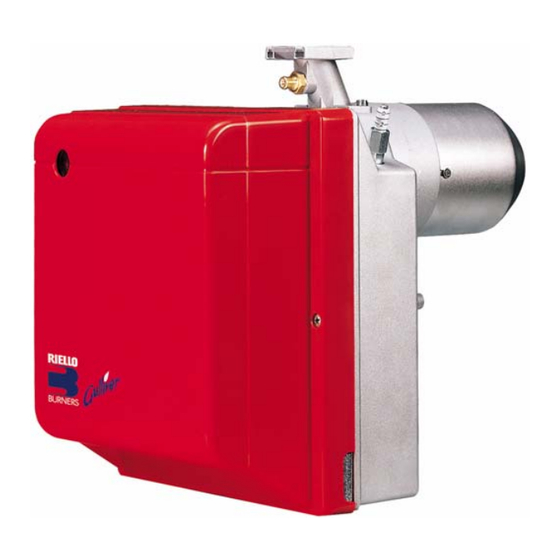
DESCRIZIONE DEL BRUCIATORE Bruciatore di gas ad aria soffiata con funzionamento monostadio. Fig. 1 D7180 1 – Pressostato aria 6 – Gruppo regolazione serranda aria 2 – Presa 6 poli per rampa gas 7 – Gruppo porta testa 3 – Apparecchiatura di comando e controllo con 8 –... -
Page 5: Dati Tecnici
KIT GPL E’ disponibile un kit speciale che montato sulla testa di combustione consente ai bruciatori, previsti per fun- zionamento a gas naturale, di bruciare GPL. Per l’installazione del “kit GPL” fare riferimento alle istruzioni che l’accompagnano. Il kit deve essere installato in conformità alle leggi e alle normative locali. KIT TESTA DI COMBUSTIONE ALTERNATIVA Il kit può... -
Page 6: Dimensioni
Alimentazione a gas naturale (Famiglia 2) per i diversi paesi: PAESE AT - IT - DK - CH GB - IE CATEGORIA GAS II2H3B/P II2H3P II2ELL3B/P II2Er3P II2L3B/P II2E3B/P I2E(R)B, I3P – – – – – – PRESSIONE – – –... -
Page 7: Campi Di Lavoro
CAMPI DI LAVORO I campi di lavoro sono stati definiti in conformità alle prescrizioni della norma EN 676. Il bruciatore è applicabile per funzionamento con camera di combustione in depressione (fino a - 2 mbar), secondo i termini di approvazione previsti dalla norma EN 746-2 per l’intero apparecchio equipaggiato. D4447 912T1 EN 676... - Page 8 GENERATORI DI PROVA Il campo di lavoro è stato ottenuto su generatori di prova secondo la norma EN 676. GENERATORI DI CALORE COMMERCIALI L’abbinamento bruciatore-generatore di calore non pone problemi se il generatore e le dimensioni della camera di combustione sono prossime a quelle previste nella norma EN 676. Se invece il bruciatore viene abbinato ad un generatore commerciale e le dimensioni della camera di com- bustione sono nettamente più...
-
Page 9: Installazione
INSTALLAZIONE L’INSTALLAZIONE DEL BRUCIATORE DEVE ESSERE EFFETTUATA IN CONFORMITÀ ALLE LEGGI E NORMATIVE LOCALI. FISSAGGIO AL GENERATORE Allargare, se necessario, i fori dello schermo isolante (3, fig. 3). Fissare alla portina del generatore (1) la flangia (5) mediante le quattro viti (4) e (se necessario) i dadi (2) interponendo lo schermo isolante (3) ma tenendo allentata una delle due viti superiori (4), (vedi fig. -
Page 10: Rampa Gas
RAMPA GAS (secondo EN 676) La rampa gas viene fornita a parte; per la sua regolazione vedere le istruzioni che l’accompagnano. RAMPA GAS ATTACCHI BRUCIATORE IMPIEGO ABBINABILE TIPO CODICE INGRESSO USCITA MBDLE 055 D01 3970570 Rp 1 / 2 Flangia 1 Gas naturale e GPL Gas naturale ≤... -
Page 11: Linea Di Alimentazione Gas
LINEA DI ALIMENTAZIONE GAS Fig. 6 Legenda – Condotto arrivo gas – Saracinesca manuale (a carico dell’installatore) – Manometro pressione gas (a carico dell’installatore) – Filtro – Pressostato gas – Valvola di sicurezza D5209 – Stabilizzatore di pressione – Valvola di regolazione M1 –... -
Page 12: Collegamenti Elettrici
COLLEGAMENTI ELETTRICI LEGENDA – Condensatore CN1 – Connettore sonda – Elettrodo – Contaore MV – Motore PA – Pressostato aria PG – Pressostato gas minima RS – Reset remoto SO – Sonda ionizzazione – Spia blocco (230V - 0,5 A max) T6A –... -
Page 13: Funzionamento
FUNZIONAMENTO REGOLAZIONE DELLA COMBUSTIONE L’applicazione del bruciatore al generatore di calore, la regolazione e il collaudo, devono essere eseguiti nell’osservanza del manuale d’istruzione del generatore stesso, compreso il controllo della concentrazione di CO e CO nei fumi, della loro temperatura e di quella media dell’acqua o dell’aria del generatore. A seconda della portata richiesta dal generatore vanno definite le regolazioni della testa di combustione e della serranda aria. -
Page 14: Regolazione Serranda Aria
REGOLAZIONE SERRANDA ARIA, Fig. 9 (fig. 8, pag. 11) Il primo avviamento deve sempre essere effettuato con serranda aria superiore a tacca 1. La serranda aria lascia la fabbrica tarata per la minima potenza. Per effettuare la regolazione procedere come segue: ±... -
Page 15: Pressostato Aria
PRESSOSTATO ARIA Eseguire la regolazione del pressostato aria dopo aver effettuato tutte le altre regolazioni del bruciatore con il pressostato aria regolato a inizio scala. Con il bruciatore funzionante alla potenza minima aumentare la pressione di regolazione girando lentamente in senso orario l’apposita manopolina fino al blocco del bruciatore. -
Page 16: Manutenzione
MANUTENZIONE Prima di effettuare qualsiasi operazione di pulizia o controllo, togliere alimentazione elettrica al bru- ciatore agendo sull’interruttore generale dell’impianto e chiudere la valvola d’intercettazione del gas. Il bruciatore richiede una manutenzione periodica, che deve essere eseguita da personale abilitato e in con- formità... -
Page 17: Anomalie / Rimedi
SEGNALE CAUSA PROBABILE Pressostato aria di minima non chiude o è già chiuso prima della chiusura del termostato limite: 3 lampeggi – guasto al pressostato aria; – pressostato aria non regolato; Luce presente in camera prima dell’accensione e allo spegnimento del bruciatore: 4 lampeggi –... - Page 18 ANOMALIE POSSIBILE CAUSA RIMEDIO È invertito il collegamento Provvedere ad un loro scambio. fase-neutro. Manca o è inefficace il collegamento Il bruciatore esegue Provvedere a renderlo efficiente. di terra. normalmente il ciclo di preventilazione ed ac- Verificare la corretta posizione ed La sonda di ionizzazione è...
-
Page 19: Anomalie In Funzionamento
6.2 ANOMALIE IN FUNZIONAMENTO ANOMALIA POSSIBILE CAUSA RIMEDIO Verificare la corretta posizione ed eventualmente aggiustarla secondo quanto indicato in questo manuale. Sonda a massa. Provvedere alla pulizia o la sostituzione della sonda di ionizzazione. Il bruciatore va in Verificare la pressione del gas in rete e/ blocco in funziona- Sparizione della fiamma per 4 volte. - Page 21 INHALT BESCHREIBUNG DES BRENNERS ..........1.1 Mitgeliefertes Zubehör .
-
Page 22: Beschreibung Des Brenners
BESCHREIBUNG DES BRENNERS Gas-Gebläsebrenner mit einstufigem Betrieb. Abb. 1 D7180 1 – Luftdruckwächter 6 – Luftklappenregulierung 2 – 6 - polige Steckdose für Gasstrecke 7 – Kopfblock - Halter 3 – Steuergerät mit 7 - poliger Steckdose 8 – Druckanschluß 4 –... -
Page 23: Technische Merkmale
SATZ FÜR FLÜSSIGGAS Zur Verfügung steht ein spezieller Satz, der nach der Montage an den Kopf von Erdgasbrennern den Betrieb mit Flüssiggas ermöglicht. Für die Installation des “Flüssiggassatzes” auf die ihm anliegenden Anweisungen Bezug nehmen. Der Satz muss in Konformität mit den örtlichen Gesetzen und Vorschriften installiert werden. SATZ ALTERNATIVER FLAMMKOPF Der Satz kann verwendet werden, um bei besonderen Anwendungen eine Verbrennungsunstabilität zu vermei- den. -
Page 24: Abmessungen
Erdgasversorgung (2. Gasfamilie) für die verschiedenen Länder: LAND AT - IT - DK - CH GB - IE GASKATEGORIE II2H3B/P II2H3P II2ELL3B/P II2Er3P II2L3B/P II2E3B/P I2E(R)B, I3P – – – – – – GAS - ANSCHLUSS – – – DRUCK –... -
Page 25: Arbeitsfelder
ARBEITSFELDER Die Arbeitsfelder sind in Übereinstimmung mit den Vorschriften der Norm EN 676 festgelegt. Der Brenner ist nach den von Norm EN 746-2 für das ganze ausgerüstete Gerät vorgesehenen Genehmi- gungsbedingungen für einen Betrieb mit Brennkammer auf Unterdruck (bis zu - 2 mbar) anwendbar. D4447 912T1 EN 676... - Page 26 HEIZKESSEL Das Arbeitsfeld wurde an einem Heizkessel, gemäß der Norm EN 676, ermittelt. HANDELSÜBLICHE HEIZKESSEL Die Vereinigung von Brenner und Wärmeerzeuger gibt keine Probleme, falls Heizkessel und Brennkam- merabmessungen jenen von Norm EN 676 vorgesehenen ähneln. Wird der Brenner dagegen mit einem handelsüblichen Heizkessel vereint und die Brennkammerabmessun- gen sind entschieden kleiner als jene von Norm EN 676 angegeben, so müssen die Hersteller zu Rate gezogen werden.
-
Page 27: Installation
INSTALLATION DIE INSTALLATION DES BRENNERS MUSS IN ÜBEREINSTIMMUNG MIT DEN ÖRTLICHEN GESETZEN UND VORSCHRIFTEN AUSGEFÜHRT WERDEN. BRENNERMONTAGE Falls erforderlich, die Bohrungen der Isolierdichtung (3, Abb. 3) erweitern. Mit den Schrauben (4) (falls erforderlich) den Muttern (2) an der Heizkesseltür (1) den Flansch (5) mit Isolierdichtung (3) montieren, aber eine der zwei höheren Schrauben losschrauben (Siehe Abb. -
Page 28: Gasstrecken
GASSTRECKE, (nach EN 676) Die Gasstrecke wird extra bestellt; die Einregulierung wird entsprechend der beigefügten Betriebsanleitung durchgeführt. GASSTRECKE ANSCHLÜSSE ABGESTIMMTER GEBRAUCH BRENNER CODE EINGANG AUSGANG MBDLE 055 D01 3970570 Rp 1/2 Flansch 1 Erdgas und Flüssiggas Erdgas ≤ 40/45 kW und Flüssiggas MBDLE 403 B01 3970545 BS1F... -
Page 29: Gasanschluss-Schema
GASANSCHLUSS–SCHEMA Abb. 6 Zeichenerklärung – Gaszuleitung – Handabsperrschieber (Sonderzubehör) – Gasdruckmanometer (Sonderzubehör) – Filter – Gasdruckwächter – Sicherheitsventil – Gasdruckregler – Einstellventil D5209 M1 – Messung, Anschlußdruck M2 – Messung, Brenner- Kopfdruck 3150... -
Page 30: Elektrisches Verdrahtungsschema
3.6 ELEKTRISCHES VERDRAHTUNGSSCHEMA ZEICHENERKLÄRUNG – Kondensator CN1 – Verbinder Fühler – Zündelektrode – 1. Stufe Stundenzähler MV – Motor PA – Minimalluftdruckwächter PG – Minimalgasdruckwächter – Fernentstörung SO – Flammenfühler – Störabschaltung-Fernmeldung (230V - 0,5A max.) T6A – Sicherung – Brenner-Erdung –... -
Page 31: Betrieb
BETRIEB EINSTELLUNG DER BRENNERLEISTUNG Die Anbringung des Brenners am Heizkessel, die Einstellung und die Endprüfung müssen unter Beachtung der Betriebsanleitung des Heizkessels ausgeführt werden, einschließlich Kontrolle der Konzentration von CO und CO in den Abgasen, ihrer Temperatur und der durchschnittlichen Wasser- oder Lufttemperatur des Heizkessels. -
Page 32: Luftklappeneinstellung
LUFTKLAPPENEINSTELLUNG, Abb. 9 (siehe Abb. 8, Seite 11) Beim ersten Anfahren muss die oberen Luftklappe immer auf Raste 1 gestellt sein. Die Luftklappe wird im Werk für die minimale Leistung eingestellt. Zur Einstellung wie folgt vorgehen: ± ± Die Mutter (9) lockern und die Schraube (8) betätigen. Die Mutter (9) nach der Einstellung wieder anschrauben. -
Page 33: Luftdruckwächter
LUFTDRUCKWÄCHTER Während der Einregulierung des Gasbrenners wird der Luftdruckwächter auf 0 gestellt. Ist die Einregulierung abgeschlossen, wird der Luftdruck einreguliert. Die Regulierskala langsam im Uhrzei- gersinn drehen, bis der Brenner abschaltet. Dann die Regulierskala entgegengesetz um einen Wert zurück- drehen, bis der Brenner wieder einschaltet. Mit dieser Einstellung den Brennerstart mehrmals wiederholen und bei Bedarf den Luftdruckwächter nachregulieren. -
Page 34: Wartung
WARTUNG Vor der Durchführung von Reinigungs- oder Kontrollarbeiten, immer die elektrische Versorgung zum Brenner durch Betätigung des Hauptschalters der Anlage abschalten und das Gasabsperrven- til schließen. Der Brenner bedarf regelmäßiger Wartung, die von autorisiertem Personal und in Übereinstimmung mit ört- lichen Gesetzen und Vorschriften ausgeführt werden muss. -
Page 35: Störungen / Abhilfe
SIGNAL MÖGLICHE URSACHE Minimalluftdruckwächter schließt nicht oder ist vor dem Schließen des Begren- zungsthermostaten bereits geschlossen: 3 Blinken – Defekt am Luftdruckwächter; – Luftdruckwächter schlecht eingestellt. Licht in der Brennkammer vor dem Einschalten und beim Ausschalten des Brenners: 4 Blinken –... - Page 36 STÖRUNGEN MÖGLICHE URSACHE ABHILFE Der Anschluss Phase - Nulleiter ist Umpolen. verwechselt. Kein oder unwirksames Erdungska- Instand setzen. Der Brenner führt den bel. Vorbelüftungs- und Gemäß den Angaben dieser Anleitung Zündzyklus regulär Der Ionisationsfühler hat eine Kurz- den richtigen Lage prüfen und den Ioni- aus;...
-
Page 37: Betriebsstörungen
6.2 BETRIEBSSTÖRUNGEN STÖRUNGEN MÖGLICHE URSACHE ABHILFE Richtige Position überprüfen und ggf. gemäß den Angaben in dieser Anleitung Geerdeter Fühler. korrekt einstellen. Ionisationsfühler reinigen oder ersetzen. Der Brenner geht N e t z g a s d r u c k ü... - Page 39 INDEX BURNER DESCRIPTION ............1.1 Burner equipment .
- Page 40 BURNER DESCRIPTION One stage forced draught gas burner. Fig. 1 D7180 1 – Pressure switch 6 – Air damper adjustment assembly 2 – 6 pole socket for gas train 7 – Head holder assembly 3 – Control box with 7 pole socket 8 –...
- Page 41 LPG KIT There is a special kit available that, when mounted on the combustion head, enables burners designed to run off natural gas to burn LPG instead. Refer to the instructions supplied with the “LPG kit” for installation. The kit must be installed in conformity with laws and local regulations. ALTERNATIVE COMBUSTION HEAD KIT The kit can be used to avoid combustion instability that might be encountered in special applications.
-
Page 42: Overall Dimensions
Natural gas supply (Family 2) for the various countries: COUNTRY AT - IT - DK - CH GB - IE GAS CATEGORY II2H3B/P II2H3P II2ELL3B/P II2Er3P II2L3B/P II2E3B/P I2E(R)B, I3P – – – – – – – – – PRESSURE –... - Page 43 FIRING RATES Firing rates have been determined in conformity with the provisions of standard EN 676. In addition, burner can be applied for operation with the combustion chamber featuring negative pressure (up to - 2 mbar) according to the approval terms provided for in standard EN 746-2 for the whole unit com- plete with equipment.
- Page 44 TEST HEAT GENERATOR The working field has been defined according to EN 676 standard. COMMERCIAL HEAT GENERATORS The burner-heat generator team does not pose problems provided the generator and size of the combustion chamber are similar to those provided for in standard EN 676. If, on the other hand, the burner is teamed with a commercially-available heat generator and the combustion chamber is much smaller than the size indicated in standard EN 676, you should consult the manufacturers.
- Page 45 INSTALLATION THE BURNER MUST BE INSTALLED IN CONFORMITY WITH LEGISLATION AND LOCAL STANDARDS. HEAT GENERATOR FIXING Widen, if necessary, the insulating gasket holes (3, fig. 3). Fix the flange (5) to the heat generator door (1) using four screws (4) and (if necessary) the nuts (2) interposing the insulating gasket (3) but keep unloosing one of the two upper screws (4) (see fig.
- Page 46 GAS TRAIN (according to EN 676) The gas train is supplied separately, for its adjustment see the enclosed instructions. GAS TRAIN CONNECTIONS MATCHED BURNER TYPE CODE INLET OUTLET MBDLE 055 D01 3970570 Rp 1/2 Flange 1 Natural gas and LPG Natural gas ≤...
- Page 47 GAS FEEDING LINE Fig. 6 Key to lay-out – Gas supply pipe – Manual cock (charged to the installer) – Gas pressure gauge (charged to the installer) – Filter – Gas pressure switch – Safety valve – Pressure governor – Adjusting valve D5209 M1 –...
-
Page 48: Electrical Wiring
3.6 ELECTRICAL WIRING KEY TO LAY-OUT – Capacitor CN1 – Ionisation probe connector – Electrode – Hour counter MV – Motor – Min. air pressure switch – Min. gas pressure svitch – Remote reset – Ionisation probe – Lock-out signal (230V - 0.5A max.) T6A –... - Page 49 WORKING COMBUSTION ADJUSTMENT The application of the burner to the heat generator, adjustment and testing must be carried out observing the instruction manual of the boiler, including verification of the CO and CO concentration in the flue gases, their temperatures and the average temperature of the water in the generator. To suit the required appliance output, choose the proper setting of the combustion head, and the air damper opening.
- Page 50 AIR DAMPER SETTING, (fig. 8, page 11) Fig. 9 Do not carry out the first ignition with the air damper lower than set point 1. The air damper leaves the factory set for minimum output. To vary the setting proceed as follows: Loosen the nut (9) and the screws (8).
- Page 51 4.7 AIR PRESSURE SWITCH The air pressure switch is set after all other adjustments have been made. Begin with the switch at the lowest setting. With the burner working at the minimum output, adjust the dial clockwise, increasing its value until the burner shuts down. Now reduce the value by one set point, turning the dial anti-clockwise.
- Page 52 MAINTENANCE Disconnect the electric supply to the burner by switching off the main power switch and close the gas shut-off valve before maintaining or checking the system. The burner requires scheduled maintenance that must be carried out by qualified personnel and in compli- ance with local legislation.
- Page 53 SIGNAL PROBABLE CAUSE Min. air pressure switch does not close or is already closed before the limit thermostat closed: 3 pulses – air pressure switch faulty; – air pressure switch incorrectly regulated. Light present in the chamber before the burner’s switching on or off: 4 pulses –...
- Page 54 FAULTS POSSIBLE CAUSES SOLUTION Phase and neutral connection is Invert them. inverted. The earth connection lacks or is ineffi- Make the earth connection efficient. T h e b u r n e r r u n s n o r - cient.
- Page 55 6.2 OPERATING IRREGULARITIES FAULTS POSSIBLE CAUSES SOLUTION Check the right position and if necessary set it according to the instructions of this Earth probe. manual. Clean or replace the ionization probe. Check the gas pressure in the network The burner locks out The flame disappears 4 times.
- Page 56 RIELLO S.p.A. I-37045 Legnago (VR) Tel.: +39.0442.630111 http:// www.rielloburners.com Con riserva di modifiche - Änderungen vorbehalten! - Subject to modifications...
Need help?
Do you have a question about the Gulliver Series and is the answer not in the manual?
Questions and answers