Table of Contents
Advertisement
Available languages
Available languages
Quick Links
Download this manual
See also:
Operating Manual
Advertisement
Chapters
Table of Contents

Related Manuals for PeakTech 1885


Summary of Contents for PeakTech 1885
- Page 1 PeakTech 1885 / 1890 ® Bedienungsanleitung / Operation manual Programmierbare DC-Schaltnetzteile / Programmable Switching Mode Power...
-
Page 2: Table Of Contents
Inhalt 1. Wichtige Sicherheitshinweise …………………………………………………………..……. 3 2. Technische Spezifikation der Netzteil-Serie ..............…... 3. Einleitung..........................……. 5 4. Bedien- und Anzeigeelemente ..................…….. 5 5. Allgemeines Arbeitsprinzip ..................……… 6 5.1. Schnellübersicht der Tastenfeldfunktionen ............……. 6 6. Bedienungsanleitung ......................… 7 6.1. Einstellen des Betriebsmodus ……………………………………………………………… 7 6.1.1. -
Page 3: Wichtige Sicherheitshinweise
1. Sicherheitsvorkehrungen Dieses Produkt erfüllt die Anforderungen der folgenden Richtlinien der Europäischen Gemeinschaft: 2014/30/EU (Elektromagnetische Verträglichkeit) und 2014/35/EU (Niederspannung) einschl. 2014/32/EU (CE-Kennzeichnung). Zur Gewährleistung des sicheren Betriebs des Geräts und zur Vermeidung von ernsthaften Verletzungen durch Kurzschluss (Funken) müssen die folgenden Sicherheitsvorkehrungen beachtet werden. -
Page 4: Technische Spezifikation Der Netzteil-Serie
Beim Reinigen unbedingt darauf achten, dass keine Flüssigkeit in das Innere des Gerätes gelangt. Dies könnte zu einem Kurzschluss und zur Zerstörung des Gerätes führen. 2. Technische Spezifikation der Netzteile Technische Daten P 1890 P 1885 Ausgangsspannung 1-20 V DC 1-40 V DC Ausgangsstrom... -
Page 5: Einleitung
3. Einleitung Diese Serie an programmierbaren Schaltnetzteilen wurde für die komplette Fernprogrammierung mit Data Logging-Funktion entwickelt. Über eine RS- 485-Schnittstelle können bis zu 31 Netzteile angeschlossen werden. Das ist ideal für Anwendungen insbesondere mit mehreren Netzteilen, die unterschiedliche Gruppen an Ausgangseinstellungen und Laufzeiten für sich wiederholende Testungen erfordern. -
Page 6: Allgemeines Arbeitsprinzip
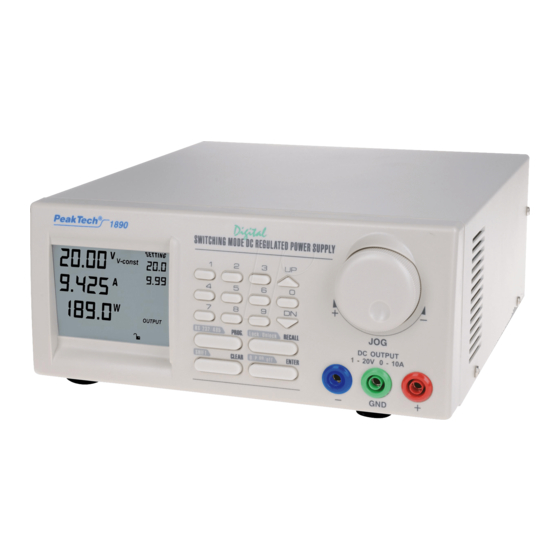
5. Allgemeines Arbeitsprinzip Hinweis: Dieser Abschnitt enthält einen zusammenfassenden Überblick über das Gerät. Lesen Sie diesen Abschnitt, wenn Sie schnell starten möchten. 5.1. Schnellübersicht der Tastenfeldfunktionen Das vorderseitige Tastenfeld ist folgendermaßen angeordnet: (1) Zifferntasten, UP/DOWN-Tasten und Drehschalter (2) 4 Dualfunktions-Steuertasten Die Anzeigefeldfunktionen lassen sich folgendermaßen zusammenfassen: Tasten Funktion... -
Page 7: Bedienungsanleitung
6. Bedienungsanleitung 6.1. Einstellen des Betriebsmodus 6.1.1. Ausgang Ein/Aus Aktion LCD-Display Beschreibung SHIFT drücken Ausgang AKTIVIERT O/P ON/OFF drücken Ausgang DEAKTIVIERT 6.1.2. Tastenfeld und Drehschalter sperren/entsperren Aktion LCD-Display Beschreibung drücken Tastenfeld und Drehschalter gesperrt. SHIFT drücken Tastenfeld und Drehschalter entsperrt. LOCK/UNLOCK 6.1.3. -
Page 8: Ausgang Beim Einschalten Ein/Aus
6.1.5. Ausgang beim Einschalten Ein/Aus Aktion LCD-Display Beschreibung Erst SHIFT PrUP Dies aktiviert den Ausgang beim Einschalten des dann UP drücken ON (Ein) Geräts, d.h. wenn Sie das Netzteil einschalten, ist der Ausgang ebenfalls automatisch AN und zeigt den zuletzt eingestellten Spannungswert. -
Page 9: Grundfunktionen
6.2. Grundfunktionen 6.2.1. Einstellen von Spannung & Strom über Drehschalter und UP-/DN-Tasten Aktion LCD-Anzeige Beschreibung ENTER drücken Spannungseinstellung. Drehen Zum Einstellen des Spannungspegels Drehschalter drehen oder oder UP-/DN-Tasten drücken. UP & DN drücken ENTER drücken I-set Stromeinstellung. Drehen Zum Einstellen des Stroms Drehschalter drehen oder UP-/DN-... -
Page 10: Verwenden Der Programmierfunktionen
6.3. Verwenden der Programmierfunktionen 6.3.1. Zeitprogrammierung Aktion LCD-Anzeige Beschreibung Drücken Sie zur Eingabe Drücke der Stufe für das Zeitprogramm. dann Drehrad oder numerische Tasten nutzen, um die Stufe des Zeitprogramm auszuwählen. Nutze oder Up und Down Tasten nutzen, um die drücke verschiedenen Einstellungen des Zeitprogramms durchzuschalten. -
Page 11: Programmlauf Starten
6.3.2. Programmlauf starten Action LCD Display Description Press to enter in run menu. rVMP Press Then Use JOG or numbering keypad select number of steps to be run start from step 0. The minimum steps to be run is 2. thru Press this key next to set number of cycle to be run. -
Page 12: Pc-Schnittstelle
7. Bedienungsanleitung PC-Schnittstelle Dieser Abschnitt zeigt den Anschluss von: einem Netzteil über die RS-232-Schnittstelle 2 oder mehr (bis zu 31) Netzteilen über die RS-485-Schnittstelle. 7.1. Anschließen mehrerer Netzteile an den PC über RS-485 Verwenden Sie bei mehreren anzuschließenden Netzteilen die RS-485-Schnittstelle über den RS-485- Anschluss auf der Rückseite der Netzteile. - Page 13 Anhang BEFEHLSSATZ Anmerkungen zur Verwendung des Fernprogrammiermodus Die USB/485-Schnittstelle ist immer für den Anschluss an einen PC zur Fernprogrammierung bereit. Befehlssatz { }-Befehlsdaten, [ ] – zurückgegebene Daten, [OK] = "OK", [CR] = 0 dh ???? = 30h, 30h, 30h, 30h - 39h, 39h, 39h, 39h (4 bytes data) ??? = 30h, 30h, 30h - 39h, 39h, 39h (3 bytes data) ?? = 30h, 30h –...
- Page 14 Command Code & Return Data Description Voltage [????] Current [????] [0] [CR] PS in CV mode [OK] [CR] Voltage [????] Current [????] [1] [CR] PS in CC mode [OK] [CR] Input Command: GETS <address> <CR> Get Voltage & Current Set Value from PS Return Data from Power Supply: Voltage [???] Current [???] [CR] [OK] [CR]...
- Page 15 Command Code & Return Data Description Timer minute [####] second [##] timer [ON] colon [ON] m [ON] s [ON] Setting voltage [###] V-const [ON] V-bar [ON] V [ON] Setting current [###] I-Const [ON] I-bar [ON] A [ON] Program [#] Program [ON] P-bar [ON] SETTING [ON] Key lock [ON] Key open [ON] FAULT [ON] Output on [ON] Output off [ON] Remote [ON] [CR] [OK] [CR]...
- Page 16 Letzter Stand bei Drucklegung. Technische Änderungen des Gerätes, welche dem Fortschritt dienen, vorbehalten. Hiermit bestätigen wir, dass alle Geräte, die in unseren Unterlagen genannten Spezifikationen erfüllen und werkseitig kalibriert geliefert werden. Eine Wiederholung der Kalibrierung nach Ablauf von 1 Jahr wird empfohlen. ® © PeakTech 07/2019 / AW/EHR...
- Page 17 Table of Contents 1. Safety precautions …………………………………………………………......……… 18 2. Technical specifications ..............…………………………….. 19 3. Introduction........................……. 19 4. Controls and indicators ………..................…….. 20 5. General operation principle ..................……… 21 5.1. Quick reference of keypad functions ............……….…. 21 6. User manual ..........................… 22 6.1.
-
Page 18: Safety Precautions
1. Safety Precautions This product complies with the requirements of the following European Community Directives: 2004/108/EC (Electromagnetic Compatibility) and 2006/95/EC (Low Voltage) as amended by 2004/22/EC (CE-Marking). To ensure safe operation of the equipment and eliminate the danger of serious injury due to short- circuits (arcing), the following safety precautions must be observed. -
Page 19: Technical Specifications
If you switch on the unit again, it should resume the normal operation. In the event of this problem persists, the unit must be investigate by your agent. 2. Technical Specifications of Power Supplies Specifications P 1890 P 1885 Output voltage 1-20 V DC 1-40 V DC Output current... -
Page 20: Controls And Indicators
This series of power supplies have obtained the safety approval EN-61010 and EN-55011 EMC approval for scientific , industrial equipment of the CE directives. Please keep this manual in a safe place and contact your vendor for any special requirement in optional accessories for RS-485. -
Page 21: General Operation Principle
5. General Operation Principle Note: This section contains a condensed overview of the unit. Read this section to quickly get started. 5.1 Quick Reference of Keypad Functions The front Keypad is organised as follow: (1) Number Keys, UP/DOWN Keys and Jog Wheel (2) 4 Dual Function Control Keys The front panel functions are summarized as follow: Function... -
Page 22: User Manual
6. User Manual 6.1 Setting Operation Modes 6.1.1. Enable/Disable Output Action LCD Display Description Press Output ENABLE Then Press Output DISABLE Then 6.1.2 Lock/ Unlock the Keypad and Jog Dial Action LCD Display Description Press Keypad and Jog Dial Locked Then Press Keypad and Jog Dial UnLocked... -
Page 23: Output Enable/Disable At Power Up
6.1.5 Output Enable/Disable at Power Up Action LCD Display Description This will enable the output at power up. 1. Press i.e. When you switch on the power supply, the Then output is also ON automatically with last set voltage value. This will disable the output at power up. -
Page 24: Enable/Disable Scpi Function
6.1.7 Enable/Disable SCPI Action LCD Display Description 1. Press Press to enter into SCPI Then enable/disable menu Use JOG select between Y and N Rotate Press this key to confirm Press 6.2 Basic Operation 6.2.1 Setting of Voltage and Current by Jog Dial and UP & DOWN Key Action LCD Display Description... -
Page 25: Setting Of Voltage And Current Using Keypad
6.2.2 Setting of Voltage and Current Using Keypad Action LCD Display Description Press to switch between V-set and I- Press set. Setting voltage/current by pressing numbers on Keypad. Press this key to confirm Press Note : whenever to terminate the settings of voltage and current, press “CLEAR” to return to the normal operation. -
Page 26: Setting Of Timed Program
6.3.2 Setting of Timed Program Action LCD Display Description Press to enter into timed Press program step setting. Then Use JOG or numbering Keypad to select step to be review. thru Use UP/DOWN key to move around voltage, Press current and time setting of step. The select part will flash to indicate it is under modification. -
Page 27: Pc-Connection
Action LCD Display Description Use JOG or numbering keypad select number of cycle to be run. thru Press this key to start running Press Press this key terminate the program running anytime. Note : whenever to terminate the Preset Program, press “CLEAR” to return to the normal operation. 7. - Page 28 APPENDIX A COMMMAND SET Remarks in using the Remote Programming Mode The USB/485 interface is always ready for connection to PC for remote programming operation . { }- command data, [ ] - return data, [OK] = "OK", [CR] = 0dh ???? = 30h, 30h, 30h, 30h - 39h, 39h, 39h, 39h (4 bytes data) ??? = 30h, 30h, 30h - 39h, 39h, 39h (3 bytes data) ?? = 30h, 30h –...
- Page 29 Command Code & Return Data Description Return Data from Power Supply: Voltage [????] Current [????] [0] [CR] PS in CV mode [OK] [CR] Voltage [????] Current [????] [1] [CR] PS in CC mode [OK] [CR] Input Command: GETS <address> <CR> Get Voltage &...
- Page 30 Command Code & Return Data Description Reading watt [####] W [ON] Timer minute [####] second [##] timer [ON] colon [ON] m [ON] s [ON] Setting voltage [###] V-const [ON] V-bar [ON] V [ON] Setting current [###] I-Const [ON] I-bar [ON] A [ON] Program [#] Program [ON] P-bar [ON] SETTING [ON] Key lock [ON] Key open [ON] FAULT [ON] Output on [ON] Output off [ON] Remote [ON] [CR]...
- Page 31 We recommend to calibrate the unit again, after 1 year. ® © PeakTech 07/2019 / AW./EHR. PeakTech Prüf- und Messtechnik GmbH – Gerstenstieg 4 –DE-22926 Ahrensburg / Germany +49-(0) 4102-97398 80 +49-(0) 4102-97398 99 info@peaktech.de...
Need help?
Do you have a question about the 1885 and is the answer not in the manual?
Questions and answers