Table of Contents
Advertisement
Advertisement
Table of Contents

Related Manuals for Vision Engineering EVO Cam II


Summary of Contents for Vision Engineering EVO Cam II
- Page 2 NAVIGATION INSTRUCTIONS The symbols in the left-hand margin of each page of the manual will enable you to carry out the following functions: The buttons in text below do not function. They are for illustrative purposes only. Contents Click on this button to display the Contents page. Back one page.
-
Page 3: Preface
PREFACE System serial numbers Unit type Serial number EVO Cam II Multi-axis stand Ergo stand Focus assembly Transmitted substage illumination module (option) EVO Cam II On the rear of the unit. Ergo stand At the base of the column at the back. -
Page 4: Copyright
All such warranties are hereby excluded to the fullest extent Copyright in this document is owned by Vision Engineering Ltd. Any person is hereby permitted by law. authorised to view, copy, print and distribute this document subject to the following We have compiled the texts and illustrations as accurately as possible. -
Page 5: Table Of Contents
Contents Contents PREFACE ASSEMBLY MAINTENANCE System serial numbers Transmitted substage illuminator (option) Troubleshooting EVO Cam II Taking care of your EVO Cam II Stand mounts Multi-axis stand Ergo stand Ergo stand FIRMWARE UPGRADE Polarisation filter (option) Focus assembly Multi-axis stand... -
Page 6: General
Compliance statements undertaking any maintenance. techniques for cleaning. Vision Engineering and its products conforms to the requirements ƒ Avoid using any form of liquid near the system. ƒ Never use chemicals to clean coloured surfaces or of the EC Directives on Waste Electrical and Electronic Equipment accessories with rubberised parts. -
Page 7: System Diagram
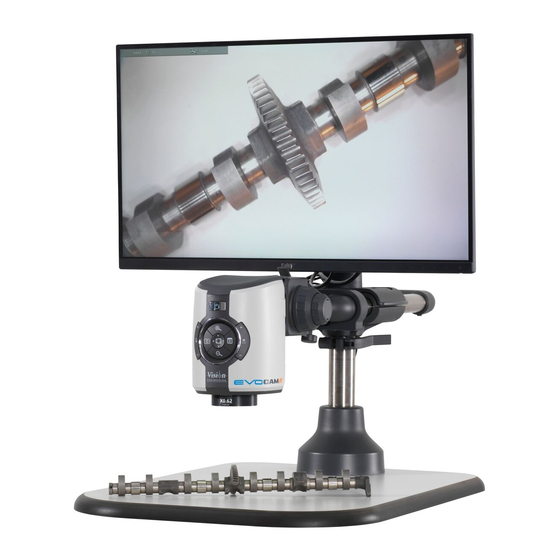
SYSTEM DIAGRAM Contents Sub-assemblies Start page Standard box contents: ƒ EVO Cam II camera unit ƒ Power supply unit ƒ Plug cord ƒ HDMI cable EVO Cam II Preface ƒ USB3 cable ECH 005 ƒ Lens cloth System Diagram ƒ 2mm HEX key... -
Page 8: Optical Data
Optical data Contents Objective Part Magnification Working Field of view Field of view Start page lens number zoom range* distance at min. zoom at max. zoom (width / height) (width / height) Full field: 2.27x – 68.04x 241.0mm / 134.0mm 7.8mm / 4.2mm 0.45x ECL001... -
Page 9: Stand Options
Contents Stand options Start page Preface Multi-axis stand column and arm System Diagram EVB021 Ergo stand with focus Assembly EVB010 Operation 75mm Riser Block Multi-axis stand Maintenance base board EVB093 EVB022 Specification Multi -directional floating stage Focus assembly EVS120 EVF111 Transmitted substage illumination Monitor mount EVS012... -
Page 10: Assembly
Once EVO Cam II is installed on the stand (see page 11) connect the sub-stage power cable to the EVO Cam II. If assembling the optional glare reducing filter, this needs to be placed between the diffuser and the surround. -
Page 11: Stand Mounts
Tighten securing grub screw with HEX key provided Polarisation filter (option) Preface Please contact Vision Engineering to have polariser fitted into the unit by an authorised engineer. Multi-axis stand System Diagram Place focus assembly on the mounting post... -
Page 12: Objective Lens
Plug the power supply into a mains socket. Plug the power lead from the power supply into the EVO Cam II power connector on the back of the unit. Maintenance If required, an external ringlight (option) can be used with EVO Cam II. Plug the external ringlight into Specification the rear panel connector of EVO Cam II. -
Page 13: Operation
OPERATION Contents Quick start Ring-light illumination control Start page Power on/off - Press ‘+’ to increase brightness Zoom in - Press ‘–’ to decrease brightness Zoom out Press and hold ‘+’ or ‘-’ for fast change to Image capture illumination. Transmitted substage illuminator (option) Short press ‘+’... -
Page 14: Control Functions
After four beeps and a few seconds the picture from the camera will appear. If not, switch your monitor to the input used for EVO Cam II. There will also be a panel in the top left of the screen displaying the EVO Cam II’s current settings. Preface To turn EVO Cam II off, hold the Power button in for approximately 2 seconds. -
Page 15: Magnification
Magnification Contents Press the Zoom-In button to enlarge the subject within the image and Zoom-Out button reduce the subject size within the image. The unit will make a sound to indicate when it has reached Start page maximum or minimum zoom limits. Magnification level OSD (On Screen Display) The current magnification level is displayed for example “x30“to show a magnification level of 30. -
Page 16: Main Menu Options
Main menu options Exposure options Contents To access the Main Menu press the Menu button The following main exposure options are available: Start page ƒ Auto exposure ƒ Aperture priority ƒ Manual exposure Preface System Diagram Assembly Operation Use the , and buttons to navigate the menu, and the button to make a selection. - Page 17 Auto exposure Aperture priority Contents Using this option, exposure is calculated and adjusted automatically. Target This option allows the exposure to be calculated automatically when the user brightness can be set to users desired level. sets the aperture value (F14 – F1.6 & closed). This allows easy control of the Start page depth of field while maintaining the correct exposure.
-
Page 18: Focus Options
Exposure time can all be adjusted. Aperture (F14 – F1.6 & closed), Gain (1 - Start page This option allows the user to set the EVO Cam II’s focus to be set 15) and Exposure time (1/10,000 – 1s) automatically if the subject is within range, or set a specific focal distance. -
Page 19: Calibration
Calibration Contents Scale Before setting a calibration, ensure the unit is in Manual Focus Use the buttons to set the size of the calibration piece that mode at Inf. When a calibration is set, the unit is automatically set Start page to Manual Focus mode and this can cause the object to move out of can be viewed on the monitor that will be used for calibration. -
Page 20: Measurement
Measurement Grid Contents This option enables a grid to be displayed on the screen. Both the size and With the measurement options ( ) displayed, use the position of the grid can be altered as follows: buttons to highlight the option required and then press to highlight Start page and then... -
Page 21: Presets And Hotkeys
System Diagram following options: ƒ Set screen size ƒ Set lens power Save: press to save the current EVO Cam II settings to the selected Assembly ƒ Set measurement units preset ƒ Set digital zoom Export: press to export the current settings to a USB stick... - Page 22 Set measurement units Black and white Contents With set measurement units ( ) highlighted, press With set black and white ( ) highlighted, press To alter the units, use the buttons to highlight either mm or To turn black and white on or off, use the buttons to highlight Start page inch, press...
- Page 23 Capture button action Language Contents With language ( ) highlighted, press Set this option to Freeze to freeze image on first push of capture button. To select the required language, use the buttons to highlight Second press to capture. Or, to Save to save image on first push of capture Start page on of the following: button.
- Page 24 Crosshair colour System set up Contents With crosshair colour ( ) highlighted, press With the system set up ( ) option highlighted, press and then use buttons to enable one of the following options: To set the crosshair colour, use the buttons to highlight the Start page ƒ...
- Page 25 Reset Contents To reset the EVO Cam II to its factory settings, ensure the reset icon ( is highlighted, press and then press to carry out the reset. Start page Press to return to the system set up options. Frequency...
-
Page 26: Using The Remote Keypad (Optional)
Press a hotkey (P1 to P3) to activate the preset settings allocated to the hot key. Front Panel Lock The remote keypad can be used to lock out the access to the menu from the front of the EVO Cam II unit. Preface Press P2 for 3 seconds until ‘Front Panel Lock On’... -
Page 27: Maintenance
Use only the supplied power supply and inspect the cabling regularly for damage. EVO Cam II contains a small battery to enable time and date settings to be retained while the unit is powered off. Should the battery need replacing System Diagram please contact you Vision Engineering representative who will be able to advise you. -
Page 28: Specification
SPECIFICATION Contents Start page Camera resolution: HD 1080p, 1920x1080 at 50/60 Hz Monitor connections: HDMI Monitor requirements: HD ready or full HD (recommended) Outputs: HDMI, USB3.0 Preface Image capture: USB 2.0 High-speed System Diagram Dimensions: 11 x 16.5 x 14 cm (w x h x d) Assembly Power: Max.
Need help?
Do you have a question about the EVO Cam II and is the answer not in the manual?
Questions and answers