Advertisement
Quick Links
Advertisement

Related Manuals for Thermalright AXP-100


Summary of Contents for Thermalright AXP-100
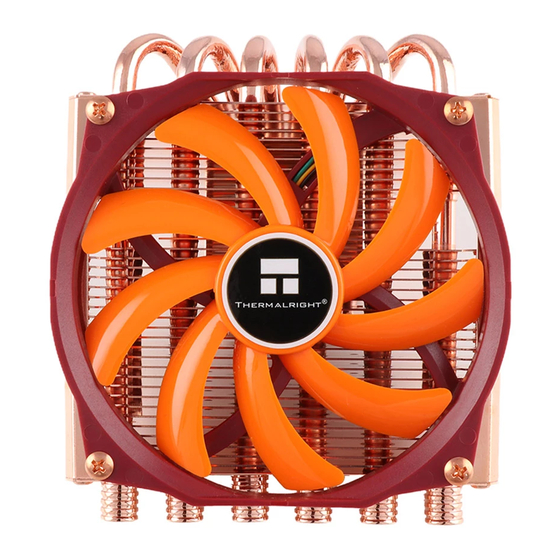
- Page 1 Thermalright AXP-100...
- Page 3 Assembly package AXP-100 × 4 × 1 × 4 × 1 × 7 × 4 × 5 × 4 × 5 × 5 × 5 × 1 × 1 × 1 × 1...
-
Page 4: Exploded View
Intel 775/1155/1156/1366 AXP-100 Exploded view Important! Before proceeding with installation, please check for the most up-to-date instructions at www.thermalright.com 120mm Fan Heatsink Body M3 L6 Screw Anchoring Mount Screw Nut Intel Washer(small) Metal Back Plate M3 L10 Screw Backplate cap... - Page 5 M3 L6 Screw ×7 Screw Pillars x4 AMD Washer (big) ×4 AMD Washer (big) ×4 Backplate cap ×1 Thermal paste ×1 TY100 Fan×1 W3 L4 Screw ×5 M3 L17 Screw ×5 M3 L30 Screw ×5 The Ultimate Cooling Solutions! www.thermalright.com...
-
Page 6: Installation Instructions
Installation Instructions: Step 1: 1366 1156 1155 Step 1 : Backplate Installation Choose the platform (775/1155/1156/1366)you are in use. Make four M3L10 Screws go through the Metal Back Plate from bottom towards top.And then place the Metal Back Plate on the table. Put the four Washers (for Intel) around the Screw Cylinders. - Page 7 Place the included TY-100 onto the Heatsink Body. And then secure it by scewing on the four M3L17 Screws, though the fan’s mounting hole. Step 8: Step 8 : Installation completed Plug in the fan connector to the CPU PWM Fan socket on the motherboard. Installation complete. The Ultimate Cooling Solutions! www.thermalright.com...
- Page 8 Intel 2011 AXP-100 Exploded view Important! Before proceeding with installation, please check for the most up-to-date instructions at www.thermalright.com 120mm Fan Heatsink Body M3 L6 Screw Anchoring Mount Mounting Plate Screw Nut...
- Page 9 M3 L10 Screw ×5 M3 L6 Screw ×7 Intel Washer (small) ×4 AMD Washer (big) ×4 Backplate cap ×1 Thermal paste ×1 TY100 Fan×1 W3 L4 Screw ×5 M3 L17 Screw ×5 M3 L30 Screw ×5 The Ultimate Cooling Solutions! www.thermalright.com...
- Page 10 Installation Instructions: Step 1: Step 1 : Screw Pillar Installation Screw on the four LGA2011 Type B Screw Pillars into the Heatsink studs on the ILM Assembly Frame around the processor socket. Step 2: Step 2 : Anchoring Mount Installation Place the Anchoring Mount onto the four LGA2011 Type B Screw Pillars, secure it by tightening it with 4 M3L6 Screws.
- Page 11 AXP-100 Step 4: Step 4 : Mounting Plate Installation. Place the Heatsink Body on top of the CPU. Make the Mounting Plate go through the Heatsink Body. Then use the two M3L6 screws to secure the Mounting Plate. Step 5: Step 5 : Fan Installation Place the included TY-100 onto the Heatsink Body.
- Page 12 AXP-100 AM2/AM2+/AM3/AM3+/FM1/FM2 Exploded view Important! Before proceeding with installation, please check for the most up-to-date instructions at www.thermalright.com 120mm Fan Heatsink Body M3 L6 Screw Anchoring Mount Mounting Plate Screw Nut AMD Washer(big) Metal Back Plate M3 L10 Screw Backplate cap...
- Page 13 M3 L10 Screw ×5 M3 L6 Screw ×7 Intel Washer (small) ×4 AMD Washer (big) ×4 Backplate cap ×1 Thermal paste ×1 TY100 Fan×1 W3 L4 Screw ×5 M3 L17 Screw ×5 M3 L30 Screw ×5 The Ultimate Cooling Solutions! www.thermalright.com...
- Page 14 Installation Instructions: Step 1: Step 1 : Backplate Installation Choose the platform (AMD) you are in use. Make four M3L10 Screws go through the Metal Back Plate from bottom towards top. And then place the Metal Back Plate on the table. Put the four Washers (for AMD) around the Screw Cylinders.
- Page 15 Place the included TY-100 onto the Heatsink Body. And then secure it by scewing on the four M3L17 Screws, though the fan’s mounting hole. Step 8: Step 8 : Installation completed Plug in the fan connector to the CPU PWM Fan socket on the motherboard. Installation complete. The Ultimate Cooling Solutions! www.thermalright.com...
-
Page 16: Technical Spec
AXP-100 Technical Spec Heatsink Specifications: Dimension: Length 105.47mm x Width 121.1mm x Height 44.15mm Weight: 360g (including fan and mounting brackets) Heatpipe: 6mm heatpipe*6 units Copper Base: C1100 Pure copper nickel plated Fan Specification: Dimension: L108.25mm x H101.5mm x W25mm... - Page 17 AXP-100 105.47 26.98 9.45 22.3 The Ultimate Cooling Solutions! www.thermalright.com...
- Page 18 Upgrading Your Fan to TY-140 series fans Step 1: Step 1 : Place the 120/140mm Fan Mount on top of the Heatsink Body, pass four M3L4 Screws through the rectangle holes. Slide the frame to adjust your fan mounting position, then tighten the 120/140mm Fan Mount.
- Page 20 The Ultimate Cooling Solutions! www.thermalright.com TEL: +886-2-8663-6630 FAX: +886-2-8663-6645 EMAIL: sales@thermalright.com...
Need help?
Do you have a question about the AXP-100 and is the answer not in the manual?
Questions and answers