
Related Manuals for Pro-face PL-6920


Summary of Contents for Pro-face PL-6920
- Page 1 PL-6920/PL-7920 Series Panel Computer User Manual When printing out this PDF manual, since the printer setting can effect the quality of the printout, be sure your printer’s quality setting is set to “High”.
-
Page 2: Introduction
Preface Introduction The PL-6920/PL-7920 series (PL) of Panel Computers are multipurpose factory automation (FA) computers, which embody Pro-face’s latest, cost- effective architecture. Before using the PL, read this manual thoroughly to familiarize yourself with the PL’s operation procedures and functions. -
Page 3: Essential Safety Precautions
• Do not create touch panel switches that are used to either control or to ensure the safety of equipment and person- nel. Mechanical switches, such as an emergency stop switch, a deadman (two-handed) start switch, etc., must be installed and operated via a separate control system. PL-6920/PL-7920 Series User Manual... - Page 4 • Read and understand Chapter 4 “Installation and Wiring” thoroughly in order to select an appropriate installation location for the PL. • Before either plugging in or unplugging a board or inter- face connector, be sure to turn the PL’s power OFF. PL-6920/PL-7920 Series User Manual...
- Page 5 Do not use thinner or organic sol- vents. • Avoid exposing the PL to, or operating the PL in direct sunlight, high temperatures and humidity, and in areas where excessive dust and vibration will occur. PL-6920/PL-7920 Series User Manual...
- Page 6 HDD stops spinning before turning on the power again (approx. 5 seconds). • When the PL unit's standard display is connected to the PL using the USB connection, wait three (3) seconds before turning the power ON again. PL-6920/PL-7920 Series User Manual...
- Page 7 1) Use the Display OFF feature; if the same image is to be displayed for a long period of time. 2) Change the screen display periodically to prevent the displaying of a single image for a long period of time. PL-6920/PL-7920 Series User Manual...
-
Page 8: Table Of Contents
1 Printer Interface (LPT1) ................2- 6 2 Keyboard Interface .................. 2- 7 3 Mouse Interface ..................2- 7 4 RS-232C Interface (COM1/COM2/COM3) ..........2- 8 5 RAS Interface ..................2- 9 6 USB Interface ..................2- 10 PL-6920/PL-7920 Series User Manual... - Page 9 Chapter 5 System Setup 5-1 Setup Procedures ..................5- 1 5-2 System Parameters ..................5- 2 1 STANDARD CMOS FEATURES ............5- 2 2 IDE HDD AUTO DETECTION ..............5- 4 3 ADVANCED BIOS FEATURES ..............5- 5 4 ADVANCED CHIPSET FEATURES ............5- 8 PL-6920/PL-7920 Series User Manual...
- Page 10 7-1 Regular Cleaning ..................7- 1 1 Cleaning the Display ................7- 1 2 Installation Gasket Replacement ..............7- 2 7-2 Cleaning the Filter ..................7- 2 7-3 Changing the PL Backlight ................7- 4 7-4 Periodic Inspection Items ................7- 12 PL-6920/PL-7920 Series User Manual...
- Page 11 4 Visual C Function Specifications (Details) ......... App-98 5 Visual C++ Functions ..............App-100 6 Visual C++ Function Specifications (Details) ........App-100 7 Visual Basic Functions ..............App-103 8 Visual Basic Function Specifications (Details) ......... App-103 Consent Agreement ................App-106 PL-6920/PL-7920 Series User Manual...
-
Page 12: Information Symbols
Indicates steps used to accomplish a given task. Be sure to follow these 1), 2) steps in the order they are written. Refers collectively to the PL-6920, PL-7920 and PL-B920 Series units. PL-X920 Series PL Series Panel Types Model Number:... -
Page 13: Package Contents
If your PL unit contains a built-in accessory, that accessory’s Installation Guide will also be included in the PL’s packing box. Please check that all items normally included with that accessory are also included in this box. PL-6920/PL-7920 Series User Manual... -
Page 14: Pl Series Features
Bright LCD with a Wide Viewing Angle The PL’s large TFT LCD display offers excellent visibility and brightness. Pro-face’s top of the line TFT color LCD allows you to create detailed and powerful visual images, with excellent brightness, a wide viewing angle, and a display capable of 64K colors. -
Page 15: Ul/C-Ul (Csa) Application Notes
- Danger of explosion if backup battery is incorrectly replaced. Replaced only with same or equivalent type recommended by the manufacturer. Dispose of used batteries according to the manufacturer’s instructions. - Be sure the unit the PL is built into uses a UL1950 compatible equipment structure. PL-6920/PL-7920 Series User Manual... -
Page 16: Ce Marking
This battery should be replaced only with same or equivalent type recom- mended by the manufacturer. Dispose of used batteries according to the manufacturer’s instructions. Be sure the cabinet/enclosure the PL is built into uses an EN60950 approved sheet steel structure. PL-6920/PL-7920 Series User Manual... - Page 17 Preface MEMO PL-6920/PL-7920 Series User Manual...
-
Page 18: Chapter 1 Overview
Other operating systems do not support this driver software, etc. After turning the PL OFF, be sure to wait at least 5 seconds before turning ON again. If the unit is stated within 5 seconds, it may not start up correctly. 1 - 1 PL-6920/PL-7920 Series User Manual... -
Page 19: Setting Up The Touch Panel Connection
Assign IRQ For USB Enabled • When using a commercial-type USB hub, additional hubs cannot be attached to the first hub. Only a single “level” USB hub can be used when connecting USB devices. 1 - 2 PL-6920/PL-7920 Series User Manual... -
Page 20: Using The Lan Interface
• This diagram shows only the PL’s internal layout and connect- able devices. The user’s actual design may differ. *1 Only one FDD unit can be used at one time, i.e. either the front panel’s FDD, or the main unit’s FDD. 1 - 3 PL-6920/PL-7920 Series User Manual... -
Page 21: Options
Preinstalled HDD (Sold only in combination with the PL main unit - not separately.) Windows compatible 3.5” FDD unit (Side slot) PL-FD200 Windows compatible 3.5” FDD unit (Front slot - PL-6920/PL-7920 FDD Unit PL-FD210 only) Provides -5V and -12V power to PL expansion slots. T otal for two... - Page 22 Spare backlight for maintenance. *1 Both the PL-FD200 and the PL-FD210 cannot be used at the same time. • When using the FDD unit with PL-6920/PL-7920 (4-slot type), either the side mount FDD unit (PL-FD200) or the front mount FDD unit (PL- FD210) is available, not simultaneously.
- Page 23 (PCI/ISA compatible) as well as a standard keyboard, mouse,printer, etc. When using a USB cable, the PL-6920 and PL-7920 Series units can also use USB compatible devices. However, among the commercially available USB devices, not all will be compatible with the PL unit.
-
Page 24: Chapter 2 Specifications
AC 1500V at 20mA for 1 minute Voltage Endurance (between the live wire and the grounding (FG) terminal) Greater than 10MΩ at DC 500V Insulation (between the live wire and the grounding (FG) terminal) Resistance 2 - 1 PL-6920/PL-7920 Series User Manual... -
Page 25: Environment Specifications
• Using the Hard Disk in an environment that is excessively hot and/or humid will shorten the disk’s usage lifetime. A maximum wet bulb temperature of 29 C is rec- ommended. This is equivalent to the following data. 2 - 2 PL-6920/PL-7920 Series User Manual... -
Page 26: Dimensions
If the installation gasket is used for a long period of time, or if the unit and its gasket are removed from the panel, the original level of the protection cannot be guaranteed. To maintain the original protection level, you need to replace the installation gasket regularly. 2 - 3 PL-6920/PL-7920 Series User Manual... -
Page 27: Performance Specifications
DRAM(SDRAM DIMM) Equipped with 128MB (2 DIMM sockets – max. of 512MB) AWARD PC/AT Compatible BIOS Secondary Cache 256KB (built-in) Memory PL-6920 Series SVGA (800 x 600 dots) PL-7920 Series XGA (1024×768 dots) Graphics VESA 16 colors/256 colors/64K colors UMA type Video Memory... -
Page 28: Expansion Slots
4 slots) 2 slots) • For the 2nd and 3rd slots on the PL-6920/PL-7920<4-slot type>, and the 2nd slot on the PL-6921/PL-7921<2-slot type>, either the PCI or the ISA type can be used. Pins 1, 4, 16 and 17 will become O.D when the SPP mode specification is used. If the mode changes to ECP or EPP, these pins will become T.S... -
Page 29: Interface Specifications
SLCT SLCT Input • Pins 1, 4, 16 and 17 will become O.D when the SPP mode specification is used. If the mode changes to ECP or EPP, these pins will become T.S 2 - 6 PL-6920/PL-7920 Series User Manual... -
Page 30: Keyboard Interface
Mini - DIN 6 pin (Female) KEY CLK (The PL’s front and side SHIELD connectors are the same) Mouse Interface Pin No. Signal Name Mouse DATA Mini - DIN 6 pin (Female) Mouse CLK SHIELD 2 - 7 PL-6920/PL-7920 Series User Manual... -
Page 31: Rs-232C Interface (Com1/Com2/Com3)
An incorrect setting could cause a unit malfunc- tion or accident. • Be sure to change these settings only after confirming that the PL’s power supply is turned OFF. Failure to do so could cause a unit malfunction. 2 - 8 PL-6920/PL-7920 Series User Manual... -
Page 32: Ras Interface
• Be sure the voltage value between terminals is controlled via the input voltage, so that the PL is operated within its recommended range. If the input voltage exceeds this range, a malfunction or PL damage may occur. 2 - 9 PL-6920/PL-7920 Series User Manual... -
Page 33: Usb Interface
If load current value used is large, a maximum voltage of 1.5V will exist between the terminals. • When connecting an induction load, be sure to connect the above drawing's protection diode(*1). USB Interface Pin No. Name Receptacle - Data + Data 2 - 10 PL-6920/PL-7920 Series User Manual... -
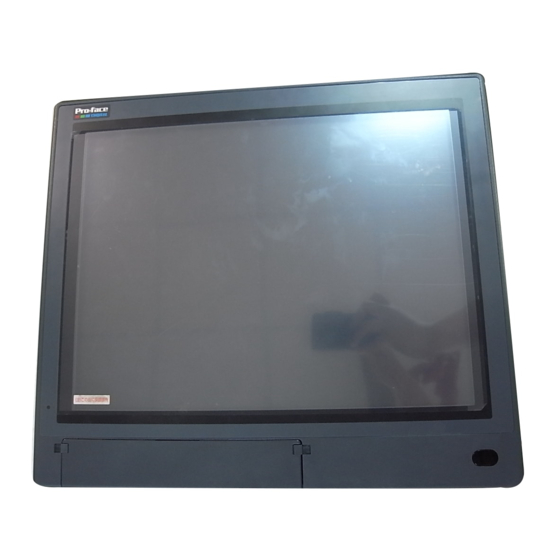
Page 34: Part Names And Features
Specifications 2-4 Part Names and Features The following explanation uses the PL-6920 Series unit. A:Display Area/Touch Panel Display output area. The built-in SVGA or XGA controller supports PC compatible architecture. B:Power Lamp LED/RAS Status Lamp This LED indicates both the RAS monitor feature’s status and the PL’s power status. - Page 35 V:Power Switch Use this switch to turn the PL’s power ON or OFF. W:Rear Maintenance Cover Remove this cover to install the optional DIM module, or an expansion board. PL-6920(4-slot type) PL-6920(4-slot type) 2 - 12 PL-6920/PL-7920 Series User Manual...
-
Page 36: Pl Dimensions
Specifications 2-5 PL Dimensions General Dimensions PL-6920 (Unit: mm/in. - excluding projections) 330[12.99] Top View 170[6.69] 346[13.62] 13[0.51] Front View Side View 2 - 13 PL-6920/PL-7920 Series User Manual... - Page 37 Specifications PL-6921 330[12.99] Top View 123[4.84] 346[13.62] 13[0.51] Front View Side View 2 - 14 PL-6920/PL-7920 Series User Manual...
- Page 38 Specifications PL-7920 (Unit: mm/in. - excluding projections) 359[14.13] Top View 180[7.09] 374[14.72] 13[0.51] Front View Side View 2 - 15 PL-6920/PL-7920 Series User Manual...
- Page 39 Specifications PL-7921 (Unit: mm/in. - excluding projections) 359[14.13] Top View 134[5.27] 374[14.72] 13[0.51] Front View Side View 2 - 16 PL-6920/PL-7920 Series User Manual...
-
Page 40: External Dimensions (With Installation Fasteners Installed)
Specifications External Dimensions (with Installation Fasteners installed) PL-6920 342[13.46] 330[12.99] 165[6.50] 236[9.29] 352[13.86] 170[6.69] 13[0.51] 346[13.62] 10[0.39] 264[10.39] 2 - 17 PL-6920/PL-7920 Series User Manual... - Page 41 Specifications PL-6921 342[13.46] 330[12.99] 236[9.29] 165[6.50] 352[13.86] 123[4.84] 346[13.62] 13[0.51] 10[0.39] 264[10.39] 2 - 18 PL-6920/PL-7920 Series User Manual...
- Page 42 Specifications PL-7920 371[14.61] 359[14.13] 264[10.39] 179.5[7.07] 11[0.43] 381[15.0] 180[7.09] 13[0.51] 374[14.72] 30[1.18] 142[5.59] 147[5.79] 2 - 19 PL-6920/PL-7920 Series User Manual...
- Page 43 Specifications 371[14.61] PL-7921 359[14.13] 179.5[7.07] 264[10.39] 11[0.43] 381[15.0] 13[0.51] 134[5.28] 374[14.72] 30[1.18] 142[5.59] 147[5.79] 2 - 20 PL-6920/PL-7920 Series User Manual...
-
Page 44: Pl And Rs-232C/Rs-485 Conversion Unit (Pl-Rc500) Dimensions
Specifications PL and RS-232C/RS-485 Conversion Unit Dimensions (PL-RC500) (Unit: mm/in. - excluding projections) PL-6920 330[12.99] Top View 170[6.69] 346[13.62] 13[0.51] Front View Side View 90[3.54] 60[2.36] 2 - 21 PL-6920/PL-7920 Series User Manual... - Page 45 Specifications PL-6921 (Unit: mm/in. - excluding projections) 330.0[12.99] Top View 346[13.62] 123[4.84] 13[0.51] Front View 145[5.71] Side View 90[3.54] 60[2.36] 2 - 22 PL-6920/PL-7920 Series User Manual...
- Page 46 Specifications PL-7920 (Unit: mm/in. - excluding projections) 359[14.13] Top View 180[7.09] 13[0.51] 374[14.72] Front View Side View 60[2.36] 120[4.72] 2 - 23 PL-6920/PL-7920 Series User Manual...
- Page 47 Specifications PL-7921 (Unit: mm/in. - excluding projections) 359[14.13] Top View 134[5.27] 374[14.72] 13[0.51] 156[6.14] Front View Side View 60[2.36] 120[4.72] 2 - 24 PL-6920/PL-7920 Series User Manual...
-
Page 48: Full Sized Cover Attachment Dimensions
Full Sized Cover Attachment Dimensions PL-6920 Series The following explanation uses the PL-6921 unit. (Unit: mm/in.) (PL-6921) 65[2.56] 310[12.20] 10[0.39] Top View PL-7920 Series The following explanation uses the PL-7920 unit. (PL-7920) 310[12.20] 66[2.60] 39[1.53] Top View 2 - 25 PL-6920/PL-7920 Series User Manual... -
Page 49: Panel Cut Dimensions
• When using a full sized expansion board, be sure to check its dimensions and shape, since they will affect the board’s environment specifications, such as for vibration, etc. • There are two types of full-sized covers - one for 4-slot units (PL-6920/7920) and one for 2-slot units (PL-6921/7921). 2-slot type PL-FC200 4-slot type PL-FC210 1.3 Optional Items... - Page 50 • To insure that the PL’s water resistance is maintained, be sure to install the PL into a panel that is flat and free of scratches or dents. • Be sure all installation tolerances are maintained to prevent the unit from falling out of its installation panel. 2 - 27 PL-6920/PL-7920 Series User Manual...
-
Page 51: Installation Fasteners
Specifications Installation Fasteners (Unit: mm/in.) 16[0.63] 31[1.22] 19.5[0.77] 2 - 28 PL-6920/PL-7920 Series User Manual... -
Page 52: Chapter 3 Installing Optional Units And Expansion Boards
Use a screw driver to loosen or tighten the screws. Be careful not to over-tighten any screws, since it may damage the equipment. Be careful when removing or inserting any screws inside the body of the PL. 3 - 1 PL-6920/PL-7920 Series User Manual... -
Page 53: Removing The Rear Maintenance Cover
Rear Maintenance Cover 2) Pivot the half cover open and lift Guide Tabs up slightly to free the guide tabs. Next, remove the half-cover. Half Cover 3) Remove the rear maintenance cover. 3 - 2 PL-6920/PL-7920 Series User Manual... - Page 54 Installing Optional Units and Expansion Boards PL-6920/PL-7920 (4 slot type) Half Cover 1) Unscrew the attachment screws used to hold the rear maintenance cover(4) and half cover(1) in place. Remove the rear mainte- nance cover, and then the half cover.
-
Page 55: Installing The Dim Module (Pl-Em500 / Pl-Em128/ Pl-Em256)
Built-in DIM Module 3) Adjust the foolproof positioning Foolproof grooves so that they align with the Positioning grooves foolproof positioning pins. Foolproof Positioning pins 4) Insert the DIM module into the DIM module socket. 3 - 4 PL-6920/PL-7920 Series User Manual... -
Page 56: Installing The Fdd Unit (Pl-Fd200)
2) Insert the FDD unit so that its guide grooves fit the chassis guide ways. Push the unit in until its rear con- nector is connected securely. 3) Fix the unit in place with its two(2) attachment screws. 3 - 5 PL-6920/PL-7920 Series User Manual... -
Page 57: Installing The Fdd Unit (Pl-Fd210)
(Rear Face) 3) Unscrew the two(2) attachment screws from the PL’s Blank Panel, and remove the blank panel. <This step is only for the PL-6920 Series> 4) Loosen the FDD unit chassis two (2) upper adjustment screws, and re- Upper Adjustment move the unit’s two (2) lower set... - Page 58 Installing Optional Units and Expansion Boards <This step is only for the PL-6920 Series> 5) Push on either end of the FDD unit to compress the unit to its shortest length. Then, re-tighten the two at- tachment screws to secure the unit in place.
-
Page 59: Removing / Installing The Hdd Unit (Pl-Hd220/Pl-Hdx920-W2K/Ml)
3) Insert the HDD unit you selected inside the guideways of the PL and push it in until its rear connector is securely connected. 4) Fix the unit in place with its two(2) attachment screws. 3 - 8 PL-6920/PL-7920 Series User Manual... -
Page 60: Installing An Expansion Board
5) Fix the expansion board’s metal po- sitioning strip in place with its at- tachment screw. 6) Last, secure the rear maintenance and half covers in place with their attachment screws. 3 - 9 PL-6920/PL-7920 Series User Manual... -
Page 61: Connecting The Cd-Rom Unit (Pl-Dk200)
IDE I/F cover, and remove the cover. 2) Connect the CD-ROM unit’s cable (PL-X920 units) to the IDE I/F. Be sure that the cable is se- curely connected before turn- ing ON the power switch. 3 - 10 PL-6920/PL-7920 Series User Manual... -
Page 62: Removing The Electric Fan Unit
1) Remove the attachment screw on the filter cover, and remove the cover. Filter Cover Filter 2) Remove the filter. 3) Remove the two(2) attachment screws on the fan unit, and take out the fan unit. 3 - 11 PL-6920/PL-7920 Series User Manual... - Page 63 Fan Unit PL-6920/PL-7920 (4-slot type) 1) Remove the filter cover’s attach- ment screw. Filter cover 2) Remove the filter cover from the fan unit, and then remove the fan unit’s two(2) attachment screws. 3 - 12 PL-6920/PL-7920 Series User Manual...
- Page 64 5) Unscrew the two(2) fan unit’s at- tachment screws and then remove the fan unit from the metal plate Metal Plate holding the fan unit. Fan Unit 6) Re-attach the metal plate and the filter cover to the PL. 3 - 13 PL-6920/PL-7920 Series User Manual...
- Page 65 Installing Optional Units and Expansion Boards MEMO 3 - 14 PL-6920/PL-7920 Series User Manual...
-
Page 66: Installing The Pl
Must use fan (CPU:1GHz) Panel face C to 40 *1 When the PL’s internal electric fan is removed. 2) Installation Positioning Cautions Be sure to install the panel in an upright (verti- cal) position. 4 - 1 PL-6920/PL-7920 Series User Manual... - Page 67 (Even a slight movement of the PL should not be performed). • When using a fan to cool the PL unit, be sure that the fan does not point directly at any of the PL’s disk drive units. 4 - 2 PL-6920/PL-7920 Series User Manual...
-
Page 68: Installation Procedures
• When the installation gasket is properly inserted, approximately 2.0 mm of it will extend outside the groove. Before installing a PL into a panel, be sure to confirm that the gasket is correctly in place. 4 - 3 PL-6920/PL-7920 Series User Manual... - Page 69 • Avoid using the PL where the ambient temperature will be higher than the allowed specification. • Keep the PL away from arc-generating devices such as magnetic switches and non- fuse breakers. • Avoid using the PL in environments where corrosive gases are present. 4 - 4 PL-6920/PL-7920 Series User Manual...
- Page 70 2-5-6 Panel Cut Dimensions Attach and Secure the Rear Installation Fasteners 1) Locate the PL’s attachment holes, located on the top, bottom, and sides of the PL-6920 Series (8 attachment holes) PL-7920 Series (12 attachment holes) Attachment Attachment holes...
- Page 71 3) Slide the fastener backwards until it stops. 4) Use a screwdriver to tighten the fastener’s adjustment screw. To ensure a high degree of moisture resistance, the torque should be 0.5N•m. Excessive torque may damage the panel or bracket. 4 - 6 PL-6920/PL-7920 Series User Manual...
-
Page 72: Wiring The Pl
Use the following steps when connecting the power cord to the PL’s power terminals. 1) Confirm that the power switch is POWER turned OFF. Then, remove the power terminal’s transparent plas- I:ON tic cover. o:OFF Screws Transparent Cover 4 - 7 PL-6920/PL-7920 Series User Manual... - Page 73 • This power cord is designed only for AC100/115V use. Be sure to use a different cord when using other than AC100/115V power. Transparent Cover 3) Reattach the terminal strip’s transpar- ent cover with the attachment screws. 4 - 8 PL-6920/PL-7920 Series User Manual...
-
Page 74: Power Supply Cautions
(E1) and the PL (E2) separately. • Select a lightning surge absorber which will not exceed the allowable circuit voltage, even w h e n t h e voltage rises to the maximum. Lightning surge absorber 4 - 9 PL-6920/PL-7920 Series User Manual... -
Page 75: Grounding Cautions
• To improve noise immunity, it is recommended to attach a ferrite core to the power cord. *1 Use a grounding resistance of 100Ω or less, and a 2mm or thicker wire, or your country’s applicable standard. For details, contact your local PL distributor. 4 - 10 PL-6920/PL-7920 Series User Manual... -
Page 76: Chapter 5 System Setup
5-1 Setup Procedures 5-2 System Parameters System Setup This chapter explains how to enter a PL-6920/PL-7920 Series unit's system settings, as well as the cautions required both before and during set up. 5-1 Setup Procedures Normally, use only the factory (default) settings. -
Page 77: System Parameters
3.5in] and Drive B [None] and recommended for most users. Video The selections for the screen (video) mode. The available settings are [EGA/VGA], [CGA40], [CGA80] and [MONO]. The [EGA/VGA] selection is factory set and recommended for most users. PL-6920/PL-7920 Series User Manual 5 - 2... - Page 78 : Displays all errors, except for those related to the disk drive (FDD), and stops the unit. [All,But Disk/Key] : Displays all errors, except for those related to the disk drive (FDD) and keyboard, and then stops the unit. PL-6920/PL-7920 Series User Manual 5 - 3...
-
Page 79: Ide Hdd Auto Detection
[IDE Primary Master (Slave)] setting is set to [Manual]. When the [IDE Primary Master (Slave)] setting is set to [Auto], these values are automaticaly detected. Capacity is set automaticaly. PL-6920/PL-7920 Series User Manual 5 - 4... -
Page 80: Advanced Bios Features
CPU's serial number. If you do not need to know the serial number, set this option to [Disabled]. If this is turned ON, use the "Serial Number Control Program" found on Intel's web site to perform the check. PL-6920/PL-7920 Series User Manual 5 - 5... - Page 81 -When only one HDD unit is installed. OS cannot be started. Be sure the BIOS setting is "HDD-0". -When 2 HDD units are installed. An HDD unit designated as the Slave HDD is recognized as "HDD-1". PL-6920/PL-7920 Series User Manual 5 - 6...
- Page 82 Report No FDD For WIN 95 This setting determines if the FDD node is reported by BIOS to WIN95. The available settings are [No] and [Yes]. The factory default setting is [No] and is recommended for most users. PL-6920/PL-7920 Series User Manual 5 - 7...
-
Page 83: Advanced Chipset Features
Sets whether the System BIOS’ Cache is used or not. When the OS is set to use this cache, the PL unit’s processing speed will increase. Settings available are [Enabled] and [Disabled]. The factory setting is [Enabled] and is recommended for most users. PL-6920/PL-7920 Series User Manual 5 - 8... - Page 84 On-Chip Video Window Size Designates the on-chip video window size used by the VGA driver. The available settings are [Disabled] and [64MB]. The factory default setting is [64MB] and is recommended for most users. PL-6920/PL-7920 Series User Manual 5 - 9...
-
Page 85: Integrated Peripherals
Designates the Master Drive's UDMA Operation Mode. The two selections available are [Auto] or [Disabled]. The [Auto] selection is factory set and recommended for most users.When using the CD-ROM drive, select [Mode 2]. PL-6920/PL-7920 Series User Manual 5 - 10... - Page 86 The factory default setting is [Enabled] and is recommended for most users. Power ON Function This feature is not supported. KB Power ON Password This feature is not supported. Hot Key Power ON This feature is not supported. PL-6920/PL-7920 Series User Manual 5 - 11...
- Page 87 Designates the ECP mode's DMA channel. [1] and [3] are available selections, however, this item can be set only when the Parallel Port Mode is set to either [ECP] or [ECP+EPP]. PWRON After PWR-Fail This feature is not supported. PL-6920/PL-7920 Series User Manual 5 - 12...
-
Page 88: Power Management Setup
When enabled, designates the period of time before all devices except the CPU are shut down. The available settings are [1Min], [2Min], [4Min], [8Min], [12Min], [20Min], [30Min], [40Min], [1Hour] and [Disabled]. The factory default setting is [Disabled]. PL-6920/PL-7920 Series User Manual 5 - 13... - Page 89 (period) of PL unit idle time prior to changing to energy-saving mode. Thus, when an event occurs for any of the items in this area that are set to [Enabled], the system will reload the Timer. PL-6920/PL-7920 Series User Manual 5 - 14...
-
Page 90: Pnp/Pci Configuration
This menu provides control over the DMA resources used. refer to 5-2-9 DMA Resources PCI/VGA Pallet Snoop However, depending on the VGA or MPEG board used, select [Enabled]. For setup details, refer to that board's installation guide. PL-6920/PL-7920 Series User Manual 5 - 15... -
Page 91: Irq Resources
IRQ-11 assigned to PCI/ISA PnP IRQ-5 assigned to PCI/ISA PnP IRQ-12 assigned to Legacy ISA IRQ-7 assigned to Legacy ISA IRQ-14 assigned to Legacy ISA IRQ-9 assigned to Legacy ISA IRQ-15 assigned to PCI/ISA PnP PL-6920/PL-7920 Series User Manual 5 - 16... -
Page 92: Dma Resources
Initial Value Initial Value DMA-0 assigned to PCI/ISA PnP DMA-5 assigned to PCI/ISA PnP DMA-1 assigned to PCI/ISA PnP DMA-6 assigned to PCI/ISA PnP DMA-3 assigned to PCI/ISA PnP DMA-7 assigned to PCI/ISA PnP PL-6920/PL-7920 Series User Manual 5 - 17... -
Page 93: Pc Health Status
When enabled, this setting determines IN1's allowable voltage range and desig- nates that a warning will be issued if the temeperature exceeds that level. The available settings are [+/-6%], [+/-8%] and [Disabled]. The factory default setting is [Disabled]. PL-6920/PL-7920 Series User Manual 5 - 18... - Page 94 When enabled, this setting designates the allowed speed range for FAN2. The available settings are [-30%], [-50%] and [Disabled]. The factory default setting is [Disabled]. FAN2 is used for the power supply fan. PL-6920/PL-7920 Series User Manual 5 - 19...
-
Page 95: Frequency/Voltage Control
This setting sets the CPU's clock speed in either of three ranges - 133MHz to 166MHz, 100MHz to 132MHz, or 66MHz to 100MHz, depending on the CPU's host clock. The available settings are [100] to [132]. The factory default setting is [100] and strongly recommended for users. PL-6920/PL-7920 Series User Manual 5 - 20... -
Page 96: Load Fail-Safe Defaults
"PASSWORD DISABLE" will appear, providing confirmation that the Pass- word is no longer set. When password input is required, use the [Advanced BIOS Features] area's [Security Option] feature to enter the password. See 5.2.3 ADVANCED BIOS FEATURES PL-6920/PL-7920 Series User Manual 5 - 21... -
Page 97: Save & Exit Setup
16 Save & Exit Setup This feature saves the settings entered in the Setup Utility and restarts the PL unit. 17 Exit Without Setting This feature quits the Setup Utility program without saving any settings en- tered. PL-6920/PL-7920 Series User Manual 5 - 22... -
Page 98: Chapter 6 Setting Up Your Pl Os
2000 / ® Windows XP Cautions Setting Up Your PL OS Pro-face has prepared the following additional program files which are not supported by ® ® the standard versions of the Windows 95 OSR2 or higher, Windows NT 4.0, Win- ®... -
Page 99: Setting Up Hdd With No Installed Os
OS versions. PL operation with any other maker’s OS is not guranteed. ® Windows 95 OSR2 or higher ® Windows 98 Second Edition ® Windows NT 4.0 (Windows Service Pack 3 or higher) ® Windows 2000 Windows ® XP Professional 6 - 2 PL-6920/PL-7920 Series User Manual... - Page 100 • To use the PL unit’s touch panel, the Mouse Emulation Software (UPDD) is re- quired. When installing this software, be sure to designate the COM port as COM4. Visit our website (http://www.pro-face.com/otasuke/) and download the Mouse Emulation Software (UPDD).
- Page 101 PLSYSMON.SYS Hardware control driver ® ® ® (WindowsNT 4.0, Windows 2000, Windows BLCTRL.VXD Backlight control driver ® ® (Windwos 95, Windwos 98 Second Edition) BLCTRL.SYS Backlight control driver ® ® ® (WindowsNT 4.0, Windows 2000, Windows 6 - 4 PL-6920/PL-7920 Series User Manual...
-
Page 102: Setting Up Os Preinstalled Hdd
PLSYSMON.VXD Hardware control driver (Windwos PLSYSMON.SYS Hardware control driver ® ® ® (WindowsNT 4.0, Windows 2000, Windows ® BLCTRL.VXD Backlight control driver (Windwos BLCTRL.SYS Backlight control driver ® ® ® (WindowsNT 4.0, Windows 2000, Windows 6 - 5 PL-6920/PL-7920 Series User Manual... -
Page 103: Installing Drivers
1) Depending on your PL OS Start up the following file and follow the instructions given. C:\Proface\Display\win9xm67.exe (Windows ® ® C:\Proface\Display\winnt4m67.exe (WindwosNT 4.0) ® ® C:\Proface\Display\win2k_xpm67.exe (Windwos 2000, Windows ® When your PL OS is WindowsNT , be sure to use Service Pack 3 or higher. 6 - 6 PL-6920/PL-7920 Series User Manual... - Page 104 Windows 98 OS CD-ROM into the CD-ROM drive. 1) Click on [Next]. 2) Select [Search for a better driver than the one your device is using now. (Recom- mended)] and click on [Next]. 6 - 7 PL-6920/PL-7920 Series User Manual...
- Page 105 The "Input Tx Early Threshold" dialog box will appear. 16) Click on [OK]. The TCP/IP dialog box will appear. 17) Enter the settings to connect with your network. The Network Setup Wizard will appear. 6 - 8 PL-6920/PL-7920 Series User Manual...
- Page 106 7) Select [Specify a location] and click [Next]. 8) Enter “C:\Proface\lan “ and click [OK]. The search for the driver will start. 9) Click on [Next]. 10) Click on [Finish] to restart your PL. 6 - 9 PL-6920/PL-7920 Series User Manual...
-
Page 107: Application Features
The use of this feature will help to extend the life of the PL’s backlight. Certain application programs may not allow the PL’s backlight to turn OFF. Please test each program individually to check if the screen saver will operate correctly. 6 - 10 PL-6920/PL-7920 Series User Manual... - Page 108 Monitor Parameter Setting Program Pl_Wps.exe For details, refer to Appendix 3.2 System Monitor Property Settings Backlight Burnout Detection Program (BLSET.EXE) PL-6920 Series unit’s only This feature designates if the PL unit's touch panel is disabled or enabled when a ®...
-
Page 109: Uninstalling Pl-X920 Driver And Utility
Logoff, the "Login Data" dialog box will appear and the User can use the name of another, registered User to log-on successfully. • If Auto LogOn Setting are not entered, when logging on, a PS/2 type keyboard is required. 6 - 12 PL-6920/PL-7920 Series User Manual... -
Page 110: Using An Uninterrupted Power Supply
Setup needs to copy some Windows NT files Setup will look for the files in the location specified below. If you want Setup to look in a different place, type the new location. When the location is corrent, click Continue. 6 - 13 PL-6920/PL-7920 Series User Manual... -
Page 111: Changing To The Ntfs File System
• After converting data to the NTFS file system, it cannot be converted back to the FAT32 (DOS compatible) file system. ® ® *1“xx” is your OS. Example) When using Windows XP: “Windows XP Professional CD-ROM” 6 - 14 PL-6920/PL-7920 Series User Manual... -
Page 112: Chapter 7 Maintenance And Inspection
Do not use sharp or hard objects, such as a mechanical pencil or screwdriver, to push on the display. This could damage the unit. Use the screen protection sheet when using Protection sheet the PL in extremely dirty or dusty areas. PL-6920/PL-7920 Series User Manual 7 - 1... -
Page 113: Installation Gasket Replacement
• Allow it to air dry completely before reat- taching to the PL. 4) After reattaching the filter to the filter cover, reattach the cover with its cover attachment screw. PL-6920/PL-7920 Series User Manual 7 - 2... - Page 114 • Allow it to air dry completely before reat- taching to the PL. 4) After reattaching the filter to the filter cover, reattach the cover with its cover attachment screw. PL-6920/PL-7920 Series User Manual 7 - 3...
-
Page 115: Changing The Pl Backlight
• Be sure to perform the backlight changeover on a flat, level surface. (PL-6921) This will prevent damage to the PL unit and the accidental cutting of Power Cord any of its power cord terminals. PL-6920/PL-7920 Series User Manual 7 - 4... - Page 116 3) Hold both sides of the front panel section and use your thumbs to slide (push) the chassis forward (see fig- ure). Slide Forward 4) The chassis can then be pivoted back and open. PL-6920/PL-7920 Series User Manual 7 - 5...
- Page 117 8) Gently lift up on the power connec- tor end of the backlight to free it and remove it from the PL. • The entire backlight unit should be changed, not just the backlight. PL-6920/PL-7920 Series User Manual 7 - 6...
- Page 118 • Be sure the backlight cables are completely secured by the cable wrap prior to connecting the PL’s front and rear sections. 14) Secure all four (4) or the PL’s attach- ment screws. PL-6920/PL-7920 Series User Manual 7 - 7...
- Page 119 (Only with PL-7920) 3) Remove the two (2) attachment screws, hold both sides of the front panel section and use your thumbs to slide (push) the chassis forward (see figure). Top Face PL-6920/PL-7920 Series User Manual 7 - 8...
- Page 120 4) The chassis can then be pivoted back and open. Remove the front face cover’s three (3) attachment screws. 6) The PL’s LCD display unit is fixed in place with two attachment screws. Remove these screws. PL-6920/PL-7920 Series User Manual 7 - 9...
- Page 121 PL’s rear cover is opened or closed. Be sure both cables are secured by their Cable Holder holder before closing the rear (opened) cover. PL-6920/PL-7920 Series User Manual 7 - 10...
- Page 122 13) Reassemble the rear cover, being careful not to pinch any internal electrical wires. 14) Replace the PL-FD210’s two attachment screws (only PL- 7900). 15) Replace and tighten the PL’s four chassis attachment screws. PL-6920/PL-7920 Series User Manual 7 - 11...
-
Page 123: Periodic Inspection Items
• Are there any flaws or tears in the moisture resistant gasket ? Display check • Is the display bright enough ? When the PL’s backlight needs to be replaced, please contact your near- est authorized service center for prompt service. PL-6920/PL-7920 Series User Manual 7 - 12... -
Page 124: Appendices
Parallel port 1 (LPT 1) 03BCH - 03BFH Video controller (VGA) 03C0H - 03DFH Reserved Serial port 3 (COM3) 03E8H - 03EFH Floppy disk controller 03F0H - 03F7H Serial port 1 (COM1) :General Use 03F8H - 03FFH PL-6920/PL-7920 Series User Manual App-1... -
Page 125: Memory Map
Appendices Memory Map FFFFFFFFH System ROM FFFF0000H Unused RAM 00100000H System ROM 000E0000H Expanded ROM Area 000CA000H VGA BIOS 000C0000H (Display Adaptor) 000A0000H Unused RAM 640 KB System Board DRAM 00000000H PL-6920/PL-7920 Series User Manual App-2... -
Page 126: Interrupt Map
DMA Channel List De scription DMA 0 DMA 1 For 8-bit transmission Floppy disk c ontroller DMA 2 DMA 3 Cascade to controller 1 DMA 4 DMA 5 For 16-bit transmission DMA 6 DMA 7 PL-6920/PL-7920 Series User Manual App-3... -
Page 127: Ras Feature
*2 The remote reset feature’s input can be either enabled or disabled, the alarm output setting cannot be set to trigger a forced system reset. *3 The Hardware Mirroring Disk and Software Mirroring Disk must be purchased sepa- rately. *4 PL-6920 Series unit's only . PL-6920/PL-7920 Series User Manual App-4... -
Page 128: Ras Feature Details
Detects Touch Panel alarms. When an alarm occurs, the LED will flash orange. Backlight Burnout Detection Feature ( PL-6920 Series unit's only Detects a backlight burnout. When a backlight burnout is detected, the touch panel is disabled and the LED will indicate that an alarm has occurred. - Page 129 • A CF card doesn't support SMART and therefore the status of the CF card cannot be monitored. • When a hard disk except options made by Pro-face is used, operation of SMART Monitoring cannot be guaranteed. The hard disks as shown in the table below are supported.
- Page 130 • With Sink/Source input, even if the D(-), and RESET(-) are positive, and D(+), RESET(+) are negative, no problems are created. Be sure to oper- ate the unit within the recommended voltage range. For connection pin location details, 2-3-5 RAS Interface PL-6920/PL-7920 Series User Manual App-7...
- Page 131 If load current value used is large, a maximum voltage of 1.5V will exist between the terminals. • When connecting an induction load, be sure to connect the above drawing's protection diode (*1) . For connection pin location details, 2-3-5 RAS Interface PL-6920/PL-7920 Series User Manual App-8...
- Page 132 None (PL-6920 Series unit's only) Orange/Red Mirror Disk and Backlight Alarm has Flashing Red/ None occurred (PL-6920 Series unit's only) Green Pop-up Message Output ® This feature uses the Windows system’s pop-up message feature to indicate that an alarm has occurred.
-
Page 133: Ras Feature Overview
General Alarm Output Purpose Input Connector 2 Bit Remote Reset Hardware Reset Input Lights Orange Touch Panel Alarm Blinks Orange/ Green Mirror Disk Alarm Lights Green Power ON Blinks Orange/ Backlight Burnout Detection Feature PL-6920/PL-7920 Series User Manual App-10... -
Page 134: System Monitor
• In order to execute a SMART moni- toring, the OS needs to be Windows ® ® ® , Windows 2000, or Windows In case of Windows ® 95 or Windows ® 98, nothing is displayed in the item of the SMART. PL-6920/PL-7920 Series User Manual App-11... - Page 135 Mirror HardMirror SMART *1 When setting Enable on Remote Reset, the same action as the Reset occurs. *2 This feature can be used only with PL-6920 Series units. Each of the above items performs the following operation. Item Operation RAS Interface Alarm Output (#9 to #10) signal is output.
-
Page 136: System Monitor Operation (Pl_Smon.exe)
Monitor screen contains the following features. Button Name Meaning Buzzer Off Stops the Alarm buzzer. Resets alarm operation or System Monitor's internal alarm Reset hold condition. Minimize Minimizes the System Monitor icon. Close Quits the System Monitor software. PL-6920/PL-7920 Series User Manual App-13... - Page 137 System Tray icon. To release this condition, click on the System Monitor dialog box's [Reset] button. Or, turn the PL unit's power OFF, find and solve the problem, and turn the PL unit's power ON again. PL-6920/PL-7920 Series User Manual App-14...
-
Page 138: Error Messages
Driver Version Error "The old system monitor driver version." "Update the driver." Overlapping Startup message "System monitor has started. " "Terminate the system monitor in starting." Shutdown Confirmation "The system monitor is terminated." "Are you sure?" PL-6920/PL-7920 Series User Manual App-15... -
Page 139: Error Displays When Using Event Viewer
Tools] -> [Event Viewer], and select [System Log]. 2) Select the System Monitor’s error and click the [Properties] icon. When the [Event Properties] dialog box appears, the error message will appear in the [Description] area. PL-6920/PL-7920 Series User Manual App-16... - Page 140 ALARM has output because of error. LAMP LAMP has output because of error. When a “+3.3V” error occurs and the buzzer sounds, two errors will be displayed, “+3.3V Error has occurred.” and “Buzzer has sounded because of +3.3V error”. PL-6920/PL-7920 Series User Manual App-17...
-
Page 141: System Monitor/Ras Feature Api-Dll
- Microsoft WindowsNT ® - Microsoft Windows 2000 ® - Microsoft Windows Each OS must use its corresponding System Monitor/RAS Device Driver. Compatible Languages - Microsoft Visual C - Microsoft Visual C++ - Microsoft Visual Basic PL-6920/PL-7920 Series User Manual App-18... - Page 142 Dynamic link library file Dynamic Link Library (DLL) In order for an application to use PL_Ioc.dll, it should be copied to the following folder. Location Windows 95/Windows 98 C:\Windows\System Windows NT4.0/Windows 2000 C:\Winnt\System32 Windows XP C:\Windows\System32 PL-6920/PL-7920 Series User Manual App-19...
-
Page 143: Class Contents
This class is used to set the parameters for device driver access using CPL_SmiIoctl class. This class is only used when using the Software Mirroring driver. Key Word Type Variable Name Description public HANDLE m_Drvhandle Device driver handle PL-6920/PL-7920 Series User Manual App-20... -
Page 144: Visual C Functions
Gets status of Software Mirroring Device SetWdtResetMask Sets the Reset Mask of the watchdog timer GetWdtResetMask Gets the Reset Mask of the watchdog timer *1 This feature can be used only with PL-6920 Series units. PL-6920/PL-7920 Series User Manual App-21... -
Page 145: Visual C Function Specifications (Details)
Call Format BOOL WINAPI CloseDrvHandle( void ) Return Value TRUE: Normal FALSE: Error Arguments None Processing Destroys the device driver handle created using the GetDrvHandle function. Example BOOL ret; //Destroys the handle ret = CloseDrvHandle(); PL-6920/PL-7920 Series User Manual App-22... - Page 146 (I/O) int *pSetup Pointer to Data 0: Disabled 1: Enabled Processing Gets the current monitoring status (enabled/disabled). Example BOOL ret; Setup; // Gets the CPU core voltage setup status. ret = GetMonitorSetup( MONITOR_VOLT_CPU, &Setup ); PL-6920/PL-7920 Series User Manual App-23...
- Page 147 = GetVoltParam( MONITOR_VOLT_CPU, &ULimit, &LLimit ); Since the data taken from this function is shown in mV units, the following conversion is needed for use in (Volt) units: Data in Volt unit = Data in mV unit/1000 PL-6920/PL-7920 Series User Manual App-24...
- Page 148 (I/O) int *pLLimit Pointer to the lower-limit fan rotation speed (Unit: RPM) (RPM: Revolutions Per Minute) Processing Gets the fan monitoring parameter. Example BOOL ret; LLimit; // Gets the lower-limit CPU fan rotation speed. ret = GetFanParam( MONITOR_FAN_CPU, &LLimit ); PL-6920/PL-7920 Series User Manual App-25...
- Page 149 Option temperature (I/O) int *pULimit Pointer to the upper-limit temperature (Unit: Degrees Celsius) Processing Gets the temperature monitoring parameter. Example BOOL ret; ULimit; // Gets the system temperature upper-limit value. ret = GetTempParam( MONITOR_TEMP_SYSTEM, &ULimit ); PL-6920/PL-7920 Series User Manual App-26...
- Page 150 TRUE: Normal FALSE: Error Arguments (I/O) int *pCounter Pointer to the watchdog timer's initial counter value (Unit: Seconds) Processing Gets the current watchdog timer's initial counter value. Example BOOL ret; Counter; ret = GetWdtCounter( &Counter ); PL-6920/PL-7920 Series User Manual App-27...
- Page 151 Example BOOL ret; Mask; // Gets the masking information for the LAMP. ret = GetWdtMask( WARNING_LAMP, &Mask ); // Gets the masking information for the alarm. ret = GetWdtMask( WARNING_ALARM, &Mask ); PL-6920/PL-7920 Series User Manual App-28...
- Page 152 TRUE: Normal FALSE: Error Arguments (I/O) int *pRunFlag Pointer to Watchdog Timer Operation Status WATCHDOG_STOP Stopped WATCHDOG_COUNTDOWN Countdown in progress Processing Gets the watchdog timer's operation status. Example BOOL ret; RunFlag; ret = RunningWdt( &RunFlag ); PL-6920/PL-7920 Series User Manual App-29...
- Page 153 Gets currently set item's warning status (LAMP or ALARM). Example BOOL ret; WarnOut; // Gets the LAMP output status. ret = GetWarningOut( WARNING_LAMP, &WarnOut ); // Gets the ALARM output status. ret = GetWarningOut( WARNING_ALARM, &WarnOut ); PL-6920/PL-7920 Series User Manual App-30...
- Page 154 Input 0, Universal Input 1). Example BOOL ret; // Cancels the input status of Universal Input 0. ret = ClearUniversalIn( PORT_UNI0 ); // Cancels the input status of Universal Input 1. ret = ClearUniversalIn( PORT_UNI1 ); PL-6920/PL-7920 Series User Manual App-31...
- Page 155 (Universal Input 0, Universal Input 1). Example BOOL ret; Mask; // Gets the masking information for Universal input 0. ret = GetUniversalInMask( PORT_UNI0, &Mask ); // Gets the masking information for Universal input 1. ret = GetUniversalInMask( PORT_UNI1, &Mask ); PL-6920/PL-7920 Series User Manual App-32...
- Page 156 Error Output Status IDE_ERROR_OFF Error Output OFF IDE_ERROR_ON Error Output ON Processing Sets the software control used to create IDE eror output. Example BOOL ret; // Sets IDE error output to OFF. ret = SetIdeErr( IDE_ERROR_OFF ); PL-6920/PL-7920 Series User Manual App-33...
- Page 157 Error Information BACKLIGHT_OK BACKLIGHT_ERR Processing Gets Backlight's current burnout error output. Example BOOL ret; LightErr; // Gets backlight's burnout condition. ret = GetLightblowErr( &LightErr ); This feature can be used only with PL-6920 Series units. PL-6920/PL-7920 Series User Manual App-34...
- Page 158 Checks the machine for voltage, fan, and temperature errors, and the Universal Input information (event) and Watchdog Timeout information. Example BOOL ret; Event; // Gets the error event information for the CPU core voltage. ret = GetEvent( EVENT_VOLT_CPU, &Event ); PL-6920/PL-7920 Series User Manual App-35...
- Page 159 // PL internal buzzer will sound at 600MHz for 1 second. ret = StartInsideBuzzer ( hz, ms ); This feature cannot be used with a PL running WindowsNT 4.0, Windows 2000 or Windows XP, due to the use of Windows 95 and Windows 98 functions. PL-6920/PL-7920 Series User Manual App-36...
- Page 160 // Checks buzzer status. ret = ChkInsideBuzzer ( &BuzzerParam ); This feature cannot be used with a PL running WindowsNT 4.0, Windows 2000 or Windows XP, due to the use of Windows 95 and Windows 98 functions. PL-6920/PL-7920 Series User Manual App-37...
- Page 161 (I) int WarningOut Output status OUTPUT_OFF Output OFF OUTPUT_ON Output ON Processing Sets DOUT warning status of current setting item. Example BOOL ret; // Sets warning DOUT output status to OFF. ret = SetWarningDOUT( OUTPUT_OFF ); PL-6920/PL-7920 Series User Manual App-38...
- Page 162 Return Value TRUE: Normal FALSE: Error Arguments None Processing Destroys the device driver handle created using the GetSmiDrvHandle function. Example BOOL ret; // Destroys the device driver handle created using the GetSmiDrvHandle function. ret = ClosetSmiDrvHandle(); PL-6920/PL-7920 Series User Manual App-39...
- Page 163 (I/O) int* pStatus Device Status DEVSTAT_GOOD Good DEVSTAT_NOTEXIST No DEVICE DEVSTAT_BROKEN BROKEN Processing Gets Software Mirroring Device Status Example BOOL ret; int Id, Type, Status; // Gets the device status Id = 0; ret = GetSmiDevStatus(Id ,&Type ,&Status); PL-6920/PL-7920 Series User Manual App-40...
- Page 164 MASK_OFF Masking disabled MASK_ON Masking enabled Processing Gets the H/W reset mask data used at WDT timeout Example BOOL ret; Mask; // Gets the reset mask data used at WDT timeout ret = GetWdtResetMask( &Mask ); PL-6920/PL-7920 Series User Manual App-41...
-
Page 165: Visual C++ Functions
GetSmiAryStatus Gets Software Mirroring feature Status GetSmiDevStatus Gets Software Mirroring Device Status SetWdtResetMask Sets Watchdog Timeout reset masking GetWdtResetMask Gets Watchdog Timeout reset masking *1 This feature can be used only with PL-6920 Series units. PL-6920/PL-7920 Series User Manual App-42... -
Page 166: Visual C++ Function Specifications (Details)
Destroys the device driver handle created using the GetDrvHandle function. Example 1 CPL_Ioctl m_Ioc; BOOL ret; // Destroys the device driver handle. ret = m_Ioc.CloseDrvHandle(); Example 2 BOOL ret; // Destroys the device driver handle. ret = ::CloseDrvHandle(); PL-6920/PL-7920 Series User Manual App-43... - Page 167 Major, Minor; ret = m_Ioc.GetDrvVersion( &Major, &Minor ); Example 2 BOOL ret; Major, Minor; ret = ::GetDrvVersion( &Major, &Minor ); If the version is 1.10, then you will get Major: 1 (decimal) Minor: 10 (decimal). PL-6920/PL-7920 Series User Manual App-44...
- Page 168 Setup; // Gets the CPU core voltage setup status. ret = m_Ioc.GetMonitorSetup( MONITOR_VOLT_CPU, &Setup ); Example 2 BOOL ret; Setup; // Get the CPU core voltage setup status. ret = ::GetMonitorSetup( MONITOR_VOLT_CPU, &Setup ); PL-6920/PL-7920 Series User Manual App-45...
- Page 169 = ::GetVoltParam( MONITOR_VOLT_CPU, &ULimit, &LLimit ); Since the data taken from this function is shown in mV units, the following conver- sion is needed for use in (Volt) units: Data in Volt unit = Data in mV unit/1000 PL-6920/PL-7920 Series User Manual App-46...
- Page 170 = ::GetCurrentVolt( MONITOR_VOLT_CPU, &Data ); Since the data taken from this function is shown in mV units, the following conver- sion is needed for use in (Volt) units: Data in Volt unit = Data in mV unit/1000 PL-6920/PL-7920 Series User Manual App-47...
- Page 171 LLimit; // Get the lower-limit CPU fan rotational speed. ret = m_Ioc.GetFanParam( MONITOR_FAN_CPU, &LLimit ); Example 2 BOOL ret; LLimit; // Get the lower-limit CPU fan rotation speed. ret = ::GetFanParam( MONITOR_FAN_CPU, &LLimit ); PL-6920/PL-7920 Series User Manual App-48...
- Page 172 BOOL ret; Data; // Get the CPU fan rotational speed. ret = m_Ioc.GetCurrentFan( MONITOR_FAN_CPU, &Data ); Example 2 BOOL ret; Data; // Get the CPU fan rotational speed. ret = ::GetCurrentFan( MONITOR_FAN_CPU, &Data ); PL-6920/PL-7920 Series User Manual App-49...
- Page 173 Example 1 CPL_Ioctl m_Ioc; BOOL ret; Data; // Gets the system temperature value. ret = m_Ioc.GetCurrentTemp( MONITOR_TEMP_SYSTEM, &Data ); Example 2 BOOL ret; Data; // Gets the system temperature value. ret = ::GetCurrentTemp( MONITOR_TEMP_SYSTEM, &Data ); PL-6920/PL-7920 Series User Manual App-50...
- Page 174 (Unit: Seconds) Processing Gets the current watchdog timer's initial counter value. Example 1 CPL_Ioctl m_Ioc; BOOL ret; Counter; ret = m_Ioc.GetWdtCounter( &Counter ); Example 2 BOOL ret; Counter; ret = ::GetWdtCounter( &Counter ); PL-6920/PL-7920 Series User Manual App-51...
- Page 175 // Disable masking for ALARM output. ret = m_Ioc.SetWdtMask( WARNING_ALARM, MASK_OFF ); Example 2 BOOL ret; // Enable masking for LAMP output. ret = ::SetWdtMask( WARNING_LAMP, MASK_ON ); // Disable masking for ALARM output. ret = ::SetWdtMask( WARNING_ALARM, MASK_OFF ); PL-6920/PL-7920 Series User Manual App-52...
- Page 176 Call Format BOOL StartWdt( void ) Return Value TRUE: Normal FALSE: Error Arguments None Processing Starts watchdog timer countdown. Example 1 CPL_Ioctl m_Ioc; BOOL ret; ret = m_Ioc.StartWdt(); Example 2 BOOL ret; ret = ::StartWdt(); PL-6920/PL-7920 Series User Manual App-53...
- Page 177 Processing Restarts watchdog timer countdown after resetting to the initial value. Example 1 CPL_Ioctl m_Ioc; BOOL ret; m_Ioc.RestartWdt(); Example 2 BOOL ret; ret = ::RestartWdt(); Processing cannot be performed if the watchdog timer is stopped. PL-6920/PL-7920 Series User Manual App-54...
- Page 178 = m_Ioc.SetWarningOut( WARNING_ALARM, OUTPUT_OFF ); Example 2 BOOL ret; // Sets the LAMP output status to ON. ret = ::SetWarningOut( WARNING_LAMP, OUTPUT_ON ); // Sets the ALARM output status to OFF. ret = ::SetWarningOut( WARNING_ALARM, OUTPUT_OFF ); PL-6920/PL-7920 Series User Manual App-55...
- Page 179 = m_Ioc.GetWarningOut( WARNING_ALARM, &WarnOut ); Example 2 BOOL ret; WarnOut; // Gets the LAMP output status. ret = ::GetWarningOut( WARNING_LAMP, &WarnOut ); // Gets the ALARM output status. ret = ::GetWarningOut( WARNING_ALARM, &WarnOut ); PL-6920/PL-7920 Series User Manual App-56...
- Page 180 Example 2 BOOL ret; UniIn; // Gets the input status of Universal Input 0. ret = ::GetUniversalIn( PORT_UNI0, &UniIn ); // Gets the input status of Universal Input 1. ret = ::GetUniversalIn( PORT_UNI1, &UniIn ); PL-6920/PL-7920 Series User Manual App-57...
- Page 181 = m_Ioc.ClearUniversalIn( PORT_UNI1 ); Example 2 BOOL ret; // Cancels the output of Universal Input 0. ret = ::ClearUniversalIn( PORT_UNI0 ); // Cancels the output of Universal Input 1. ret = ::ClearUniversalIn( PORT_UNI1 ); PL-6920/PL-7920 Series User Manual App-58...
- Page 182 = m_Ioc.SetUniversalInMask( PORT_UNI1, MASK_ON ); Example 2 BOOL ret; // Disable masking for Universal Input 0. ret = ::SetUniversalInMask( PORT_UNI0, MASK_OFF ); // Enable masking for Universal Input 1. ret = ::SetUniversalInMask( PORT_UNI1, MASK_ON ); PL-6920/PL-7920 Series User Manual App-59...
- Page 183 MASK_OFF Masking disabled MASK_ON Masking enabled Processing Sets reset-masking. Example 1 CPL_Ioctl m_Ioc; BOOL ret; // Disable reset-masking. ret = m_Ioc.SetResetMask( MASK_OFF ); Example 2 BOOL ret; // Disable reset-masking. ret = ::SetResetMask( MASK_OFF ); PL-6920/PL-7920 Series User Manual App-60...
- Page 184 Error Output OFF IDE_ERROR_ON Error Output ON Processing Uses software control to set IDE error output. Example 1 CPL_Ioctl m_Ioc; BOOL ret; ret = m_Ioc.SetIdeErr( IDE_ERROR_OFF ); Example 2 BOOL ret; ret = ::SetIdeErr( IDE_ERROR_OFF ); PL-6920/PL-7920 Series User Manual App-61...
- Page 185 // Gets backlight's burnout condition. ret = m_Ioc.GetLightblowErr( &LightErr ); Example 2 BOOL ret; LightErr; // Gets backlight's burnout condition. ret = ::GetLightblowErr( &LightErr ); This feature can be used only with PL-6920 Series units. PL-6920/PL-7920 Series User Manual App-62...
- Page 186 // Gets the error event information for the CPU core voltage. ret = m_Ioc.GetEvent( EVENT_VOLT_CPU, &Event ); Example 2 BOOL ret; Event; // Gets the error event information for the CPU core voltage. ret = ::GetEvent( EVENT_VOLT_CPU, &Event ); PL-6920/PL-7920 Series User Manual App-63...
- Page 187 // Cancels the error event for the CPU core voltage. ret = m_Ioc.ClearEvent( EVENT_VOLT_CPU ); Example 2 BOOL ret; // Cancels the error event for the CPU core voltage. ret = ::ClearEvent( EVENT_VOLT_CPU ); PL-6920/PL-7920 Series User Manual App-64...
- Page 188 // Stops PL internal buzzer. ret = ::StopInsideBuzzer ( ); This feature cannot be used with a PL running WindowsNT 4.0, Windows 2000 Win- dows XP due to the use of Windows 95 and Windows 98 functions. PL-6920/PL-7920 Series User Manual App-65...
- Page 189 Gets watchdog timeout status. Example 1 CPL_Ioctl m_Ioc; BOOL ret; Timebuf; // Gets watchdog timeout status. ret = Gm_Ioc.GetWdtTimeout( &Timebuf ); Example 2 BOOL ret; Timebuf; // Gets watchdog timeout status. ret = ::GetWdtTimeout( &Timebuf ); PL-6920/PL-7920 Series User Manual App-66...
- Page 190 Sets alarm status of DOUT. Example 1 CPL_Ioctl m_Ioc; BOOL ret; // Sets DOUT output status to OFF. ret = m_Ioc.SetWarningDOUT( OUTPUT_OFF ); Example 2 BOOL ret; // Sets DOUT output status to OFF. ret = ::SetWarningDOUT( OUTPUT_OFF ); PL-6920/PL-7920 Series User Manual App-67...
- Page 191 // Gets Software Mirroring driver handle. ret = m_SmiIoc.GetSmiDrvHandle(); Example 2 BOOL ret; // Gets Software Mirroring driver handle. ret = ::GetSmiDrvHandle(); When the Software Mirroring Driver is not loaded, an error is returned. PL-6920/PL-7920 Series User Manual App-68...
- Page 192 ARYSTAT_DEAD Dead Processing Gets Software Mirroring status. Example 1 CPL_SmiIoctl m_Smiloc; BOOL ret; Status; // Gets Software Mirroring status. ret = m_Smiloc.GetSmiAryStatus(&Status); Example 2 BOOL ret; Status; // Gets Software Mirroring status. ret = ::GetSmiAryStatus(&Status); PL-6920/PL-7920 Series User Manual App-69...
- Page 193 Id, Type, Status; // Gets device status. Id = 0; ret = m_SmiIoc.GetSmiDevStatus(ID ,&Type ,&Status); Example 2 BOOL ret; Id, Type, Status; // Gets device status. Id = 0; ret = ::GetSmiDevStatus(ID ,&Type ,&Status); PL-6920/PL-7920 Series User Manual App-70...
- Page 194 BOOL ret; Mask; // Gets data of WDT timeout reset mask. ret = m_Ioc.GetWdtResetMask( &Mask ); Example 2 BOOL ret; Mask; // Gets data of WDT timeout reset mask. ret = ::GetWdtResetMask( &Mask ); PL-6920/PL-7920 Series User Manual App-71...
-
Page 195: Visual Basic Functions
Destroys Software Mirroring driver handle GetSmiAryStatus Gets status of Software Mirroring Array GetSmiDevStatus Gets status of Software Mirroring Device SetWdtResetMask Sets the Reset Mask of the watchdog timer GetWdtResetMask Gets the Reset Mask of the watchdog timer PL-6920/PL-7920 Series User Manual App-72... -
Page 196: Visual Basic Function Specifications (Details)
Declare Function CloseDrvHandle Lib "PL_Ioc.dll"() As Long Return value Other than 0: Normal 0: Error Argument None Processing Destroys the handle acquired with the "GetDrvHandle" function. Example Dim ret As Long // Destroy handle ret = CloseDrvHandle() PL-6920/PL-7920 Series User Manual App-73... - Page 197 Version data (Major, 0 to 99) (pass by reference) Processing Gets the driver version. Example Dim ret As Long Dim Major As Long Dim Minor As Long ret = GetDrvVersion(Major, Minor) When the version is 1.10, Major:1 (Decimal) Minor:10 (Decimal) PL-6920/PL-7920 Series User Manual App-74...
- Page 198 Get data (pass by reference) 0:Disable 1:Enable Processing Gets the current enabled/disabled monitor status. Example Dim ret As Long Dim Setup As Long // Get the setup status of the CPU core voltage ret = GetMonitorSetup(MONITOR_VOLT_CPU, Setup ) PL-6920/PL-7920 Series User Manual App-75...
- Page 199 = GetVoltParam( MONITOR_VOLT_CPU, ULimit, LLimit ) Since the data received from this function is in mV units, the following conversion is needed for use in (Volt) units: Data in Volt unit = Data in mV unit/1000 PL-6920/PL-7920 Series User Manual App-76...
- Page 200 (RPM: revolutions per minute) Processing Gets the parameter for monitoring the FAN. Example Dim ret As Long Dim LLimit As Long // Get the CPU FAN lower limit rpm value ret = GetFanParam( MONITOR_FAN_CPU, LLimit ) PL-6920/PL-7920 Series User Manual App-77...
- Page 201 Temperature upper limit (unit: (pass by reference) Processing Gets the parameter for monitoring the temperature. Example Dim ret As Long Dim ULimit As Long // Gets the upper limit of SYSTEM temperature ret = GetTempParam( MONITOR_TEMP_SYSTEM, ULimit ) PL-6920/PL-7920 Series User Manual App-78...
- Page 202 Counter As Long The initial counter value of the watchdog timer (pass by value) (unit: second) Processing Gets the initial counter value of the current watchdog timer. Example Dim ret As Long Dim Counter As Long ret = GetWdtCounter(Counter) PL-6920/PL-7920 Series User Manual App-79...
- Page 203 Gets the WDT timeout warning output mask data. Example Dim ret As Long Dim Mask As Long // Gets LAMP mask data ret = GetWdtMask( WARNING_LAMP, Mask ) // Gets ALARM mask data ret = GetWdtMask( WARNING_ALARM, Mask ) PL-6920/PL-7920 Series User Manual App-80...
- Page 204 RunFlag As Long Operating status of the watchdog timer (pass by reference) WATCHDOG_STOP Stopped WATCHDOG_COUNTDOWN Counting down Processing Gets the operating status of the watchdog timer. Example Dim ret As Long Dim RunFlag As Long ret = RunningWdt( RunFlag ) PL-6920/PL-7920 Series User Manual App-81...
- Page 205 Dim ret As Long Dim WarnOut As Long // Gets the output status of the LAMP ret = GetWarningOut( WARNING_LAMP, WarnOut ) // Get the output status of the ALARM ret = GetWarningOut( WARNING_ALARM, WarnOut ) PL-6920/PL-7920 Series User Manual App-82...
- Page 206 (Universal Input 0 and Universal Input 1). Example Dim ret As Long // Clear the input status of Universal Input 0 ret = ClearUniversalIn( PORT_UNI0 ) // Clear the input status of Universal Input 1 ret = ClearUniversalIn( PORT_UNI1 ) PL-6920/PL-7920 Series User Manual App-83...
- Page 207 Dim ret As Long Dim Mask As Long // Get the masking information for Universal Input 0 ret = GetUniversalInMask( PORT_UNI0, Mask ) // Get the masking information for Universal Input 1 ret = GetUniversalInMask( PORT_UNI1, Mask ) PL-6920/PL-7920 Series User Manual App-84...
- Page 208 Disables error output IDE_ERROR_ON Enables error output Processing Uses software control to set the IDE error output. Example Dim ret As Long // Set the system to disable the IDE error output ret = SetIdeErr( IDE_ERROR_OFF ) PL-6920/PL-7920 Series User Manual App-85...
- Page 209 Gets the current backlight error information. Example Dim ret As Long Dim LightblowErr As Long // Gets the backlight error information. ret = GetLightblowErr( LightblowErr ) This feature can be used only with PL-6920 Series units. PL-6920/PL-7920 Series User Manual App-86...
- Page 210 Universal Input function (event) data, and WatchDog Timeout data. Example Dim ret As Long Dim Event As Long // Gets the error event data of the CPU core voltage ret = GetEvent( EVENT_VOLT_CPU, Event ) PL-6920/PL-7920 Series User Manual App-87...
- Page 211 System temp. EVENT_TEMP_CPU_OPT CPU or OPTION temp. EVENT_UNI_IN0 Universal Input0 EVENT_UNI_IN1 Universal Input1 EVENT_WDT_TIMEOUT Watchdog Timeout Processing Cancels the error event. Example Dim ret As Long // Cancels the error event. ret = ClearEvent( EVENT_VOLT_CPU ) PL-6920/PL-7920 Series User Manual App-88...
- Page 212 // Stops the internal Buzzer. ret = StopInsideBuzzer() This feature cannot be used with a PL running WindowsNT 4.0, Windows 2000 or Windows XP due to the use of Windows 95 and Windows 98 functions. PL-6920/PL-7920 Series User Manual App-89...
- Page 213 Declare Function ClearWdtTimeout Lib "PL_Ioc.dll () As Long Return value Other than 0: Normal 0: Error Argument None Processing Clears the timeout status of the watchdog. Example Dim ret As Long // Clear the timeout status of the watchdog. ret = ClearWdtTimeout() PL-6920/PL-7920 Series User Manual App-90...
- Page 214 Gets the device driver handle to exchange information with the software mirroring device driver. Example1 Dim ret As Long ret = GetSmiDrvHandle() An error will occur if the software mirroring device driver is not running. PL-6920/PL-7920 Series User Manual App-91...
- Page 215 Mirror status destroyed Processing Gets the status of the software mirroring feature. Example Dim ret As Long Dim Status As Long // Get the status of the software mirroring feature. ret = GetSmiAryStatus( Status ) PL-6920/PL-7920 Series User Manual App-92...
- Page 216 MASK_OFF Release mask MASK_ON Mask Processing Sets the H/W reset mask for the WDT timeout. Example Dim ret As Long // Releases the reset masking used when WDT timeout occurs. ret = SetWdtResetMask( MASK_OFF ) PL-6920/PL-7920 Series User Manual App-93...
- Page 217 Mask Processing Gets the WDT timeout's H/W reset mask data. Example Dim ret As Long Dim Mask As Long // Get the H/W reset mask data for the WDT timeout. ret = GetWdtResetMask( Mask ) PL-6920/PL-7920 Series User Manual App-94...
-
Page 218: Backlight Control Api-Dll
- Microsoft WindowsNT ® - Microsoft Windows 2000 ® - Microsoft Windows Each OS must use its corresponding Backlight Control Device. Compatible Languages - Microsoft Visual C - Microsoft Visual C++ - Microsoft Visual Basic PL-6920/PL-7920 Series User Manual App-95... - Page 219 Library definition file PL_BLIoc.dll Dynamic link library file Dynamic Link Library (DLL) In order for an application to use PL_BLIoc.dll, it should be copied to the follow- ing folder. Location Windows95/Windows98 C:\Windows\System WindowsNT4.0/Windows2000 C:\Winnt\System32 WindowsXP C:\Windows\System32 PL-6920/PL-7920 Series User Manual App-96...
-
Page 220: Class Contents
Input data buffer size Output data buffer public void * m_obp address Output data buffer public ULONG m_obsize size Address for actual public DWORD m_retsize no. of output bytes Address of overlap public LPOVERLAPPED m_ovlp design PL-6920/PL-7920 Series User Manual App-97... -
Page 221: Visual C Functions
(I/O) HANDLE *pHndl Pointer to the device driver handle Processing Gets the device driver handle to communicate with the device driver. Example ret; HANDLE hndl; ret = GetBLDrvHandle( &hndl ); An error will occur if the Backlight Control Device Driver is not running. PL-6920/PL-7920 Series User Manual App-98... - Page 222 (I/O) int *pBLFlag Pointer to backlight condition BACKLIGHT_OFF Backlight OFF BACKLIGHT_ON Backlight ON Processing Gets the backlight control (settings) condition. Example BOOL ret; BLFlag; // Gets the backlight control (settings) condition. ret = GetBLControl( &BLFlag ); PL-6920/PL-7920 Series User Manual App-99...
-
Page 223: Visual C++ Functions
The handle obtained is stored in the member variable m_handle. Example 1 CPL_BLIoctl m_BLIoc; m_BLIoc.GetBLDrvHandle(); Example 2 ret; HANDLE hndl; ret = ::GetBLDrvHandle( &hndl ); An error will occur if the Backlight Control Device Driver is not running. PL-6920/PL-7920 Series User Manual App-100... - Page 224 Sets the backlight ON/OFF. Example 1 CPL_BLIoc m_BLIoc; BOOL ret; // Turns the backlight control ON. ret = m_BLIoc.SetBLControl( BACKLIGHT_ON ) Example 2 BOOL ret; // Turns the backlight control ON. ret = ::SetBLControl( BACKLIGHT_ON ); PL-6920/PL-7920 Series User Manual App-101...
- Page 225 Gets the backlight control (settings) status. Example 1 CPL_BLIoc m_BLIoc; BOOL ret; BLFlag; // Gets the backlight control condition. ret = m_BLIoc.GetBLControl( &BLFlag ); Example 2 BOOL ret; BLFlag; // Turns the backlight control ON. ret = ::GetBLControl( &BLFlag ); PL-6920/PL-7920 Series User Manual App-102...
-
Page 226: Visual Basic Functions
Gets the device driver handle to communicate with the device driver. Example Dim ret As Long Dim hndl As Long ret = GetBLDrvHandle( hndl ) An error will occur if the Backlight Control Device Driver is not running. PL-6920/PL-7920 Series User Manual App-103... - Page 227 BLFlag As Long Setting Parameters (pass by value) BACKLIGHT_OFF Backlight OFF BACKLIGHT_ON Backlight ON Processing Sets the backlight ON/OFF. Example Dim ret As Long; // Turns the backlight control ON. ret = SetBLControl( BACKLIGHT_ON ) PL-6920/PL-7920 Series User Manual App-104...
- Page 228 BLFlag As Long Pointer to backlight status (pass by reference) BACKLIGHT_OFF Backlight OFF BACKLIGHT_ON Backlight ON Processing Gets the backlight control (settings) status. Example Dim ret As Long Dim BLFlag As Long // Gets the backlight control (settings) condition. ret = GetBLControl( BLFlag ); PL-6920/PL-7920 Series User Manual App-105...
-
Page 229: Consent Agreement
Digital Electronics Corporation shall be in no case liable for any loss or damages to you or any third party whatsoever arising from any faulty performance of IN-fINITY soft, nor shall be responsible to correct such error of the software program in question. PL-6920/PL-7920 Series User Manual App-106...
Need help?
Do you have a question about the PL-6920 and is the answer not in the manual?
Questions and answers